
User's Manual


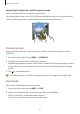
Table Of Contents
- Basics
- Read me first
- Device overheating situations and solutions
- Device layout and functions
- Battery
- SIM or USIM card (nano-SIM card)
- Memory card (microSD card)
- Turning the device on and off
- Initial setup
- Samsung account
- Transferring data from your previous device (Smart Switch)
- Understanding the screen
- Notification panel
- Entering text
- Apps and features
- Installing or uninstalling apps
- Phone
- Contacts
- Messages
- Internet
- Camera
- Gallery
- Multi window
- Samsung Health
- Samsung Notes
- Samsung Members
- Galaxy Shop
- Calendar
- Reminder
- Radio
- Voice Recorder
- My Files
- Clock
- Calculator
- Game Launcher
- Game Booster
- Samsung Kids
- SmartThings
- Sharing content
- Music Share
- Smart View
- Link to Windows
- Samsung Global Goals
- Google apps
- Settings
- Introduction
- Samsung account
- Connections
- Sounds and vibration
- Notifications
- Display
- Wallpaper
- Themes
- Home screen
- Lock screen
- Biometrics and security
- Privacy
- Location
- Accounts and backup
- Advanced features
- Digital Wellbeing and parental controls
- Battery and device care
- Apps
- General management
- Accessibility
- Software update
- About phone
- Appendix

Apps and features
49
Video mode
The camera adjusts the shooting options automatically depending on the surroundings to
record videos easily.
1 On the shooting modes list, tap
VIDEO
and tap to record a video.
•
To switch between the front and rear cameras while recording, swipe upwards or
downwards on the preview screen or tap
.
•
To capture an image from the video while recording, tap .
2 Tap to stop recording the video.
The optical zoom may not work in low-light environments.
Pro mode
Capture pictures while manually adjusting various shooting options, such as exposure value
and ISO value.
On the shooting modes list, tap
MORE
→
PRO
. Select options and customise the settings,
and then tap
to take a picture.
Available options
•
: Select an ISO value. This controls camera light sensitivity. Low values are for
stationary or brightly lit objects. Higher values are for fast-moving or poorly lit objects.
However, higher ISO settings can result in noise in pictures.
•
: Select an appropriate white balance, so images have a true-to-life colour range. You
can set the colour temperature.
•
: Change the exposure value. This determines how much light the camera’s sensor
receives. For low-light situations, use a higher exposure.