
User's Manual
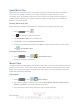
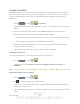
Table Of Contents
- 09.User manual_A3LSPHP500_09-11-2012_Cover
- SPH-P500_UG_FCC수정완료
- Table of Contents
- Get Started
- Device Basics
- Settings
- Wi-Fi Settings
- Bluetooth Settings
- Data Usage Settings
- More Settings
- Sound Settings
- Display Settings
- Wallpaper Settings
- Power Saving Settings
- Storage Settings
- Battery Settings
- Application Manager
- Accounts and Sync Settings
- Location Services Settings
- Security Settings
- Language and Input Settings
- Back Up and Reset Settings
- Accessory Settings
- Date and Time Settings
- Accessibility Settings
- Developer Options Settings
- System Update Settings
- About Device
- Contacts
- Accounts and Messaging
- Applications and Entertainment
- DivX
- Google Play Store App
- Navigation
- Google Maps
- TelenavTM GPS Navigation
- Installing TeleNav GPS Navigator
- Registering TeleNav GPS Navigator
- TeleNav: Using TeleNav GPS Navigator
- TeleNav: Getting Driving Directions
- TeleNav: Creating a Favorites Location
- TeleNav: Sharing a Recent Location with Others
- TeleNav: Configuring Your Navigation Preferences
- Google Navigation
- Latitude
- Music
- Google Play Movies
- Sprint TV & Movies
- AllShare Play
- Peel Smart Remote
- Media Hub
- NASCAR Sprint Cup Mobile
- Web and Data
- Camera and Video
- Tools and Calendar
- Index
- 09.User manual_A3LSPHP500_09-11-2012_H_S

DRAFT
FOR INTERNA L USE ONLY
Web and Data 91
TeleNav: Getting Driving Directions
The built-in GPS hardware (when enabled) allows you to get driving directions to selected
locations or establishments based on your current location.
Using a Physical Address
1. Press and tap > > Drive To.
2. Enter an address or business in the search bar.
3. Tap a location in the Search Results list, and then tap any of the address fields to then
enter respective information (Address, City, State/ZIP, and Country). As you enter an
address, potential matches appear onscreen. Tap a match to immediately get directions
to that location.
To receive turn-by-turn directions (2D):
1. Press and tap > > Drive To.
2. Enter an address or business in the search bar, and then tap Done.
Note: A 2D map is a flat representation of your projected driving directions. A 3D map
represents the driving directions with a representation of depth.
3. Tap a location in the Search Results list.
4. Tap the green button containing the location address.
Using a Local Business Category
The Samsung Galaxy Tab2 10.1 can also cross-reference your current location with local business
and points of interest, such as Grocery Stores, Gas Stations, Wi-Fi Spots, Malls, Hospitals, etc.
1. Press
and tap > > Places.
2. Enter a keyword into the Name or Category field to begin retrieving matches. Once you
see a matching business name, tap the entry.
3. Tap the Category field and then choose from one of the available category entries by
tapping an onscreen entry such as: Food/Coffee, Gas Stations, Gas by Price,
Banks/ATMs, WiFi Spots, Hospitals, etc.
Entries with more than one available category (a subcategory) appear with an
adjacent gray arrow. These entries can be expanded and then closed.
4. Tap Search to store your information and begin the search.