
User's Manual


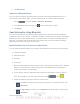
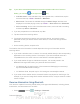

Table Of Contents
- 09.User manual_A3LSPHP500_09-11-2012_Cover
- SPH-P500_UG_FCC수정완료
- Table of Contents
- Get Started
- Device Basics
- Settings
- Wi-Fi Settings
- Bluetooth Settings
- Data Usage Settings
- More Settings
- Sound Settings
- Display Settings
- Wallpaper Settings
- Power Saving Settings
- Storage Settings
- Battery Settings
- Application Manager
- Accounts and Sync Settings
- Location Services Settings
- Security Settings
- Language and Input Settings
- Back Up and Reset Settings
- Accessory Settings
- Date and Time Settings
- Accessibility Settings
- Developer Options Settings
- System Update Settings
- About Device
- Contacts
- Accounts and Messaging
- Applications and Entertainment
- DivX
- Google Play Store App
- Navigation
- Google Maps
- TelenavTM GPS Navigation
- Installing TeleNav GPS Navigator
- Registering TeleNav GPS Navigator
- TeleNav: Using TeleNav GPS Navigator
- TeleNav: Getting Driving Directions
- TeleNav: Creating a Favorites Location
- TeleNav: Sharing a Recent Location with Others
- TeleNav: Configuring Your Navigation Preferences
- Google Navigation
- Latitude
- Music
- Google Play Movies
- Sprint TV & Movies
- AllShare Play
- Peel Smart Remote
- Media Hub
- NASCAR Sprint Cup Mobile
- Web and Data
- Camera and Video
- Tools and Calendar
- Index
- 09.User manual_A3LSPHP500_09-11-2012_H_S

DRAFT
FOR INTERNA L USE ONLY
Tools and Calendar 158
1. Press
and tap > Settings > Storage.
2. Tap Unmount SD card.
3. Remove the microSD card. See Remove the microSD Card.
Update Your Device
From time to time, updates may become available for your device. You can download and apply
updates through the Settings > About Device menu.
Update Your Device Firmware
You can update your device's software using the Update Firmware option.
Before Updating Your Firmware
Updating your device firmware will erase all user data from your device. You must back up all
critical information before updating your device firmware.
Back Up All Data Prior to Update
To back up your Gmail information:
1. Press
and tap > Settings > Accounts and sync.
2. Tap the Auto-sync option to enable the feature (checkmark).
If the Auto-sync option is on, email, Calendar and Contacts automatically
synchronize whenever a change is made.
If the Auto-sync option is off, tap the sync icon within the account field to reveal the
account’s synchronization settings screen.
To back up your Exchange Mail information:
1. Press and tap > Settings > Accounts and sync.
2. Tap the sync icon within the Corporate account field to reveal the account’s
synchronization settings screen.
3. Toggle the onscreen checkmark to manually synchronize the desired parameters
(Contacts or Calendar).
To back up your Google applications:
Your Google™ application purchases are reloaded remotely and can be re-installed after the
update is applied.