
User's Manual
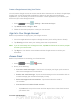
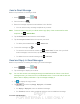

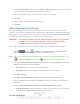

Table Of Contents
- 09.User manual_A3LSPHP500_09-11-2012_Cover
- SPH-P500_UG_FCC수정완료
- Table of Contents
- Get Started
- Device Basics
- Settings
- Wi-Fi Settings
- Bluetooth Settings
- Data Usage Settings
- More Settings
- Sound Settings
- Display Settings
- Wallpaper Settings
- Power Saving Settings
- Storage Settings
- Battery Settings
- Application Manager
- Accounts and Sync Settings
- Location Services Settings
- Security Settings
- Language and Input Settings
- Back Up and Reset Settings
- Accessory Settings
- Date and Time Settings
- Accessibility Settings
- Developer Options Settings
- System Update Settings
- About Device
- Contacts
- Accounts and Messaging
- Applications and Entertainment
- DivX
- Google Play Store App
- Navigation
- Google Maps
- TelenavTM GPS Navigation
- Installing TeleNav GPS Navigator
- Registering TeleNav GPS Navigator
- TeleNav: Using TeleNav GPS Navigator
- TeleNav: Getting Driving Directions
- TeleNav: Creating a Favorites Location
- TeleNav: Sharing a Recent Location with Others
- TeleNav: Configuring Your Navigation Preferences
- Google Navigation
- Latitude
- Music
- Google Play Movies
- Sprint TV & Movies
- AllShare Play
- Peel Smart Remote
- Media Hub
- NASCAR Sprint Cup Mobile
- Web and Data
- Camera and Video
- Tools and Calendar
- Index
- 09.User manual_A3LSPHP500_09-11-2012_H_S

DRAFT
FOR INTERNA L USE ONLY
Accounts and Messaging 74
Important! Key info here is the Domain information. Maintain the “\” between the Domain
and Username.
Password: typically your network access password (case-sensitive).
Exchange Server: your exchange server remote email address. Typically starts with
mail.XXX.com. Obtain this information from your company network administrator.
Do not accept the default entry as this is a guess based on returned information.
If your network requires SSL encryption, tap the Use secure connection (SSL) field
to place a checkmark in the box and activate this additional level of security.
Important! If your exchange server requires this feature, leaving this field unchecked can
prevent connection.
Note: Signal interruptions or incorrect username or password information can cause
completion issues.
7. Read the onscreen activation disclaimer and, if prompted, tap Next.
8. Configure your Email check frequency, Amount to synchronize (days to synchronize
between your device and server), and activate any other email settings, and then tap
Next.
9. Identify your new account with a unique name and provide the outgoing name text then
tap Done.
Note: You can have multiple Work Email (Microsoft Exchange ActiveSync) accounts active on
your device.
Compose and Send Email
Compose and send email using any account you have set up on your device. Increase your
productivity by attaching files such as pictures, videos, or documents to your email messages.
1. Press
and tap .
2. From the Inbox, tap .
3. Select an email account. Tap the From field and select an available account.
4. Enter the message recipient’s email address in the To field.
You can add as many message recipients as you want.
To send a carbon copy (Cc) or a blind carbon copy (Bcc) of the current email to other
recipients, tap
<icon> > Add Cc/Bcc.
5. Tap the Subject field and enter the email subject.