SyncMaster 151x Install drivers Install programs
Notational Failure to follow directions noted by this symbol could result in bodily harm or damage to equipment. Prohibited Important to read and understand at all times Do not disassemble Disconnect the plug from the outlet Do not touch Grounding to prevent an electric shock Power When not used for extended period of time, set your computer to DPMS. If using a screen saver, set it to the active screen mode.
Do not use a damaged or loose plug. z This may cause an electric shock or fire. Do not pull the plug out by the wire nor touch the plug with wet hands. z This may cause an electric shock or fire. Use only a properly grounded plug and receptacle. z An improper ground may cause electric shock or equipment damage. Insert the power plug firmly so that it does not come loose. z A bad connection may cause fire.
Do not drop the monitor when moving it. z This may cause damage to the product or human body. Install the monitor base in a showcase or shelf so that the end of the base does not project beyond the showcase or shelf. z Dropping the product may cause damage to the product or personal injury. Do not place the product on an unstable or small surface area. z Place the product on an even, stable surface, as the product may fall and cause harm to someone walking by, specifically children.
Do not place the monitor face down. z The TFT-LCD surface may be damaged. Installing a wall bracket must be done by a qualified professional. z z Installation by unqualified personnel may result in injury. Always use the mounting device specified in the owner's manual. When installing the product, make sure to keep it away from the wall (more than 10cm/4inch ) for ventilation purposes.
Unplug the power cord from the power outlet and wipe the product using a soft, dry cloth. z Do not use any chemicals such as wax, benzene, alcohol, thinners, insecticide, air freshener, lubricant or detergent. Contact the Service Center or Customer Center for interior cleaning once a year. z Keep the product's interior clean. Dust which has accumulated in the interior over an extended period of time may cause malfunction or fire. Others Do not remove cover (or back).
Do not try to move the monitor by pulling only the wire or the signal cable. z This may cause a breakdown, electric shock or fire due to damage to the cable. Do not move the monitor right or left by pulling only the wire or the signal cable. z This may cause a breakdown, electric shock or fire due to damage to the cable. Do not cover the vents on the monitor cabinet. z Bad ventilation may cause a breakdown or fire. Do not place water containers, chemical products or small metal objects on the monitor.
Adjust the resolution and frequency to the levels appropriate for the model. z Inappropriate resolution may cause undesirable picture quality. 15 inch - 1024 X 768 Be careful that adapter should not be in contact with water and therefore not be wet. z z z This may cause malfunction, an electric shock or fire. Do not use adapter by the waterside or outside particularly when it rains or snows. Be careful that adapter should not be wet while cleaning floor with water. Keep all power adapters apart.
Do not install the product on an unstable, uneven surface or a location prone to vibrations. z Dropping the product may cause damage to the product or personal injury. Using the product in a location prone to vibrations may shorten the lifetime of the product or may catch fire. When moving the monitor, turn off and unplug the power cord. Make sure that all cables, including the antenna cable and cables connected to other devices, are disconnected before moving the monitor.
Please make sure the following items are included with your monitor. If any items are missing, contact your dealer. Contact a local dealer to buy optional items.
VESA Mounting Bracket Front Auto button Use this button to auto adjustment direct access. / Exit button Use this button to Exit the active menu or the OSD. Menu button Use this button to open the OSD and activate a highlighted menu item. Power button Use this button for turn the monitor on and off. Power indicator This light glows green during normal operation, and blinks green once as the monitor saves your adjustments.
4) Entertain : High brightness For watching motion pictures such as a DVD or VCD. >>Click here to see an animation clip Adjust buttons [- / +] These buttons allow you to highlight and adjust items in the menu. See PowerSaver described in the manual for further information regarding power saving functions. For energy conservation, turn your monitor off when it is not needed, or when leaving it unattended for long periods.
1. Connect the DC Adapter for your monitor to the power port on the back of the monitor. Plug the power cord for the monitor into a nearby outlet. 2. Using the D-sub (Analog) connector on the video card. Connect the D-sub cable to the 15-pin, D-sub connector on the back of your monitor. 3. Connected to a Macintosh. Connect the monitor to the Macintosh computer using the D-sub connection cable. 4. In the case of an old model Macintosh, you need to connect the monitor using a special Mac adapter. 5.
As shown in the figure above, you first fold the stand. You attach the VESA mounting brackets on the wall. You hang the monitor aligning its bottom grove with the bracket. Attaching a base NOTE: This monitor accepts a 75 mm x 75 mm VESA-compliant mounting interface pad. Squeeze the folded monitor stand into the VESA mounting bracket. Then fasten it using four supplied nuts with the monitor, mounting pad and VESA mounting bracket aligned. 1. VESA Mounting Brkt 2.
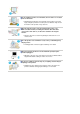
z Internet web site : http://www.samsung.com/ (Worldwide) http://www.samsung.com/monitor (U.S.A) http://www.sec.co.kr/monitor (Korea) http://www.samsungmonitor.com.cn/ (China) Windows ME 1. Insert CD into the CD-ROM drive. 2. Click "Windows ME Driver". 3. Choose your monitor model in the model list, then click the "OK" button. 4. Click the "Install" button in the "Warning" window. 5. Monitor driver installation is completed. Windows XP/2000 1. Insert CD into the CD-ROM drive. 2.
This monitor driver is under certifying MS logo,and this installation don't damage your system.The certified driver will be posted on Samsung Monitor Homepage http://www.samsung.com/. 5. Monitor driver installation is completed. Installing the Monitor Driver (Manual) Windows XP | Windows 2000 |Windows Me |Windows NT | Linux When prompted by the operating system for the monitor driver, insert the CD-ROM included with this monitor.
4. Click the "Properties" button on the "Monitor" tab and select "Driver" tab. 5. Click "Update Driver.." and select "Install from a list or.." then click "Next" button. 6. Select "Don't search ,I will.." then click "Next" and then click "Have disk". 7. Click the "Browse" button then choose A:(D:\Driver) and choose your monitor model in the model list and click the "Next" button.
8. If you can see following "Message" window, then click the "Continue Anyway" button. Then click "OK" button. This monitor driver is under certified MS logo,and this installation doesn't damage your system.The certified driver will be posted on Samsung Monitor homepage. http://www.samsung.com/ 9. Click the "Close" button then click "OK" button continually. 10. Monitor driver installation is completed.
1. 2. 3. 4. 5. 6. 7. 8. 9. 10. Click "Start" , "Setting" , "Control Panel". Double click the "Display" Icon. Choose the "Settings" tab and then click "Advanced..". Choose "Monitor". Case1: If the "Properties" button is inactive, it means your monitor is properly configured. Please stop installation Case2: If the "Properties" button is active, click the "Properties" button then follow next steps continually. Click "Driver" and then click on "Update Driver.." then click on the "Next" button.
Natural Color Natural Color Software Program One of the recent problems in using a computer is that the color of the images printed out by a printer or other images scanned by a scanner or a digital camera are not the same as those shown on the monitor. The Natural Color S/W is the very solution for this problem. It is a color administration system developed by Samsung Electronics in association with Korea Electronics & Telecommunications Research Institute (ETRI).
AUTO
Menu Description When the 'AUTO' button is pressed, the Auto Adjustment screen appears as shown in the animated screen on the center. Auto adjustment allows the monitor to self-adjust to the incoming video signal. The values of fine, coarse and position are adjusted automatically. AUTO To make the automatic adjustment function sharper, execute the 'AUTO' function while the AUTO PATTERN is on. z z If Auto Adjustment does not work properly, press Auto button again to adjust picture with more accuracy.
MagicBright™ Menu MagicBright™ Menu Brightness Description Then push the MagicBright button again to circle through available preconfigured modes. - four different modes(User Adjusted/Text/Internet/Entertain) Description You can use the on-screen menus to change the brightness according to personal preference.
Menu Contrast Description You can use the on-screen menus to change the contrast according to personal preference. Image Lock Menu Description Fine Removes noise such as horizontal stripes. If the noise persists even after Fine tuning, repeat it after adjusting the frequency (clock speed). Coarse Removes noise such as vertical stripes. Coarse adjustment may move the screen image area. You may relocate it to the center using the Horizontal Control menu.
Menu Description H-Position Follow these instructions to change the horizontal position of the monitor's entire display. V-Position Follow these instructions to change the vertical position of the monitor's entire display. Play/Stop Reset Menu Description Geometry Reset Geometry parameters are replaced with the factory default values. Color Reset Color parameters are replaced with the factory default values.
Menu Color Temperature Menu Color Control Description Color temperature is a measure of the "warmth"of the image colors. Description Adjusts individual R,G,B color balance.
Menu Description You can choose one of the seven languages. Language Note:The language chosen affects only the language of the OSD. It has no effect on any software running on the computer. Menu Half Tone Description Change the transparency of the background of the OSD.
Menu Description H-Position You can change the horizontal position where the OSD menu appears on your monitor. V-Positon You can change the vertical position where the OSD menu appears on your monitor. Menu Menu Display Time Play/Stop Description The menu will be automatically turned if no adjustments are made for a certain time period. You can set the amount of time the menu will wait before it is turned off.
Menu Display Mode Description You can see the frequency, the polarity of the operational signals and the resolution level. Note: These screens do not allow any changes to the settings, they are for information only.
Overview | Installation | OSD Mode | Color Calibration | Uninstall | Troubleshooting Overview What is MagicTune™? Monitor performance can vary due to the graphics card, host computer lighting conditions and other environmental factors. In order to get the best image on a monitor requires you to adjust it for your unique setting. Unfortunately, the manual controls available to tune the image often prove to be challenging.
Overview | Installation | OSD Mode | Color Calibration | Uninstall | Troubleshooting Installation 1. Insert the installation CD into the CD-ROM drive. 2. Click the MagicTune™ installation file. 3. Select installation Language, Click "Next". 4. When the InstallationShield Wizard window appears, click "Next." 5. Select "I agree to the terms of the license agreement" to accept the terms of use.
6. Choose a folder to install the MagicTune program. 7. Click "Install." 8. The "Installationation Status" window appears.
9. 10. Click "Finish." When the installation is complete, the MagicTune executable icon appears on your desktop. Double-click the icon to start the program. Magictune execution icon may not appear depending on specification of computer system or monitor. If that happens, press F5 Key. Installationation Problems The installation of MagicTune™ can be affected by such factors as the video card, motherboard and the network environment. See "Troubleshooting" if you have trouble during installation.
OS z z z z z Windows Windows Windows Windows Windows 98 SE Me 2000 XP Home Edition XP Professional Hardware z z 32MB Memory above 25MB Hard disk space above * For more information, visit the MagicTune website.
Overview | Installation | OSD Mode | Color Calibration | Uninstall | Troubleshooting MagicTune allows for quick accurate tuning of the display with the ability to easily save and use monitor configurations that are best suited for you. z z z OSD mode may appear inconsistent with the explanation in guidance book depending on specification of each monitor. When Pivot is functioning, part of Magictune Program may not operate normally.
Picture Tab Definition Allows the user to adjust the screen settings to the desired values. j Resolution n k l m i Brightness n j k l m n j Contrast n k l m j MagicBright k l m Brightness Makes the entire screen brighter or darker. The detailed data of the images in the dark areas can be lost if the brightness is not adjusted to the proper level. Adjust the brightness for best viewing conditions. Contrast Adjusts the difference in brightness between the bright and dark areas on screen.
n Color Tone m i j k l m n Color Control m j k l n Calibration j k l The tone of the color can be changed. Color Tone z z Color Control Adjusts of the monitor image color. You can change the monitor color to your desired color. z Calibration Warm - Normal - Cool Custom R- G - B The process through which the colors of your choice are optimized and maintained.
i Image Setup n j k l m n j Position k l m z Image Setup z z Position Fine : Removes noise such as horizontal stripes. If the noise persists even after Fine tuning, repeat it after adjusting the frequency (clock speed). Coarse : Removes noise such as vertical stripes. Coarse adjustment may move the screen image area. You may relocate it to the center using the Horizontal Control menu. Auto Setup : Auto adjustment allows the monitor to self-adjust to the incoming video signal.
z Preferences z Source Select Enable task tray menu . - To access the MagicTune menus, click the icon on the [task tray menu]. The menus are not displayed if the [Enable System Tray] is deselected in [Options] ' [Basic Settings]. Select Language - The language chosen affects only the language of the OSD. Source Select will be shown only in dual monitor. In analog only model source select will not be shown.
Overview | Installation | OSD Mode | Color Calibration | Uninstall | Troubleshooting Color Calibration 1. Color Calibration Color Calibration guides you to get optimal color condition for your monitor. Proceed following 5steps for getting optimal monitor color condition . 1. 2. 3. 4. 5.
Press "Preview" button on the Color Calibration. The above picture will be shown. 1. 2. Press "View Calibrated" button to see the calibration effect which you adjusted. Press "View Uncalibrated" button to see the original image.
Overview | Installation | OSD Mode | Color Calibration | Uninstall | Troubleshooting Uninstall The MagicTune program can be removed only by using the "Add or Remove Programs" option of the Windows Control Panel. Perform the following steps remove MagicTune. 1. Go to [Task Tray] ' [Start] ' [Settings] and select [Control Panel] in the menu. If the program runs on Windows XP, go to [Control Panel] in the [Start] menu. 2. Click the "Add or Remove Programs" icon in Control Panel. 3.
Overview | Installation | OSD Mode | Color Calibration | Uninstall | Troubleshooting Troubleshooting z MagicTune may not work in case monitor is replaced or driver of graphic card is updated while MagicTune is operating. If so, please restart the system. Symptom Check List Check when MagicTune does not function properly. MagicTune feature is found only on PC (VGA) with Window OS that supports Plug and Play.
Before calling for service, check the information in this section to see if you can remedy any problems yourself. If you do need assistance, please call the phone number on the Information section or contact your dealer. Symptom No images on the screen. I cannot turn on the monitor. Check List Solutions Is the power cord connected properly? Check the power cord connection and supply. Can you see "No Connection, Check Signal Cable" on the screen? Check the signal cable connection.
The screen shows strange colors or just black and white. The screen suddenly has become unbalanced. Is the screen displaying only one color as if looking at the screen through a cellophane paper? Check the signal cable connection.Make sure the video card is fully inserted in it's slot. Have the screen colors become strange after running a program or due to a crash between applications? Reboot the computer. Has the video card been set properly? Set the video card by referring to the video card manual.
compatible graphic card list provided. http://www.samsung.com/monitor/magictune MagicTune™ doesn't work properly. Have you changed your PC or video graphic card? Download the latest program. The program can be downloaded http://www.samsung.com/monitor/magictune. Visit our website and download the installation software for MagicTune MAC. Check the following items if there is trouble with the monitor. 1. Check if the power cord and the video cables are properly connected to the computer. 2.
functioning properly. Self-Test Feature Check 1. Turn off both your computer and the monitor. 2. Unplug the video cable from the back of the computer. 3. Turn on the monitor. If the monitor is functioning properly, you will see a box in the illustration below. This box appears during normal operation if the video cable becomes disconnected or damaged. 4. Turn off your monitor and reconnect the video cable; then turn on both your computer and the monitor.
General General Model Name SyncMaster 151x LCD Panel Size 15" Diagonal Display area 304.1mm (H) x 228.1mm (V) Pixel Pitch 0.297mm (H) x 0.297mm (V) Type a-si TFT active matrix Synchronization Horizontal 31 ~ 60 kHz Vertical 56 ~ 75 Hz Display Color 16,194,277 Colors Resolution Optimum resolution 1024 x 768@60 Hz Maximum resolution 1024 x 768@75 Hz Input Signal, Terminated RGB Analog 0.7Vp-p Positive at 75 ohms Separate H/V sync, SOG(Option), TTL level positive or negative.
Dimensions (WxDxH)/ Weight 326.3 x 49.5 x 267.1 mm / 12.8 x 1.9 x 10.5 inch (Without Stand) 326.3 x 158.7 x 314.3 mm / 12,8 x 6,2 x 12,4 inch (with Basic Stand) / 2.5kg VESA Mounting Interface 75mm x 75mm (for use with Specialty(Arm) Mounting hardware.
IBM, 640 x 350 31.469 70.086 25.175 +/- IBM, 640 x 480 31.469 59.940 25.175 -/- IBM, 720 x 400 31.469 70.087 28.322 -/+ MAC, 640 x 480 35.000 66.667 30.240 -/- 49.726 74.551 57.284 -/- VESA, 640 x 480 37.500 75.000 31.500 -/- VESA, 640 x 480 37.861 72.809 31.500 -/- VESA, 800 x 600 35.156 56.250 36.000 -/- VESA, 800 x 600 37.879 60.317 40.000 +/+ VESA, 800 x 600 46.875 75.000 49.500 +/+ VESA, 800 x 600 48.077 72.188 50.000 +/+ VESA, 1024 x 768 48.
Service The address and phone number of the company can be changed without prior notice. AUSTRALIA : Samsung Electronics Australia Pty Ltd. Customer Response Centre 7 Parkview Drive, Homebush Bay NSW 2127 Tel : 1300 362 603 http://www.samsung.com.au/ BRAZIL : Samsung Eletronica da Amazonia Ltda. R. Prof. Manoelito de Ornellas, 303, Terro B Chacara Sto. Antonio, CEP : 04719-040 Sao Paulo, SP SAC : 0800 124 421 http://www.samsung.com.br/ CANADA : Samsung Electronics Canada Inc.
ESPAÑA : Samsung Electronics Comercial Iberica, S.A. Ciencies, 55-65 (Poligono Pedrosa) 08908 Hospitalet de Llobregat (Barcelona) Tel. : (93) 261 67 00 Fax. : (93) 261 67 50 http://samsung.es/ FRANCE : SAMSUNG ELECTRONICS FRANCE Service Paris Nord 2 66 rue des Vanesses BP 50116 Villepinte 95950 Roissy CDG Cedex Tel : 08 25 08 65 65 Fax : 01 48 63 06 38 http://www.samsungservices.com/ GERMANY : TELEPLAN Rhein-Main GmbH Feldstr. 16 64331 Weiterstadt T. 06151/957-1306 F. 06151/957-1732 * EURO 0.
PANAMA : Samsung Electronics Latinoamerica( Z.L.) S.A. Calle 50 Edificio Plaza Credicorp, Planta Baja Panama Tel. : (507) 210-1122, 210-1133 Tel : 800-3278(FAST) http://www.samsung-latin.com/ PERU : Servicio Integral Samsung Av.Argentina 1790 Lima1. Peru Tel: 51-1-336-8686 Fax: 51-1-336-8551 http://www.samsungperu.com/ PORTUGAL : SAMSUNG ELECTRONICA PORTUGUESA S.A. Rua Mário Dioniso, No2 - 1º Drt. 2795-140 LINDA-A-VELHA Tel. 214 148 114/100 Fax. 214 148 133/128 Free Line 800 220 120 http://www.samsung.
Surbiton, Surrey KT6 7LD Tel. : (0208) 391 0168 Fax. : (0208) 397 9949 < European Service Center & National Service > Stafford Park 12 Telford, Shropshire, TF3 3BJ Tel. : (0870) 242 0303 Fax. : (01952) 292 033 http://samsungservice.co.uk/ U.S.A : Samsung Electronics America Service Division 400 Valley Road, Suite 201 Mount Arlington, NJ 07856 1-800-SAMSUNG (1-800-726-7864) http://samsung.com/monitor/ Terms Dot Pitch The image on a monitor is composed of red, green and blue dots.
1. Adjust computer resolution and screen injection rate (refresh rate) oncomputer as described below to enjoy the best quality of picture. You can have an uneven quality of picture in the screen if the best quality of picture is not provided in TFT-LCD. { { Resolution: 1024 x 768 Vertical frequency (refresh rate): 60 Hz 2. When you clean the monitor and the panel outside, please apply the recommended small amount of cleaner by using soft and dry cloth and polish it.
FCC Information | IC Compliance Notice | MPR II Compliance European Notice (Europe only) | PCT Notice | VCCI | TCO'95-Ecological requirements for personal computers (TCO'95 applied model only) TCO'99-Ecological requirements for personal computers (TCO'99 applied model only) TCO'03-Ecological requirements for personal computers (TCO'03 applied model only) TCO'03 Recycling Information (TCO'03 applied model only) Medical Requirement Mercury Statement (LCD Monitor, LCD TV, DLP Projection TV, Projector for USA o
MPR II Compliance This monitor complies with SWEDAC(MPR II) recommendations for reduced electric and magnetic fields. European Notice(Europe Only) Products with the CE marking comply with the EMC Directive(89/336/EEC), (92/31/EEC), (93/68/EEC) and the Low Voltage Directive (73/23/EEC) issued by the Commission of the European Community.
climate-influencing emissions, radioactive waste, etc.) it is vital to conserve energy. Electronic equipment in offices consumes an enormous amount of energy, since it is often routinely left running continuously. What does labelling involve? This product meets the requirements for the TCO'95 scheme, which provides for international environmental labelling of monitors.
CFCs (freons) are sometimes used for washing printed circuit boards and in the manufacturing of expanded foam for packaging. CFCs break down ozone and thereby damage the ozone layer in the stratosphere, causing increased reception on Earth of ultraviolet light with consequent increased risks of skin cancer (malignant melanoma). The relevant TCO'95 requirement: Neither CFCs nor HCFCs may be used during the manufacturing of the product or its packaging.
Flame retardants Flame retardants are present in printed circuit boards, cables, wires, casings and housings. Their purpose is to prevent, or at least to delay the spread of fire. Up to 30% of the plastic in a computer casing can consist of flame retardant substances. Most flame retardants contain bromine or chloride, and those flame retardants are chemically related to another group of environmental toxins, PCBs.
Emissions z z Electromagnetic fields Noise emissions Ecology The product must be prepared for recycling and the manufacturer must have a certified environmental management system such as EMAS or ISO 14 000 z Restrictions on o chlorinated and brominated flame retardants and polymers o heavy metals such as cadmium, mercury and lead. z The requirements included in this label have been developed by TCO Development in cooperation with scientists, experts, users as well as manufacturers all over the world.
cause harmful interference to other devices in the vicinity. However, there is no guarantee that interference will not occur in a particular installation. If this equipment does cause harmful interference to other devices, which can be determined by turning the equipment off and on, the user is encouraged to try to correct the interference by one or more of the following measures: z z z z Reorient or relocate the receiving device. Increase the separation between the equipment.
PRODUCT INFORMATION (Image Retention Free) LCD Monitors and TVs may have image retention when switching from one image to another especially after displaying a stationary image for a long time. This guide is to demonstrate correct usage of LCD products in order to protect them from Image retention. What is Image retention ? During normal operation of a LCD panel, pixel image retention doesn't occur.
The best way to protect your monitor from Image retention is to set your PC or System to operate a Screen Saver program when you are not using it. Image retention may not occur when a LCD panel is operated under normal conditions. Normal conditions are defined as continuously changing video patterns. When the LCD panel is operated for a long time with a fixed pattern (-over 12 hours-), there may be slight difference in voltage between electrodes that work the liquid crystal (LC) in a pixel.
Correct Disposal of This Product (Waste Electrical & Electronic Equipment) - Europe only (Applicable in the European Union and other European countries with separate collection systems) This marking shown on the product or its literature, indicates that it should not be disposed with other household wastes at the end of its working life.