SyncMaster 152MP / 172MP
English > Main > Index Main Page Safety Instructions Notational Power Installation Cleaning Other Introduction Unpacking Front Adjusting Your LCD Monitor User Controls User control buttons Direct-Access Features On-Screen Display OSD Functions Screen Adjustment Animation Clips Troubleshooting Check before Calling for Service Problems and Solutions Rear Remote Control Setup Connecting Your Monitor Connecting to a Computer Connecting to Other Devices Installing the Monitor Driver Q&A Specifications Genera
English > Main > Safety Instructions > Notational Notational Power Installation Cleaning Other Failure to follow directions noted by this symbol could result in bodily harm or damage to equipment.
English > Main > Safety Instructions > Power When not used for extended periods of time, set your PC to DPMS. If using a screen saver, set it to the active screen mode. Notational Power Do not use a damaged or loose plug. Installation Cleaning z This may cause an electric shock or fire. Other Do not pull the plug out by the wire nor touch the plug with wet hands. z This may cause an electric shock or fire. Use only a properly grounded plug and receptacle.
English > Main > Safety Instructions > Installation Do not cover the vents on the monitor cabinet. z Bad ventilation may cause a breakdown or fire. Notational Power Installation Cleaning Put your monitor in a location with low humidity and a minimum of dust. Other z An electric shock or fire could result inside the monitor. Do not drop the monitor when moving it. z This may cause damage to the product or human body. Place the monitor on a flat and stable surface.
English > Main > Safety Instructions > Cleaning When cleaning the monitor case or the surface of the TFT-LCD, wipe with a slightly moistened, soft fabric. Notational Power Installation Do not spray detergent directly on the monitor. Cleaning Other Use the recommended detergent with a smooth cloth. If the connector between the plug and the pin is dusty or dirty, clean it properly with a dry cloth. z A dirty connector can cause an electric shock or fire.
English > Main > Safety Instructions > Ohter Do not remove cover(or back). No user serviceable parts inside. z z This may cause an electric shock or a fire. Refer servicing to qualified service personnel. Notational Power Installation Cleaning Other If your monitor does not operate normally - in particular, if there are any unusual sounds or smells coming from it - unplug it immediately and contact an authorized dealer or service. z This may cause an electric shock or fire.
Keep power adaptor away from any other heat source. z Possible fire hazard. Remove and discard vinyl bag from power adaptor before use. z Possible fire hazard. Always keep power adaptor in well-ventilated area. If you view a fixed screen for an extended period of time, residual image or blurriness may appear. z Change the mode to energy save or set a screensaver to moving picture when you need to be away from the monitor for an extended period of time.
English > Main > Introduction > Unpacking Please make sure the following items are included with your monitor. If any items are missing, contact your dealer.
English > Main > Introduction > Front For detailed information concerning the monitor functions, refer to User Controls under Adjusting Your Monitor. The monitor's front configuration may vary slightly depending on the monitor model. Unpacking Front Rear Remote Control 1. PC mode button 6. Up-Down button / Channel button 2. PIP mode button 7. Left-Right button / Volume button 3. Video mode button 8. Menu button 4. Audio mode button 5. Power button / Power indicator 9. Exit button 10.
English > Main > Introduction > Rear For detailed information concerning cable connections, refer to Connecting Cables under Setup. The monitor's rear configuration may vary slightly depending on the monitor model. Unpacking Front Rear Remote Control A. PC Connection Terminal 1. Power Connection Terminal (14V DC) 2. Computer Connection Terminal (15 Pin D-SUB) 3. Audio Connection Terminal (Audio (ST)) B. AV Connection Terminal 1. AV right audio / video connection terminal (L,R) 2.
English > Main > Introduction > Remote Control For detailed information of the Remote Control Unit functions, refer to Adjusting Your Monitor > User Controls > User Control Buttons > Remote Control buttons. The remote control's configuration may vary slightly depending on the monitor model. Unpacking The Remote control may function within a range of 0.23 to 33 feet (7cm to 10m) and 30 degrees to the left and right of the monitor's Remote Control Reception sensor.
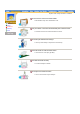
English > Main > Setup > Connecting Your Monitor > Connecting to a Computer Connecting to a Computer Connecting to other devices Connecting Your Monitor Installing the Monitor Driver Installing a VESA base Turn on your computer and monitor. If your monitor displays an image, installation is complete. 1. Connecting to a Computer 1. Connect the power cord to the DC adapter and connect the adapter jack to the DC POWER port on the back of your monitor. 2.
English > Main > Setup > Connecting Your Monitor > Connecting to other devices Connecting to a Computer Connecting to other devices Connecting Your Monitor Installing the Monitor Driver Installing a VESA base AV input devices like DVDs, VCRs or Camcorders as well as your computer may be connected to the monitor. For detailed information on connecting AV input devices, refer to User Controls under Adjusting Your Monitor.
1. Connect the antenna or the cable box to the TV tuner box(option), using the "ANTENNA" terminal on the tuner box. 2. Remove the TV Tuner Box cover from the rear of the monitor. 3. Insert the connected tuner box into the slot and firmly tighten the two screws using a coin to lock the box in place. (Loose screws may cause a blank screen or picture noise) 4. Replace the TV Tuner Box cover. 5. Turn on the monitor. 6. Select TV using Source button among the external signal adjustment buttons. 7.
4. Connecting Headphone You may connect your headphones to the monitor. 1. Connect your headphones to the Headphone-out port.
English > Main > Setup > Installing the Monitor Driver > Automatic Automatic Manual Connecting Your Monitor Installing the Monitor Driver Installing a VESA base When prompted by the operating system for the monitor driver, insert the CD-ROM included with this monitor. Driver installation is slightly different from one operating system to another. Follow the directions as appropriate for the operating system you have.
2. Windows XP/2000 Refer to "Installing the Monitor Driver and User Manual" CD-ROM supplied with the monitor. When inserted into the computer CD drive, the CD-ROM boots up automatically. If it fails to boot up automatically, click monsetup.exe twice in the CD-ROM drive folder of Windows Explorer. 1. Insert CD into the CD-ROM driver. 2. Click "Windows XP/2000 Driver". 3. Choose your monitor model in the model list, then click the "OK" button. 4. Click the "Install" button in the "Warning" window. 5.
English > Main > Setup > Installing the Monitor Driver > Manual Automatic Manual Connecting Your Monitor Installing the Monitor Driver Installing a VESA base When prompted by the operating system for the monitor driver, insert the CD-ROM included with this monitor. Driver installation is slightly different from one operating system to another. Follow the directions as appropriate for the operating system you have.
5. Click "Update Driver.." and select "Install from a list or.." then click "Next" button. 6. Select "Don't search ,I will.." then click "Next" and then click "Have disk". 7. Click the "Browse" button then choose A:(D:\Driver)and choose your monitor model in the model list and click the "Next" button. 8. If you can see following "Message" window, then click the "Continue Anyway" button. Then click "OK" button.
This monitor driver is under a certified MS logo. This installation will not damage your system. The certified driver will be posted on Samsung Monitor Homepage http://www.samsung-monitor.com/ 9. Click the "Close" button then click "OK" button continually. 10. Monitor driver installation is completed. 2. Microsoft® Windows® 2000 Operating System * When you can see "Digital Signature Not Found" on your monitor, follow these steps. 1. Choose "OK" button on the "Insert disk" window. 2.
5. Click "Driver" and then click on "Update Driver.." then click on the "Next" button. 6. Choose "Display a list of the known drivers for this device so that I can choose a specific driver" then click "Next" and then click "Have disk". 7. Click the "Browse" button then choose A:(D:\Driver). 8. Click the "Open" button, then click "OK" button. 9. Choose your monitor model and click the "Next" button then click "Next" button. 10. Click the "Finish" button then the "Close" button.
English > Main > Setup > Installing a VESA base > Folding or removing the base Folding or removing the base Installing a VESA base Connecting Your Monitor Installing the Monitor Driver Installing a VESA base This monitor supports various types of VESA-standard bases. You need to either fold or remove the base in use in order to install a VESA base. Folding the base | Removing the base 1. Folding the base The monitor may be reclined from 0 to 90 degrees.
1. 2. 3. 4. Lay the LCD monitor face-down on a flat surface with a cushion beneath it to protect the screen. Disconnect the monitor cables. Remove the four bolts that fasten the base to the monitor. Reconnect the monitor cables. You may install a VESA base when the monitor base is separated.
English > Main > Setup > Installing a VESA base > Installing VESA base Folding or removing the base Installing a VESA base Connecting Your Monitor Installing the Monitor Driver Installing a VESA base The monitor supports VESA mounting standard for use with various VESA mounting devices. This monitor accepts a 75mm x 75mm VESA-compliant mounting interface pad. You need to fold the monitor base before installing a VESA base.
English > Main > Adjusting Your Monitor > User Controls > User control buttons User control buttons Direct-Access Features User Controls On-Screen Display The control button configuration may vary slightly depending on the monitor model. Source Buttons | Control Buttons | Remote Control Buttons | Source Buttons | 1. PC mode button Switches from Video mode to PC mode. 2. PIP mode button In PC Mode, turns on Video or TV screens in PIP mode.
For more information on the screen adjustment functions, refer to On-Screen Display. 5. Power button / Power indicator Use this button to turn the monitor on and off. Power Indicator shows PowerSaver mode by green blinking. Refer to Specifications > PowerSaver. 6. + CH / - CH button Moves from one menu item to another vertically or adjusts selected menu values. In TV mode, selects TV channels. For more information, refer to Direct-Access Features > Channel. 7.
6 PIP Position button Adjusts the location of Video image in PIP mode. Press VOL buttons to adjust the location up and down or left and right. / VOL + , + CH / - CH 7 PIP Size button Adjusts the PIP image size in PIP mode. Use the VOL reduce or enlarge the PIP screen. / VOL + buttons to exit PIP mode, or 8-11 Control Buttons See the Control Buttons above. 12 Mute button Pauses (mutes) the audio output temporarily. The audio resumes if Mute or VOL button is pressed in the Mute mode.
English > Main > Adjusting Your Monitor > User Controls > Direct-Access Features User control buttons Direct-Access Features User Controls On-Screen Display Direct-Access Features let you display Monitor Adjustment Menu by simply pressing Auto button once. Or they are used to adjust monitor functions. You need to activate functions other than Auto Adjustment only when Auto-Access Features are off. Automatic Save | OSD Lock/Unlock | Volume | Channel 1.
3. Volume When OSD is not on the screen, push the VOL adjust volume. 1. Push the 2. Push the / VOL + button to button to decrease the volume. button to increase the volume. 4. Channel When OSD is not on the screen, push the channel number. 1. Push the 2. Push the + CH / - CH button to select button to decrease the channel number. button to increase the channel number. This function is available in TV or PC + TV (PIP) mode only.
SyncMaster 152MP English > Main > Adjusting Your Monitor > On-Screen Display > OSD Functions OSD Functions Screen Adjustment Animation Clips User Controls On-Screen Display Characters and icons become highlighted in blue during adjustment for each menu. PC Screen | TV Screen | Video Screen | OSD Control 1. PC Screen For detailed information on Screen Adjustment in the PC mode, refer to PC Screen Adjustment Animation Clips. Contrast Adjust Contrast. Brightness Adjust Brightness.
• Custom : Choose Custom to recall your personalized settings. - Bass : Emphasize low frequency audio. - Treble : Emphasize high frequency audio. • Standard : Choose Standard for the standard factory settings. • Music : Choose Music when watching music videos or concerts. • Movie : Choose Movie when watching movies. • Speech : Choose Speech when watching a show that is mostly dialogue (i.e., news).
: Beligie, Espania, Italia, Nederland, Schweiz, Sverige, UK, France, Deutschland, East Europe. 2) Manual Store : You can scan the frequency ranges available on your television in your area and store all the channels found manually. • Color system: Adjust repeatedly until the color is of the best quality. (Auto <-> PAL <-> SECAM <-> NT4.43) • Sound system: Adjust repeatedly until the sound is of the best quality.
• Warm 2 • Cool 1 • Cool 2 Sound The monitor has a built-in high fidelity stereo audio amplifier. 1) Mode • Custom : Choose Custom to recall your personalized settings. - Bass : Emphasize low frequency audio. - Treble : Emphasize high frequency audio. • Standard : Choose Standard for the standard factory settings. • Music : Choose Music when watching music videos or concerts. • Movie : Choose Movie when watching movies. • Speech : Choose Speech when watching a show that is mostly dialogue (i.e., news).
SyncMaster 172MP English > Main > Adjusting Your Monitor > On-Screen Display > OSD Functions OSD Functions Screen Adjustment Animation Clips User Controls On-Screen Display Characters and icons become highlighted in blue during adjustment for each menu. PC Screen | TV Screen | Video Screen | OSD Control 1. PC Screen For detailed information on Screen Adjustment in the PC mode, refer to PC Screen Adjustment Animation Clips. Contrast Adjust Contrast. Brightness Adjust Brightness.
• Custom : Choose Custom to recall your personalized settings. - Bass : Emphasize low frequency audio. - Treble : Emphasize high frequency audio. • Standard : Choose Standard for the standard factory settings. • Music : Choose Music when watching music videos or concerts. • Movie : Choose Movie when watching movies. • Speech : Choose Speech when watching a show that is mostly dialogue (i.e., news).
: Beligie, Espania, Italia, Nederland, Schweiz, Sverige, UK, France, Deutschland, East Europe. 2) Manual Store : You can scan the frequency ranges available on your television in your area and store all the channels found manually. • Color system: Adjust repeatedly until the color is of the best quality. (Auto <-> PAL <-> SECAM <-> NT4.43) • Sound system: Adjust repeatedly until the sound is of the best quality.
• Normal • Warm 1 • Warm 2 • Cool 1 • Cool 2 Sound The monitor has a built-in high fidelity stereo audio amplifier. 1) Mode • Custom : Choose Custom to recall your personalized settings. - Bass : Emphasize low frequency audio. - Treble : Emphasize high frequency audio. • Standard : Choose Standard for the standard factory settings. • Music : Choose Music when watching music videos or concerts. • Movie : Choose Movie when watching movies.
English > Main > Troubleshooting > Check before calling for service Check the following items yourself before calling for service. Contact the service center for problems that you cannot solve by yourself. Check before calling for service Problems and Solutions Q&A Self-Test Feature Check | Video mode not supported | Display Adapter Driver Maintenance and Cleaning | Symptoms & Recommended Actions 1.
video card manufacturers. 2. Installing Adapter Driver The instructions given below are for general circumstances. For specific issues, contact the relevant computer or video card manufacturers. 1) Click Start Settings Control Panel Display Settings Advanced Adapter Update Driver Next Display a list of the known drivers for this device so that I can choose a specific driver Next Have Disk (Insert Video Card Driver diskette) OK Next Next Finish.
The following table lists possible problems and their solutions. Before calling for service, check the information in this section to see if you can remedy any problems yourself. If you do need assistance, please call the phone number on the warranty card, the phone number on the Information section or contact your dealer. Check before calling for service Problems and Solutions Q&A Installation | Screen | Audio | Remote Control 1.
monitor menu and Preset Timing Modes. Ghost images are shown in the picture. The image is too light or too dark z Adjust the Brightness and Contrast. (Refer to the Brightness, Contrast) Screen color is inconsistent. z Adjust color using User Mode under OSD Color Adjustment menu. Power Indicator blinks green. z The monitor is currently saving the changes made in settings to the OSD memory. Screen is blank and power indicator light is steady green or blinks every 0.
English > Main > Troubleshooting > Q & A Frequently asked questions are summarized here for your reference. Question Check before calling for service Problems and Solutions Q&A How can I change the frequency? Answer Frequency can be changed by reconfiguring the video card. Note that video card support can vary, depending on the version of the driver used. (Refer to the computer or the video card manual for details.
SyncMaster 152MP English > Main > Specifications > General Specifications Design and specifications are subject to change without prior notice. General General PowerSaver Preset Timing Modes Model Name SyncMaster 152MP LCD Panel Size 15.0 inch (Diagonal) Display area 304.128 (H) x 228.056 (V) Pixel Pitch 0.297 (H) x 0.
SyncMaster 152MP English > Main > Specifications > General Specifications Environmental considerations Operating Humidity : 10% ~ 80%, non-condensing General PowerSaver Preset Timing Modes Temperature : 50°F ~ 104°F(10°C ~ 40°C) Storage Temperature : -4°F ~113°F (-20°C ~ 45°C) Humidity : 5% ~ 95%, non-condensing Plug and Play Capability This monitor can be installed on any Plug & Play compatible system.
SyncMaster 172MP English > Main > Specifications > General Specifications Design and specifications are subject to change without prior notice. General General PowerSaver Preset Timing Modes Model Name SyncMaster 172MP LCD Panel Size 17.0 inch (Diagonal) Display area 337.92 (H) x 270.336.336 (V) Pixel Pitch 0.264 (H) x 0.
SyncMaster 172MP English > Main > Specifications > General Specifications Environmental considerations Operating Temperature : 50°F ~ 104°F(10°C ~ 40°C) Humidity : 10% ~ 80%, non-condensing Storage Temperature : -4°F ~113°F (-20°C ~ 45°C) Humidity : 5% ~ 95%, non-condensing General PowerSaver Preset Timing Modes Plug and Play Capability This monitor can be installed on any Plug & Play compatible system.
SyncMaster 152MP English > Main > Specifications > PowerSaver General PowerSaver Preset Timing Modes This monitor has a built-in power management system called PowerSaver. This system saves energy by switching your monitor into a low-power mode when it has not been used for a certain amount of time. The monitor automatically returns to normal operation when you move the computer's mouse or press a key on the keyboard.
SyncMaster 172MP English > Main > Specifications > PowerSaver General PowerSaver Preset Timing Modes This monitor has a built-in power management system called PowerSaver. This system saves energy by switching your monitor into a low-power mode when it has not been used for a certain amount of time. The monitor automatically returns to normal operation when you move the computer's mouse or press a key on the keyboard.
SyncMaster 152MP English > Main > Specifications > Preset Timing Modes If the signal transferred from the computer is the same as the following Preset Timing Modes, the screen will be adjusted automatically. However, if the signal differs, the screen may go blank while the power LED is on. Refer to the video card manual and adjust the screen as follows. General PowerSaver Preset Timing Modes Table 1.
SyncMaster 172MP English > Main > Specifications > Preset Timing Modes If the signal transferred from the computer is the same as the following Preset Timing Modes, the screen will be adjusted automatically. However, if the signal differs, the screen may go blank while the power LED is on. Refer to the video card manual and adjust the screen as follows. General PowerSaver Preset Timing Modes Table 1.
English > Main > Information > Service Center Service Center Terms Regulatory Natural Color For Better Display Authority U.S.A. : Samsung Computer Products Customer Service 400 Valley Road, Suite 201, Mt. Arlington, NJ 07856 Tel. : (973)601-6000, 1-800-SAMSUNG (1-800-726-7864) Fax. : (973)601-6001 http://www.samsungusa.com/monitor/ BRAZIL : Samsung Eletronica da Amazonia Ltda. R. Prof. Manoelito de Ornellas, 303, Terro B Chacara Sto. Antonio, CEP : 04719-040 Sao Paulo, SP SAC : 0800 124 421 http://www.
http://samsung.es/ United Kingdom : Samsung Electronics (UK) Ltd. Samsung House, 225 Hook Rise South Surbiton, Surrey KT6 7LD Tel. : (0208) 391 0168 Fax. : (0208) 397 9949 < European Service Center & National Service > Stafford Park 12 Telford, Shropshire, TF3 3BJ Tel. : (0870) 242 0303 Fax. : (01952) 292 033 http://samsungservice.co.
Teatinos 550, Santiago Centro, Santiago, Chile Fono: 56-2-5605000 Fax: 56-2-5605353 56-2-800200211 http://www.sonda.com/ http://www.samsung.cl/ MEXICO : Samsung Electronics Mexico S.A. de C.V. Saturno 44 Col. Nueva Industrial Vallejo Del. Gustavo A. Madero C.P. 07700 Mexico D.F. Tel. 01 57 47 51 00 Fax. 01 57 47 52 02 RFC: SEM950215S98 http://www.samsung.com.mx/ IMPORTADO POR: SAMSUNG ELECTRONICS MEXICO S.A. DE C.V. SATURNO 44 COL. NVA. INDUSTRIAL VALLEJO DEL. GUSTAVO A. MADERO C.P. 07700 MEXICO D.F. TEL.
English > Main > Information > Terms Sync Signal Service Center Terms Regulatory Natural Color For Better Display Authority Sync (Synchronized) Signals refer to the standard signals that are required to display desired colors on the monitor. They are divided into Vertical and Horizontal Sync Signals. These signals display normal color images by the set resolution and frequency. Types of Sync Signals Separate This is a scheme of transmitting individual vertical sync signals to the monitor.
English > Main > Information > Regulatory Service Center FCC Information | IC Compliance Notice | MPR II Compliance | European Notice (Europe only) | PCT Notice | VCCI | TCO'95-Ecological requirements for personal computers (TCO'95 applied model only) TCO'99-Ecological requirements for personal computers (TCO'99 applied model only) TCO'03-Ecological requirements for personal computers (TCO'03 applied model only) Terms Regulatory FCC Information Natural Color For Better Display Authority User Instructi
MPR II Compliance This monitor complies with SWEDAC(MPR II) recommendations for reduced electric and magnetic fields. European Notice (Europe only) Products with the CE marking comply with the EMC Directive(89/336/EEC), (92/31/EEC), (93/68/EEC) and the Low Voltage Directive (73/23/EEC) issued by the Commission of the European Community.
What does labelling involve? This product meets the requirements for the TCO'95 scheme, which provides for international environmental labelling of monitors. The labelling scheme was developed as a joint effort by the TCO (The Swedish Confederation of Professional Employees), Naturskyddsforeningen (The Swedish Society for Nature Conservation) and NUTEK (The National Board for Industrial and Technical Development in Sweden).
Congratulations! You have just purchased a TCO'99 approved and labelled product! Your choice has provided you with a product developed for professional use. Your purchase has also contributed to reducing the burden on the environment and also to the further development of environmentally adapted electronics products. This product meets the requirements for the TCO'99 scheme which provides for an international environmental and quality labelling labelling of personal computers.
in high doses. The relevant TCO'99 requirement states that batteries may not contain any mercury. It also demands that mercury is not present in any of the electrical or electronics components associated with the labelled unit. There is however one exception. Mercury is, for the time being, permitted in the back light system of flat panel monitors as today there is no commercially available alternative. TCO aims on removing this exception when a Mercury free alternative is available.
English > Main > Information > Natural Color Natural Color Software Program Service Center Terms Regulatory Natural Color For Better Display Authority One of the recent problems in using a computer is that the color of the images printed out by a printer or other images scanned by a scanner or a digital camera are not the same as those shown on the monitor. The Natural Color S/W is the very solution for this problem.
SyncMaster 152MP For Better Display Service Center 1. Adjust computer resolution and screen injection rate (refresh rate) in control panel of computer as described below to enjoy the best quality of picture. You can have an uneven quality of picture in the screen if the best quality of picture is not provided in TFT-LCD. Terms Regulatory { { Resolution: 1024 x 768 Vertical frequency (refresh rate): 60 Hz Natural Color For Better Display Authority 2.
SyncMaster 172MP For Better Display Service Center 1. Adjust computer resolution and screen injection rate (refresh rate) in control panel of computer as described below to enjoy the best quality of picture. You can have an uneven quality of picture in the screen if the best quality of picture is not provided in TFT-LCD. Terms Regulatory { { Resolution: 1280 x 1024 Vertical frequency (refresh rate): 60 Hz Natural Color For Better Display Authority 2.
English > Main > Information > Authority Information in this document is subject to change without notice. © 2003 Samsung Electronics Co., Ltd. All rights reserved. Service Center Terms Regulatory Reproduction in any manner whatsoever without the written permission of Samsung Electronics Co., Ltd. is strictly forbidden. Samsung Electronics Co., Ltd.