SyncMaster 320MX-2,320MXn-2 zaslon LCD Uporabniški priročnik
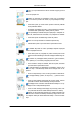
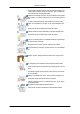
Varnostna navodila Simboli Opomba Upoštevajte ta varnostna navodila, da zagotovite lastno varnost in preprečite poškodbo lastnine. Pozorno preberite navodila in izdelek uporabljajte pravilno. Opozorilo/pozor Neupoštevanje navodil, označenih s tem simbolom, lahko povzroči telesne poškodbe ali poškodbo opreme.
Varnostna navodila Zagotovite, da je napajalni vtič čvrsto in pravilno priključen na napajalno vtičnico. • Sicer lahko pride do požara. Napajalnega vtiča ne upogibajte ali vlecite na silo in nanj ne postavljajte težkih predmetov. • Sicer lahko pride do požara. Na eno napajalno vtičnico ne priključujte več naprav. • Sicer lahko pride do požara zaradi pregretja. Med uporabo izdelka ne izključujte napajalnega kabla. • Sicer lahko pride do poškodbe izdelka zaradi električnega udara.
Varnostna navodila Grelne naprave naj se nahajajo čim dlje od napajalnega kabla in izdelka. • Sicer lahko pride do električnega udara ali požara. Ne nameščajte ga na slabo prezračevanem mestu, kot so knjižne police ali omara. • Sicer lahko pride do požara zaradi povišanja notranje temperature. Izdelek odlagajte previdno. • Sicer se lahko poškoduje zaslon. Sprednjega dela izdelka ne postavljajte na tla. • Sicer se lahko poškoduje zaslon.
Varnostna navodila Pine napajalnega vtiča in napajalno vtičnico čistite s suho krpo. • Sicer lahko pride do požara. Pred čiščenjem izdelka izključite napajalni kabel. • Sicer lahko pride do električnega udara ali požara. Preden očistite izdelek, izključite napajalni kabel, nato pa izdelek nežno očistite s suho krpo. • (Ne uporabljajte kemikalij, kot so vosek, benzol, alkohol, razredčilo, sredstvo proti komarjem, mazivo in čistilo.
Varnostna navodila Zaslona LCD ne poskušajte premakniti tako, da vlečete samo napajalni ali signalni kabel. • Sicer lahko pade in lahko zaradi poškodbe kabla pride do električnega udara, poškodbe izdelka ali požara. Izdelka ne dvigujte ali premikajte naprej in nazaj ali levo in desno tako, da držite samo napajalni ali signalni kabel. • Sicer lahko pade in lahko zaradi poškodbe kabla pride do električnega udara, poškodbe izdelka ali požara. Odprtine za prezračevanje ne sme blokirati miza ali zavesa.
Varnostna navodila Po eni (1) uri uporabe zaslona LCD si vzemite vsaj pet (5) minut odmora. S tem si spočijete oči. Izdelka ne namestite na nestabilno mesto, kot je nestabilna polica, na neravno površino ali mesto, ki je izpostavljeno tresljajem. • Sicer lahko pade, pri čemer lahko pride do telesnih poškodb in/ali poškodbe izdelka. • Če izdelek uporabljate na mestu, ki je izpostavljeno tresljajem, se izdelek lahko poškoduje in lahko pride do požara.
Varnostna navodila • Stranka lahko rabljene baterije ali akumulatorske baterije vrne v bližnji javni reciklirni center ali v trgovino, kjer prodajajo isto vrsto baterij ali akumulatorskih baterij. Izdelka ne postavljajte na mesto, ki je izpostavljeno neposredni sončni svetlobi, ali v bližino toplotnih virov, kot sta odprt ogenj ali grelnik. • To lahko skrajša življenjsko dobo izdelka in povzroči požar. Pazite, da na izdelek nič ne pade, in ga ne izpostavljajte udarcem.
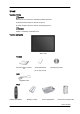
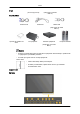
Uvod Vsebina paketa Opomba Preverite, ali ste z zaslonom LCD dobili naslednje predmete. Če kateri predmet manjka, se obrnite na trgovca. Za nakup dodatne opreme se obrnite na lokalnega trgovca. Opomba Stojalo ni namenjeno namestitvi na tla.
Uvod Drugo Kabel D-Sub Kabel DVI Kabel LAN (ni na voljo povsod) (Velja samo za model MXn-2.) Naprodaj ločeno Kabel D-Sub Kabel DVI Kabel LAN (Velja samo za model MXn-2.) Oprema za pritrditev na steno TV-sprejemnik Omrežni sprejemnik Komplet nastavka (Velja samo za model MX-2.) Opomba • Kupite in povežete lahko ločen omrežni ali TV-sprejemnik. Za informacije o uporabi le-teh si oglejte njuna uporabniška priročnika. • Povezati je mogoče samo en zunanji sprejemnik.
Uvod Gumb MENU [MENU] Odpre in zapre meni na zaslonu. Uporablja se tudi za izhod iz menija na zaslonu in za vrnitev v prejšnji meni. Gumba za krmarjenje (navzgor in navzdol) Z njimi se navpično pomikate med menijskimi elementi ali prilagajate izbrane menijske vrednosti. Gumba za prilagajanje (levo in desno)/gumba za glasnost Z njimi se vodoravno pomikate med menijskimi elementi ali prilagajate izbrane menijske vrednosti. Ko na zaslonu ni prikaza, s tem gumbom nastavite glasnost.
Uvod POWER S/W ON [ │ ] / OFF [O] Vklop/izklop zaslona LCD. POWER IN Napajalni kabel priključite na zaslon LCD in stensko vtičnico. RS232C RS232C) OUT/IN (serijska vrata Programska vrata za MDC (Multiple Display Control) DVI / PC / HDMI IN [DVI/PC/HDMI AUDIO IN] (priključek za avdio povezavo PC/ DVI/HDMI (vhod)) DVI / PC / HDMI IN [HDMI] S kablom HDMI povežite priključek HDMI na hrbtni strani zaslona LCD in priključek naprave HDMI.
Uvod S kablom DVI (DVI-D in DVI-D) – način DVIja (digitalni računalniki) DC OUT [5V/1.5A] Zagotovite, da bodo vrata DC-OUT povezana z dodeljenim TV-sprejemnik [SBB-DT*]. V nasprotnem primeru lahko pride do poškodb izdelka. AV IN [VIDEO] (priključek za VIDEO) Z VIDEO kablom povežite priključek [ VIDEO ] na zaslonu LCD in priključek za video na zunanji napravi.
Uvod Kensington Lock Ključavnica Kensington je naprava, ki se uporablja za fizično pritrditev sistema, ko se ta uporablja na javnem mestu. Napravo za zaklep je treba kupiti posebej. Videz in način zaklepanja se lahko razlikujeta od slike, odvisno od proizvajalca. Za pravilno uporabo si oglejte priročnik, ki je priložen ključavnici Kensington. Napravo za zaklep je treba kupiti posebej. Opomba Kje je nameščena ključavnica Kensington, je odvisno od modela. Uporaba proti kraji 1.
Uvod POWER OFF Number Buttons Gumb DEL + VOL MUTE TV/DTV MENU INFO BARVNI GUMBI TTX/MIX STILL AUTO S.MODE MDC LOCK SOURCE ENTER/PRE-CH CH/P D.MENU GUIDE RETURN Gumbi za navzgor in navzdol ter levo in desno EXIT SRS MagicInfo P.MODE DUAL/MTS PIP SWAP 1. POWER Vklop izdelka. 2. Off Izklop izdelka. 3.
Uvod 4. Gumb DEL Gumb "-" deluje samo pri DTV-ju. Z njim izberete MMS (več kanalov) za DTV. 5. + VOL - Nastavitev glasnosti zvoka. 6. Začasna ustavitev (izklop) avdio izhoda. To se prikaže v spodnjem levem vogalu zaslona. Predvajanje zvoka se nadaljuje, če v načinu izklopa zvoka pritisnete gumb MUTE ali - VOL +. MUTE 7. TV/DTV Neposredna izbira načina TV-ja in DTV-ja 8. MENU Odpre in zapre meni na zaslonu ter zapre meni za prilagoditev. 9. Aktivira označen menijski element. 10. INFO 11.
Uvod 21.D.MENU Prikaz menija DTV-ja 22.GUIDE Prikaz elektronskega programskega vodnika (EPG). RETURN 23. 24. Gumbi za navzgor in navzdol ter levo in desno EXIT 25. 26. SRS Vrnitev na prejšnji meni. Z njimi se navpično ali vodoravno pomikate med menijskimi elementi ali prilagajate izbrane menijske vrednosti. Za izhod iz zaslona z menijem. Za izbiro načina SRS TruSurround XT. 27.MagicInfo Gumb za hitri zagon MagicInfo . 28. P.
Uvod Mehanska razporeditev Mehanska razporeditev
Uvod Osrednji del zaslona LCD VELIKOST OMREŽNEGA MODELA Namestitev nosilca VESA • Pri nameščanju nosilca VESA upoštevajte mednarodne standarde VESA. • Nakup nosilca VESA in navodila za namestitev: Za naročilo se obrnite na najbližjega prodajalca izdelkov SAMSUNG. Po oddaji naročila vas bodo obiskali strokovnjaki za namestitev in namestili nosilec. • Za premikanje zaslona LCD sta potrebni vsaj dve osebi.
Uvod Dimenzije Pomembno Za pritrditev nosilca na steno uporabite samo strojne vijake premera 6 mm in dolžine od 8 do 12 mm. Namestitev stenskega nosilca • Za namestitev stenskega nosilca se obrnite na tehnika. • SAMSUNG Electronics ne odgovarja za poškodbe izdelka ali ostale poškodbe, če namestitev opravi stranka sama. • Izdelek je namenjen namestitvi na cementne stene. Če boste izdelek namestili na ometeno površino ali les, morda ne bo ostal na mestu.
Uvod Sestava stenskega nosilca Opomba V kompletu sta dva tečaja (levi in desni). Pazite, da ju ne zamenjate. 1. Vstavite fiksni vijak in ga privijte v smeri puščice. Nato stenski nosilec namestite na steno. V kompletu sta dva tečaja (levi in desni). Pazite, da ju ne zamenjate. 2. A– fiksni vijak B– stenski nosilec C– tečaj (levi) D– tečaj (desni) Preden zavrtate v steno, preverite, ali je razdalja med odprtinama za namestitev na zadnji strani izdelka pravilna.
Uvod 3. Preglejte namestitveno shemo in na steni označite mesta vrtanja. Za vrtanje odprtin, ki naj bodo globlje kot 35 mm, uporabite 5-milimetrski sveder. V vsako odprtino vstavite sidrni vložek. Poravnajte vsak nosilec in odprtine v tečajih z ustreznimi odprtinah v sidrnih nastavkih ter vstavite in privijte 11 vijakov A. Namestitev izdelka na stenski nosilec. Oblika izdelka se lahko razlikuje glede na model. (Enako velja za sklope plastičnih zank in vijakov.) 1.
Uvod 4. Odstranite varnostno zaponko (3) in vstavite 4 držala v ustrezne odprtine v nosilcu (1). Nato izdelek (2) namestite tako, da bo dobro pritrjen na nosilec. Ne pozabite znova vstaviti in pritrditi varnostne zaponke (3), ki je dodatno ščiti namestitev izdelka na nosilec. A– zaslon LCD B– stenski nosilec C– stena Nastavitev kota stenskega nosilca Pred namestitvijo na steno nastavite kot nosilca na -2˚. 1. Izdelek namestite na stenski nosilec. 2.
Uvod Pri prilagajanju kota držite zgornji osrednji del izdelka in ne levega ali desnega dela.
Povezave Priključitev računalnika Uporaba napajalnega kabla z ozemljitvijo • V primeru napake lahko ozemljitveni vod povzroči električni udar. Pred priklopom na enosmerni tok poskrbite za ustrezno namestitev ozemljitvenega voda. Pred odstranjevanjem ozemljitvenega voda pa izdelek odklopite z enosmernega toka. Opomba Z zaslonom LCD lahko povežete vhodne naprave AV, kot so predvajalniki DVD, videorekorderji in videokamere, ter računalnik.
Povezave Avdio kabel zaslona LCD priključite na vrata za zvok na hrbtni strani računalnika. Opomba • Vklopite računalnik in zaslon LCD. • Kabel DVI / D-sub je izbiren. • Za nakup dodatne opreme se obrnite na lokalni servisni center SAMSUNG Electronics. Povezovanje z drugimi napravami Uporaba napajalnega kabla z ozemljitvijo • V primeru napake lahko ozemljitveni vod povzroči električni udar. Pred priklopom na enosmerni tok poskrbite za ustrezno namestitev ozemljitvenega voda.
Povezave Priključitev videokamere 1. Poiščite izhodne vtičnice AV na videokameri. Običajno se nahajajo na stranskem deli ali hrbtni strani videokamere. S kompletom avdio kablov povežite vtičnice AUDIO OUTPUT na videokameri in AV AUDIO IN [L-AUDIO-R] na zaslonu LCD. 2. Z video kablom povežite vtičnico VIDEO OUTPUT na videokameri in AV IN [VIDEO] na zaslonu LCD. 3. Z gumbom Source na sprednji strani zaslona LCD ali na daljinskem upravljalniku izberite AV za priključitev videokamere. 4.
Povezave Povezava s kablom za povezavo vrat DVI in HDMI Opomba • S kablom za povezavo vrat DVI in HDMI povežite izhodni priključek DVI na napravi z digitalnim izhodom in priključek HDMI na zaslonu LCD. • Povežite rdeče in bele vtičnice kabla za povezavo RCA s stereom (za računalnik) z avdio izhodnimi priključki enake barve na napravi z digitalnim izhodom, drugo vtičnico pa povežite s priključkom DVI / PC / HDMI AUDIO IN na zaslonu LCD.
Povezave Opomba Priključite kabel LAN. (Velja samo za model MXn-2.) Priključitev naprave USB Uporaba napajalnega kabla z ozemljitvijo • V primeru napake lahko ozemljitveni vod povzroči električni udar. Pred priklopom na enosmerni tok poskrbite za ustrezno namestitev ozemljitvenega voda. Pred odstranjevanjem ozemljitvenega voda pa izdelek odklopite z enosmernega toka. Opomba Z zaslonom LCD lahko povežete vhodne naprave AV, kot so predvajalniki DVD, videorekorderji in videokamere, ter računalnik.
Uporaba programske opreme Gonilnik monitorja Opomba Ko operacijski sistem zahteva gonilnik monitorja, vstavite CD-ROM, priložen monitorju. Namestitev gonilnika se lahko med operacijskimi sistemi malce razlikuje. Sledite navodilom za operacijski sistem, ki ga uporabljate. Pripravite prazen disk in s tu navedenega spletnega mesta prenesite datoteko s programom gonilnika. Spletno mesto: http://www.samsung.com/ (za cel svet) Namestitev gonilnika monitorja (samodejna) 1. Vstavite CD v pogon CD-ROM. 2.
Uporaba programske opreme Opomba Ta gonilnik monitorja je potrjen z logotipom MS in ta namestitev ne bo poškodovala vašega sistema. Potrjeni gonilnik bo objavljen na domači strani monitorja Samsung. http://www.samsung.com/ Namestitev gonilnika monitorja (ročna) Operacijski sistem Microsoft® Windows Vista™ 1. CD s priročnikom vstavite v pogon CD-ROM. 2. Kliknite (Start) in "Nadzorna plošča". Nato dvokliknite "Appearance and Personalization" (Videz in prilagajanje). 3.
Uporaba programske opreme Če se prikaže sporočilo "Windows needs..." (Windows mora …), kot je prikazano na spodnji sliki, kliknite "Continue" (Nadaljuj). Opomba Gonilnik monitorja je potrjen z logotipom MS in ta namestitev ne bo poškodovala vašega sistema. Potrjeni gonilnik bo objavljen na domači strani monitorja Samsung. 6. Kliknite "Update Driver..." (Posodobi gonilnik ...) na zavihku "Driver" (Gonilnik). 7.
Uporaba programske opreme 9. Na seznamu modelov monitorjev na zaslonu izberite vaš model in kliknite "Next" (Naprej). 10. Na naslednjih, zaporedoma prikazanih zaslonih kliknite "Close" (Zapri) → "Close" (Zapri) → "OK" (V redu) → "OK" (V redu).
Uporaba programske opreme Operacijski sistem Microsoft® Windows® XPoperacijskimi sistemi 1. Vstavite CD v pogon CD-ROM. 2. Kliknite "Start" → "Control Panel" (Nadzorna plošča) in nato ikono "Appearance and Themes" (Videz in teme). 3. Kliknite ikono "Display" (Zaslon) in izberite zavihek "Settings" (Nastavitve) ter kliknite "Advanced..." (Dodatno ...). 4. Kliknite gumb "Properties" (Lastnosti) na zavihku "Monitor" in izberite zavihek "Driver" (Gonilnik). 5. Kliknite "Update Driver...
Uporaba programske opreme 6. Izberite "Don't search, I will..." (Ne išči ...) in kliknite "Next" (Naprej) ter kliknite "Have disk" (Imam disk). 7. Kliknite gumb "Browse" (Prebrskaj) in izberite A: (pogon D:\) ter na seznamu modelov monitorja izberite vaš model in kliknite gumb "Next" (Naprej). 8. Če se prikaže naslednje okno s sporočilom, kliknite gumb "Continue Anyway" (Vseeno nadaljuj). Nato kliknite gumb ""OK" (V redu).
Uporaba programske opreme http://www.samsung.com/ 9. Kliknite gumb "Close" (Zapri), nato klikajte zaporedoma prikazan gumb "OK" (V redu). 10. Namestitev gonilnika monitorja je dokončana. Operacijski sistem Microsoft® Windows® 2000operacijskimi sistemi Ko se na monitorju prikaže "Digital Signature Not Found" (Digitalnega podpisa ni bilo mogoče najti), sledite naslednjim korakom. 1. Izberite gumb "OK" (V redu) v oknu "Insert disk" (Vstavite disk). 2.
Uporaba programske opreme 7. Kliknite gumb "Browse" (Prebrskaj) in izberite A: (pogon D:\). 8. Kliknite gumb "Open" (Odpri) in nato gumb "OK" (V redu). 9. Izberite vaš model monitorja in kliknite gumb "Next" (Naprej) ter znova kliknite gumb "Next (Naprej). 10. Kliknite gumb "Finish" (Dokončaj) in nato gumb "Close" (Zapri). Če se prikaže okno "Digital Signature Not Found" (Digitalnega podpisa ni bilo mogoče najti), kliknite gumb "Yes" (Da).
Uporaba programske opreme Operacijski sistem Linux Za X-Window morate izdelati datoteko X86Config, ki je vrsta datoteke z nastavitvami sistema. 1. Po izvedbi datoteke X86Config na prvem in drugem zaslonu pritisnite "Enter" (Vnos). 2. Na tretjem zaslonu se nastavi miška. 3. Nastavite miško za računalnik. 4. Na naslednjem zaslonu izberete tipkovnico. 5. Nastavite tipkovnico za računalnik. 6. Na naslednjem zaslonu se nastavi monitor. 7. Najprej nastavite vodoravno frekvenco za monitor.
Uvod Multiple Display Control (MDC) je aplikacija, ki omogoča enostaven in sočasen nadzor nad več zasloni na osebnem računalniku. Za komunikacijo med računalnikom in zaslonom je uporabljen RS-232C, standard za zaporedno komunikacijo. Zato morajo biti zaporedna vrata računalnika in zaslona povezana z zaporednim kablom. Začetek - Glavni zaslon Kliknite Start > Program > Samsung > Multiple Display Control za zagon programa. Izberite niz in si oglejte obseg izbranega niza na drsniku.
Glavne ikone Gumb za izbiro Remocon Mreža z informacijami Safety Lock Izbira zaslonov Port Selection Orodja za nadzor 1. Za preklop na določen zaslon uporabite glavne ikone. 2. Omogoča vam vklop ali izklop funkcije prejemanja signala daljinskega upravljalnika zaslona. 3. Nastavite funkcijo Safety Lock (Varnostna ključavnica). Ko je funkcija zaklepa vklopljena, lahko uporabljate samo gumbe power (vklop) in lock (zaklep) na daljinskem upravljalniku in televizorju. 4.
1. Aplikacija Multiple Display Control je privzeto nastavljena na vrata COM1. 2. Če so uporabljena druga vrata in ne COM1, je mogoče v meniju za izbiro vrat (Port Selection Menu) določiti vrata od COM1 do COM4. 3. Če ime vrat, ki so povezana z monitorjem z zaporednim kablom, ni natančno določeno, komunikacija ne bo na voljo. 4. Izbrana vrata so shranjena v programu in uporabljena tudi za naslednji program. Upravljanje napajanja 1.
Mreža z informacijami prikazuje osnovne informacije, ki so potrebne za upravljanje napajanja. 1) Stanje napajanja 2) Vir napajanja 3) Velikost slike 4) Stanje časovnika vklopa 5) Stanje časovnika izklopa 2. Za izbiro zaslona, ki ga želite upravljati, izberite gumb Select All (Izberi vse) ali potrditveno polje. Upravljanje napajanja omogoča nadzor nad nekaterimi funkcijami izbranega zaslona.
- Vklopi/izklopi napajanje izbranega zaslona. 2) Volume (Glasnost) - Regulira glasnost izbranega zaslona. Prejme vrednost glasnosti izbranega zaslona od skupin in jih prikaže na drsniku. (Ko prekinete izbiro ali izberete Select All (Izberi vse), se nastavitev vrne na privzeto vrednost 10) 3) Mute On/Off (Vklop/izklop zvoka) - Vklopi/izklopi funkcijo Mute (Video stena) izbranega zaslona. Ko izbirate po en zaslon, funkcijo Mute (Nemo) omogočite, ko je za izbrani zaslon omogočena.
Mreža z informacijami prikazuje osnovne informacije, ki so potrebne za upravljanje vhodnega vira. 1) PC - Spremeni vhodni vir izbranega zaslona na PC. 2) BNC - Spremeni vhodni vir izbranega zaslona na BNC. 3) DVI - Spremeni vhodni vir izbranega zaslona na DVI. 4) TV - Spremeni vhodni vir izbranega zaslona na BNC. 5) DTV - Spremeni vhodni vir izbranega zaslona na DTV. 6) AV - Spremeni vhodni vir izbranega zaslona na AV. 7) S-Video - Spremeni vhodni vir izbranega zaslona na S-Video.
Mreža z informacijami prikazuje osnovne informacije, ki so potrebne za upravljanje velikosti slike. 1) Stanje napajanja - Prikaže stanje napajanja trenutnega zaslona.. 2) Image Size (Velikost slike) - Prikaže trenutno velikost slike zaslona, ki je v uporabi. 3) Input Source (Vhodni vir) - Prikaže trenutni vhodni vir zaslona, ki je v uporabi. 4) Mreža z informacijami prikaže le zaslone, katerih vhodni viri so PC, BNC ali DVI .
Mreža z informacijami prikazuje osnovne informacije, ki so potrebne za upravljanje velikosti slike. 1) Kliknite jezičke TV, AV, S-Video in Component ter prilagodite velikost slike za TV, AV, S-Video Component , HDMI in DTV. Kliknite Select All (Izberi vse) ali uporabite potrditveno polje za izbiro zaslona, ki ga želite upravljati. 2) Mreža z informacijami prikazuje le zaslone, katerih vhodni viri so TV, AV, S-Video, Component , HDMI ali DTV. 3) Velikost slike izbranega zaslona lahko naključno spreminjate.
Mreža z informacijami prikazuje osnovne informacije, ki so potrebne za upravljanje časa. 1) Current Time (Trenutni čas) - Nastavi trenutni čas za izbrani zaslon (čas PC). - Za spremembo trenutnega časa najprej spremenite čas PC. 2) On Time Setup (Nastavitev časa vklopa) - Nastavite uro, minuto, AM/PM časa vklopa, stanja, vira in glasnosti izbranega zaslona. 3) Off Time Setup (Nastavitev časa izklopa) - Nastavite uro, minuto in AM/PM ter stanje časovnika izklopa za izbrani zaslon.
Mreža z informacijami prikazuje osnovne informacije, ki so potrebne za upravljanje velikosti PIP. 1) PIP Size (Velikost PIP) - Prikaže trenutno velikost PIP zaslona, ki je v uporabi. 2) OFF (IZKLOPLJENO) - Izključi PIP izbranega zaslona. 3) Large (Veliko) - Vključi PIP izbranega zaslona in spremeni velikost na Veliko. 4) Small (Majhno) - Vključi PIP izbranega zaslona in spremeni velikost na Majhno. 5) Double 1 - Vključi PIP izbranega zaslona in spremeni velikost na Double 1.
Mreža z informacijami prikazuje osnovne informacije, ki so potrebne za upravljanje vira PIP. 1) PIP Source (Vir PIP) - Vir PIP je mogoče regulirati z vklopom napajanja monitorja. 2) PC - Spremeni vir PIP izbranega zaslona na PC. 3) BNC - Spremeni vir PIP izbranega zaslona na BNC. 4) DVI - Spremeni vir PIP izbranega zaslona na DVI. 5) AV - Spremeni vir PIP izbranega zaslona na AV. 6) S-Video - Spremeni vir PIP izbranega zaslona na S-Video. 7) Component - Spremeni vir PIP izbranega zaslona na Component.
Mreža z informacijami prikazuje osnovne informacije, ki so potrebne za upravljanje nastavitev. Ko je izbrana funkcija, je določena vrednost prikazana na drsniku. Ko je izbrano Select All (Izberi vse), se vrne privzeta vrednost (50). Če izberete "Select All" (Izberi vse), se prikaže privzeta vrednost. Sprememba vrednosti na tem zaslonu samodejno spremeni način na "CUSTOM" (PO MERI). 1) Picture (Slika) - Na voljo le za TV, AV, S-Video, Component, HDMI, DTV.
Mreža z informacijami prikazuje osnovne informacije, ki so potrebne za upravljanje nastavitev. Ko je izbrana funkcija, je določena vrednost izbrane funkcije prikazana na drsniku. Izbrana funkcija vzame vrednost za niz in jo prikaže na drsniku. Če izberete "Select All" (Izberi vse), se prikaže privzeta vrednost. Sprememba vrednosti na tem zaslonu samodejno spremeni način na "CUSTOM" (PO MERI). 1) Picture PC - Na voljo le za PC, BNC in DVI. 2) Contrast (Kontrast) - Prilagodi kontrast izbranega zaslona.
Mreža z informacijami prikazuje osnovne informacije, ki so potrebne za upravljanje nastavitev. Ko je izbrana funkcija, je določena vrednost izbrane funkcije prikazana na drsniku. Izbrana funkcija vzame vrednost za niz in jo prikaže na drsniku. Če izberete "Select All" (Izberi vse), se prikaže privzeta vrednost. Sprememba vrednosti na tem zaslonu samodejno spremeni način na "CUSTOM" (PO MERI). 1) Audio (Avdio) - Regulira avdio funkcije za vse vhodne vire.
Mreža z informacijami prikazuje osnovne informacije, ki so potrebne za upravljanje nastavitev. 1) Image Lock (Zaklep slike) - Na voljo le za PC in BNC. 2) Coarse (Grobo) - Prilagodi grobost izbranega zaslona. 3) Fine (Fino) - Prilagodi finost izbranega zaslona. 4) Position (Položaj) - Prilagodi Položaj izbranega zaslona. 5) Auto Adjustment (Samodejna prilagoditev) - Samodejna prilagoditev za vhodni PC signal. Vhodni vir MagicInfo deluje le na modelu MagicInfo.
Pojavi se "Mreža z informacijami", ki prikazuje več osnovnih podatkovnih elementov. 1) Maintenance (Vzdrževanje) - Omogoča upravljanje vzdrževanja za vse vhodne vire. 2) Auto Lamp Control (Samodejno upravljanje osvetlitve) - Samodejno prilagodi osvetlitev ozadja izbranega zaslona ob določenem času. Samodejno upravljanje osvetlitve se samodejno izključi, če uporabite ročno upravljanje.
1) Scroll - S to funkcijo odstranite zakasnele slike, ki se pojavijo, če je na izbranem zaslonu dlje časa prikazana mirujoča slika. 2) Pixel Shift - Za natančen pomik zaslona ob določenem časovnem intervalu. 3) Safety Screen - Funkcija Safety Screen (Varnostni zaslon) se uporablja za preprečevanje zakasnelih slik, ki se lahko pojavijo v primeru dolgotrajnega prikaza mirujoče slike na monitorju.
1) Video Wall - Video stena je niz video zaslonov, ki so med seboj povezani tako, da vsak zaslon prikazuje del celotne slike ali da se ista slika ponovi na vsakem zaslonu. 2) Screen Divider - Zaslon je mogoče razdeliti. Pri razdelitvi lahko izberete število zaslonov z različno postavitvijo. z V Screen divider (Razdelilnik zaslona) izberite način. z V Display Selection (Izbor zaslona) izberite zaslon. z Mesto nastavite s pritiskom števila v izbranem načinu.
ti zasloni niso primerno zaznani s strani programa zaradi spora med podatki. - Preverite, ali je ID zaslona vrednost med 0 in 25. (Prilagodite jo z uporabo menija Display) Opomba ID zaslona mora biti vrednost med 0 in 25. Če je vrednost izven razpona, sistem MDC ne more upravljati zaslona. 2. Zaslon, ki ga želite upravljati, se ne prikaže na drugih mrežah z informacijami za upravljanje. - Preverite, ali je zaslon vključen.
Prilagajanje zaslona LCD Input Razpoložljivi načini • PC / DVI • AV • HDMI • MagicInfo • TV Opomba • Meni TV je na voljo, če je nameščen TV-sprejemnik. • Pri modelu MX-2 lahko uporabljate meni MagicInfo, èe je povezan omrežni sprejemnik. Source List MENU → ENTER → → , → ENTER → → ENTER Uporabite za izbiro PC-ja, DVI-ja ali drugega zunanjega vhodnega vira, povezanega z zaslonom LCD. Uporabite za izbiro želenega zaslona. 1. PC 2. DVI 3. AV 4. HDMI 5. MagicInfo 6.
Prilagajanje zaslona LCD , → → ENTER Poimenujte vhodno napravo, ki je priključena na vhodne vtičnice, da boste lažje izbrali vhodne vire. 1. PC 2. DVI 3. AV 4. HDMI Opomba • Pri povezavi računalnika in priključka HDMI ali DVI nastavite Edit Name na PC. V drugih primerih nastavite Edit Name na AV. Ker so 640x480, 720P (1280x720) in 1080p (1920x1080) običajni signali za AV in PC, nastavite Edit Name glede na vhodni signal. • Meni Picture se spremeni glede na vhodni signal in Edit Name.
Prilagajanje zaslona LCD → , → ENTER MagicBright je funkcija, ki nudi optimalno okolje za gledanje, odvisno od vsebine slike, ki jo gledate. Trenutno so na voljo štirje različni načini: Entertain, Internet, Text in Custom) Vsak način ima svojo predhodno konfigurirano vrednost svetlosti. Med štirimi nastavitvami lahko enostavno izbirate s pritiskom kontrolnega gumba MagicBright. (Ni na voljo v načinu Dynamic Contrast možnosti On.) 1.
Prilagajanje zaslona LCD → , → ENTER Nastavitev kontrasta. Brightness MENU → → , → ENTER → → ENTER → → → → ENTER → → ENTER Nastavitev svetlosti. Sharpness MENU → → , → ENTER → → → ENTER → → → → ENTER → → ENTER Nastavitev ostrine. Color Tone MENU → → , → ENTER → → → →ENTER → → ENTER Spreminjanje barvnih tonov. (Ni na voljo v načinu Dynamic Contrast možnosti On.) 1. Off 2. Cool 3. Normal 4. Warm 5.
Prilagajanje zaslona LCD Če možnost Color Tone nastavite na Off, je funkcija Color Control onemogočena. Color Control Prilagoditev posameznih barvnih ravnovesij za rdečo, zeleno in modro. MENU → → ENTER → → → → → ENTER → (Ni na voljo v načinu Dynamic Contrast možnosti On.) Opomba Če sliko prilagodite s funkcijo Color Control, se možnost Color Tone preklopi v način Custom.
Prilagajanje zaslona LCD Image Lock Funkcija Image Lock se uporablja za natančno nastavitev in za dosego najboljše slike. Omogoča odstranitev šumov, ki povzročajo migetajoče slike. Če z uporabo nastavitve Natančno ne dobite zadovoljivih rezultatov, uporabite nastavitev Grobo in nato znova Natančno. (Na voljo samo v načinu PC-ja.) MENU → → ENTER → [Picture] → → → → → ENTER → [Image Lock] MENU → → ENTER → → → → → ENTER → Coarse → , → → ENTER Odstrani šume, kot so navpične proge.
Prilagajanje zaslona LCD Auto Adjustment MENU → → ENTER → → → → → → → ENTER → Vrednosti za Fine, Coarse in Position se samodejno prilagodijo. Ko na nadzorni plošči spremenite ločljivost, se izvede samodejna funkcija. (Na voljo samo v načinu PC-ja.) Opomba Neposredni gumb na daljinskem upravljalniku je 'AUTO'. Signal Balance Namenjeno je izravnavi šibkega signala RGB, ki ga oddaja dolg signalni kabel. MENU → → ENTER → → → → → → → → ENTER → (Na voljo samo v načinu PC-ja.
Prilagajanje zaslona LCD MENU → → , 3. → ENTER → → ENTER → → → ENTER → → ENTER → → → → → → → ENTER → → → → ENTER→ → ENTER → ENTER R-Offset MENU → → ENTER → → ENTER → → → , → → → → → → → ENTER → → → → → ENTER→ → ENTER → ENTER G-Offset MENU → → ENTER → → ENTER → → → , 6. → → → → → → ENTER→ B-Gain → , 5. → → ENTER MENU → → ENTER → → ENTER → → 4.
Prilagajanje zaslona LCD → , → ENTER Možnost Size lahko preklopite. 1. 16:9 2. 4:3 Dynamic Contrast MENU → → , → ENTER → → → → → → → → → → ENTER → → ENTER Dynamic Contrast samodejno zazna porazdelitev slikovnega signala in izvede prilagoditev, da ustvari optimalen kontrast. 1. Off 2. On Picture [način AV/HDMI/TV] Razpoložljivi načini • PC/DVI • AV • HDMI • MagicInfo • TV Opomba • Meni TV je na voljo, če je nameščen TV-sprejemnik.
Prilagajanje zaslona LCD , → → ENTER Zaslon LCD ima štiri privzete samodejne slikovne nastavitve ("Dynamic", "Standard", "Movie" in "Custom"). Aktivirati je mogoče možnosti Dynamic, Standard, Movie ali Custom. (Ni na voljo v načinu Dynamic Contrast možnosti On.) 1. Dynamic 2. Standard 3. Movie 4. Custom Opomba Neposredni gumb na daljinskem upravljalniku je 'P.MODE'. Custom Z meniji na zaslonu lahko kontrast in svetlobo prilagajate po svoji želji.
Prilagajanje zaslona LCD Sharpness MENU → → , → ENTER → → → ENTER → → → → ENTER → → ENTER Prilagoditev ostrine slike. Color MENU → → → , → ENTER → → → ENTER → → → → → ENTER → ENTER Prilagoditev barve slike. Tint MENU → → → , → ENTER → → → ENTER → → → → → → → → ENTER → ENTER zaslon obarva z naravnimi toni. Color Tone MENU → → , → ENTER → → ENTER → → ENTER Spreminjanje barvnih tonov. Uporabnik lahko nastavi tudi posamezne barvne komponente.
Prilagajanje zaslona LCD 4. Normal 5. Warm1 6. Warm2 Opomba Če možnost Color Tone nastavite na Cool2, Cool1, Normal, Warm1 ali Warm2, je funkcija Color Temp onemogočena. Color Temp MENU → → , → ENTER → → → → → ENTER → → ENTER Color Temp je merilo za 'toploto' barv slike. (Ni na voljo v načinu Dynamic Contrast možnosti On.) Opomba Ta funkcija je omogočena samo, če je možnost Color Tone nastavljena na Off.
Prilagajanje zaslona LCD Možnosti Zoom 1 in Zoom 2 ne bosta na voljo v naèinu HDMI. Opomba Funkciji Position in Reset sta na voljo, èe je zagnano Zoom1 ali Zoom2. Digital NR (Digital Noise Reduction) MENU → → , → ENTER → → → → → → → ENTER → → ENTER Nastavi funkcijo digitalnega zmanjševanja šumov na Off/On. Funkcija digitalnega zmanjševanja šumov omogoča jasnejšo in čistejšo sliko. 1. Off 2.
Prilagajanje zaslona LCD → , → ENTER Dynamic Contrast samodejno zazna porazdelitev slikovnega signala in izvede prilagoditev, da ustvari optimalen kontrast. 1. Off 2. On Sound Razpoložljivi načini • PC/DVI • AV • HDMI • MagicInfo • TV Opomba • Meni TV je na voljo, če je nameščen TV-sprejemnik. • Pri modelu MX-2 lahko uporabljate meni MagicInfo, èe je povezan omrežni sprejemnik.
Prilagajanje zaslona LCD Izbira možnosti Standard za standardne tovarniške nastavitve. 2. Music Izbira možnosti Music, ko gledate glasbene videe ali koncerte. 3. Movie Izbira možnosti Movie, ko gledate filme. 4. Speech Izbira možnosti Speech, ko gledate oddaje, kjer večinoma govorijo (npr. novice). 5. Custom Izbira možnosti Custom, če želite nastavitve prilagoditi v skladu s svojimi potrebami. Custom Zvočne nastavitve lahko prilagodite popolnoma po vaši želji.
Prilagajanje zaslona LCD Prilagoditev zvočnega ravnovesja med levim in desnim zvočnikom. Auto Volume MENU → → , → → ENTER → → → → ENTER → → ENTER Zmanjšanje razlike v glasnosti med različnimi televizijskimi postajami. 1. Off 2. On SRS TS XT MENU → → , → → ENTER → → → → → ENTER → → ENTER SRS TS XT je patentirana tehnologija SRS za predvajanje 5.1-večkanalne vsebine prek dveh zvočnikov.
Prilagajanje zaslona LCD • HDMI • MagicInfo • TV Opomba • Meni TV je na voljo, če je nameščen TV-sprejemnik. • Pri modelu MX-2 lahko uporabljate meni MagicInfo, èe je povezan omrežni sprejemnik. Language MENU → → , → → → ENTER → → ENTER → → ENTER Izberete lahko enega od 13 jezikov. Opomba Izbrani jezik se uporablja samo kot jezik prikaza na zaslonu. Ne vpliva na programsko opremo v računalniku. Time Izbira med 4 časovnimi nastavitvami: Clock Set, Sleep Timer, On Timer in Off Timer.
Prilagajanje zaslona LCD Sleep Timer MENU → → , → → → ENTER → → → ENTER → → → ENTER→ → ENTER Za samodejen izklop zaslona LCD ob določenem času. 1. Off 2. 30 3. 60 4. 90 5. 120 6. 150 7. 180 On Timer MENU → → , / , → → → ENTER → → → ENTER → → → → ENTER→ → ENTER Za samodejen vklop zaslona LCD ob prednastavljenem času. Za nadzor načina in ravni glasnosti zaslona LCD ob samodejnem vklopu.
Prilagajanje zaslona LCD → , / , → ENTER Za samodejen izklop zaslona LCD ob prednastavljenem času. Menu Transparency MENU → → , → → → ENTER → → → → ENTER → → ENTER Za spreminjanje prosojnosti ozadja prikaza na zaslonu. 1. High 2. Medium 3. Low 4. Opaque Safety Lock PIN MENU → → → → ENTER → → → → → ENTER → → [0∼9, 0∼9, 0∼9, 0∼9] → [0∼9, 0∼9, 0∼9, 0∼9] → [0∼9, 0∼9, 0∼9, 0∼9] Geslo je mogoče spremeniti. Opomba Prednastavljeno geslo za zaslon LCD je "0000".
Prilagajanje zaslona LCD Energy Saving MENU → → , → → → ENTER → → → → → → ENTER → → ENTER S to funkcijo prilagodite porabo energije izdelka in tako prihranite energijo. 1. Off 2. On HDMI Black Level MENU → → , → → → ENTER → → → → → → → ENTER → → ENTER Če je predvajalnik DVD ali sprejemnik s TV-jem povezan prek kabla HDMI, lahko to poslabša kakovost slike na zaslonu, na primer zviša raven črne, zniža kontrast, povzroči razbarvanje, itd., odvisno od povezane zunanje naprave.
Prilagajanje zaslona LCD Video Wall MENU → → → → ENTER → → ENTER → → , → → → → → → → ENTER → → ENTER Izklopi/vklopi funkcijo Video Wall izbranega zaslona. 1. Off 2. On Format MENU → → → → ENTER → → → ENTER → → , → → → → → → → ENTER → → ENTER Za ogled razdeljenega zaslona izberite možnost Format. 1. Full Za celoten zaslon brez omejitev. 2. Natural Prikaz naravne slike z izvirnim razmerjem slike.
Prilagajanje zaslona LCD → , → ENTER Nastavi, na koliko delov naj bo zaslon razdeljen vodoravno. Pet nastavitev: 1, 2, 3, 4 in 5. Vertical MENU → → → → ENTER → → → → → ENTER → → , → → → → → → → ENTER → → ENTER Nastavi, na koliko delov naj bo zaslon razdeljen navpično. Pet nastavitev: 1, 2, 3, 4 in 5. Screen Divider MENU → → → → ENTER → → → → → → ENTER → → → → → → → → ENTER → Zaslon je mogoče razdeliti na več slik. Pri razdelitvi lahko izberete več zaslonov z različno razporeditvijo.
Prilagajanje zaslona LCD Safety Screen Funkcija Safety Screen se uporablja za preprečevanje zakasnelih slik, ki se lahko pojavijo v primeru dolgotrajnega prikaza mirujoče slike na zaslonu. • Funkcija Safety Screen služi za pomikanje zaslona v določenem časovnem obdobju. • Ta funkcija ni na voljo, če je napajanje izklopljeno.
Prilagajanje zaslona LCD Nastavitev, koliko slikovnih pik se po zaslonu pomika navpično. Pet nastavitev: 0, 1, 2, 3 in 4. Time MENU → → → → ENTER → → ENTER → → → → → → → → → → → ENTER → → → ENTER → → , → ENTER Nastavitev časovnega intervala za izvajanje vodoravnega oziroma navpičnega pomikanja. Timer Timer MENU → → → → ENTER → → → ENTER → → → → → → ENTER → → → → → ENTER → → , → ENTER Lahko nastavite časovnik za zaščito pred ožigom zaslona.
Prilagajanje zaslona LCD Spremenite lahko vrsto funkcije Safety Screen. 1. Scroll 2. Bar 3. Eraser Period MENU → → → → ENTER → → → ENTER → → → → → → → → → → ENTER → → → ENTER → [Period] → , → ENTER S to funkcijo nastavite čas izvedbe za vsak način, ki je nastavljen v časovniku. Time MENU → → → → ENTER → → → ENTER → → → → → → → → → → → ENTER → → → ENTER → → , → ENTER Znotraj nastavljenega časa določite čas izvedbe.
Prilagajanje zaslona LCD Ta funkcija pomaga pri preprečevanju pojava zakasnele slike na zaslonu, tako da vse slikovne pike na zaslonu LCD pomika po določenem vzorcu. Uporabite jo, če so na zaslonu prikazane zakasnele slike ali simboli. Še posebej je uporabna, če je bila na zaslonu zelo dolgo prikazana mirujoča slika. Bar MENU → → → → ENTER → → → → → → → → →ENTER → → → → → ENTER → Ta funkcija pomaga pri preprečevanju zakasnele slike na zaslonu tako, da pomika dolge črne in bele navpične vrstice.
Prilagajanje zaslona LCD → , → ENTER Če slika na zaslonu pri nastavitvah grafične kartice računalnika na ločljivost 1024 x 768 pri 60 Hz, 1280 x 768 pri 60 Hz, 1360 x 768 pri 60 Hz ali 1366 x 768 pri 60 Hz ni pravilno prikazana, jo lahko z uporabo te funkcije (Izbira ločljivosti) z določeno ločljivostjo prikažete na zaslonu. Opomba Na voljo samo v načinu PC-ja. 1. Off 2. 1024 X 768 3. 1280 X 768 4. 1360 x 768 5.
Prilagajanje zaslona LCD Side Gray MENU → → → → ENTER → ENTER → , → → → → → → → → → → → → → ENTER Izbira svetlosti sive za ozadje zaslona. 1. Off 2. Light 3. Dark Reset Povrnitev nastavitev izdelka na privzete tovarniške vrednosti. Funkcija ponastavitve je na voljo samo, če uporabljate PC/DVI. MENU → → → → ENTER → → ENTER → → → → → → → → → → → → → → → → → → → → → → → Image Reset MENU → → → → ENTER → → ENTER → → ENTER → → , → ENTER Opomba Na voljo samo v načinu PC-ja.
Prilagajanje zaslona LCD OSD Rotation MENU → → → → ENTER → → → → ENTER → [OSD Rotation ] → , → → → → → → → → → → → → → → → → → → → → → → → ENTER OSD Rotate 1. Landscape 2. Portrait Lamp Control MENU → → → → ENTER → → → ENTER → → , → ENTER Prilagoditev lučke frekvenčnega menjalnika, da se zmanjša poraba energije. Opomba Ta funkcija ne deluje, če je možnost Dynamic Contrast nastavljena na On v načinih PC-ja, DVI-ja, AV-ja, HDMI-ja in TV-ja.
Multi Control Dodelitev posameznega ID-ja MONITORJU. MENU → → • , → → → → ENTER → → ENTER → [0~9] ID Setup Dodelitev ločenih ID-jev MONITORJU. • ID Input Uporabite za izbiro funkcij oddajnika za posamezen MONITOR. Aktivira se samo MONITOR, pri katerem se ID ujema z nastavitvijo oddajnika.
MagicInfo Razpoložljivi načini z PC/DVI z AV z HDMI z MagicInfo z TV Opomba z Meni TV je na voljo, če je nameščen TV-sprejemnik. z Pri modelu MX-2 lahko uporabljate meni MagicInfo, èe je povezan omrežni sprejemnik. Opomba z Pri programski opremi MagicInfo je na voljo daljinski upravljalnik za MagicInfo. Vendar je priporočena uporaba ločene tipkovnice USB. z Če med zagonom programske opreme MagicInfo v načinu naprave premikate zunanje naprave, lahko pride do napak.
1. V meniju Source List izberite Magicinfo. 2. Prikaže se zaslon MUISetup. Izberite želeni jezik. 3. Pritisnite gumbInstall. Èe izberete Do not show again in kliknete gumb Install, se po vnoviènem zagonu prikaže zaslon razporejevalnika. 4. Povežite tipkovnico in miško in pritisnite tipki "ALT + F12" na tipkovnici. 5. Prikažeta se namizje programa Windows in ikona programa Magicinfo (the image will be inserted). Pomaknite kazalec prek ikone.
Odpravljanje težav Preverjanje funkcije samopreskusa Opomba Preden pokličete pomoč, sami preverite naslednje. Če težav ne morete rešiti sami, pokličite servis. Preverjanje funkcije samopreskusa 1. Izklopite računalnik in zaslon LCD. 2. Izključite video kabel iz zadnjega dela računalnika. 3. Vklopite zaslon LCD.
Odpravljanje težav • Ne uporabite benzena, razredčila ali drugih vnetljivih snovi in ne uporabljajte mokre krpe. • Priporočamo čistilno sredstvo SAMSUNG, da se izognete poškodbam na zaslonu. 2.) Vzdrževanje ploskega zaslona. Nežno očistite z mehko krpo (bombažna krpa za čiščenje). • Nikoli ne uporabite acetona, benzena ali razredčila. (lahko povzročijo napake ali deformacije površine zaslona.) • Uporabnik je odgovoren za plačilo stroškov za popravilo povzročene škode in povezanih izdatkov.
Odpravljanje težav Q: Slika na zaslonu LCD utripa. A: Preverite, ali je signalni kabel med računalnikom in zaslonom LCD ustrezno priključen. (Oglejte si Priključitev računalnika.) Težave, povezane z zaslonom Opomba Navedene so težave, povezane s sliko na zaslonu LCD, in kako jih odpraviti. Q: Zaslon je prazen in indikator napajanja je izklopljen. A: Poskrbite, da je napajalni kabel trdno priključen in da je zaslon LCD vklopljen. (Oglejte si Priključitev računalnika.
Odpravljanje težav (Oglejte si Brightness in Contrast.) Q: Barva zaslona je neskladna. A: Barvo prilagodite z možnostjo Custom v meniju prilagajanja barv, ki je na zaslonu. Q: Barvno sliko motijo temne sence. A: Barvo prilagodite z možnostjo Custom v meniju prilagajanja barv, ki je na zaslonu. Q: Nezadostna belina. A: Barvo prilagodite z možnostjo Custom v meniju prilagajanja barv, ki je na zaslonu. Q: Indikator napajanja utripa.
A: Preverite polarnost (+/-) baterij. A: Preverite, ali sta bateriji prazni. A: Preverite, ali je vklopljeno napajanje. A: Preverite, ali je napajalni kabel ustrezno priključen. A: Preverite, ali je v bližini posebna fluorescentna ali neonska žarnica. Vprašanja in odgovori Q: Kako spremenim frekvenco? A: Frekvenco spremenite z vnovično konfiguracijo video kartice. Opomba Podpora video kartice se lahko razlikuje, odvisno od različice uporabljenega gonilnika.
Odpravljanje težav A: Windows XP: Ločljivost nastavite v možnosti "Control Panel" (Nadzorna plošča) → "Appearance and Themes" (Videz in teme) → "Display" (Zaslon) → "Screen Saver" (Ohranjevalnik zaslona). Nastavite funkcijo v NASTAVITVI BIOS-A v računalniku. (Oglejte si priročnik za Windows/računalnik.) A: Windows ME/2000: Nastavite ločljivost v možnosti "Control Panel" (Nadzorna plošča → "Display" (Zaslon) → "Screen Saver" (Ohranjevalnik zaslona). Nastavite funkcijo v NASTAVITVI BIOS-A v računalniku.
Specifikacije Splošno Splošno Ime modela SyncMaster 320MX-2, 320MXn-2 Plošča LCD Velikost 32 palcev diagonalno (80 cm) Območje prikaza 697,68 mm (V) x 392,3 mm (N) Razmik med sli- 0,51075 mm (V) x 0,51075 mm (N) kovnimi pikami Sinhronizacija Vodoravno 30 ~ 81 kHz Navpično 56 ~ 85 Hz Barve zaslona 16,7 M Ločljivost Optimalna ločljivost 1360 x 768 pri 60 Hz/1366 x 768 pri 60 Hz, odvisno od grafične kartice Največja ločljivost 1366 x 768 pri 60 Hz Vhodni signal, zaključen Analogni RGB, z DVI (Digit
Mere (Š x V x G)/teža 320MXn-2 780,0 x 482,0 x 109,0 mm (brez stojala) 780,0 x 545 x 311,0 mm (s stojalom) / 15,1 kg (Z izbirnim zaščitnim steklom) 20,6 kg Vmesnik za namestitev VESA 200 x 200 mm Okoljski vidiki 320MXn- Delovanje 2 320MX -2 Temperatura : 10˚C ~ 40˚C (50˚F ~ 104˚F) Vlaga : 10–80 %, brez kondenzacije Shranjevanje Temperatura : -20˚C ~ 45˚C (-4˚F ~ 113˚F) Delovanje Temperatura : 0˚C ~ 40˚C (32˚F ~ 104˚F) Vlaga : 5–95 %, brez kondenzacije Vlaga : 10–80 %, brez kondenzacije Shranjevanj
PowerSaver V zaslonu LCD je vgrajen sistem PowerSaver za upravljanje porabe. Sistem varčuje z energijo tako, da zaslon LCD po določenem času mirovanja preklopi v način manjše porabe. Če pritisnete katero koli tipko na tipkovnici, se zaslon LCD samodejno vrne v način normalnega delovanja. Da bi varčevali z energijo, IZKLOPITE zaslon LCD, kadar ga ne potrebujete ali ga puščate dalj časa nenadzorovanega. Sistem PowerSaver deluje z video kartico, nameščeno v računalniku, ki je združljiva s standardom VESA DPM.
Specifikacije Varčevanje z energijo (če je izdelek uporabljen kot omrežni zaslon LCD) Stanje Normalno de- Način varčeIzklop Izklop lovanje vanja z ener- (Gumb za na- (Stikalo za nagijo pajanje) pajanje) Indikator napajanja Vklopljen Utripa Vklopljen Izklopljen Poraba to- 320MXnka 2 200 W Manj kot 5 W 5W 0W Varčevanje z energijo (če je izdelek uporabljen kot običajni zaslon LCD) Stanje Normalno de- Način varčeIzklop Izklop lovanje vanja z ener- (Gumb za na- (Stikalo za nagijo pajanje) pajanje)
Specifikacije Vodoravna frekvenca Čas, potreben za branje ene vrstice, ki vodoravno povezuje desni rob zaslona z levim, se imenuje vodoravni cikel, inverzno število vodoravnega cikla pa vodoravna frekvenca. Enota: kHz Navpična frekvenca Kot fluorescentna luč mora tudi zaslon ponoviti isto sliko mnogokrat na sekundo, da prikaže sliko uporabniku. Frekvenca tega ponavljanja se imenuje navpična frekvenca ali hitrost osveževanja.
Informacije Za boljšo sliko Za najboljšo kakovost slike ločljivost računalnika in hitrost osveževanja zaslona prilagodite v računalniku, kot je opisano spodaj. Če ni nastavljena najboljša kakovost slike za zaslon TFT-LCD, je lahko kakovost slike na zaslonu neenakomerna. • Ločljivost: 1360 x 768 • Navpična frekvenca (hitrost osveževanja): 60 Hz Za ta izdelek so uporabljene plošče TFT-LCD, izdelane z napredno polprevodniško tehnologijo z natančnostjo 1ppm (ena milijonina) in več.
Informacije Izklop,Ohranjevalnik zaslona Način varčevanja z energijo • Po 20-urni uporabi izklopite napajanje za 4 uri. • Po 12-urni uporabi izklopite napajanje za 2 uri. • Nastavite izklop monitorja s shemo napajanja zaslona računalnika. • Če je mogoče, uporabljajte ohranjevalnik zaslona – priporočamo enobarven ohranjevalnik ali premikajočo sliko. Redno spreminjajte informacije o barvi Opomba Uporabljajte dve različni barvi. Na 30 minut zamenjajte barve, pri čemer uporabite 2 barvi.
Informacije • Izogibajte se uporabi kombinacije znakov in barve ozadja, katerih svetilnost se zelo razlikuje. Izogibajte se uporabi sivih barv, ker zlahka povzročijo zadrževanje slike. Izogibajte se: Barvam, katerih svetilnost se močno razlikuje (črno-bela, siva). Redno spreminjajte barvo znakov • Uporabljajte svetle barve, pri katerih svetlost se ne razlikuje dosti. – Ciklus: Barvo znakov in ozadja spreminjajte na 30 minut. • Na 30 minut spremenite znake s premikanjem.
Informacije Opomba (V navodilih za uporabo na CD-ju preglejte funkcijo prikaza na zaslonu; pri nekaterih modelih ni na voljo.) Na izdelku uporabite funkcijo slikovne pike zaslona • Uporabite funkcijo slikovne pike zaslona – Simptom: Pika s črno barvo se pomika gor in dol.
Informacije – Izberite metodo • Navodila za uporabo: Meni na zaslonu -> Nastavitev -> Varnostni zaslon > Brisanje. • Časovni interval: 1–10 ur (priporočljivo: 1 ) • Časovno obdobje: 10–50 sekund (priporočljivo: 50 ) Opomba (V navodilih za uporabo na CD-ju preglejte funkcijo prikaza na zaslonu; pri nekaterih modelih ni na voljo.
Dodatek Obrnite se na SAMSUNG WORLDWIDE (GLOBALNI SAMSUNG) Opomba V primeru vprašanj ali pripomb v zvezi z izdelki Samsung se obrnite na center za pomoč strankam SAMSUNG. North America U.S.A 1-800-SAMSUNG(726-7864) http://www.samsung.com/us CANADA 1-800-SAMSUNG(726-7864) http://www.samsung.com/ca MEXICO 01-800-SAMSUNG (726-7864) http://www.samsung.com/mx Latin America ARGENTINE 0800-333-3733 http://www.samsung.com/ar BRAZIL 0800-124-421 http://www.samsung.
Dodatek Europe BELGIUM 02 201 2418 http://www.samsung.com/be (Dutch) http://www.samsung.com/ be_fr (French) CZECH REPUBLIC 800 (800-726786) SAMSUNG http://www.samsung.com/cz DENMARK 8 - SAMSUNG (7267864) http://www.samsung.com/dk EIRE 0818 717 100 http://www.samsung.com/ie FINLAND 30 - 6227 515 http://www.samsung.com/fi FRANCE 01 4863 0000 http://www.samsung.com/fr GERMANY 01805 SAMSUNG http://www.samsung.de (7267864, € 0,14/Min) HUNGARY 06-80-SAMSUNG (726-7864) http://www.samsung.
Dodatek Asia Pacific AUSTRALIA 1300 362 603 http://www.samsung.com/au CHINA 800-810-5858 http://www.samsung.com/cn 400-810-5858 010-6475 1880 INDIA HONG KONG:3698 - 4698 http://www.samsung.com/hk 3030 8282 http://www.samsung.com/in 1-800-3000-8282 1800 110011 INDONESIA 0800-112-8888 http://www.samsung.com/id JAPAN 0120-327-527 http://www.samsung.com/jp MALAYSIA 1800-88-9999 http://www.samsung.com/my NEW ZEALAND 0800 SAMSUNG(0800 726 http://www.samsung.
Dodatek verzno število vodoravnega cikla se imenuje vodoravna frekvenca. Enota: kHz Način prepletanja in način neprepletanja Zaporedno prikazovanje vodoravnih vrstic od vrha zaslona navzdol se imenuje način neprepletanja, prikazovanje najprej lihih in nato sodih vrstic pa se imenuje način prepletanja. Način neprepletanja se uporablja pri večini monitorjev, saj zagotavlja čisto sliko. Način prepletanja je enak tistemu, ki se uporablja pri TV-jih.
Dodatek Ustrezno odstranjevanje baterij v tem izdelku Ta oznaka na bateriji, v navodilih ali na embalaži pomeni, da baterij ob izteku njihove življenjske dobe v tem izdelku ne smete odstraniti skupaj z ostalimi gospodinjskimi odpadki. Oznake za kemijske elemente Hg, Cd ali Pb pomenijo, da baterija vsebuje živo srebro, kadmij ali svinec v količinah, ki presegajo referenčne nivoje v direktivi EC 2006/66. Če te baterije niso ustrezno odstranjene, te snovi lahko škodujejo zdravju ljudi oziroma okolju.