SyncMaster 320P
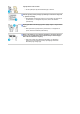
Symbole Niezastosowanie się do wskazówek oznaczonych tym symbolem może doprowadzić do obrażeń ciała lub uszkodzenia sprzętu. Zabronione. Należy przeczytać i zawsze stosować się do tych zaleceń. Nie należy otwierać obudowy monitora. Należy wyjąć wtyczkę z gniazda zasilającego. Nie dotykać. Uziemienie dla zapobieżenia porażenia prądem. Zasilanie Gdy komputer nie jest używany przez dłuższy czas należy włączyć funkcję DPMS. Jeśli się używa wygaszacza ekranu, należy go ustawić na tryb "ekran aktywny”.
z Może to spowodować porażenie prądem lub pożar. Przy wyłączaniu z zasilania nie należy ciągnąć za przewód; nie należy też dotykać wtyczki mokrymi rękami. z Może to spowodować porażenie prądem lub pożar. Należy używać wyłącznie wtyczki i gniazdka z odpowiednim uziemieniem. z Niewłaściwe uziemienie może spowodować porażenie prądem lub uszkodzenie sprzętu. Umieścić wtyczkę przewodu zasilającego solidnie w gniazdku, aby się nie poluzowała.
dużych ilości kurzu, wysokich lub niskich temperatur, wilgoci czy preparatów chemicznych oraz używania go przez 24 godziny na dobę, np. w przypadku lotniska, stacji kolejowej itp., należy skonsultować się z autoryzowanym punktem serwisowym. Konsultacja jest konieczna, gdyż korzystanie z monitora w tych warunkach może spowodować jego poważne uszkodzenie. Monitor powinien być ulokowany w miejscu możliwie suchym i czystym. z We wnętrzu monitora może powstać zwarcie lub pożar.
Monitor należy stawiać ostrożnie. z Może ulec uszkodzeniu. Nie należy kłaść monitora ekranem w dół. z Może to uszkodzić powierzchnię ekranu. Installing a wall bracket must be done by a qualified professional. Instalację wspornika naściennego powinien przeprowadzić wykwalifikowany specjalista. z z Instalacja wykonana przez osoby niewykwalifikowane może prowadzić do obrażeń ciała. Należy zawsze stosować urządzenie montażowe, określone w instrukcji obsługi.
szmatką. z Brudny wtyk może spowodować porażenie prądem lub pożar. Przed czyszczeniem monitora pamiętać o wcześniejszym odłączeniu przewodu zasilającego. z Czyszczenie urządzenia znajdującego się pod napięciem grozi porażeniem prądem elektrycznym lub pożarem. Wyjąć wtyczkę przewodu zasilającego z gniazdka i przetrzeć monitor miękką, suchą szmatką.
W czasie wyładowań atmosferycznych na zewnątrz należy wyłączyć zasilanie monitora lub nie korzystać z niego przez jakiś czas. z W przeciwnym razie monitor może ulec uszkodzeniu, powodując porażenie prądem lub pożar. Nie przesuwaj monitora, ciągnąc za przewód lub kabel sygnałowy. z Może to spowodować awarię sprzętu, porażenie prądem lub pożar w rezultacie uszkodzenia przewodu. Nie należy przesuwać monitora w prawo lub lewo ciągnąc jedynie za przewód zasilania lub kabel sygnałowy.
Rozdzielczość i częstotliwość należy dostosować odpowiednio do modelu. z Niewłaściwa rozdzielczość i częstotliwość może uszkodzić wzrok. 32-calowa (80 cm) - 1360 X 768 Ciągłe patrzenie na monitor ze zbyt małej odległości może spowodować uszkodzenie wzroku. Aby pozwolić odpocząć oczom, po każdej godzinie pracy przed monitorem zrób co najmniej 5-minutową przerwę. Nie należy instalować produktu na niestabilnej, nierównej powierzchni lub w miejscu narażonym na drgania.
Trzymaj baterie z dala od dzieci. z W razie połknięcia natychmiast skontaktuj się z lekarzem. Podczas wymiany baterii pamiętaj o prawidłowym umieszczeniu biegunów +/-, zgodnie z ilustracją. z Nieprawidłowe umieszczenie biegunów może prowadzić do pęknięcia lub wycieku baterii, a w następstwie do pożaru, obrażeń lub skażenia (uszkodzenia). Używaj tylko baterii określonego typu. Nie używaj nowych i starych baterii razem.
Należy się upewnić, czy w opakowaniu znajdują się następujące elementy. Aby zakupić wyposażenie dodatkowe skontaktuj się z lokalnym przedstawicielem handlowym. Nie stawiać produktu na podłodze.
Port sygnałowy(15 pin DSub) Kabel zasilania Przewód głośnika Zestaw głośnikowy Podstawy Pilot Baterie (AAA X 2) Zaślepka Gniazdo adaptera BNC-RCA Podstawa tymczasowa Do nabycia osobno ZESTAW do montażu na ścianie Kabel DVI Inne Przód
1. MENU 6. PIP 2. Przycisk góra-dół 7. Przycisk zasilania 3. Przycisk lewo-prawo / głośność przycisk 8. Wskaęnik zasilania 4. ENTER 9. Czujnik zdalnego sterowania 5. SOURCE 1. MENU Przycisk ten sluzy do otwierania OSD i uruchamiania podswietlonej pozycji menu. 2. Przycisk góra-dół Służy do przechodzenia w pionie z jednej pozycji menu do kolejnej lub do regulacji wybranej wartości menu. 3.
Tył Szczegółowe informacje dotyczące podłączania kabli znajdują się w części Podłączanie kabli w sekcji Instalacja. Panel tylny monitora może się różnić w zależności od modelu. 1. RS232C OUT/IN (PORT szeregowy RS232C) : port programowy MDC (Multiple Display Control) 2. DVI IN(HDCP) (Gniazdo sygnaůowe PC) : Używając DVI-D do DVI-D - tryb DVI (Digital PC) 3. PC IN(RGB) (Gniazdo sygnaůowe PC) : Używając 15-pinowe D-Sub - tryb PC (Analog PC) 4.
6. BNC/COMPONENT OUT (Gniazdo sygnaůowe BNC / Gniazdo sygnaůowe Component (wyjúcie)) - zůŕcze BNC (Analog PC) : podůŕczanie portu R, G, B, H, V - zůŕcze Component: podůŕczanie portu PR, Y, PB 7. BNC/COMPONENT IN (Gniazdo sygnaůowe BNC / Gniazdo sygnaůowe Component (wejúcie)) 8. AV AUDIO IN [L-AUDIO-R](Gniazdo sygnaůowe audio MONITOR (wejúcie)) 9. AV OUT [VIDEO](Gniazdo sygnaůowe) : tryb AV (wyjúcie) 10. AV IN [VIDEO](Gniazdo sygnaůowe) (wejúcie) 11.
Pilot Na pracę pilota może wpływać telewizor lub inne urządzenia elektroniczne używane w pobliżu monitora, będące przyczyną nieprawidłowego działania z powodu zakłóceń częstotliwości. 1. ON / OFF 2. MAGICNET 3. MDC 4. LOCK 5. Przyciski MagicNet 6. +100 7. VOL 8. MUTE 9. AUTO 10. MENU 11. ENTER 12. PRE-CH 13. CH/PAGE 14. SOURCE 15. INFO 16. EXIT 17. Przyciski Góra-Dól, Lewo-Prawo 18. P.MODE (M/B) 19. STILL 20. BBE 21. MTS 22. PIP 23. SOURCE 24. SIZE 25. SWAP 26. 27. 28. 29. 1.
5.Przyciski MagicNet - Do obsługi programu MagicNet służą następujące przyciski: z z z z Alphabet/ Number : Use the buttons when inputting an address of website. DEL : Kasowanie ostatniego wprowadzonego znaku. SYMBOL : Umożliwia wprowadzanie symboli(.O_-:/). ENTER : Służy do zatwierdzenia wprowadzonych danych. - Ta funkcja nie jest dostępna na tym monitorze. 6.+100 Naciśnij, aby wybrać kanał oznaczony numerem wyższym niż 100. Na przykład, aby wybrać kanał 121, naciśnij „+100”, a następnie „2” i „1”.
19.STILL Nacisnąć przycisk jeden raz, aby włączyć pauzę. Nacisnąć ponownie, aby ją wyłączyć. 20.BBE Odtwarza naturalny dźwięk i poprawia jego wyrazistość poprzez zwiększenie częstotliwości w wysokim i niskim zakresie. W rezultacie wysokie dźwięki są wyraźniejsze, czyste i bardziej szczegółowe, natomiast niskie są doładniejsze, lepiej zdefiniowane i bardzo harmoniczne. 21.MTS Służy do przełączania MONO/STEREO, DUAL 1/DUAL 2 i MONO/NICAM MONO/NICAM STEREO. - Ta funkcja nie jest dostępna na tym monitorze. 22.
Elementy mechaniczne | Górna krawędź monitora | Podstawa | Głośnik | Jak zainstalować wspornik VESA | Montaż wspornika naściennego 1. Elementy mechaniczne 2.
3. Podstawa 4. Głośnik 5. Jak zainstalować wspornik VESA z z z z Należy upewnić się, że instalacja wspornika VESA jest zgodna z międzynarodowymi standardami VESA. Informacje na temat zakupu i instalacji wspornika VESA: Prosimy o kontakt z lokalnym dystrybutorem firmy Samsung w celu złożenia zamówienia. Po złożeniu zamówienia odwiedzą Państwa profesjonalni instalatorzy, którzy dokonają montażu wspornika. Do przenoszenia monitora LCD potrzebne są co najmniej dwie osoby.
Wymiary Do mocowania wspornika na ścianie należy używać wyłącznie wkrętów do części metalowych o średnicy 6 mm i długości od 8 do 12 mm. 6. Montaż wspornika naściennego z z z Aby zamontować wspornik naścienny, należy skontaktować się z pracownikiem technicznym. Firma Samsung Electronics nie ponosi odpowiedzialności za szkody poniesione przez klienta w przypadku przeprowadzenia samodzielnego montażu. Produkt jest przeznaczony do montażu na ścianach wykonanych z cementu.
3. 1. Wsuń 3 wieszaki wspornika telewizora B w wyżłobienia we wsporniku naściennym A . 2. Połącz wspornik telewizora B i wspornik naścienny A za pomocą wkrętów D. Przed zamontowaniem zestawu na ścianie należy najpierw podłączyć do niego kable.
Montaż podstawy Należy wykorzystać wyłącznie dostarczone śrubki. Firma Samsung Electronics nie ponosi żadnej odpowiedzialności za szkody powstałe w wyniku zastosowania podstawy innej, niż zalecana. 1. Montaż Podstawa tymczasowa Lewa podstawa Prawa podstawa Umieścić etykietę „CAUTION” na odwrocie. 1. ‘Pokrywa ochronna’ służy do zabezpieczenia otworu w dolnej części monitora, w którym umieszczana jest podstawa.
2. Odpowiednio rozmieścić lewą i prawą podstawę. 3. Włożyć podstawę w otwór w dolnej części monitora. Umieścić śrubkę w oznaczonym otworze i dokręcić. (M4 × L15) Podstawa zaprojektowana jest do regulacji kąta ustawienia ekranu. Firma nie odpowiada za jakiekolwiek problemy spowodowane użytkowaniem podstawy. Produktu nie wolno używać jako podstawy pod inne przedmioty niż monitor. 2. Montaż podstawy (sprzedawanego oddzielnie) 1.
1. Podłączanie do komputera 1. Podlacz przewód zasilania monitora do gniazda przewodu zasilania w tylnej czesci obudowy monitora. Włączyć zasilanie. 2. Przewód sygnałowy można podłączyć do monitora na 3 sposoby. Wybierz jeden z następujących: 2-1. Używając złącza D-sub (analogowego) na karcie graficznej. Podłącz kabel sygnałowy do 15-pinowego portu RGB z tyłu monitora. 2-2. Używając złącza DVI (cyfrowego) na karcie graficznej. Podłącz kabel DVI do portu DVI(HDCP) z tyłu monitora. 2-3.
3. Podłączyć kabel audio monitora do portu audio z tyłu komputera. 4. Włączyć komputer i monitor. Żeby zakupić elementy wyposażenia dodatkowego, należy skontaktować się z Serwisemlokalnym firmy Samsung Electronics. 2. Podłączanie do magnetowidu 1. Urządzenia wejścia AV, takie jak magnetowidy czy kamery podłącza się do gniazda Gniazdo sygnaůowe AV IN [VIDEO] lub Gniazdo sygnaůowe AV IN [S-VIDEO] monitora za pomocą kabla SVHS lub BNC. Kabel S-VHS lub BNC stanowi wyposażenie dodatkowe.
1. Podłącz kable audio do gniazd COMPONENT AUDIO IN [L-AUDIO-R] monitora i gniazd AUDIO OUT odtwarzacza DVD. 2. Podłącz kabel wideo do gniazd BNC/COMPONENT IN - podůŕczanie portu PR , Y, PB monitora i gniazd PR , Y, PB odtwarzacza DVD. Kabel S-VHS lub Component stanowi wyposaýenie dodatkowe. 3. Używając przycisku Source na przednim panelu monitora należy wybrać źródło sygnału Component podłączonego odtwarzacza DVD. 4. Następnie uruchom odtwarzacz DVD, umieszczając w urządzeniu płytę DVD lub.
1. Podłącz kable audio do COMPONENT AUDIO IN [L-AUDIO-R] monitora i gniazd AUDIO OUT przystawki internetowej. 2. Podłącz kabel wideo do BNC/COMPONENT IN - podůŕczanie portu P R, Y, PB monitora i gniazd PR, Y, PB przystawki internetowej. 3. Używając przycisku Source na przednim panelu monitora należy wybrać źródło sygnału Component podłączonego przystawki internetowej DTV. Opis gniazd urządzenia wideo znajduje się w instrukcji użytkownika przystawki internetowej. 6. Podłączanie głośników 1.
1. Podłącz kable audio do gniazd AUX L, R systemu audio i gniazd MONITOR IN [L-AUDIO-R] monitora. 1. Wstęp 2. Rozpoczęcie pracy : Ekran główny | Konfiguracja portów 3. Power Control (Sterowanie zasilaniem) 4. Input Source (Regulacja sygnału wejściowego) 5. Regulacja rozmiaru obrazu : PC, BNC, DVI | AV, S-Video, Component, DVI(HDCP) 1. Wstęp 6. Regulacja godziny 7. Regulacja PIP : Rozmiar PIP | Źródło PIP 8. Regulacja ustawień : Obraz | Obraz PC | Dźwięk | Blokada obrazu | 9.
MDC (Multiple Display Control) to aplikacja umożliwiająca prostą równoczesną obsługę kilku wyświetlaczy na jednym komputerze. Do komunikacji między komputerem i wyświetlaczem służy standardowy port szeregowy RS-232C. Dlatego, aby połączyć porty szeregowe komputera i wyświetlacza należy zastosować kabel szeregowy. 2. Rozpoczęcie pracy – Ekran główny Aby uruchomić program, kliknij Start > Programy > Multiple Display Control. Wybierz urządzenie, aby sprawdzić jego ustawienie głośności na suwaku.
Ikony główne Przycisk wyboru Remocon Info Grid Safety Lock Wybór wyświetlacza Port Selection Narzędzia sterowania 1. Włącz wyświetlacze za pomocą głównych ikon. 2. Służy do włączania lub wyłączania funkcji odbioru sygnału zdalnego sterowania przez wyświetlacz. 3. Ustawienie funkcji blokady. 4. Ustawienie portu szeregowego komputera można zmienić. Wartością oryginalną jest COM1. 5. Kliknij Select All lub Clear All, aby wybrać lub usunąć wszystkie wyświetlacze. 6.
1. Program Multiple Display Control jest oryginalnie ustawiony na COM1. 2. Jeśli używany jest jakikolwiek inny port niż COM1, można wybrać porty od COM1 do COM4 w menu Port Selection. 3. Jeśli nie zostanie wybrana dokładna nazwa portu podłączonego do monitora kablem szeregowym, komunikacja nie będzie dostępna. 4. Wybrany port zostaje zachowany w programie i wykorzystany także w kolejnym programie. 3. Sterowanie zasilaniem 1. Kliknij ikonę Power Control, aby wyświetlić ekran sterowania zasilaniem.
Power Control umożliwia regulację niektórych funkcji wybranego wyświetlacza. 1) Power On/Off (Zasilanie włączone/wyłączone) - Włącza i wyłącza zasilanie wybranego wyświetlacza. 2) Volume Control (Głośność) - Steruje poziomem głośności wybranego wyświetlacza. Odbiera poziom głośności wyświetlacza i wyświetla ją na suwaku. (Po anulowaniu wyboru lub kliknięciu Select All, zostaje przywrócona wartość domyślna 10) 3) Mute On/Off (Dźwięk włączony/wyłączony) - Włącza i wyłącza dźwięk wybranego wyświetlacza.
4) AV - Służy do zmiany sygnału źródłowego wybranego wyświetlacza na AV. 5) S-Video - Służy do zmiany sygnału źródłowego wybranego wyświetlacza na S-Video. 6) Component - Służy do zmiany sygnału źródłowego wybranego wyświetlacza na Component. 7) MagicNet - Źródło sygnału wejściowego programu MagicNet dostępne jest wyłącznie w modelach wyposażonych w oprogramowanie MagicNet. Regulacja sygnału wejściowego dotyczy tylko wyświetlaczy z włączonym zasilaniem. 5. Regulacja rozmiaru obrazu - PC, BNC, DVI 1.
Tabela informacyjna zawiera podstawowe informacje potrzebne do regulacji rozmiaru obrazu. 1) Kliknij zakładkę AV, S-VIDEO, Component, aby przeprowadzić regulację rozmiaru obrazu dla AV, S-VIDEO, Component. Aby wybrać obraz do regulacji, kliknij przycisk Zaznacz wszystko lub zaznacz odpowiednie pole wyboru. 2) W tabeli informacyjnej znajdują się tylko obrazy, których sygnałem źródłowym jest AV, S-VIDEO, Component, DVI(HDCP). 3) Dowolnie zmieniać rozmiar obrazu wybranego monitora.
4) Wyświetla ustawienia uruchamiania. 5) Wyświetla ustawienia wyłączania. Regulacja godziny dotyczy tylko wyświetlaczy z włączonym zasilaniem. Źródło sygnału wejściowego programu MagicNet dostępne jest wyłącznie w modelach wyposażonych w oprogramowanie MagicNet. 7. Regulacja PIP - Rozmiar PIP 1. Kliknij ikonę PIP, aby wyświetlić ekran Regulacja PIP. Aby wybrać obraz do regulacji, kliknij przycisk Zaznacz wszystko lub zaznacz odpowiednie pole wyboru.
Tabela informacyjna zawiera podstawowe informacje potrzebne do regulacji źródła PIP. 1) PIP Source - Regulacja źródła PIP jest możliwa po włączeniu zasilania monitora. 2) PC - Służy do zmiany sygnału źródłowego PIP wybranego wyświetlacza na PC. 3) BNC - Służy do zmiany sygnału źródłowego PIP wybranego wyświetlacza na BNC. 4) DVI - Służy do zmiany sygnału źródłowego PIP wybranego wyświetlacza na DVI. 5) AV - Służy do zmiany sygnału źródłowego PIP wybranego wyświetlacza na AV.
Siatka informacyjna zawiera podstawowe informacje potrzebne do regulacji ustawień. Po zaznaczeniu danej funkcji, jej wartość zostaje wyświetlona na suwaku. Kliknięcie przycisku Select All powoduje przywrócenie wartości domyślnej (50). Zmiana wartości tego ekranu spowoduje automatyczną zmianę trybu na „CUSTOM” (NIESTANDARDOWY). 1) Picture (Obraz) - Dostępny tylko dla sygnałów AV, S-Video, Component, DVI(HDCP). 2) Contrast(kontrastu) - Reguluje kontrastu wybranego wyświetlacza.
Siatka informacyjna zawiera podstawowe informacje potrzebne do regulacji ustawień. Po zaznaczeniu danej funkcji, jej wartość zostaje wyświetlona na suwaku. Kliknięcie przycisku Select All powoduje przywrócenie wartości domyślnej (50). Zmiana wartości tego ekranu spowoduje automatyczną zmianę trybu na „CUSTOM” (NIESTANDARDOWY). 1) Picture PC(Obraz PC) - Dostępny tylko dla sygnałów PC, BNC, DVI. 2) Contrast (Kontrast) - Reguluje kontrast wybranego wyświetlacza.
Siatka informacyjna zawiera podstawowe informacje potrzebne do regulacji ustawień. Po zaznaczeniu danej funkcji, jej wartość zostaje wyświetlona na suwaku. Kliknięcie przycisku Select All powoduje przywrócenie wartości domyślnej (50). Zmiana wartości tego ekranu spowoduje automatyczną zmianę trybu na „CUSTOM” (NIESTANDARDOWY). 1) Audio (Dźwięk) - Reguluje ustawienia dźwięku wszystkich sygnałów wejściowych. 2) Bass (Basy) - Reguluje basy wybranego wyświetlacza.
9. Obsługa - regulacja podświetlenia 1. Kliknij ikonę Maintenance (Obsługa) w kolumnie ikon głównych, aby wyświetlić ekran Maintenance (Obsługa). Pojawi się Info Grid (Siatka informacyjna) zawierająca kilka podstawowych danych. 1) Maintenance (Obsługa) - Udostępnia funkcję Maintenance Control (Obsługa) dla wszystkich sygnałów wejściowych. 2) Auto Lamp Control (Automatyczna regulacja podświetlenia) Automatycznie reguluje podświetlenie wybranego monitora w określonym czasie.
Eliminuje ślady obrazu, które mogą wystąpić, kiedy wybrany monitor pozostaje przez dłuższy czas w - trybie Pause (Pauza). Można ustawić timer odświeżania wybierając Interval wg godzin i Second wg sekund. Funkcja Maintenance Control (Obsługa) jest dostępna tylko dla monitorów z włączonym zasilaniem. Źródło sygnału wejściowego programu MagicNet dostępne jest wyłącznie w modelach wyposażonych w oprogramowanie MagicNet. 11. Obsługa - Video Wall 1.
z Full z Natural Funkcja Maintenance Control (Obsługa) jest dostępna tylko dla monitorów z włączonym zasilaniem. Źródło sygnału wejściowego programu MagicNet dostępne jest wyłącznie w modelach wyposażonych w oprogramowanie MagicNet. 12. Rozwiązywanie problemów 1. Wyświetlacz, który chcesz wyregulować nie znajduje się w siatce informacyjnej regulacji zasilania. - Sprawdź port RS232C. (Sprawdź, czy kabel jest prawidłowo podłączony do portu Com1.
Natural Color Program Natural Color Jednym z napotykanych ostatnio problemów w użyciu komputerów jest niezgodność koloru wydruku lub obrazów skanowanych skanerami czy utrwalonych kamerami cyfrowymi z kolorami widocznymi na ekranie. Program Natural Color pozwala na rozwiązanie tego problemu. Jest to system zarządzania kolorami opracowany przez firmę Samsung Electronics we współpracy z instytutem Korea Electronics & Telecommunications Research Institute (ETRI).
Model Input Dostępne tryby : PC / BNC / DVI : AV : S-Video OSD Spis treści Source List Powoduje włączenie wskaźnika, informującego o wyświetlanym aktualnie sygnale wejściowym - Bezpośrednim przyciskiem na pilocie jest przycisk 'SOURCE'. Funkcja PIP zostaje wyłączona po przełączeniu monitora na źródło zewnętrzne.
Nie można nałożyć więcej niż jednego obrazu PIP, ponieważ przewody BNC i Component korzystają z tego samego gniazda. 1) PIP - Bezpośrednim przyciskiem na pilocie jest przycisk 'PIP'. Off On 2) Source - Bezpośrednim przyciskiem na pilocie jest przycisk 'SOURCE'.
Dostępne tryby OSD : PC / BNC / DVI : AV : S-Video : Component Spis treści Reproduzir MagicBright™ MagicBright™ to nowa funkcja monitora, która umożliwia uzyskanie obrazu o dwukrotnie lepszej jakości w porównaniu do monitorów obecnych na rynku. Zapewnia ona optymalną jasność i rozdzielczość obrazu dla tekstu, Internetu czy animacji multimedialnych, wychodząc naprzeciw różnorodnym wymaganiom użytkownika.
4) Custom Color Control Ta funkcja służy do dokładnej regulacji kolorów. - Opcja dostępna tylko w trybie PC/BNC 1) Red 2) Green 3) Blue Regulując obraz za pomocą funkcji Color Control, funkcja Color Tone przełączy się w tryb Custom. Image Lock Image Lock używane jest do dokładnej regulacji i uzyskania najlepszego obrazu poprzez usunięcie zakłóceń (drżenia i migotania), wpływających niekorzystnie jego stabilność.
Dostępne tryby : PC / BNC / DVI : AV : S-Video : Component OSD Spis treści Mode Regulacja otoczenia obrazu. - Bezpośrednim przyciskiem na pilocie jest przycisk 'P.MODE'. 1) Dynamic 2) Standard 3) Movie 4) Custom Custom Menu ekranowe służą do regulacji kontrastu i jaskrawości odpowiednio do indywidualnych preferencji. 1) Contrast : Regulacja kontrastu. 2) Brightness : Regulacja jasności 3) Sharpness : Wyreguluj ostrość obrazu. 4) Color : Wyreguluj kolory obrazu.
Mode The Film Mode feature offers you a theater-quality viewing experience. Off On DNIe Demo - Funkcja DNIe(Digital Natural Image engine) — nowa technologia firmy Samsung — zapewnia bardziej szczegółowy obraz o większym kontraście oraz podwyższonym poziomem bieli, a także trójwymiarową redukcją szumów. Nowy algorytm kompensacji obrazu umożliwia naszym klientom uzyskanie jaśniejszego i wyraźniejszego obrazu. Funkcja DNIe zapewnia poprawę jakości obrazu niezależnie od poziomu sygnału.
OSD Spis treści Mode Monitor posiada wbudowany wzmacniacz fonii stereo hi-fi. 1) Standard : Służy do przywracania standardowych ustawień fabrycznych. 2) Music : Służy do oglądania programów muzycznych lub koncertów. 3) Movie : Służy do oglądania filmów. 4) Speech : Służy do oglądania programów złożonych głównie z wypowiedzi (np. wiadomości). 5) Custom : Służy do przywracania indywidualnych ustawień użytkownika. Custom Możesz regulować ustawienia dźwięku odpowiednio do indywidualnych preferencji.
Dostępne tryby : PC / BNC / DVI : AV : S-Video OSD Spis treści Time Pozwala na wybranie jednego z czterech ustawień: zegara, włącznika czasowego, wyłącznika czasowego, automatycznego wyłączania monitora po upływie określonego czasu. 1) Clock Set : Bieżące ustawienia czasu. 2) Sleep Timer : Pozwala na ustawienie automatycznego wyłączenia monitora po upływie określonej ilości minut. (Off(Wył.
1) Image Reset 2) Color Reset 2) Color Reset Video Wall Ściana wideo to zestaw połączonych ze sobą ekranów, z których każdy może wyświetlać odpowiednią część całego obrazu lub cały obraz (każdy ekran zestawu wyświetla kompletny obraz osobno). 1) Video Wall : Włącza/wyłącza funkcję Video Wall (Ściana wideo) dla wybranego ekranu. Off On 2) Format : Wybierz format, aby uzyskać podzielony ekran. Full Umożliwia wyświetlenie obrazu na całym ekranie, bez pozostawiania ciemnych obrzeży.
: Ustala, czy konieczne jest włączenie (On) lub wyłączenie (Off) funkcji Screen Scroll (Przewijanie ekranu). Off On 2) Interval : Ustala odstęp czasowy pomiędzy operacjami funkcji Screen Scroll (Przewijanie ekranu). (1~10 godzin). Czas ten jest obliczany na podstawie czasu pracy monitora. Ustawieniem domyślnym jest wartość 10 godzin.
Funkcje bezpośreDNIe Demogo sterowania Dostępne tryby OSD : PC / BNC / DVI : AV : S-Video Spis treści MDC Przejdź do ekranu OSD Multi Control. LOCK Ustaw funkcję Safety Lock (Blokada bezpieczeństwa). 1) Lock On : Blokada zostanie włączona. 2) Lock Off : Blokada zostanie wyłączona. Podczas ustawiania funkcji blokady można używać tylko przycisków power (zasilania) i lock (blokady) znajdujących się na pilocie i urządzeniu. Fabrycznie ustawione hasło monitora to „0000”.
Autotest monitora Przed skontaktowaniem się z serwisem należy sprawdzić następujące pozycje. W razie wystąpienia problemów, z którymi nie można sobie poradzić, należy skontaktować się z serwisem. Autotest monitora | Skalowanie | Konserwacja i czyszczenie | Objawy i zalecane czynności 1. Autotest monitora Monitor jest wyposażony w funkcję Autotest, która pozwala sprawdzić, czy monitor działa prawidłowo. 1. Wyłącz zarówno komputer, jak i monitor. 2. Odłącz przewód sygnału video od komputera. 3.
Informacje dotyczące rozdzielczości i częstotliwości obsługiwanych przez ten monitor znajdują się w częściFabrycznie ustawione tryby wyświetlania. 3. Konserwacja i czyszczenie 1. Konserwacja obudowy monitora Czyścić miękką szmatką po uprzednim odłączeniu kabla zasilającego. z z Nie należy stosować benzenu, rozcieńczalnika ani innych substancji łatwopalnych. Nie należy również używać mokrej szmatki. Żeby zapobiec uszkodzeniu ekranu zaleca się stosowanie środków czyszczących firmy Samsung. 2.
2. Problemy z Obraz Problemy z obrazem monitora oraz ich rozwiązania. Problemy Ekran jest pusty, a wskaźnik zasilania wyłączony. Komunikat „Check Signal Cable” Rozwiązania z z z Komunikat „Not Optimum Mode” z z Obraz przewija się w pionie. Obraz jest niewyraźny. Obraz jest zamazany. z z z z Picture image is unstable and vibrates. z Na obrazie widoczne są cienie. Obraz jest zbyt jasny lub zbyt ciemny. Kolory obrazu nie są spójne.
z Poziom głośności jest zbyt niski. z z Dźwięk jest zbyt wysoki lub zbyt niski. z wejścia audio monitora i wyjścia audio karty dźwiękowej. (Patrz Podłączenie monitora) Sprawdzić poziom głośności. (Patrz Volume) Sprawdzić poziom głośności. (Patrz Volume) Jeśli po ustawieniu maksymalnej głośności dźwięk nadal jest zbyt cichy, należy sprawdzić regulację głośności w karcie dźwiękowej komputera lub w oprogramowaniu. Ustawić Treble i Bass na odpowiednim poziomie. 4.
Model SyncMaster 320P Ogólne Ogólne Nazwa modelu SyncMaster 320P Panel LCD Wielkość przekątna 32-calowa (80 cm) Wielkość obrazu 697,685 mm (H) x 392,256 mm (V) Rozstaw pikseli 0,511 mm (H) x 0,511 mm (V) Synchronizacja poziomo 30 ~ 70 kHz pionowo 50 ~ 85 Hz Kolor obrazu 16,7 M Kolory Colors Rozdzielczość Rozdzielczość optymalna Dostępność rozdzielczości 1360 x 768 /1366 x 768 @ 60 Hz zależy od karty graficznej Rozdzielczość maksymalna 1366 x 768 @ 60 Hz Sygnał wejściowy, Przesył Złącze RGB
Funkcja oszczędnego zużycia energii Poniżej 5 W Wymiary (Szer.x Wys.
Wyłącznik zasilania wyłączony (Przycisk zasilania) Stan Normalna Praca Tryb oszczędzania energii Wyłącznik zasilania wyłączony (Wskaźnik zasilania) Wskaźnik zasilania Zielony Migający Zielony Bursztynowy Czarny Pobór mocy Poniżej 180 W Poniżej 5 W (Wyłączony) Poniżej 1 W (120 Vac) Poniżej 0 W Opcja: SPEAKER L/R (8 ohm, 10 W) Fabrycznie ustawione tryby wyświetlania Jeśli sygnał z komputera jest taki sam, jak poniższe Ustawienia fabryczne, obraz na ekranie zostanie uregulowany automatycznie.
Cz ęstotliwość odchylania pionowego Podobnie jak lampa fluorescencyjna, ekran wielokrotnie wy świetla ten sam obraz w ciągu sekundy, aby powstał obraz widzialny dla użytkownika. The frequency of this repetition is called Vertical Frequency or Refresh Rate.
Model Kontakt do SAMSUNG WORLDWIDE Jeżeli masz jakieś uwagi lub pytania w sprawie produktów marki Samsung, skontaktuj się z naszą infolinią. North America U.S.A 1-800-SAMSUNG (7267864) http://www.samsung.com CANADA 1-800-SAMSUNG (7267864) http://www.samsung.com/ca MEXICO 01-800-SAMSUNG (7267864) http://www.samsung.com/mx Latin America ARGENTINE 0800-333-3733 http://www.samsung.com/ar BRAZIL 4004-0000 http://www.samsung.com/br CHILE 800-726-7864 (SAMSUNG) http://www.samsung.
844 000 844 http://www.samsung.com/cz DENMARK 38 322 887 http://www.samsung.com/dk FINLAND 09 693 79 554 http://www.samsung.com/fi FRANCE 08 25 3260 (€ 0,15/min) http://www.samsung.com/fr GERMANY 01805 - 121213 (€ 0,14/Min) http://www.samsung.de HUNGARY 06-80-SAMSUNG (7267864) http://www.samsung.com/hu ITALIA 800 SAMSUNG (7267864) http://www.samsung.com/it LUXEMBURG 02 261 03 710 http://www.samsung.lu NETHERLANDS 0900 20 200 88 (€ 0,10/Min) http://www.samsung.
TAIWAN 0800-329-999 http://www.samsung.com/tw VIETNAM 1 800 588 889 http://www.samsung.com/vn Middle East & Africa SOUTH AFRICA 0860 7267864 (SAMSUNG) http://www.samsung.com/za U.A.E 800SAMSUNG (7267864) 8000-4726 http://www.samsung.com/mea Terminologia Sync Signal Ssynchronizacja (Sync.) oznacza standardowe sygnały, potrzebne do wyświetlenia określonych kolorów na monitorze. Wyróżnia się synchronizację pionową i poziomą.
Aby poprawic obraz 1. Według poniższych wskazówek ustaw odpowiednio częstotliwość odświeżania monitora w panelu sterowania komputera, aby zapewnić możliwie wysoką jakość obrazu. Jakość obrazu może być nierówna, gdy w TFT-LCD nie ustawiono najwyższej jakości obrazu. { Rozdzielczość 1360 x 768 { Częstotliwość odchylania pionowego: 60Hz 2. Dla tego produktu użyto panelu TFT LCD wytworzonego przy użyciu zaawansowanej technologii półprzewodnikowej o precyzji rzędu 1ppm (jedna milionowa).
IMPORTADO POR: SAMSUNG ELECTRONICS MÉXICO. S.A. de C.V. Vía Lopez Portillo No. 6, Col. San Fco. Chilpan Tultitlán, Estado de México, C.P. 54940 Tel: 01-55-5747-5100 / 01-800-726-7864 EXPORTADO POR: Samsung Electronics CO.,LTD.
INFORMACJE O PRODUKCIE (Bez zjawiska utrwalenia obrazu) Co to jest utrwalenie obrazu? Utrwalenie obrazu nie występuje, gdy ekran LCD działa w normalnych warunkach. Warunki te zdefiniowano jako ciągle zmieniające się wzory obrazu wideo. Gdy ekran LCD wyświetla przez długi czas (ponad 12 godzin) stały wzór, może wystąpić nieznaczna różnica w napięciu między elektrodami obsługującymi ciekły kryształ (LC) w pikselu.
Okresowa zmiana kolorów znaków z Zalecane jest używanie jasnych kolorów nieznacznie różniących się jaskrawością - Zmiana cykliczna: Należy dokonywać zmiany kolorów znaków i tła co 30 minut z z z Co 30 minut zalecane jest przesuwanie znaków Cały wyświetlany obszar, łącznie z logo, należy okresowo przesuwać. - Zmiana cykliczna: Wyświetlanie ruchomych obrazów, razem z logo, przez 60 sekund po 4 godzinach użytkowania.
- Wybór metody . Instrukcja obsługi: Menu ekranowe -> opcja Set Up (Konfiguracja) -> opcja Safety Screen (Zabezpieczanie ekranu) -> opcja Bar (Pasek). . Odstęp czasowy: 1 ~ 10 godzin (zalecane: 1 ) . Odstęp czasowy: 10 ~ 50 sekund (zalecane: 50 ) Prosimy zajrzeć do instrukcji obsługi na dysku CD, w części „Funkcja menu ekranowego”; w niektórych modelach funkcja ta nie jest dostępna.
Prawidłowe usuwanie produktu (zużyty sprzęt elektryczny i elektroniczny) - Tylko obszar Europy Oznaczenie umieszczone na produkcie lub w odnoszących się do niego tekstach wskazuje, że produktu po upływie okresu użytkowania nie należy usuwać z innymi odpadami pochodzącymi z gospodarstw domowych.