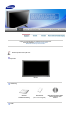
SyncMaster 320P
Symbolen Het niet-naleven van instructies die aangegeven worden met dit symbool, kan lichamelijk letsel of schade aan de apparatuur veroorzaken. Verboden Goed lezen Niet demonteren Trek de stekker uit het stopcontact Niet aanraken Aarden om een elektrische schok te voorkomen Elektriciteit Als u de monitor regelmatig enige tijd niet gebruikt, is het handig om op de pc de DPMS instelling voor energiebeheer van de monitor aan te zetten.
Gebruik geen beschadigde of niet goed bevestigde stekker. z Dit kan leiden tot elektrische schokken en brand. Trek de stekker niet aan de kabel uit het stopcontact en raak de stekker nooit aan met natte handen. z Dit kan leiden tot elektrische schokken en brand. Gebruik alleen een stekker en stopcontact die zijn voorzien van een aardeaansluiting. z Wanneer het apparaat niet goed is geaard, kan dit leiden tot schokken of schade aan het apparaat. Sluit het netsnoer goed aan, zodat deze niet losraakt.
Neem contact op met een geautoriseerd servicentrum als u de monitor installeert in een omgeving waar veel stof, hoge of lage temperaturen of hoge vochtigheid voorkomt, op een plaats waar gewerkt wordt met chemische oplossingen of waar de monitor 24 uur per dag in werking is, zoals een vliegveld of treinstation. Als u dit niet doet, kan er schade aan het apparaat ontstaan. Zet uw monitor in een ruimte met een lage luchtvochtigheid en zo weinig mogelijk stof.
Zet de monitor voorzichtig op zijn plaats. z Zo voorkomt u schade aan de monitor. Leg de monitor nooit met de voorkant omlaag. z Het oppervlak van de beeldbuis kan anders beschadigd raken. Het installeren van een wandbeugel moet door een deskundig persoon uitgevoerd worden. z z Als dit echter niet door een kundig persoon wordt uitgevoerd, kan dit resulteren in schade of letsel. Gebruik altijd het montagegereedschap dat beschreven staat in de gebruiksaanwijzing.
verwijderen met een droge doek. z Vuil tussen de stekker kan leiden tot elektrische schokken en brand. Controleer dat het netsnoer uit het stopcontact is gehaald voordat u het product reinigt. z Anders kan dit een elektrische schok of brand veroorzaken. Haal het netsnoer uit het stopcontact en veeg het product schoon met een zachte, droge doek. z Gebruik geen chemische middelen zoals boenmiddel, benzeen, alcohol, verdunners, insecticide, luchtverfrisser, smeermiddel of wasmiddel.
Schakel de stroom niet in als het buiten onweert en bliksemt of maak gedurende een langere periode geen gebruik van de monitor. z Een defecte monitor kan een elektrische schok of brand veroorzaken. Probeer het beeldscherm niet te verplaatsen door enkel aan het snoer of de signaalkabel te trekken. z Dit kan leiden tot storingen, elektrische schokken en brand ten gevolge van schade aan de kabel. Probeer de monitor niet te draaien door aan de stroomkabel of de signaalkabel te trekken.
Stel de resolutie en de frequentie in op de gewenste niveaus van het model. z Een niet geschikte resolutie en frequentie kan uw gezichtsvermogen letsel toebrengen. 32 inch (80 cm) - 1360 X 768 Als u gedurende lange tijd te dicht op de monitor zit, kan dit schade aan uw ogen veroorzaken. Neem minstens een pauze van 5 minuten, na ieder uur dat u gebruik maakt van de monitor, om de vermoeidheid van de ogen te ontlasten.
Wanneer u de batterijen verwijdert, zorgt u dat deze niet door kinderen worden ingeslikt. Houd batterijen uit de buurt van kinderen. z Raadpleeg onmiddellijk uw arts als een kind een batterij heeft ingeslikt. Wanneer u batterijen vervangt, plaats u deze met de plus- en minpool in de juiste richting zoals op de batterijhouder staat aangegeven. z Door een onjuiste polariteit kan een batterij breken of lekken, en brand, letsel of aantasting (schade) veroorzaken.
Kijk of de volgende items zijn meegeleverd met uw monitor. Als er iets ontbreekt, contact op met uw dealer. Neem dan contact op met uw dealer. Plaats het product niet op de vloer.
D-Sub-kabel Stroomkabel Luidsprekerkabel Luidsprekerset Voet Afstandsbediening Batterijen (AAA X 2) Afdekplaat Adapteruitgang voor BNC naar RCA.
1. MENU 6. PIP 2. Omlaag/omhoog-knop 7. Aan/uit knop 3. Links/rechts-knop 8. Het aan/uit 4. ENTER 9. Afstandsbedieningssensor 5. SOURCE 1. MENU Als het menu beeldinstellingen niet geactiveerd is, maak dan gebruik van deze knop om de OSD te openen en vervolgens een menu-onderdeel te activeren. 2. Omlaag/omhoog-knop Hiermee gaat u verticaal van het ene menuonderdeel naar het andere of regelt u de geselecteerde menuwaarden. 3.
Achterkant Ausführliche Informationen in Bezug auf Kabelverbindungen finden Sie im Abschnitt Anschließen von Kabeln unter Aufstellen. Die Konfiguration an der Rückseite des Monitors variiert leicht abhängig vom jeweils verwendeten Monitormodell. 1. RS232C OUT/IN (Serieller ANSCHLUSS RS232C) : MDC (Multiple Display Control)-ProgrammAnschluss 2. DVI IN(HDCP) (PC-Video-Anschlussbuchse) : Verwenden des DVI-D an DVI-D - DVI-Modus (Digital PC) 3.
5. COMPONENT AUDIO IN [L-AUDIO-R] (Component Audio-aansluitklem (invoer)) 6. BNC/COMPONENT OUT (BNC-Video-Anschlussbuchse / ComponentAnschlussbuchse(Ausgang)) - RGB-3-Modus (Analog PC)-Anschluss: Anschluss von R, G, B, H, V Port - Component-Anschluss: Anschluss von P R, Y, PB-Port 7. BNC/COMPONENT IN (BNC-Video-Anschlussbuchse / ComponentAnschlussbuchse(Eingang)) 8. AV AUDIO IN [L-AUDIO-R](MONITOR-Audio-Anschlussbuchse (Eingang)) 9. AV OUT [VIDEO](Video-Anschlussbuchse) : AV-Modus (Ausgang) 10.
17. Kensingtonslot Het Kensingtonslot is een instrument dat gebruikt wordt om het systeem vast te zetten bij gebruik in een openbare ruimte. (Het slot dient apart aangeschaft te worden. ) Voor meer informatie over gebruik van het slot, kunt u contact opnemen met de dealer. Zie Aansluiten voor meer informatie over het aansluiten van kabels.
27. 28. 29. 1.ON / OFF Gebruik deze knop als u de monitor wilt in- of uitschakelen. 2.MAGICNET MagicNet knop voor snelstart. - Deze functionaliteit is voor deze monitor niet beschikbaar. 3.MDC MDC knop voor snelstart. 4.LOCK Met deze knop kunt u de functietoetsen activeren of deactiveren op zowel de afstandsbediening als op de monitor, met uitzondering van de Aan/Uit-toetsen en de LOCK-toetsen (vergrendelingstoetsen) 5.MagicNet-knop - Gebruik deze knoppen voor MagicNet.
Als het menu beeldinstellingen geactiveerd is, kunt u met de Exit-knop (Afsluit-knop) het menuvenster of het venster Menu Instellingen afsluiten. 17.Up-Down Left-Right Buttons Hiermee gaat u horizontaal van het ene menuonderdeel naar het andere of regelt u de geselecteerde menuwaarden. Hiermee regelt u ook het geluidsvolume. 18.P.MODE (M/B) Wanneer u op deze kop drukt, wordt de huidige modus midden onder op het scherm weergegeven. AV / S-Video /Component Mode : P.
Mechanische vormgeving | Monitor head | Standaard | Speaker | Aanwijzingen voor het installeren van de VESA-beugel | Installatie van de wandsteun 1. Mechanische vormgeving 2.
3. Standaard 4. Speaker 5. Aanwijzingen voor het installeren van de VESA-beugel z z z z Let er bij het installeren van VESA op, dat u voldoet aan de internationale VESA-normen. Informatie over en aankoop en installatie van de VESA-beugel: Neem contact op met uw dichtsbijzijnde Samsung distributeur om een bestelling te plaatsen. Nadat de bestelling is geplaatst, zal een professioneel team de beugel bij u komen installeren. Er zijn ten minste twee personen nodig om de LDC-monitor te verplaatsen.
Afmetingen Gebruik voor het bevestigen van de beugel aan de muur alleen kolomschroeven met een diameter van 6 mm en een lengte van 8 tot 12 millimeter. 6. Installatie van de wandsteun z z z Neem contact op met een technicus alvorens de wandsteun te bevestigen. Samsung Electronics aanvaardt geen aansprakelijkheid voor enige schade aan het product of letsel bij de klant als de installatie uitgevoerd wordt door de klant zelf. Dit product is geschikt voor installatie aan cementen muren.
3 1. Plaats de 3 hangers van deze apparaatbeugel B stevig in de gleuven van de muurbeugel A. 2. Bevestig de apparaatbeugel B en de muurbeugel A met de schroeven D. Sluit eerst de kabels aan voordat u de monitor aan de muur bevestigt.
De voet installeren Gebruik hiervoor alleen de meegeleverde schroeven. Samsung Electronics is niet verantwoordelijk voor eventuele schade die veroorzaakt wordt door het gebruik van een andere voet dan aangegeven. 1. De tijdelijke voet installeren. Linker voet Right stand Plaats het label "caution" aan de achterzijde. 1. Een afdekkap wordt gebruikt om de opening onder aan de monitor te beschermen, waar de voet in bevestigd wordt.
2. Installeer de linker en de rechter voet. 3. Plaats de voet in de opening aan de onderkant van de monitor. Plaats vervolgens een schroef in de opening, zoals aangegeven, en draai deze vast. (M4 × L15) Deze standaard is oorspronkelijk bedoeld voor het aanpassen van de hoek waar in het scherm is gepositioneerd. Het bedrijf is niet aansprakelijk voor problemen die worden veroorzaakt door gebruik van deze standaard. Gebruik dit product nooit als een standaard waarop voorwerpen worden geplaatst. 2.
1. Op een computer aansluiten 1. Sluit het netsnoer aan op de netaansluiting aan de achterkant van uw monitor. Druk op de Aanknop. 2. U kunt op drie manieren de signaalkabel op uw monitor aansluiten. Kies een van de volgende manieren : 2-1. De D-sub-stekker (analoog) gebruiken op uw videokaart. Sluit de signaalkabel aan op de 15 pins, RGB-poort aan de achterkant van uw monitor. 2-2. De DVI-stekker (digitaal) gebruiken op uw videokaart.
3. Sluit de audiokabel van uw monitor aan op de audiopoort van uw computer. Deze poort bevindt aan de achterzijde van uw computer. 4. Zet zowel uw computer als uw monitor aan. Neem contact op met een lokaal servicecentrum van Samsung Electronics, om optionele onderdelen te kopen. 2. Op een VCR aansluiten 1. AV-apparaten zoals vcr's of camcorders zijn aangesloten op de AV IN [VIDEO] of AV IN [S-VIDEO] uitgang van uw monitor. Hierbij wordt gebruik gemaakt van een S-VHS of BNC-kabel.
1. Sluit op COMPONENT AUDIO IN [L-AUDIO-R] van de monitor een audiokabel aan en verbindt deze met de AUDIO-UITGANG van de dvd-speler. 2. Sluit op de BNC/COMPONENT IN - voor aansluiting op PR, Y, PB poort van de monitor een videokabel aan en verbindt deze met de PR, Y, PB van de dvd-speler. De Component-kabel is optioneel. 3. Selecteer de optie Component waarop een dvdspeler is aangesloten, door gebruik te maken van de source-knop. Deze knop bevindt zich aan de voorkant van de monitor. 4.
1. Sluit op de COMPONENT AUDIO IN [L-AUDIO-R] van de monitor een audiokabel aan en verbindt deze met AUDIO-UITGANG van de Set Top Box. 2. Sluit op de BNC/COMPONENT IN - voor aansluiting op PR, Y, PB poort van de monitor een videokabel aan en verbindt deze met de PR, Y, PB van de Set Top Box. 3. Selecteer de optie Component waarop een D-TV Set Top Box is aangesloten, door gebruik te maken van de source-knop. Deze knop bevindt zich aan de voorkant van de monitor.
De luidsprekerbeugel voor bevestiging van de SET-luidspreker is mogelijk beschadigd. 7. Aansluiten op een stereo-installatie 1. Sluit op de AUX L en R van de stereo-installatie een audiokabel aan en verbindt deze met de linker en rechter MONITOR IN [L-AUDIO-R] van de monitor. 1. Inleiding 2. Begin : Hoofdscherm | Poort Instellen 3. Power Control (Vermogensregeling) 4. Ingangsbronregeling (Input Source Control) 5. Beeldformaat instellen : PC, BNC, DVI | AV, S-Video, Component, DVI(HDCP) 1. Inleiding 6.
Een Multiple Display Control (MDC) is een applicatie waarmee u diverse beeldschermen gemakkelijk en gelijktijdig op uw computer kunt bedienen. RS-232C, een standaard voor seriële communicatie, wordt gebruikt voor de communicatie tussen een computer en een beeldscherm. Daarom moet er een seriële kabel verbonden worden met de seriële poort van uw computer en de seriële poort van het beeldscherm. 2.
Hoofdpictogrammen Selectieknop Remocon (afstandsbediening) Overzicht Safety Lock Selectie beeldscherm Poortselectie Bedieningsgereedschappen 1. Gebruik de hoofdpictogrammen om over te schakelen naar ieder beeldscherm. 2. Met deze optie kunt u de signaalontvangst van de afstandsbediening van de betreffende beeldschermeenheid in- en uitschakelen. 3. Stelt de slotfunctie in. 4. U kunt de instelling voor de seriële poort van de pc wijzigen. De oorspronkelijke waarde is COM1. 5.
1. De Meervoudige Display Control wordt oorspronkelijk ingesteld op COM1. 2. Als u een andere poort dan COM1 gebruikt, kunt u COM1 tot en met COM4 selecteren in het menu Port selection. 3. Als de exacte poortnaam die op de monitor met een seriële kabel is aangesloten, niet is geselecteerd, is communicatie niet mogelijk. 4. De geselecteerde poort is in het programma opgeslagen en wordt ook voor het volgende programma gebruikt. 3. Power Control (Vermogensregeling) 1.
Met de optie Power Control kunt u sommige functies bedienen van het geselecteerde beeldscherm. 1) Power On/Off (Aan/uitknop) - Schakelt het geselecteerde beeldscherm Aan/Uit. 2) Volume Control (Volumeregeling) - Controleert het volumeniveau van het geselecteerde scherm. Het ontvangt de volumewaarde van het geselecteerde beeldscherm en geeft dit weer in de schuifbalk.
- Verandert de ingangsbron van het geselecteerde display in BNC. 3) DVI - Verandert de ingangsbron van het geselecteerde display in DVI. 4) AV - Verandert de ingangsbron van het geselecteerde display in AV. 5) S-Video - Verandert de ingangsbron van het geselecteerde display in S-Video. 6) Component - Verandert de ingangsbron van het geselecteerde display in Component. 7) MagicNet - De invoerbron van MagicNet werkt alleen op het MagicNet-model.
Het overzicht toont u basisinformatie die noodzakelijk is voor het instellen van het beeldformaat. 1) Klik op het tabblad AV, S-VIDEO of Component om het beeldformaat in te stellen voor AV, S-VIDEO en Component. Klik op de optie Alles selecteren of maak gebruik van het aankruisvakje, om een beeldscherm te selecteren dat u wilt bedienen. 2) Het overzicht geeft alleen het beeldscherm weer waarvan Video AV, S-VIDEO en Component, DVI(HDCP) de ingangsbron is.
- Stelt de uren, minuten en AM/PM in op de gewenste eindtijd van het geselecteerde beeldscherm. 4) Geeft de instellingen van On Timer (Timer Aan) weer. 5) Geeft de instellingen van Off Timer (Timer Uit) weer. De Tijdcontrole is alleen beschikbaar voor beeldschermen die AANSTAAN. Indgangskilden for MagicNet fungerer kun på MagicNet-modellen. 7. PIP (beeld in beeld)-bediening - PIP-formaat 1. Klik in de hoofdpictogrammen op PIP en vervolgens zal het scherm PIP instellen op uw beeldscherm verschijnen.
Het overzicht toont u basisinformatie die noodzakelijk is voor het instellen van het PIP-bron. 1) PIP Source - U kunt de PIP-bron instellen, zodra u de monitor heeft ingeschakeld. 2) PC - Verandert de PIP-bron van het geselecteerde display in PC. 3) BNC - Verandert de PIP-bron van het geselecteerde display in BNC. 4) DVI - Verandert de PIP-bron van het geselecteerde display in DVI. 5) AV - Verandert de PIP-bron van het geselecteerde display in AV.
Het overzicht toont u basisinformatie die noodzakelijk is voor Settings Control. Als iedere functie geselecteerd is, wordt de ingestelde waarde van de geselecteerde functie weergeven op de schuifbalk. Als u de optie Alles selecteren geselecteerd heeft, verandert de waarde weer in de standaardwaarde 50. Wanneer u een waarde op dit scherm wijzigt, wordt de modus automatisch gewijzigd in "CUSTOM". 1) Picture (Afbeelding) - Alleen beschikbaar voor AV, S-Video, Component, DVI(HDCP).
Het overzicht toont u basisinformatie die noodzakelijk is voor Settings Control. Als iedere functie geselecteerd is, wordt de ingestelde waarde van de geselecteerde functie weergeven op de schuifbalk. Als u de optie Alles selecteren geselecteerd heeft, verandert de waarde weer in de standaardwaarde 50. Wanneer u een waarde op dit scherm wijzigt, wordt de modus automatisch gewijzigd in "CUSTOM". 1) Picture PC (Afbeelding PC) - Alleen beschikbaar voor PC, BNC, DVI.
geselecteerd is, wordt de ingestelde waarde van de geselecteerde functie weergegeven op de schuifbalk. Als u de optie Alles selecteren geselecteerd heeft, verandert de waarde weer in de standaardwaarde 50. Wanneer u een waarde op dit scherm wijzigt, wordt de modus automatisch gewijzigd in "CUSTOM". 1) Audio - Bediening van de audio-instellingen van alle ingangsbronnen. 2) Bass - Adjusts Bass of the selected display.
1. Klik op het pictogram "Maintenance" in de kolom Main Icon om het scherm Maintenance weer te geven. Op het informatieraster ziet u een aantal basisgegevens verschijnen. 1) Maintenance - Hiermee is de functie Maintenance Control mogelijk voor alle ingangsbronnen. 2) Auto Lamp Control Regelt automatisch de achtergrondverlichting van de geselecteerde display op een specifieke tijd. - De functie Auto Lamp Control wordt automatisch uitgeschakeld als u de functie Manual Lamp Control regelt.
11. Onderhoud - Video Wall 1. Klik op het pictogram "Maintenance" in de kolom Main Icon om het scherm Maintenance weer te geven. 1) Video Wall - Een videomuur is een aantal videoschermen die met elkaar zijn verbonden, zodat op ieder scherm een gedeelte van het geheel wordt weergegeven of zodat op ieder scherm het beeld wordt herhaald. 2) Screen Divider - De videomuur kan op verschillende manieren worden ingedeeld. U kunt gebruikmaken van verschillende schermen en deze op verschillende manieren indelen.
z Natural De functie Maintenance Control is alleen beschikbaar voor beeldschermen die AANSTAAN. Indgangskilden for MagicNet fungerer kun på MagicNet-modellen. 12. Problemen oplossen 1. Het beeldscherm dat u wilt bedienen, verschijnt niet in het overzicht - Controleer de verbinding van RS232C. (Controleer of deze goed aangesloten is op de Com1 poort) - Controleer of andere aangesloten schermen dezelfde ID hebben.
Natural Color Natural Color met Natural Color programma Een vrij nieuw probleem is dat de kleuren van afdrukken, gescande afbeeldingen en foto's uit een digitale camera kunnen afwijken van de kleuren die door een monitor worden weergegeven. Het programma Natural Color is de oplossing voor dit probleem. Dit kleurbeheer systeem is ontwikkeld door Samsung Electronics in samenwerking met het Korea Electronics & Telecommunications Research Institute (ETRI).
Model Input Beschikbare modi : PC / BNC / DVI : AV : S-Video OSD Specificatie Source List Gebruiken om pc, BNC of andere externe invoerbron die aangesloten is op de monitor te selecteren. Gebruiken om het scherm van uw keus te selecteren. - De rechtstreekse knop op de afstandsbediening is de knop 'SOURCE'. De PIP schakelt uit als de monitor naar een externe bron wordt overgezet.
signaal wordt gezet. Als de BNC-kabel en het element gebruik maken van dezelfde terminal, kan slechts een PIP tegelijk het scherm bedekken. 1) PIP - De rechtstreekse knop op de afstandsbediening is de knop 'PIP'. Off On : Schakel het PIP in of uit. 2) Source - De rechtstreekse knop op de afstandsbediening is de knop 'SOURCE'.
PC / BNC / DVI Modus Beschikbare modi OSD : PC / BNC / DVI : AV : S-Video : Component Specificatie Afspelen MagicBright™ MagicBright is een nieuwe functie, die afhankelijk van de soort afbeelding waarnaar uw bekijkt, een zo optimaal mogelijke weergave produceerd. Momenteel zijn er drie opties beschikbaar: Tekst, Internet en Entertainment. Iedere optie heeft zijn eigen vooraf ingestelde helderheidswaarde. Iedere optie kunt u gemakkelijk selecteren door op de betreffende MagicBright-knop te drukken.
Color Control Hiermee regelt u de afzonderlijke RGB-kleuren. - Alleen beschikbaar in modus PC/BNC 1) Red 2) Green 3) Blue Als u het beeld regelt met de functie Color Control, wordt Color Tone overgeschakeld naar de modus Custom. Image Lock De beeldvergrendeling (Image Lock) wordt gebruikt om een zo optimaal mogelijke beeldkwaliteit te krijgen. Door deze optie kunt u beeldruis die instabiele afbeeldingen produceert met beeldflikkering te verwijderen.
Beschikbare modi : PC / BNC / DVI : AV : S-Video : Component OSD Specificatie Mode De monitor heeft vier automatische beeldinstellingen ("Dynamic", "Standard", "Movie" en "Custom") die op de fabriek tevoren zijn ingesteld. U kunt Dynamic, Standard, Movie of Custom activeren. - De rechtstreekse knop op de afstandsbediening is de knop 'P.MODE'. 1) Dynamic 2) Standard 3) Movie 4) Custom Custom Met de on-screen menu´s kunt u het contrast en de helderheid (brightness) geheel naar wens instellen.
Off On Film Mode U kunt Film Mode in- en uitschakelen. De functie Film Mode zorgt voor televisiekijken met theaterkwaliteit. Off On DNIe Demo - De Digital Natural Image engine (DNIe Demo) is de nieuwe technologie van Samsung en biedt u meer gedetailleerde afbeeldingen met contrast, meer wit en 3D-geluidsreductie. Een nieuw compensatiealgoritme voor afbeeldingen levert onze klanten heldere en schonere afbeeldingen op. Met de DNIe-technologie krijgt u precies wat uw oog ziet.
Beschikbare modi : PC / BNC / DVI : AV : S-Video OSD Specificatie Mode De monitor heeft een ingebouwde hifi-stereo-versterker. 1) Standard : Kies Standaard voor de standaardfabrieksinstellingen. 2) Music : Kies Muziek wanneer u muziekvideo's of concerten kijkt. 3) Movie : Kies Film wanneer u films kijkt. 4) Speech : Kies spraak wanneer u een show met gesprekken kijkt (bijvoorbeeld het nieuws). 5) Custom : Kies Aangepast wanneer u de instellingen aan uw persoonlijke voorkeur wilt aanpassen.
Beschikbare modi : PC / BNC / DVI : AV : S-Video OSD Specificatie Time U kunt kiezen uit vier tijdsinstellingen: Clock Set, Sleep Timer, On Timer en Off Timer. 1) Clock Set : Huidige tijdsinstelling. 2) Sleep Timer : Hiermee kunt u de monitor zo instellen dat het toestel binnen een aantal minuten automatisch wordt uitgezet. (Off(Uit), 30, 60, 90, 120, 150, 180) 3) On Timer : Hiermee kunt u de monitor automatisch laten inschakelen op een vooraf ingesteld tijdstip.
fabriekswaarden. 1) Image Reset 2) Color Reset 2) Color Reset Video Wall Een videomuur is een aantal videoschermen die met elkaar zijn verbonden, zodat op ieder scherm een gedeelte van het geheel wordt weergegeven of zodat op ieder scherm het beeld wordt herhaald. 1) Video Wall : U kunt de plaats selecteren door in de geselecteerde modus op een nummer te drukken. Off On 2) Format : De indeling kan worden geselecteerd om het scherm te splitsen.
: Bepaalt of de functie Screen Scroll (Schermverschuiving) On (aan) of Off (uit) moet worden geschakeld. Off On 2) Interval : Bepaalt de tijdsinterval voor de uitvoering van de Screen Scroll (Schermverschuiving)-operatie. (1-10 uur) De tijd wordt berekend aan de hand van de tijd waarin het apparaat aanstaat. Standaard is de tijd ingesteld op 10 uur. 1~10 uur 1) Auto Scroll 2) Interval 3) Second 3) Second : Bepaalt de duur van de uitvoering van de Screen Scroll (Schermverschuiving)-operatie.
Directe bedieningsfuncties Beschikbare modi OSD : PC / BNC / DVI : AV : S-Video Specificatie MDC Ga naar het Multi Control OSD-scherm. LOCK Hiermee stelt u de Safety Lock in. 1) Lock On : Het slot wordt aangezet. 2) Lock Off : Het slot wordt uitgezet. Wanneer u de slotfunctie instelt, kunt u de knoppen power en lock alleen op de afstandsbediening en op de set gebruiken. Het standaard ingestelde password (wachtwoord) op het beeldscherm is "0000".
Zelftestfunctiecontrole Controleer de volgende punten zelf voordat u het servicecenter belt.Neem contact op met het servicecenter als u het probleem zelf niet kunt oplossen. Zelftestfunctiecontrole | Niet-optimale modus | Onderhoud en reinigen | Symptomen en aanbevolen handelingen 1. Zelftestfunctiecontrole Uw monitor beschikt over een zelftest functie waarmee u kunt controleren of de monitor goed werkt. 1. Zet zowel uw computer als de monitor uit. 2.
Zie Specificaties > Vooraf ingestelde timingmodi voor de resoluties of frequentie die door de monitor worden ondersteund. 3. Onderhoud en reinigen 1. De monitorbehuizing onderhouden Schoonmaken met een zachte doek nadat u de stekker uit het stopcontact hebt gehaald. z z Geen benzeen, verfverdunner of andere ontvlambare stoffen en ook geen natte doek gebruiken. Wij raden u een reinigingsmiddel van Samsung aan om schade aan het scherm te voorkomen. 2.
Hier worden problemen met het monitorscherm en hun oplossingen beschreven. problemen Het scherm is leeg en het voedingslampje brandt niet Bericht "Check Signal Cable" Mulige løsninger z z z Bericht "Not Optimum Mode" z z Het beeld rolt verticaal. De afbeelding is niet helder. Het beeld is wazig. z z z z Het beeld is onstabiel en trilt. Zorg dat de voedingskabel goed is aangesloten en dat de LCD-monitor is ingeschakeld.
z Het geluid klinkt te hoog of te laag z Als het geluid nog steeds te zacht klinkt, nadat u het volume maximaal open heeft gedraaid, controleer dan de volumeregeling van de geluidskaart of het softwareprogramma. Stel de Treble en Bassbas op het juiste niveau in. 4. Problemen met de afstandsbediening Hier worden problemen met de afstandsbediening en hun oplossingen beschreven. problemen De knoppen van de afstandsbediening reageren niet. Mulige løsninger z z z z z Controleer de batterijpolen (+/-).
Model SyncMaster 320P Algemene specificaties Algemeen Model SyncMaster 320P LCD-scherm Afmeting 32,0 inch diagonaal (80 cm) Beeldgrootte 697,685 mm (H) x 392,256 mm (V) Pixel Pitch 0,511 mm (H) x 0,511 mm (V) Synchronisatie Horizontaal 30 ~ 70 kHz Verticaal 50 ~ 85 Hz Beeldschermkleur 16,7 M Kleuren Resolutie Optimale resolutie 1360 x 768 / 1366 x 768 @ 60 Hz afhankelijk van de grafische kaart die wordt gebruikt Maximale resolutie 1366 x 768 @ 60 Hz Ingangssignaal, Afgebroken RGB analoog,
Minder dan 5 W Afmetingen (BxDxH)/Gewicht 780 780 982 982 X 482 X X 530 X X 482 X X 530 X 107 223 107 223 mm / 30,1 mm / 30,1 mm / 38,7 mm / 38,7 X 19,0 X 20,9 X 19,0 X 20,9 X X X X 4,6 inch 8,8 inch 4,2 inch 8,8 inch / 16,1 kg (Inclusief voet) - optioneel (met speaker) - optioneel (met speaker, Inclusief voet) - optioneel VESA Feste Schnittstelle 200 mm x 200 mm (voor het gebruik van een speciale armmontagebeugel) Omgevingsfactoren In bedrijf Temperatuur: 10 °C ~ 40 °C (50 °F ~ 104 °F) Vochtigheid
Stroomverbruik Minder dan 180 W Minder dan 5 W (Uitschakelstand) Minder dan 1 W (120 Vac) Minder dan 0 W Optioneel: SPEAKER L/R (8 ohm, 10 W) Voorkeurinstellingen Als het signaal dat van de computer wordt ontvangen gelijk is aan een van de volgende voorkeurinstellingen, wordt de monitor hier automatisch op ingesteld. Bij afwijkende signalen kan het scherm leeg blijven ondanks dat de aan/uit LED indicator brandt. Zie de handleiding van de videokaart en stel het beeldscherm als volgt in. Tabel 1.
Model Contact Samsung wereldwijd Wanneer u suggesties of vragen heeft met betrekking tot Samsung producten, gelieve contact op te nemen met de consumenten dienst van Samsung North America U.S.A 1-800-SAMSUNG (7267864) http://www.samsung.com CANADA 1-800-SAMSUNG (7267864) http://www.samsung.com/ca MEXICO 01-800-SAMSUNG (7267864) http://www.samsung.com/mx Latin America ARGENTINE 0800-333-3733 http://www.samsung.com/ar BRAZIL 4004-0000 http://www.samsung.
844 000 844 http://www.samsung.com/cz DENMARK 38 322 887 http://www.samsung.com/dk FINLAND 09 693 79 554 http://www.samsung.com/fi FRANCE 08 25 3260 (€ 0,15/min) http://www.samsung.com/fr GERMANY 01805 - 121213 (€ 0,14/Min) http://www.samsung.de HUNGARY 06-80-SAMSUNG (7267864) http://www.samsung.com/hu ITALIA 800 SAMSUNG (7267864) http://www.samsung.com/it LUXEMBURG 02 261 03 710 http://www.samsung.lu NETHERLANDS 0900 20 200 88 (€ 0,10/Min) http://www.samsung.
TAIWAN 0800-329-999 http://www.samsung.com/tw VIETNAM 1 800 588 889 http://www.samsung.com/vn Middle East & Africa SOUTH AFRICA 0860 7267864 (SAMSUNG) http://www.samsung.com/za U.A.E 800SAMSUNG (7267864) 8000-4726 http://www.samsung.com/mea Woordenlijst Sync-signaal Sync-signalen (gesynchroniseerde) hebben betrekking op signalen die nodig zijn om de gewenste kleuren op de monitor te kunnen weergeven. Deze zijn ingedeeld in verticale en horizontale syncsignalen.
kabel verbonden worden met de seriële poort van uw computer en de seriële poort van het beeldscherm. Voor een betere weergave 1. Stel de resolutie en de refresh rate (herhalingsfrequentie) in via het configuratiescherm van de computer, om een zo optimaal mogelijke beeldkwaliteit te krijgen. { { Resolutie: 1360 x 768 Verticale frequentie (refresh rate): 60 Hz 2.
MÉXICO IMPORTADO POR: SAMSUNG ELECTRONICS MÉXICO. S.A. de C.V. Vía Lopez Portillo No. 6, Col. San Fco. Chilpan Tultitlán, Estado de México, C.P. 54940 Tel: 01-55-5747-5100 / 01-800-726-7864 EXPORTADO POR: Samsung Electronics CO.,LTD.
PRODUCTGEGEVENS (zonder scherminbranding) Wat is scherminbranding? Scherminbranding komt mogelijk niet voor als een LCD-scherm onder normale omstandigheden wordt gebruikt. Normale omstandigheden worden bepaald door continu veranderende videopatronen. Als het LCDscherm voor langere tijd wordt gebruikt met een vast patroon (meer dan 12 uur), is er mogelijk een klein verschil in het voltage tussen de elektroden die de vloeibare kristallen in pixels veranderen.
De kleur van de tekens regelmatig wijzigen z z z z Gebruik heldere kleuren met weinig verschil in helderheid - Cyclus: wijzig elke 30 minuten de kleur van de tekens en de achtergrond. Wijzig elke 30 minuten de bewegende tekens. Voor alle delen op het scherm geldt dat u regelmatig een bewegend beeld met logo moet weergeven. - Cyclus: geef na 4 uur gebruik 60 seconden een bewegend beeld met logo weer.
- Methode selecteren . Gebruiksaanwijzingen: OSD Menu -> Set Up -> Safety Screen -> Bar (OSD-menu -> Instellen -> Veiligheidsscherm -> Balk) . Tijdsinterval: 1 ~ 10 uur (aanbevolen: 1) . Tijdsduur: 10 ~ 50 seconden (aanbevolen: 50) (Controleer in de Gebruikershandleiding op de cd het onderwerp 'OSD-functies'. Voor sommige modellen is dit niet beschikbaar.) De schermwisfunctie van het product toepassen z De schermwisfunctie toepassen - Symptoom: 2 verticale blokken bewegen terwijl het scherm wordt gewist.
Correcte verwijdering van dit product (elektrische & elektronische afvalapparatuur) - Alleen Europa Dit merkteken op het product of het bijbehorende informatiemateriaal duidt erop dat het niet met ander huishoudelijk afval verwijderd moet worden aan het einde van zijn gebruiksduur.