DVD Player DVD-P181K www.samsung.
PRECAUTIONS 1. Setting up - Refer to the identification label located on the rear of your player for its proper operating voltage. - Install your player in a cabinet with adequate ventilation holes. (7~10cm) Do not block ventilation holes on any of the components for air circulation. - Do not push the disc tray in by hand. - Do not stack components. - Be sure to turn all components off before moving the player. - Before connecting other components to this player, be sure to turn them off.
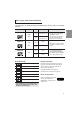
Remote Control Video/Audio Cable User’s Manual Install Batteries in the Remote control 1. Open the battery cover on the back of the remote control. 2. Insert two AAA batteries. Make sure that the polarities (+ and -) are aligned correctly. 3. Replace the battery cover. If remote control doesn’t operate properly: - Check the polarity + - of the batteries (Dry-Cell) - Check if the batteries are drained. - Check if remote control sensor is blocked by obstacles.
SETUP General Features Excellent Sound Dolby Digital, a technology developed by Dolby Laboratories, provides crystal clear sound reproduction. Screen Both regular and widescreen(16:9) pictures can be viewed. Slow Motion An important scene can be viewed in slow motion. Parental Control (DVD) The parental control allows users to set the level necessary to prohibit children from viewing harmful movies such as those with violence, adult subject matter, etc.
Disc Type and Characteristics Disc Types (Logos) Recording Types DVD Audio + Video VIDEO-CD Audio + Video AUDIO-CD Disc Size Max. Playing Time Characteristics 12 Cm Single-sided 240 min. Double-sided 480 min. 8 Cm Single-sided 80 min. Double-sided 160 min. - DVD contains excellent sound and video due to Dolby Digital and MPEG-2 system. - Various screen and audio functions can be easily selected through the on-screen menu. 12 Cm 74 min. 8 Cm 20 min. 12 Cm 74 min. 8 Cm 20 min.
Description Front Panel Controls 1 1. 2. 3. 4. 2 3 STANDBY/ON ( ) When STANDBY/ON is pressed on, the indicator goes out and the player is turned on. STANDBY indicator When the unit is first plugged in, this indicator lights. DISC TRAY Place the disc here. MIC Connect Microphone for karaoke functions. 4 5 6 7 8 5. MICROPHONE VOLUME Use to adjust microphone volume level. Use the button by pressing it. Turn it to the left or right to control the volume. 6.
Rear Panel English 4 1 1. 2 3 AUDIO OUT JACKS - Connect to the Audio input jacks of your television or audio/video receiver. 2. VIDEO OUT JACK - Use a video cable to connect to the Video input jack on your television. 3. COMPONENT VIDEO OUT JACKS - Use these jacks if you have a TV with Component Video in jacks. These jacks provide PR, PB and Y video. - If P-SCAN Video Output is selected in Setup Menu, progressive scan mode will work. - If I-SCAN Video Output is selected in Setup Menu, 4.
Tour of the Remote Control 6. 7. 16 17 8. 18 9. 10. 3 19 11. 4 20 12. 5 6 7 8 9 10 21 1 2 22 13. 23 24 14. 15. 11 16. 17. 12 25 13 26 18. 14 15 27 28 19. 20. 21. 22. 23. 1. DVD Power Button Turns the power on or standby. 2. NUMBER Buttons 3. TITLE MENU (number 7) Button 24. 25. 26. Brings up the Title menu. 4. 5. 8 ZOOM/- /-- Button Enlarge DVD Picture Use this button to select the channel of TV program by inserted the channel number (TV mode).
CONNECTIONS The following shows examples of connections commonly used to connect the DVD player with a TV and other components. Before Connecting the DVD Player - Always turn off the DVD player, TV, and other components before you connect or disconnect any cables. - Refer to the user’s manual of the additional components you are connecting for more information on those particular components.
Connection to a TV (Interlace) - Connecting to your TV using Component video cables. - You will enjoy high quality and accurate color reproduction images. Component video separates the picture element into black and white(Y), blue(PB), red(PR) signals to present clear and clean images. (Audio signals are delivered through the audio output.) 1 Using component video cables (not included), connect the COMPONENT VIDEO OUT terminal on the rear of the DVD player to the COMPONENT IN terminal of TV.
Connection to a TV (Progressive) 1 English Using component video cables (not included), connect the COMPONENT VIDEO OUT terminal on the rear of the DVD player to the COMPONENT IN terminal of TV. 2 Using the audio cables, connect the AUDIO (red and white) OUT on the rear of the DVD player to the AUDIO (red and white) IN terminals of TV. Turn on the DVD player and TV.
Connection to an Audio System (2 Channel Amplifier) 1 Using the audio cables, connect the AUDIO (red and white) OUT on the rear of the DVD player to the AUDIO (red and white) IN terminals of the Amplifier. 2 Using the video signal cable(s), connect the VIDEO or COMPONENT OUT terminals on the rear of the DVD player to the VIDEO orCOMPONENT IN terminal of your TV. WHITE RED 3 Audio Cable Turn on the DVD player, TV, and Amplifier.
Connection to an Audio System (Dolby digital, MPEG2 or DTS Amplifier) 1 English If using a coaxial cable (not included), connect the DIGITAL AUDIO OUT (COAXIAL) terminal on the rear of the DVD player to the DIGITAL AUDIO IN (COAXIAL) terminal of the Amplifier. 2 Using the video signal cable(s), connect the VIDEO or COMPONENT OUT terminals on the rear of the DVD player to the VIDEO or COMPONENT IN terminal of TV. Audio Cable 3 Turn on the DVD player, TV, and Amplifier.
BASIC FUNCTIONS Playing a Disc Before Play - Turn on your TV and set it to the correct Video Input by pressing TV/VIDEO button on the TV remote control. - If you connected an external Audio System, turn on your Audio System and set it to the correct Audio Input. After plugging in the player, the first time you press the DVD POWER button, this screen comes up: If you want to select a language, press a NUMBER button. (This screen will only appear when you plug in the player for the first time.
During play, you can search quickly through a chapter or track, and use the skip function to jump to the next selection. Searching through a Chapter or Track. During play, press the SEARCH ( the remote control. or 2. Press the / buttons to select the desired item. 3. Press the ¦/ buttons to make the desired setup and then press the ENTER button. - You may use the number buttons of the remote control to directly access a title, chapter or to start the playback from the desired time. 4.
Note DVD/VCD - Depending on a disc, the Disc Menu may not work. - You can also use the Disc Menu, using the DISC MENU button on the remote control. - Only Menu Off is available for VCD2.0. Each press of the DISC MENU button toggles between Menu On and Menu Off. Repeat Play Press the REPEAT button to change playback mode. When playing a DVD/VCD - DVD repeat play by chapter,title or disc VCD repeat play by disc or track. - Chapter : repeats the chapter that is playing.
If you are using a 4:3 TV Adjusting the Aspect Ratio (EZ View) To play back using aspect ratio (DVD) Press the EZ VIEW button. - The screen size changes when the button is pressed repeatedly. - The screen zoom mode operates differently depending on the screen setting in the Display Setup menu. - To ensure correct operation of the EZ VIEW button, you should set the correct aspect ratio in the Display Setup menu. (See pages 25).
Note - This function depends on audio languages are encoded on the disc and may not work. - A DVD disc can contain up to 8 audio languages. - To have the same audio language come up whenever you play a DVD; Refer to “Using the Audio Language” on page 23. Selecting the Subtitle Language You can select a desired subtitle quickly and easily with the SUBTITLE button.
Using the Zoom Function (DVD/VCD) - During DVD or VCD play or pause mode, press ZOOM button on the remocontrol repetedly to zoom in 2X/3X/4X - During VCD play, press ZOOM button to zoom in 2X/4X/2X/Normal in order. : STOP file icon. - : PLAY file icon - : WMA file icon - : MP3 file icon. - : JPG file icon. - : AVI file icon. - : CD file icon.
CD-R MP3/WMA file When you record MP3 or WMA files on CD-R, please refer to the following. - Your MP3 or WMA files should be ISO 9660 or JOLIET format. ISO 9660 format and Joliet MP3 or WMA files are compatible with Microsoft's DOS and Windows, and with Apple's Mac. This format is the most widely used. - When naming your MP3 or WMA files, do not exceed 8 characters, and enter “.mp3, .wma” as the file extension. General name format : Title.mp3. or Title.wma.
DivX5 Zoom Bitrate may fluctuate: 720 x 480 @30fps Device may skip decoding the 720 x 576 @25fps - Each time zoom button is pressed, the picture is enlarged. zoom mode : 100% -125%-150%-200%-100% . high bitrate portions and begin : Maximum bitrate : 4Mbps Slide show decoding again when Bitrate returns to normal. Note - Some MPEG4 files created on a personal computer may not be play back. That is why Codec Type, Version and Higher resolution over specification is not supported.
KARAOKE FUNCTIONS CHANGING SETUP MENU Karaoke Functions Using the Setup Menu Operation Sequence 1. Connect the Mixed Audio Out terminals with the TV or Amplifier. (see page 9 to 12) 2. Connect Mic into Mic jack. When a MIC is connected, the karaoke functions can be used. The Setup menu lets you customize your DVD player by allowing you to select various language preferences, set up a parental level, even adjust the player to the type of television screen you have. 1.
If you set the player menu, disc menu, audio and subtitle language in advance, they will come up automatically every time you watch a movie. Using the Player Menu Language 1. Press the MENU button. 2. Press the ¦/ buttons to select Language Setup, then press the or ENTER button. buttons to select Player Menu, then press 3. Press the / the or ENTER button. buttons to select the desired language, 4. Press the / then press ENTER button.
Using the DivX Subtitle Language 1. Press the MENU button. 2. Press the ¥/ buttons to select DivX Page, then press the or ENTER button. buttons to select DivX Subtitle, then press 3. Press the / the or ENTER button. buttons to select the desired language, 4. Press the / then press the ENTER button. - The language is selected and the screen returns to Language Setup menu.
❷ Screen Message Use to turn on-screen messages On or Off. ❸ Video Output Select Video Output. - I-SCAN: Select when you want to use Component Interlace (525i) Out. “DTS” and “DTS Digital Out” are trademarks of Digital Theater Systems, Inc. - P-SCAN: Select when you want to use Component Progressive (525p) Out. Setting Up the Display Options • If you press the VIDEO SEL. button, Video output mode is changed in regular sequence in no disc mode. (I-SCAN ➝ P-SCAN).
Note Setting Up the Parental Control ❶ KID SAFE ❷ G(General Audiences) : All Ages Admitted ❸ PG(Parental Guidance suggested): Some material may The Parental Control function works in conjunction not be suitable for young children. with DVDs that have been assigned a rating, which ❹ PG-13 (PG-13-Parents strongly cautioned) : Some material helps you control the types of DVDs that your family may be inapproriate for children under 13 watches. There are up to 8 rating levels on a disc.
English Note If you have forgotten your password, see “Forgot Password” in the Troubleshooting Guide.
REFERENCE Firmware upgrade Introduction Samsung will often support the software upgrade to improve the performance of this unit to the lastest status , trough samsung Internet Site(www.samsung.com) 2.Press enter or play to start upgrade. - Other key to cancel upgrade back to samsung logo and eject the disc. Upgrade file detected Curent version: 07.12.15.00 Upgrade ? Press Play to start File copying Firmware upgrade Start Because the specially new mpeg4 codec continuse and it is appearing.
Troubleshooting Before requesting service (troubleshooting), please check the following. Page No operations can be performed with the remote control. • Check the batteries in the remote control. They may need replacing. • Operate the remote control at a distance of no more than 20 feet. • Remove batteries and hold down one or more buttons for several minutes to drain the microprocessor inside the remote control to reset it. Reinstall batteries and try to operate the remote control again.
Specifications General Power Requirements AC 110-240 V, 50/60 Hz Power Consumption 9W 1.3 Kg Weight 360mm (W) X 200mm (D) X 37mm (H) Dimensions +5°C to +35°C Operating Temperature Range Operating Humidity Range 10 % to 75 % DVD (DIGITAL VERSATILE DISC) Disc Reading Speed : 3.49 ~ 4.06 m/sec. Approx. Play Time (Single Sided, Single Layer Disc) : 135 min. CD : 12Cm (COMPACT DISC) Reading Speed : 4.8 ~ 5.6 m/sec. Maximum Play Time : 74 min. CD : 8Cm (COMPACT DISC) Reading Speed : 4.8 ~ 5.
Contact SAMSUNG WORLD WIDE If you have any questions or comments relating to Samsung products, please contact the SAMSUNG customer care center. Region North America Latin America Country CANADA MEXICO U.S.A ARGENTINE BRAZIL CHILE NICARAGUA HONDURAS COSTA RICA ECUADOR EL SALVADOR GUATEMALA JAMAICA PANAMA PUERTO RICO REP.
Contact SAMSUNG WORLD WIDE If you have any questions or comments relating to Samsung products, please contact the SAMSUNG customer care centre. ☎ 1800-10-SAMSUNG(726-7864)/ www.samsung.