Laser Printer User’s Guide QwikLaser 6050
Copyright This manual is provided for information purposes only. All information included herein is subject to change without notice. Samsung Electronics is not responsible for any damages, direct or indirect, arising from or related to use of this manual. © 1998 Samsung Electronics Co. Ltd. All rights reserved. Trademark Notices •QwikLaser 6050 and Samsung logo are trademarks of Samsung Electronics Co. Ltd. •Centronics is a registered trademark of Centronics Data Computer Corporation.
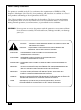
Notice FCC Regulations This equipment has been tested and found to comply with the limits for a Class B digital device, pursuant to Part 15 of the FCC Rules. These limits are designed to provide reasonable protection against harmful interference in a residential installation. This equipment generates, uses and can radiate radio frequency energy and, if not installed and used in accordance with the instructions, may cause harmful interference to radio communications.
EC Declaration of Conformity We, SAMSUNG ELECTRONICS CO.,LTD #259, Gong Dan-Dong, Gumi-City, Kyung Buk, Korea declare sole responsibility that the QwikLaser 6050 Laser printer meets the intent of Directive 89/336/EEC for Electromagnetic Compatibility and Low Voltage Directive 73/23/EEC.
Laser Safety Statement The printer is certified in the U.S. to conform to the requirements of DHHS 21 CFR, chapter 1 Subchapter J for Class I(1) laser products, and elsewhere is certified as a Class I laser product conforming to the requirements of IEC 825. Class I laser products are not considered to be hazardous. The laser system and printer are designed so there is never any human access to laser radiation above a Class I level during normal operation, user maintenance, or prescribed service condition.
Safety Information PRODUCT SAFETY USA & CANADA UL 1950 Third Edition (C-UL LISTING) EEC(Europe) EN 60950 (TÜV GS Certification) CB IEC 60950 LASER SAFETY EEC(Europe) EN 60825 USA 21 CFR, Chapter 1, Subchapter J (CDRH Certified) Power Saver This printer contains advanced energy conservation technology that reduces power consumption when it is not in active use. When the printer does not receive data for an extended period of time, power consumption is automatically lowered.
Contents Chapter 1 Introduction Unpacking the Printer ______________________________ 1-2 Control Locations and Functions ____________________ 1-2 Front View _______________________________________ 1-2 Inside ___________________________________________ 1-3 Rear View ________________________________________ 1-3 Using the Operator Panel ___________________________ 1-4 Indicator Light Status ______________________________ 1-4 Operator Panel Button Usage _______________________ 1-6 Chapter 2 Setting Up Your P
Chapter 4 Operating Your Printer Selecting Your Printer ______________________________ 4-2 Printing a Document _______________________________ 4-3 Printer Settings ____________________________________ 4-4 Using HELP ______________________________________ 4-7 Changing Printer Settings for All Documents _________ 4-8 Font Navigator ____________________________________ 4-9 How to use “Disk Image Utility” ____________________ 4-9 Remote Control Panel for Windows/Dos _____________ 4-10 Chapter 5 Troubleshooti
Chapter 1 Introduction
Unpacking the Printer Make sure that you have the items listed below: • Toner cartridge • Power cord • Centronics-compatible parallel cable (IEEE 1284-compliant) • Setup CD-ROM • This manual • Diskette (Only in U.S.A.) Notes: • If you need help during setup, or if any items are missing or damaged, notify your dealer immediately. Control Locations and Functions Front View Paper Support Supports paper stacked in the output bin. Output Bin Automatically stacks up to 250 sheets of printed paper, face down.
Inside Printer Cover Toner Cartridge Printer Cover Release Button To open the printer cover, press this button. Rear View Rear Cover Tab Pull it out to open the rear output tray. Rear Output Tray Holds printed paper, face up.
Using the Operator Panel The operator panel has 4 indicator lights and 1 button. ERROR MANUAL PAPER READY Indicator Light Status The indicator lights shows the current status including error condition. Off ERREUR MANUEL PAPIER PRET On Blinking On line If the READY light is on steadily, the printer is ready to print. ERROR Printer busy MANUAL If the READY light is blinking slowly, the printer is receiving data from PC.
ERROR MANUAL Paper jam READY If the ERROR and the PAPER light both are steadily on, there is paper jammed in the printer. See ‘Clearing Paper Jams’ on page 5-2. ERROR Manual feed mode PAPER MANUAL PAPER READY If the MANUAL and the READY light both are steadily on, the printer is in manual feed mode. It happens when you insert paper into manual feed slot, or when you select ‘Manual Feed’ source from your software application.
Operator Panel Button Usage The operator button is located in the operator panel. It can be used to accomplish the following functions: Function On line and Off line Description Briefly press the button. Each time you press the button, the printer goes to on-line or off-line status. The READY light goes on and off according to the line status. To print data, the printer should have on-line status.
Chapter 2 Setting Up Your Printer
Selecting a Location Place your printer on a flat, stable surface near your workstation. Leave enough space around the printer, so that you can easily: • open the printer cover • open the rear cover to remove jammed paper, or retrieve the paper when you use the rear output path • remove and install the paper cassette to load paper • allow air circulation around the vents to prevent the printer from overheating Do not place the printer: • in direct sunlight • near heat sources or air conditioners.
Installing the Toner Cartridge 1. Open the printer cover by pressing the cover release button. 2. Raise the printer cover. 3. Unpack the toner cartridge, and carefully remove the sealing tape.
4. Gently shake the cartridge from side to side 5 or 6 times to distribute the toner evenly inside the cartridge. 5. Find the cartridge slots inside the printer, one on each side. 6. Grasp the handle and slide the cartridge down between the cartridge slots, until it drops into place.
7. Close the printer cover. Make sure that the cover is securely closed. Connecting Your Printer to the Computer Your printer has parallel interface port, which allows you to use it with IBM PC and compatible computers. To connect the printer to the computer, follow the steps below: 1. Make sure that both the printer and computer are turned off. 2. Plug the cable into the connector on the back of the printer. Push the metal clips down to fit inside the notches on the cable plug. 3.
Attaching the Power Cord 1. Plug one end of the power cord into the connector on the printer. 2. Plug the other end into a properly grounded AC outlet. 3. Turn the printer on.
4. As the printer powers up, all operator panel lights turn on briefly. When only the READY light is steadily on, press and hold the operator panel button until all lights are blinking (approximately four seconds), then release the button. A test page should print out. If this does not happen, re-check the installation. ERROR MANUAL PAPER READY The test page lists your printer model and default settings along with the data streams available for your printer model.
Installing Printer Driver Overview Included with your printer is a CD-ROM containing printer drivers for some of the most popular Windows software applications. You must install a printer driver, which translates data from your application into data the printer understands. The CD-ROM shipped with your printer contains the following printer drivers and utilities. PCL6 is the combination of PCL5e and the new PCLXL printer language. • PCL5e: Printer driver for Windows 95/98, Windows 3.1x, and Windows NT 4.
Installation Procedure Before you start, make sure that your computer meets or exceeds the system requirements for the driver and application program you want to install. In Windows 95/98/NT 4.0 1. Insert the CD-ROM into your CD-ROM drive. 2. Type in the user name and company. Then click on the Next button. 3. Select the model to install. Then click on the Next button. 4. Follow the instructions on the screen. IF WINDOWS DOES NOT RUN THE CD-ROM 1. Insert the CD-ROM into your CD-ROM drive. 2.
IN CASE OF PLUG AND PLAY For Windows 95 1. Make sure the printer is plugged and connected to your computer. 2. Turn on the printer and start Windows on your computer. 3. Windows recognizes the printer, and ‘New Hardware Found’ dialog box is displayed. 4. Click on the OK button. 5. Insert the CD-ROM into your CD-ROM drive, and click on the Browse button. 6. Select the CD-ROM drive, then click on the OK button. 7. Follow steps 2 through 4 on page 2-9 to complete the installation. For Windows 98 1.
With Windows 3.1x 1. Make sure the printer is plugged in and connected to your computer. Turn on your printer and computer. 2. Insert the CD-ROM disk into your CD-ROM drive. 3. From Program Manager window, select Run from the File menu. The Run dialog box appears. 4. Type d: (or e:) \setup.exe on the command line, then click on the OK button. 5. Type the user name and company. Click on the Next button. 6. Select the model to install. Click on the Next button. 7. Follow the instructions on the screen.
MEMO 2-12 Setting Up Your Printer
Chapter 3 Paper Handling
Loading a Stack of Paper You can load approximately 250 sheets of paper in the paper cassette. If you purchase an optional cassette and attach it below the standard paper cassette (see ‘Second Cassette’ on page 6-8), you can also load paper in the optional cassette. 1. Remove the paper cassette by pulling it toward you. 2. The paper cassette is preset to load A4 size paper. If you want to load letter or legal size paper, move the guides to adjust the width and length you want to use.
3. Push down the metal plate to load paper. 4. Fan the paper and load the paper in the cassette with the print side facing down. The print side is usually indicated on the paper package. If you are using a preprinted stock, such as letterhead, place the printed design side face down with the top edge of the page toward the front of the cassette.
5. Make sure that the stack goes under the metal retaining clip A and the plastic tabs on the end guides. Paper overloading may cause paper jams. A 6. Make sure that the stack of paper does not exceed the line indicated by mark on the left inside wall of the cassette. 7. Adjust the guides if necessary. See page 3-6. 8. Insert the cassette back into the printer.
How To Adjust Paper Guides LENGTH GUIDES There are two main guides and one auxiliary guides for adjusting paper length. Please refer to the diagram below. One of main guides is for legal, A4, or folio size. The other is for letter (LTR), executive (EXEC), or B5 size paper. It is recommended that you use the auxiliary guide on the upper right corner of the cassette, in conjunction with the appropriate main guide, when loading letter size paper.
When you load letter, executive, or B5 size paper, it is recommended that you use the auxiliary guide with the main guide before loading paper. To adjust the auxiliary guide, remove the guide 1 , then insert it to the appropriate position 2 . B5 O LT R EX IS JIS B5 EO 1 B5 O LT EX IS JIS B5 EO R 2 WIDTH GUIDE Squeeze the guide as shown and slide the guide to the left until it lightly rests against the edge of the paper stack.
Manually Feeding Paper When you print on envelopes, heavier weight papers, transparencies, index cards, or paper labels, you must manually feed them one at a time through the manual feed slot. The manual feed slot is located on the top of the paper cassette. Manual Feed Slot 1. Open the rear output tray, if you want to use the rear output path. 2. Pull the paper cassette slightly toward you holding it by the hand grip on the front of the cassette and pulling it straight up and out.
The paper cassette tray drops down and fits into place. 3. Load the desired print material in the manual slot with the left edge to the far left of the slot. You must feed one at a time. ERROR MANUAL PAPER • If you use letterhead paper, load the letterhead paper with the design facing up. The top edge of the sheet with the logo should enter the printer first. • When you load transparency or label sheet with a paper backing, load with the paper side down.
Note: Never use envelopes with clasps, snaps, windows, coated linings, or self-stick adhesives. These envelopes may severely damage the printer. 4. Gently insert the print material until the printer starts to pick it, then let it go. The MANUAL light comes on. 5. Make sure that the paper source, the paper size, and the paper type are set to the correct value for the print material you are using from your software application, and start your print job. 6.
Using Rear Output Tray If you open the rear output tray, the printed paper is placed on the tray with the printed side facing up. If you experience paper jams, especially when you load paper, envelopes, or other special media manually, use the rear output tray. To use the rear output tray, open the rear cover. The cover functions as an output tray. Printed page is placed facing up. S a Pri msu nte ng r Note: The printed pages do not stack on the standard output bin unless you close the rear output tray.
Selecting Paper Types and Feed Source One of the most important things you can do to assure the best possible print quality from your printer is to select the correct paper. Your printer produces letter quality output on most plain bond papers, including cotton bond and photocopying papers; it does not require special papers. However, the print quality varies with different paper types. Be sure to test a small quantity of paper before you purchase a large quantity.
Paper Guidelines When selecting or loading paper, envelopes, or other special media, keep these guidelines in mind: • Attempting to print on damp, curled, wrinkled, or torn paper can cause paper jams and poor print quality. • Use cut-sheet paper only. You cannot use multipart paper. • Use only high quality, copier grade paper. Avoid paper with embossed lettering, perforations, or texture that is too smooth or too rough. • Coloured paper should be of the same high quality as white photocopy paper.
Chapter 4 Operating Your Printer
Selecting Your Printer To use all of the features of your Samsung QwikLaser 6050 printer, make sure it is selected as the default printer. When you install the printer driver, Samsung QwikLaser 6050 is automatically set as the default printer. If you use more than one printer, select QwikLaser 6050 as the default printer as follows: Windows 95/98/NT 4.0 1. Select Start, Settings, then Printers. 2. Double-click Samsung 6050 PCL5e or Samsung 6050 PCLXL. 3. Select Set As Default from the Printer menu.
Printing a Document This procedure describes the general steps required for printing from various Windows applications. The exact steps for printing a document may vary depending on the application program you are using. Refer to your software application’s documentation for the exact printing procedure. 1. Start the program you are using to create the document, and open the document you want to print. 2. Choose Print or Print Setup from the File menu.
Printer Settings Most Windows applications allow you to make changes to the print settings. This changes the number of copies, sequence of the pages, paper orientation, and margins. If you click Properties, Setup, or Options in the Print dialog box, you’ll access the printer driver’s dialog box. It allows you to change additional printer settings. Note: Most Windows applications will override settings you specify in the printer driver.
RCP Using this tab, you can control the following printer features: Auto Continue It determines the action to be taken when a manual feed print job is sent to the printer and there is no paper in the manual feeder. If Auto Continue option is set to ON, the printer picks up the paper from the paper cassette after 10 seconds. Otherwise, the printer waits for you to load paper in the manual feeder. Econo Mode It determines the toner quantity to use when printing.
Samsung 6050 PCLXL driver’s Properties dialog box includes 9 tabs. Paper Using this tab, you can change the paper orientation and size, and source. Source setting identifies the default paper source. Option Cassette source is available if the optional cassette is installed. Manual Feed source is used when manually feeding envelopes or other print material. With it set to Auto Select, the printer automatically selects the print material according to the print job.
Finishing Using this tab, you can select job finishing mode, e.g., Multiple pages per side and Fit to page. Printer Using this tab, you can change the printer resolution, memory setting, and print to file format. Overlays This tab displays a list of currently loaded overlays and the options to load an overlay or create a new overlay. Watermarks Using this tab, you can print texts in the foreground of a document. There are a few predefined watermarks that come with the printer driver.
Changing Printer Settings for All Documents Changing the printer settings from your program will change them for one document. If you want to make the change for all documents you print on this printer, do as follows: In Windows 3.1x 1. From Program Manager, double-click Main. 2. Double-click Control Panel and then Printers. The Print dialog box appears. 3. Make sure that the correct printer is selected as default printer. 4. Click Setup. The selected printer’s Setup dialog box appears. 5.
Font Navigator Font Navigator is a font manager for Windows 95/98, Windows NT 4.0, and Windows 3.1x. It gives a quick and easy way to find fonts, install fonts, and print font samples. To access the Font Navigator, select Programs from the Start menu, and select Font Navigator. How to use “Disk Image Utility” 1. Insert the CD-ROM. 2. Change directory to “Diskutil”. (ex; D:\Diskutil\) 3. Select the model that you want. 4. Select the language that you want to install. 5. Execute “CDTODISK.exe”. 6.
Remote Control Panel for Windows/Dos The Remote Control Panel dialog box includes six tabs. PRINTER Power Save Determines the length of time the printer waits after a job is printed before it goes to a reduced power state. If the printer is used constantly, select OFF which keeps the printer ready to print with the minimum warm-up time. This uses more energy to keep the printer warm and ready to print.
Orientation Determines how the printing is oriented on the page. FONT SETUP Typeface Allows you to select the desired typeface. This setting is ignored when the software application specifies a font. Symbol Set Determines the symbol set. A symbol set is a set of alphabetic and numeric characters, punctuation, and special symbols used when printing with a selected font. Pitch If you chose a scalable monospaced font, you can select the font pitch.
SMET SMET (Samsung Memory Enhancement Technology) mode makes the printer process more data by optimizing the memory. With this mode set to ON, the complex data can be processed. Note: SMET Mode item is available in PCLXL driver only. TEST Configuration Sheet This prints detailed information on the printer. Demonstration Page This page prints a one page summary of the main features of this printer. ABOUT This tab shows the software version and copyright information.
Chapter 5 Troubleshooting and Maintenance
Clearing Paper Jams By carefully selecting paper types and loading them properly, you should be able to avoid most paper jams. If paper jams occur, an error message appears on the Status Monitor which pops up automatically each time you use the printer. The PAPER and the ERROR indicator light both come on steadily on the operator panel. Follow the steps below to clear jam. To avoid tearing paper, pull the jammed paper out gently and slowly. Paper Jam in Output Area 1.
3. Loosen the paper if it is caught in the feed rollers. Then pull the paper gently out. 4. Close the rear cover. 5. To resume printing, open the printer cover, then close the cover back.
Paper Jam in Input Area 1. Pull the paper cassette half way out of the printer. 2. If you see the paper jammed, pull the paper back out of the printer toward you. 3. Slide the cassette back into the printer. Note: If a short piece is visible and you cannot grasp it, or if you do not see the paper, the jam has occurred inside the printer. See the following page. 4. After clearing the jam, if the printer does not resume printing, open the printer cover, then close it back.
Paper Jam Inside Printer 1. Open the printer cover by pressing the cover release button, and raise the cover. 2. Remove the print cartridge. 3. Gently pull the paper toward you. 4. Check that there is no other paper in the printer. 5. Reinstall the printer cartridge, then close the printer cover.
Paper Jam in Optional Paper Cassette 1. Pull the upper paper cassette half way out of the printer. 2. If you see that the paper is jammed, pull the paper out. 3. Slide the upper cassette back into the printer. Note: If a short piece is visible and you cannot grasp it, or if you do not see the paper, the jam has occurred inside the optional paper cassette. See the following page.
4. Pull the lower paper cassette out of the printer. 5. If you see that the paper is jammed, pull the paper out. 6. Slide the cassettes back into the printer. 7. After clearing the jam, if the printer does not resume printing, open the printer cover, then close it back.
Tips for Avoiding Paper Jams By carefully selecting print materials and loading them properly, you should be able to avoid most paper jams. If jams do occur, follow the steps outlined in “Clearing Paper Jams” starting on page 5-2. If jams occur frequently, make sure you are following these tips to avoid jams. • Follow the procedures in “Loading a Stack of Paper” on page 3-2 to load paper properly. Make sure the adjustable guides are positioned correctly. • Do not overload the paper cassette.
Fixing Problems Note: The causes listed in the table below are probable causes only, and may not represent all of the possible cases which may occur under actual operating conditions. If you experience a problem which does not seem to fall under any of the cases listed in this table, or if you are concerned about any other aspect of printer operation, contact an authorized service representative. Printing Problems Problem Possible Cause and Remedy The printer does not print.
Problem The paper is not fed into the printer. Possible Cause and Remedy • Paper has not been loaded correctly. Remove the paper cassette and reload the paper correctly. • There is too much paper in the paper cassette. Remove some of the paper from the cassette. The printer ejects blank pages. • The print cartridge is empty. Replace the print cartridge. See page 5-16. • When you load paper, make sure that the paper stack goes under the metal retaining clip A . Half of the page is blank.
Problem Possible Cause and Remedy The paper keeps jamming. • There is too much paper in the paper cassette. Remove some of the paper from the cassette. If printing onto envelopes, transparencies, or labels, insert them one at a time in the manual feed slot. • An incorrect type of paper is being used. Use only paper that meets the specifications required by the printer. • An incorrect output method is being used. Items such as thick paper should not be printed using the standard output bin.
Print Quality Problems Problem Irregular faded patches of print Possible Cause and Remedy • There is a paper quality problem. Use only paper that meets the specifications required by the printer. • Toner may be unevenly distributed. Remove the print cartridge and shake it gently to evenly distribute the toner. Then replace the print cartridge. Black staining • There is a paper quality problem. Use only paper that meets printer specifications. • A print cartridge from another printer has been installed.
Problem Possible Cause and Remedy Missing characters • The paper may be too damp. Try printing with a different batch of paper. Do not open packages of paper until necessary so that the paper does not absorb too much moisture from the air. Back of printout dirty • The transfer roller may be dirty. Print a few blank pages to clean the transfer roller. Incorrect fonts • TrueType fonts may be disabled. Use the Fonts dialog box in the Control Panel to enable TrueType fonts.
Before You Call For Service If you’re unable to solve your printer problems, you may want to call for service.
Managing Toner Cartridge Expected Cartridge Life The life of your toner cartridge depends on the amount of toner used in each print job. For instance, when you print a typical business letter with about 5% page coverage, you can expect a toner cartridge life of approximately 5,000 pages. (You can check the amount of printed page by printing a test page. See page 1-6.) The actual number may vary according to the print density of the page you print.
To replace the toner cartridge: 1. Open the printer cover by pressing the cover release button, and raise the printer cover. 2. Remove the old toner cartridge. Follow the instructions printed on the cartridge box to recycle the used cartridge. 3. Unpack the new toner cartridge, and carefully remove the sealing tape.
4. Gently shake the cartridge from side to side 5 or 6 times to distribute the toner evenly inside the cartridge. 5. Find the cartridge slots inside the printer, one on each side. 6. Grasp the handle and slide the cartridge down between the cartridge slots until it drops into place. Then, close the printer cover.
MEMO 5-18 Troubleshooting and Maintenance
Chapter 6 Printer Options
Memory and Option Cards You can purchase optional memory for your printer to enhance its performance. The cards are installed on the control board inside the printer. Accessing the Printer Control Board Complete the following steps before you install a printer memory option. 1. Turn the printer power Off (0) and unplug the printer power cord. Disconnect the printer cable. 2. Remove the cover located at the right side of the printer.
3. Remove one screw. Slide the metal shield cover in the direction of the OPEN arrow marked on the cover, then remove the shield cover. OP EN CL OS E Note: You’ll see a part of the control board. If you want to install only a printer memory option, you can now install the memory option. It’s not necessary to open the control board again. Continue to ‘Printer Memory Option’ on page 6-5. 4. Unplug the two connectors from the control board.
5. Remove the three screws securing the board and pull the board out of the printer. 6. Locate the appropriate connector for the option you want to install. Memory connector 7. Continue to the appropriate section for installation instructions: - See ‘Printer Memory Option’ on page 6-5. 8. After you have completed installing all of your options on the printer control board, insert the board in place, tighten the screws, plug the connectors, replace the shield, then close the cover.
Printer Memory Option The printer memory option increases the printer dynamic random access memory (DRAM). Additional printer memory allows the printer to print complex jobs and operate more efficiently. Anything that is stored in printer memory is lost when the printer is turned off. Your printer is shipped with 4MB of standard memory. You can install one memory option in your printer. The upgrade options available are 4, 8, 16, or 32MB.
3. Hold the memory option with the connection points pointing toward the connector and the notch upward. Notch Connection points 4. Insert the memory option all the way into the connector at a 30o angle, and rotate it down until it snaps into place.
5. Make sure both metal clips on the connector are fastened and the two pins on the connector are pushed through the holes on the memory option. Clip Pin 6. If you need to install another option on the control board: Note: After you complete installing, you have to set the Printer Memory item on the Printer Properties dialog box to the upgraded value. To access the Properties dialog box, see page 4-8. Removing a Memory Option 1.
Second Cassette You can install an optional 250-sheet paper cassette. The cassette consists of a support unit and a paper cassette. Support unit Paper cassette Installing Second Cassette If your printer is already set up, make sure the printer power is off. Unplug the power cord and disconnect the printer cable attached to the printer. 1. Locate the following parts located on the top surface of the support unit ; the tabs, and the connector.
2. Place the printer on the top of the support unit. Be sure the edges of the printer and the support unit are aligned so that all the parts fit. 3. Load paper in the cassette. See ‘Loading a Stack of Paper’ on page 3-2. 4. Reconnect the printer cable, then plug in the printer power cord. Then, turn the printer power On (I). 5. To use paper in the optional cassette, select the paper source as Option Cassette from your application program, then start your print job. See page 4-4.
MEMO 6-10 Printer Options
Appendix
Specifications Paper Size The following table gives details about the print material you can load in each of the printer trays. Paper Paper size Cassette Optional Cassette Manual Tray A4 210 ✕ 297 ● ● ● LETTER 216 ✕ 279 (8.5✕11”) ● ● ● FOLIO (LEGAL 13”) 216 ✕ 330 (8.5✕13”) ● ● ● LEGAL (LEGAL 14”) 216 ✕ 356 (8.5✕14”) ● ● ● EXECUTIVE 184 ✕ 267 (7.25✕10.5”) ● ● ● STATEMENT 140 ✕ 216 (5.5✕8.5”) ISO B5 176 ✕ 250 ● ● ● JIS B5 182 ✕ 257 ● ● ● A5 148.
Controller Characteristic Description CPU ARM7 KS32C6100 Emulations Default : PCL6 Memory • 4MB Standard • Max up to 36 MB Interface • IEEE 1284 B type Font 45 Scalable font, 1 Bit Map Device Driver PCL : Windows 3.1x/95/98/NT 4.
Cable Characteristic Parallel Description IEEE 1284 Paper Handling Characteristic Description Input Capacity 250 sheets Optional Input 250 sheets Output Capacity 250 sheets Facedown Environment Characteristic Description Temperature Operating : 10 OC ~ 30 OC Storage : 0 OC ~ 35 OC Humidity Operating : 30 % ~ 80 % Storage : 10 % ~ 90 % A-4 Appendix
ELECTRONICS Visit us at: http://samsungprinter.com If you have access to this online service, you can download the User’s Guide and drivers from Samsung Electronics. P/N. JC68-00060A Rev. 5.