
User`s guide


Table Of Contents
- Contents
- Introduction
- Software overview
- Getting Started
- Loading originals and print media
- Copying
- Understanding the Copy screen
- Copying originals
- Changing the settings for each copy
- Using special copy features
- ID card copying
- Copying ID with the manual ID copy option
- 2-up or 4-up copying (N-up)
- Poster copying
- Clone copying
- Book copying
- Booklet copying
- Cover copying
- Transparency copying
- Watermark copying
- Overlay copying
- Auto crop copying
- Multi-Bin
- Erasing edges
- Erasing background images
- Shifting margins
- Gray enhance copying
- Adjusting backside images
- Faxing (Optional)
- Preparing to fax
- Sending a fax from a computer
- Understanding the Fax screen
- Sending a fax
- Receiving a fax
- Adjusting the document settings
- Setting up a fax phonebook
- Using the polling option
- Using Mailbox
- Printing a report after sending a fax
- Sending a fax in toll save time
- Adding documents to a reserved delay fax job
- Forwarding a received fax to other destination
- Forwarding a sent fax to other destination by a fax
- Forwarding a received fax to other destination by a fax
- Forwarding a sent fax to other destination by an email
- Forwarding a received fax to other destination by an email
- Forwarding a sent fax to other destination by server
- Forwarding a received fax to other destination by server
- Setting up the end fax tone
- Setting up receiving faxes in color
- Scanning
- Basic printing
- Using USB flash memory
- Machine status and advanced setup
- Maintenance
- Printing a machine report
- Monitoring the supplies life
- Finding the serial number
- Sending the imaging unit reorder notification
- Sending the toner reorder notification
- Checking Document Box
- Cleaning your machine
- Maintaining the toner cartridge
- Redistributing toner
- Replacing the toner cartridge
- Replacing the imaging unit
- Replacing the waste toner container
- Maintenance Parts
- Managing your machine from the website
- Troubleshooting
- Ordering supplies and accessories
- Installing accessories
- Specifications
- Glossary
- Index
- Software section
- Software section Contents
- Installing Printer Software in Windows
- Basic Printing
- Advanced Printing
- Using Windows PostScript Driver
- Using Direct Printing Utility
- Sharing the Printer Locally
- Scanning
- Using Smart Panel
- Using Your Printer in Linux
- Using Your Printer with a Macintosh
- Software section Index
5.1 <
Copying>
5 Copying
This chapter gives you information about using your machine as a copy
machine.
This chapter includes:
• Understanding the Copy screen
• Copying originals
• Changing the settings for each copy
• Using special copy features
Understanding the Copy screen
When you press Copy on the Main screen, the Ready To Copy screen
appears which has several tabs and lots of copying options. All the
options are grouped by features so that you can configure your selections
easily.
If the screen displays an other menu, press ( ) to go to the Main
screen.
Basic tab
• Original Size: Selects the size of the originals. (Page 5.3)
• Reduce/Enlarge: Reduces or enlarges the size of a copied image.
(Page 5.3)
• Duplex: Sets the machine to print copies on both sides of the
paper. (Page 5.3)
• Output: Selects Collated or Uncollated copy options. If you
install the optional stacker & stapler, then the staple related option
appears. (Page 5.4)
• Text, Text/Photo, Photo, Magazine: Improves the copy quality by
selecting the document type for the current copy job. (Page 5.5)
• Color, B/W, Auto: You can switch this mode among color, black/
white and automatic mode. Select whether the user print copies in
mono or color. If you select the Auto mode, the machine detects
the original document and decide the output is colored or not. In
this case, the copying speed will be reduced.
Note
• When Auto mode is used, there maybe some orginals for
which the mode is not correctly switched between
in color and
black/white
. In this case, select Color or B/W manually as
appropriate to the original.
• Light, Dark: Adjusts the brightness level to make a copy that is
easier to read, when the original contains faint markings and dark
images. (Page 5.5)
• Paper Supply: Selects the paper supply tray.
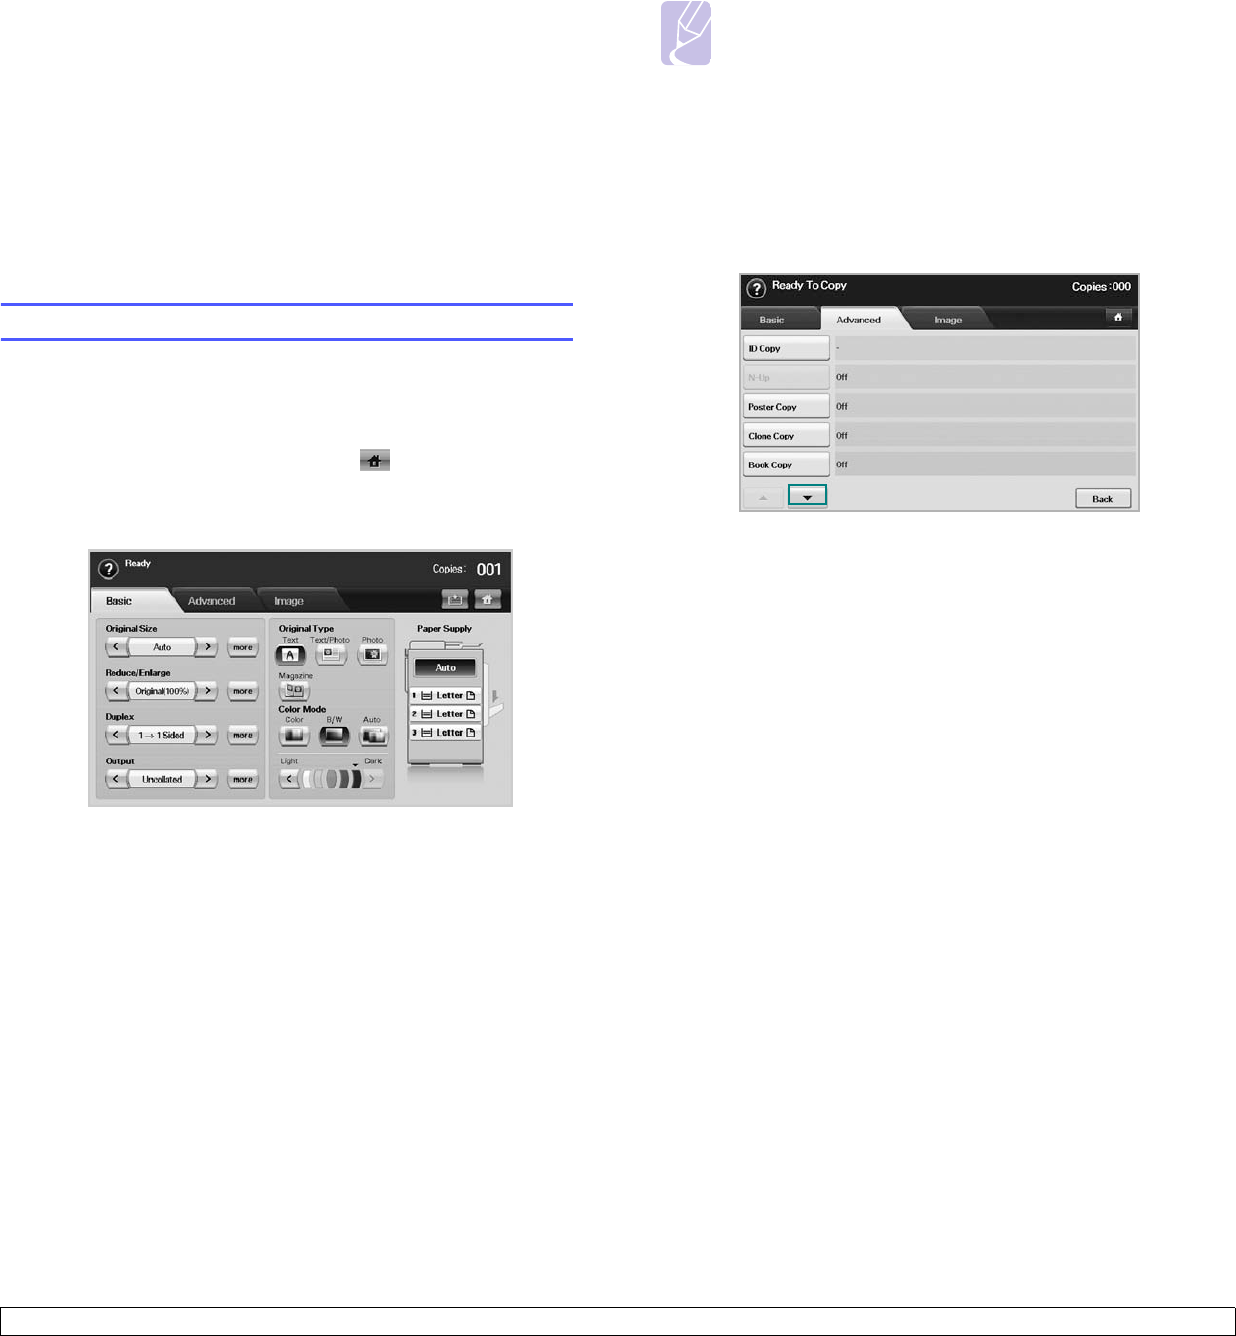
Advanced tab
• ID Copy: Prints 2-sided originals on one sheet of paper. This
feature is helpful for copying a small-sized item, such as a
business card. (Page 5.5)
• N-Up: Prints 2 or 4 original images, reduced to fit onto one sheet of
paper. (Page 5.5)
• Poster Copy: Prints a large image into divided 9 pages.
(Page 5.6)
• Clone Copy: Prints multiple image copies from the original
document on a single page. (Page 5.7)
• Book Copy: Allows you to copy an entire book. (Page 5.7)
• Booklet: Creates booklets from a sequential set of either 1-sided
or 2-sided originals. (Page 5.7)
• Covers: Automatically adds covers to your copied set using stock
taken from a different tray. (Page 5.8)
• Transparencies: Adds a blank or printed divider between
transparencies within a set. (Page 5.8)
• WaterMark: Prints an image with the added watermark. (Page 5.8)
• Overlay: Prints an image with the image previously stored in your
machine. (Page 5.8)
• Auto Crop: Prints only the image of an original after cropping the
blank parts like the margin. (Page 5.8)
• Multi-Bin: Allows you to select the output mode. (Page 5.9)