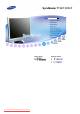
! ! ! ! SyncMaster 711LT/ 911LT Install drivers Downloaded from ManualMonitor.
Notation Failure to follow directions noted by this symbol could result in bodily harm or damage to the equipment. Prohibited Important to read and understand at all times Do not disassemble Disconnect the plug from the outlet Do not touch Ground to prevent an electric shock Power When not used for extended period of time, set your computer to DPM. If using screen saver, set it to active screen mode. The images here are for reference only, and are not applicable in all cases (or countries).
Otherwise, this may result in electric shock or fire. Do not touch the power plug with wet hands when removing or plugging the plug into the outlet. Otherwise, this may result in electric shock. Make sure to connect the power cord to a grounded power outlet. Otherwise, it may result in electric shock or personal injury. Ensure that the power plug is plugged into the power outlet firmly and correctly. Otherwise, this may result in fire.
Installation Be sure to contact an authorized Service Center when installing your monitor in a location with heavy dust, high or low temperatures, high humidity, and exposed to chemical substances and where it operates for 24 hours such as at airports, train stations etc. Failure to do so may cause serious damage to your monitor. Do not drop the monitor when moving it. This may cause damage to the product or the person carrying it. Ensure that at least two persons lift and move the product.
Put down the monitor carefully. Failing to do so may damage the monitor. Do not place the front of the product on the floor. Otherwise, this may result in damage to the screen display. Ensure that an authorized installation company installs the wall mount. Otherwise, it may fall and cause personal injury. Make sure to install the specified wall mount. Install your product in a well ventilated location. Ensure that there is a clearance of more than 10 cm from the wall.
cleaner other than the monitor cleaner, dilute it with water at a ratio of 1:10. When cleaning the power plug pins or dusting the power outlet, clean it with a dry cloth. Otherwise, it may result in fire. When cleaning the product, make sure to disconnect the power cord. Otherwise, it may result in electric shock or fire. When cleaning the product, disconnect the power cord and clean it softly with a dry cloth.
Do not place this product in a location exposed to moisture, dust, smoke, water, or in a car. Otherwise, this may result in electric shock or fire. When you drop the product or the case is broken, turn the power off and disconnect the power cord. Contact a Service Center. Otherwise, this may result in electric shock or fire. If thunder or lightening is occurring, do not touch the power cord or antenna cable. Otherwise, this may result in electric shock or fire.
If water or foreign material enters the product, disconnect the power cord and contact a Service Center. Otherwise, this may result in electric shock or fire. When using a fixed screen for a long time, an afterimage or stain may occur. If you are not using your product for a long period of time, put it into sleep mode or use a moving screen saver. Set a resolution and frequency appropriate to the product. Otherwise, your eyesight may be damaged.
If you do not use the product for a long period of time, disconnect the power cord from the power outlet. Otherwise, this may result in overheating or fire due to dust, and may result in fire due to electric shock or leakage. Do not place any heavy items or toys or confectionery, such as cookies etc. that may attract the attentions of children onto the product. Your children may hang onto the product causing it to fall and this may result in personal injury or death.
Be careful when adjusting the angle of the product or the height of the stand. This may result in personal injury as your hand or fingers may become caught. Also, if you tilt the product too far, it may fall and cause personal injury. Do not install the product in a location low enough for children to reach. Otherwise, it may fall and result in personal injury. Since the front part of the product is heavy, install the product on a level and stable surface. Do not put any heavy objects on the product.
conditions of the purchase contract. This product should not be mixed with other commercial wastes for disposal. Downloaded from ManualMonitor.
Features Tuning the power off while booting up a Client may damage the monitor In addition, exit all running programs before turning the monitor off. What is Client Monitor? Client Monitor is a new type of monitor that can be used as a general monitor and can also be used as a terminal by connecting it to a host PC with a LAN connection so that you can use a Client Monitor to access the Internet, create a document and edit an image file. In addition, you can connect an external storage device (e.g.
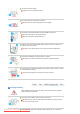
Please make sure the following items are included with your monitor. If any items are missing, contact your dealer. Contact a local dealer to buy optional items. Unpacking Without stand With Stand Manual Quick Setup Guide Warranty Card (Not available in all locations) User's Guide, Monitor Driver, Natural Color software, MagicTune™ software Cable Power Cord Sold separately Keyboard (USB) Your Monitor Front Downloaded from ManualMonitor.
MENU button [ ] Opens the OSD menu. Also use to exit the OSD menu or return to the previous menu. MagicBright™ button [ ] MagicBright™ is a new feature providing optimum viewing environment depending on the contents of the image you are watching. Currently six different modes are available : Custom, Text, Internet, Game, Sport and Movie. Each mode has its own pre-configured brightness value. You can easily select one of six settings by simply pressing MagicBright™ control button.
mode -- Analog or Client input signal.) >> Click here to see an animation clip AUTO button Power button [ Use this button for auto adjustment. >> Click here to see an animation clip ] Use this button for turn the monitor on and off. Be careful as pressing the Power button in client mode will shut down Windows XPe. Be careful that if you force shut down Windows it may cause damage. In these cases your monitor will be forcefully shut down and this may cause damage to your operating sysetm.
and turn it in the locking direction ( ). 2. Connect the Kensington Lock cable. 3. Fix the Kensington Lock to a desk or a heavy stationary object. Cable Fix Ring When connecting the cable is finished, fix the cables to the Cable Fix Ring. Earphone jack [ ] Headphone connection terminal. The Microphone connection terminal (MIC) Connect a microphone to the MIC terminal.
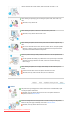
Connecting Cables Connecting Cables (When used as a normal monitor) Connect the power cord for your monitor to the power port on the back of the monitor. Plug the power cord for the monitor into a nearby outlet. Use appropriate connection for your computer. Using the D-sub (Analog) connector on the video card. - Connect the D-Sub Cable to the VGA IN port on the back of your monitor. [VGA IN] Using Macintosh - Connect the monitor and the Macintosh computer using the computer connection cable.
USB (USB Connection Terminal) Connect USB devices such as a mouse, keyboard and external storage devices (DSC, MP3, external storage, etc.). LAN (LAN Connection Terminal) Connect the LAN cable. RS-232C Connection Terminal Connect a RS-232C cable to this terminal. D-sub 15-pin port [VGA OUT] Use it by connecting it to another monitor. (The picture of the main monitor is displayed on the connected monitor.
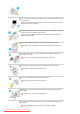
You can easily adjust the position of the monitor screen from right to left using the rotating stand. Rubber stubs are attached at the bottom of the monitor to help fix it to the installation location. Using Other Stands Attaching a Base This monitor accepts a 100 mm x 100 mm VESA-compliant mounting interface pad. Monitor Mounting interface pad ( Sold separately ) Turn off your monitor and unplug its power cord.
z z mount the monitor at least 10cm away from the wall surface. Contact the nearest Samsung Service Center for more information. Samsung Electronics will not be responsible for damages caused by using a base other than those specified. Please use Wall Mount according to the International standards. Downloaded from ManualMonitor.
Introduction Welcome Congratulations on purchasing one of the Samsung Linux-based Thin Client models. The Samsung Thin Clients are composed of state-of-the-art hardware and an operating system based on the Samsung Flash Linux Technology. We have done our best to deliver an excellent product and we promise to provide support and service of the same quality.
PXE Network Boot Support Yes Yes SSH Yes Yes DHCP Yes Yes DPMS Yes Yes Screen Saver Yes Yes USB Mass Storage Yes Yes EmelFM2 EmelFM2 Yes Yes 1.2.32 1.2.32 Yes Yes File Browser Smart Card Support Icewm Thin Print Boot Procedure System BIOS The BIOS looks for extensions in the appropriate memory area. The next step is the execution of the master boot record, which starts a secondary stage loader.
Control Center (Global Settings) Starting the Control Center Once the STC boots up, you have the option to set the STC as per your choice using the settings provided in the Control Panel. The Control Panel can be accessed using two methods. From the start menu Select the Settings option from the Start Menu. You can set up your STC using the options provided in the Settings tab.
Resolution It can be set to any one of the following screen size. z z z 800 x 600 1024 x 768 1280 x 1024 Color It can be set to any one of the following color depths. 8 bit ( Low Color / 256 Colors) 16 bit ( High Color / 65,535 Colors) z 24 bit ( True Color / 16.7 Million Colors) Screen Saver It can be set to any one of following types with Waiting Time. z z z z z None : In this, the screensaver option is disabled. This is the default choice.
Keyboard Type Choose your keyboard type from the available options from the drop box. Character Repeat In this section you can set the auto repeat behavior for the keyboard: Repeat delay: - Sets the delay time (in relative value) between pressing a key and the start of the auto repeat mode. z Repeat rate: - Sets the number of repeated characters per second (relative scale). At Boot Option This sub-menu has three options to be set z z z z Num Lock: - Enable this if Num Lock is to be activated after reboot.
z z Session Name: - Enter the name for the session to be saved or loaded. Load / Save / Delete: - For loading, saving or deleting a saved session from memory. It is possible to select/create a new/existing mount point using the Control Centre dialog boxes itself. The process is described here along with figures. First the IP address of the NFS server is given. It automatically lists all the directories shared on that NFS server which can be seen like this.
It is possible to select/create a new/existing mount point using the Control Centre dialog boxes itself. The process is described here along with figures. First the IP address of the Samba server is given. It automatically lists all the directories shared on that Samba server which can be seen as shown in the figure below. Then the directory where the share has to be mounted is selected. z Then a new empty directory is created and named accordingly.
ICA Global Settings Citrix® Independent Computing Architecture (ICA)® allows users to connect remotely to servers running Citrix MetaFrame. ICA Client offers quick, secure access to applications, content, and entire desktops published on servers running MetaFrame. ICA separates the user interface from the application while keeping the logic on the server. By doing this, only screen updates, mouse clicks and keystrokes traverse the connection media.
accessible on the network and using the chosen browsing protocol. TCP/IP If your network configuration uses routers or gateways, or to eliminate additional network traffic by the broadcasts, you can set specific server addresses for the Citrix servers from which the list of available servers and/or published applications should be requested.
and over again. Set the maximum size of local system memory (in kilobytes) to be used for caching and the minimum size of bitmaps to be cached and the directory the files should be stored locally. A too high setting might leave the Thin Client with too low memory for its system and other applications! In doubt, you have the possibility of adding RAM to your Thin Client. Drive Mapping "Drive Mapping" makes any directory mounted on your Thin Client available to you during ICA sessions on Citrix servers.
You can perform bi-directional mapping between serial devices that are attached to the Thin Client (e.g. scanners, serial printers) and the Citrix Server's COM ports. This enables programs running on the server to exchange data with the local devices. COM Port Devices Select the COM port your device is attached to from this drop-down box: /dev/ttyS0 stands for the local COM1 and /dev/ttyS1 stands for the local COM2.
PNAgent This “PNAgent” (Program Neighborhood Agent) page allows you to configure and search for published applications by Metaframe servers. Server: You need to provide the IP address of server with which you want to connect. The “Refresh Settings” or “Change->Update” settings will update the settings published by Metaframe server. Logon Method: Here you may want to specify how you want to connect to server. You can select either “Prompt User” or “Anonymous Logon”.
This page allows you to configure how you want to connect to your Metaframe servers. However options are self explanatory. The page is enabled only when the you have selected your Logon Method as "Prompt User" at Server page. Session Options: Most of the options in this page are self explanatory. Handling of Keyboard Shortcuts Translated applies keyboard shortcuts to the local desktop rather than the remote desktop.
This menu allows time settings for the STC to be configured. The available options to be set are Date This menu section allows you to configure the date settings for the STC. The available options are z z z Year: - Enter the year you want to set the date to. Month: - Enter the month you want to set the date to. Date: - Enter the day number of the month you want to set the date to. Time This menu section allows you to configure the time settings for the STC.
Apart from these options, there also is a Factory Reset option available that is used to reverse any unnecessary changes being made by the user knowingly/unknowingly. It replaces the main settings and configuration files in the system with the default files that were present at the time of installing the OS. Upgrade It is used to upgrade the STC OS.
password has to be provided. Upgrade Using NFS The firmware file is present in the location specified by the NFS share address. No username or password is needed. The upgrading process displays a warning message before starting the process. This warning message is used to remind the user that once the upgradation process starts, there is no way that the user can access the STC or the files present on it.
Automatic Logon : Select if you want to logon automatically. { User Name: User Name to be used for connection. { Password: Password to be used for connecting to the system. { Domain: Domain name in which the system is present on the network. Display The Display tab of the Connection Manager has the following display properties to be set while connecting to the remote desktop / server z Remote Desktop Size: - Size of the window when connection is established.
z z Screen Size: - Size of the window when connection is established. Color Depth: - Color depth to be used while connecting to the server. Input "View Only" Specifies that no keyboard or mouse events should be sent to the server. It is a useful feature if you want to view a desktop without interfering. Misc Shared: When you make a connection to a VNC server, all other existing connections are normally closed.
Xterm Xterm is the terminal used in STC wherein we can execute local commands using a shell. It is the basic busybox shell that is used in the Xterm as the command prompt. The X-term can be used to perform all the functionalities that we can do from the various application GUIs. The terminal can be invoked from the start menu, desktop icon, mouse right click or from shortcut provided on the taskbar. We can also perform many functions with the Xterm using the local commands.
fdisk free halt ifconfig insmod kill killall lsmod mkdir modprobe mount ping poweroff rdesktop rm rmdir rmmod reboot shutdown top udevd umount uname vi whoami pwd x11vncserver xpdf xterm busybox Used for getting or altering partition table information Displays the amount of free and used system memory To halt/shutdown the system To get IP information for the system Insert a kernel module Kills a specified application Kills a specified process Lists the kernel modules already inserted Create an empty direct
command prompt using the commands "shutdown" or "reboot", or using the shutdown interface as shown below. This interface is accessible using the start menu, mouse right click and from the power button of the thin client. The available options are as shown here The suspend button will make the system to suspend state. Once the system is in suspend state you can get back to your previous session without much effort just by pressing power button on thin client panel. Downloaded from ManualMonitor.
Monitor Driver When prompted by the operating system for the monitor driver, insert the CD-ROM included with this monitor. Driver installation is slightly different from one operating system to another. Follow the directions appropriate for the operating system you have. Prepare a blank disk and download the driver program file at the Internet web site shown below. Internet web site :http://www.samsung.com/ (Worldwide) http://www.samsung.com/monitor (U.S.A) http://www.sec.co.kr/monitor (Korea) http://www.
This monitor driver is under certifying MS logo, and this installation doesn't damage your system. The certified driver will be posted on Samsung Monitor homepage http://www.samsung.com/ Monitor driver installation is completed. Installing the Monitor Driver (Manual) Windows Vista | Windows XP | Windows 2000 | Windows ME | Windows NT | Linux Microsoft® Windows Vista™ Operating System Insert your Manual CD into your CD-ROM drive. Click (Start) and "Control Panel".
Click "Properties" in the "Monitor" tab. If the "Properties" button is deactivated, it means the configuration for your monitor is completed. The monitor can be used as is. If the message “Windows needs…” is displayed, as shown in the figure below, click "Continue". This monitor driver is under certifying MS logo, and this installation doesn't damage your system. The certified driver will be posted on Samsung Monitor homepage http://www.samsung.com/ Click "Update Driver…" in the "Driver" tab.
Select the model that matches your monitor from the list of monitor models on the screen, and click "Next". Click "Close"→ "Close" → "OK" → "OK" on the following screens displayed in sequence. Microsoft® Windows® XP Operating System Insert the CD into the CD-ROM drive. "Start" → "Control Panel" then click the "Appearance and Themes" icon. Downloaded fromClick ManualMonitor.
Click "Display" icon and choose the "Settings" tab then click "Advanced." Click the "Properties" button on the "Monitor" tab and select "Driver" tab. Click "Update Driver." and select "Install from a list or." then click the "Next" button. Select "Don't search ,I will." then click "Next" and then click "Have disk". the "Browse" button then choose A:(D:\Driver) and choose your monitor model in the model Downloaded fromClick ManualMonitor.
list and click the "Next" button. If you can see following "Message" window, then click the "Continue Anyway" button. Then click the "OK" button. This monitor driver is under certifying MS logo, and this installation doesn't damage your system. The certified driver will be posted on Samsung Monitor homepage http://www.samsung.com/ Click the "Close" button then click the "OK" button continually. Monitor driver installation is completed.
How to install Click "Start," "Setting," and then "Control Panel." Double click the "Display" icon. Select the "Settings" tab and click the "Advanced Properties" button. Choose "Monitor." Case1 : If the "Properties" button is inactive, it means your monitor is properly configured. Please stop installation Case2 : If the "Properties" button is active, click the "Properties" button then follow next steps continually. Click "Driver" and then click "Update Driver." then click the "Next" button.
Natural Color Natural Color One of the recent problems in using a computer is that the color of the images printed out by a printer or other images scanned by a scanner or a digital camera are not the same as those shown on the monitor. the Natural Color S/W is the very solution for this problem. It is a color administration system developed by Samsung Electronics in association with Korea Electronics & Telecommunications Research Institute (ETRI).
MagicTune™ execution icon may not appear depending on specification of computer system or monitor. If that happens, press F5 Key. Installation Problems (MagicTune™) The installation of MagicTune™ can be affected by such factors as the video card, motherboard and the network environment. System Requirements OS z z z z Windows 2000 Windows XP Home Edition Windows XP Professional Windows Vista™ It is recommended using MagicTune™ in Windows® 2000 or later.
Control Buttons [ ] Opens the OSD menu. Also use to exit the OSD menu or return to the previous menu. [ ] These buttons allow you to adjust items in the menu. [ ] Press this button to Activates a highlighted menu item. [AUTO] When the 'AUTO' button is pressed, the Auto Adjustment screen appears as shown in the animated screen on the center. Direct Functions AUTO Downloaded from ManualMonitor.
Menu Description When the 'AUTO' button is pressed, the Auto Adjustment screen appears as shown in the animated screen on the center. The values of fine, coarse and position are adjusted automatically. AUTO Available in analog Mode Only If auto adjustment does not work properly, press 'AUTO' button again to adjust picture with more accuracy. If you change resolution in the control panel, auto function will be executed automatically.
In case of pushing MENU button after locking OSD Menu Description This is the function that locks the OSD in order to keep the current states of settings or prevent others from adjusting the current settings. Lock : Hold down the menu button for more than five (5) seconds to activate the OSD adjustment lock function. OSD Lock & Unlock Unlock : Hold down the menu button for more than five (5) seconds to deactivate the OSD adjustment lock function.
MagicBright™ Push the MagicBright™ button to circle through available preconfigured modes. - Six different modes (Custom/Text/Internet/Game/Sport/Movie) Volume Menu Volume Description When OSD is not on the screen, push [▲/ ] the button to adjust volume. SOURCE Menu SOURCE Description Selects the Video signal while the OSD is off. (Analog/Client) Downloaded from ManualMonitor.
OSD Function Picture Brightness Contrast Color MagicColor Color Tone Color Control Gamma Image Coarse Fine Sharpness H-Position V-Position OSD Language H-Position V-Position Transparency Display Time Setup Image Reset Color Reset Information Picture Menu Brightness Description You can use the on-screen menus to change the brightness according to personal preference.
Menu Description Play/Stop MagicColor is a new technology that Samsung has exclusively developed to improve digital image and to display natural color more clearly without disturbing image quality. Off Demo Returns to the original mode. The screen before applying MagicColor appears on the right and the screen after applying MagicColor appears on the left. Full Displays not only vivid natural color but also more realistic natural skin color with clearness.
Color Tone ( Not available in MagicColor mode of Full and Intelligent. ) MENU → Color Control , → → , → , → → MENU Adjusts individual Red, Green, Blue color balance. - Red, Green, Blue ( Not available in MagicColor mode of Full and Intelligent. ) MENU → , → → , → , → → → , → MENU Gamma correction changes the luminance of the colors with intermediate luminance.
Changes the horizontal position of the monitor's entire display. H-Position Available in analog Mode Only MENU → , → , → → → , → MENU Changes the vertical position of the monitor's entire display. V-Position Available in analog Mode Only MENU → , → , → → → , → MENU OSD Menu Description You can choose one of the nine languages. Language The language chosen affects only the language of the OSD. It has no effect on any software running on the computer.
Display Time turned off. - 5 Sec, 10 Sec, 20 Sec, 200 Sec MENU → , → → , → , → → MENU Setup Menu Image Reset Description Image parameters are replaced with the factory default values. MENU → Color Reset , → → → , → MENU Color parameters are replaced with the factory default values. MENU → , → Information Downloaded from ManualMonitor.
Menu Information Description Shows a video source, display mode on the OSD screen. MENU → , Downloaded from ManualMonitor.
Check List Before calling for service, check the information in this section to see if you can remedy any problems yourself. If you do need assistance, please call the phone number on the Information section or contact your dealer. Symptom Check List Solutions No images on the screen. I cannot turn on the monitor. Is the power cord connected properly? Check the power cord connection and supply. Can you see "Check Signal Cable" on the screen? Check the signal cable connection.
the monitor and restore the image on the screen. I cannot see the On Screen Display. Have you locked the On Screen Display (OSD) Menu to prevent changes? Unlock the OSD by pressing the [ ] button for at least 5 seconds. The screen shows strange colors or just black and white. Is the screen displaying only one color as if looking at the screen through a cellophane paper? Check the signal cable connection.
Sound level is too low. Check the volume level. If the volume is still too low after turning the control to its maximum, check the volume control on the computer sound card or software program. Check when MagicTune™ does not function properly. MagicTune™ feature is found only on PC (VGA) with Window OS that supports Plug and Play.
digital device such as a digital camera, camcorder or USB memory to the USB port, but they do not work. an additional driver installation. Check if the device you want to connect to is a device that supports the removable disk function without an additional driver installation. The file list does not appear. 1) Check the files on the card. If only abnormal files (e.g. 0KByte, broken JPEG) exist, the files do not appear on the screen. 2) The time required to display is determined by the size of the file.
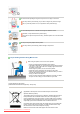
monitor with a soft cloth, using either a cleaning solution or plain water. Do not leave any remains of the detergent nor scratch the case. Do not allow any water to go inside the monitor. Self-Test Self-Test Feature Check | Warning Messages | Environment | Useful Tips Your monitor provides a self test feature that allows you to check whether your monitor is functioning properly. Self-Test Feature Check Turn off both your computer and the monitor. Unplug the video cable from the back of the computer.
Video mode not supported, etc. In this case, first check the source of the problem, and then contact the Service Center or your dealer. Judging the monitor's working condition If there is no image on the screen or a "Not Optimum Mode", "Recommended Mode 1280 x 1024 60 Hz" message comes up, disconnect the cable from the computer while the monitor is still powered on. If there is a message coming up on the screen or if the screen goes white, this means the monitor is in working condition.
Specifications General Model Name SyncMaster 711LT LCD Panel Size 17 inch (43 cm ) Display area 337.92 mm (H) x 270.336 mm (V) Pixel Pitch 0.264 mm (H) x 0.264 mm (V) Synchronization Horizontal 30 ~ 81 kHz Vertical 56 ~ 75 Hz Display Color 16.7 M Resolution Optimum resolution 1280 x 1024@60 Hz Maximum resolution 1280 x 1024@75 Hz Input Signal, Terminated RGB Analog 0.7 Vp-p ± 5 % separate H/V sync, Composite H/V sync TTL level (V high ≥ 2.0 V, V low ≤ 0.
AC 100 - 240 V ~ (+/- 10 %), 50/60 Hz Signal Cable 15pin to 15pin D-sub cable, Detachable Dimensions (W x H x D) / Weight 370.0 x 342.3 x 69 mm / 14.6 x 13.5 x 2.7 inch (Without Stand) 370.0 x 404.3 x 200 mm / 14.6 x 15.9 x 7.9 inch (With Basic Stand), 6.2 Kg / 13.7 (lbs) VESA Mounting Interface 100 mm x 100 mm (For use with Specialty(Arm) Mounting hardware.
5~7 P4 3.0 GHz 1 Gbyte Server 100 Mbps 8~10 P4 3.2 GHz 2 Gbyte The content presented above is the result of testing a specific server. The information may change as the server may be different. For some products, the OS may not be supported. When purchasing a product, make sure to check whether or not the OS is supported. PowerSaver This monitor has a built-in power management system called PowerSaver.
VESA, 800 x 600 35.156 56.250 36.000 +/+ VESA, 800 x 600 37.879 60.317 40.000 +/+ VESA, 800 x 600 48.077 72.188 50.000 +/+ VESA, 800 x 600 46.875 75.000 49.500 +/+ VESA, 1024 x 768 48.363 60.004 65.000 -/- VESA, 1024 x 768 56.476 70.069 75.000 -/- VESA, 1024 x 768 60.023 75.029 78.750 +/+ VESA, 1152 x 864 67.500 75.000 108.000 +/+ VESA, 1280 x 960 60.000 60.000 108.000 +/+ VESA, 1280 x 1024 63.981 60.020 108.000 +/+ VESA, 1280 x 1024 79.976 75.025 135.
Specifications General Model Name SyncMaster 911LT LCD Panel Size 19 inch(48 cm) Display area 376.32 mm(H) x 301.056 mm(V) Pixel Pitch 0.294(H) x 0.294(V) Synchronization Horizontal 30 ~ 81 kHz Vertical 56 ~ 75Hz Display Color 16.7 M Resolution Optimum resolution 1280x1024@60 Hz Maximum resolution 1280x1024@75 Hz Input Signal, Terminated RGB Analog 0.7 Vp-p ± 5 % separate H/V sync, Composite H/V sync TTL level (V high ≥ 2.0 V, V low ≤ 0.
AC 100 - 240 V ~ (+/- 10 %), 50/60 Hz Signal Cable 15pin-to-15pin D-sub cable, Detachable Dimensions (W x H x D) / Weight 416.6 X 375.2 X 74.7 mm / 16.4 x 14.8 x 2.9 inch (Without Stand) 416.6 X 420.9 X 200.0 mm / 16.4 x 16.6 x 7.9 inch (With Stand) / 6.8 Kg / 15.0 (lbs) VESA Mounting Interface 100 mm x 100 mm (For use with Specialty(Arm) Mounting hardware.
5~7 P4 3.0 GHz 1 Gbyte Server 100 Mbps 8~10 P4 3.2 GHz 2 Gbyte The content presented above is the result of testing a specific server. The information may change as the server may be different. For some products, the OS may not be supported. When purchasing a product, make sure to check whether or not the OS is supported. PowerSaver PowerSaver This monitor has a built-in power management system called PowerSaver.
VESA, 640 x 480 37.500 75.000 31.500 -/- VESA, 800 x 600 35.156 56.250 36.000 +/+ VESA, 800 x 600 37.879 60.317 40.000 +/+ VESA, 800 x 600 48.077 72.188 50.000 +/+ VESA, 800 x 600 46.875 75.000 49.500 +/+ VESA, 1024 x 768 48.363 60.004 65.000 -/- VESA, 1024 x 768 56.476 70.069 75.000 -/- VESA, 1024 x 768 60.023 75.029 78.750 +/+ VESA, 1152 x 864 67.500 75.000 108.000 +/+ VESA, 1280 x 960 60.000 60.000 108.000 +/+ VESA, 1280 x 1024 63.981 60.020 108.
Contact SAMSUNG WORLDWIDE If you have any questions or comments relating to Samsung products, please contact the SAMSUNG customer care center. North America U.S.A 1-800-SAMSUNG (726-7864) http://www.samsung.com CANADA 1-800-SAMSUNG (726-7864) http://www.samsung.com/ca MEXICO 01-800-SAMSUNG (726-7864) http://www.samsung.com ARGENTINE 0800-333-3733 http://www.samsung.com/ar BRAZIL 0800-124-421 4004-0000 http://www.samsung.com CHILE 800-SAMSUNG(726-7864) http://www.samsung.
TRINIDAD & TOBAGO 1-800-SAMSUNG(726-7864) http://www.samsung.com/latin VENEZUELA 0-800-100-5303 http://www.samsung.com/latin AUSTRIA 0800-SAMSUNG(726-7864) http://www.samsung.com/at BELGIUM 0032 (0)2 201 24 18 http://www.samsung.com/be CZECH REPUBLIC 844 000 844 http://www.samsung.com/cz DENMARK 70 70 19 70 http://www.samsung.com/dk EIRE 0818 717 100 http://www.samsung.com/ie FINLAND 030-6227 515 http://www.samsung.
UKRAINE 8-800-502-0000 http://www.samsung.com UZBEKISTAN 8-10-800-500-55-500 http://www.samsung.uz AUSTRALIA 1300 362 603 http://www.samsung.com CHINA 800-810-5858, 010- 6475 1880 http://www.samsung.com HONG KONG 3698-4698 http://www.samsung.com/hk INDIA 3030 8282 1800 110011 http://www.samsung.com INDONESIA 0800-112-8888 http://www.samsung.com JAPAN 0120-327-527 http://www.samsung.com/jp MALAYSIA 1800-88-9999 http://www.samsung.
Showing the horizontal lines of the screen from the top to the bottom sequentially is called the NonInterlace method while showing odd lines and then even lines in turn is called the Interlace method. The Non-Interlace method is used for the majority of monitors to ensure a clear image. The Interlace method is the same as that used in TVs. Plug & Play This is a function that provides the best quality screen for the user by allowing the computer and the monitor to exchange information automatically.
PRODUCT INFORMATION (Image Retention Free) LCD Monitors and TVs may have an image retention when switching from one image to another especially after displaying a stationary image for a long time. This guide is to demonstrate a correct usage of LCD products in order to protect them from Image retention. Warranty Warranty does not cover any damage caused by image retention. Burn-in is not covered by the warranty.
The best way to protect your monitor from Image retention is to set your PC or System to operate a Screen Saver program when you are not using it. Image retention may not occur when a LCD panel is operated under normal conditions. Normal conditions are defined as continuously changing video patterns. When the LCD panel is operated for a long time with a fixed pattern (-over 12 hours-), there may be slight difference in voltage between electrodes that work the liquid crystal (LC) in a pixel.