Features of your new air conditioner Strong Turbo/Long Function Your new air conditioner supports Turbo function which makes you cool fast for 30 minutes and Long function which makes the cool air goes to much further place. Look for Everywhere The elegant and harmonious design gives priority to the esthetics of your space and complements any of your existing interior décor. With its soft color and latest design, the new air conditioner adds class to any room.
Contents User manual ENGLISH Safety precautions . . . . . . . . . . . . . . . . . . . . . . . . . . . . . . . . . . . . . . . . . . . . . . . . . . . . . . . . . . . . . . . . . . . . . . . . . . . . . . . . . . . . . . . . . . . . . . . . . . . . . . . 4 Checking the name of the parts . . . . . . . . . . . . . . . . . . . . . . . . . . . . . . . . . . . . . . . . . . . . . . . . . . . . . . . . . . . . . . . . . . . . . . . . . . . . . . . . . . . . . . . . . . 9 Checking the remote controller . . . .
User manual Safety precautions Before using your new air conditioner, please read this manual thoroughly to ensure that you know how to safely and efficiently operate the extensive features and functions of your new appliance. Because the following operating instructions cover various models, the characteristics of your air conditioner may differ slightly from those described in this manual. If you have any questions, call your nearest contact center or find help and information online at www.samsung.com.
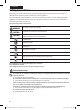
WARNING SEVERE WARNING SIGNS ENGLISH Never use a damaged or dusted power cable, or loosened power receptacle. ffPotential risk of fire or electric shock. Install an exclusive circuit breaker and short-circuit breaker for the air conditioner. ffPotential risk of electric shock or fire. Do not insert anything such as fingers or branches into the air conditioner vents while the air conditioner is running.
Safety precautions Always make sure that the power supply is compliant with current safety standards. Always install the air conditioner in compliance with current local safety standards. Verify that the voltage and frequency of the power supply comply with the specifications and that the installed power is sufficient to ensure the operation of any other domestic appliance connected to the same electric lines. Use a rated circuit breaker only. ffNever use steel wires or copper wires as a circuit breaker.
CAUTION CAUTION SIGNS ENGLISH Do not allow children to climb on the air conditioner. Do not use the air conditioner as a cooling precision instrument for food, pets, plants, cosmetics or machinery. Do not pull or give excessive shock to the air conditioner. ffPotential risk of fire, or unit malfunction and there are risk of personal injury because unit may fall down. Do not spray water directly on the air conditioner or use benzene, thinner or alcohol to clean the surface of the unit.
Safety precautions When using a wireless remote controller, the distance should not be more than 7 meters from the air conditioner. If the remote controller is not used for a long period of time, remove the batteries to prevent leakage of electrolyte. When cleaning the outdoor unit, touch the heat exchanger radiator fins with extreme care. ffWearing thick gloves can protect your hands. Make sure that the condensed water dripping from the drain hose runs out properly and safely.
Checking the name of the parts Congratulations on the purchase of the air conditioner. We hope you enjoy the features of your air conditioner and stay cool with optimal efficiency. Please read the manual to get started and to make the best use of the air conditioner. ENGLISH Checking the indoor unit and display Carefully unpack your air conditioner and check the indoor unit to make sure it is not damaged.
Checking the name of the parts Control panel You can operate the air conditioner with the control panel when you can’t or don’t want to operate the air conditioner with the remote controller. (see pages 24~25) Fan speed indicator Air swing (Up/Down) indicator Temperature setting Air swing (Left/Right) indicator Operation mode indicators (Heat is applicable for AP55M1✴, AF55GP1M✴✴ model only) Defrost indicator (Defrost is applicable for AP55M1✴, AF55GP1M✴✴ model only) Turbo button Timer indicator S.
Checking the remote controller Remote controller buttons You can activate the air conditioner by pointing the remote controller away from it. When using the remote controller, always point it directly at the air conditioner. ENGLISH Vertical air swing Power Turns the air conditioner on or off. Adjusts the air flow direction up and down (Not applicable to Duct type models). Mode Selects operation mode. Temperature Adjusts the temperature. Fan speed Adjusts the fan speed.
Checking the remote controller Remote controller display Operation mode *Heat mode is applicable to AP55M1✴, AF55GP1M✴ model only. Set temperature or on/off set time with the timer function On/Off timer Remote controller transmission Low battery Fan speed Air flow direction Options * These functions are not supported NOTE • Single, Heater and Purity functions are not supported by this model.
Battery changing time When the battery is exhausted,( )will be displayed in the remote controller display. When the icon appears, change the batteries. The remote controller requires two 1.5V AAA type batteries. Storing the remote controller ENGLISH When you do not use the remote controller for a long time, remove the batteries from the remote controller and store it in the remote controller holder. Inserting the batteries 1. Open the battery cover.
Basic operation Basic operation is an operation mode that can be selected by pressing the Mode button. Auto In Auto mode, the air conditioner will automatically set the Operation(Cool/Heat Mode) and fan speed depending on the room temperature detected by the room temperature sensor. (Heat mode is applicable to AP55M1✴, AF55GP1M✴ model only.) Cool Cool mode is frequently used and you can freely control the temperature, fan speed, and air flow direction in cool mode.
Turning on the power Press the button to turn on the air conditioner. Press the ENGLISH Selecting the operation mode button to set the operation mode. Selecting the fan speed Press the Auto Cool Dry Fan Heat button to set the desired fan speed. (Auto) (Auto), (Med), (High), (Med), (High), (Turbo) (Auto), (Med), (High), (Turbo) (Auto) (Turbo) Adjusting the desired temperature Press the button to adjust the desired temperature.
Basic operation Selecting air flow direction This function allows you to shift the air flow direction up and down or left and right. Press the or button to move the air flow direction up and down or left and right while the air conditioner is turned on. ffWhen the blade reaches the desired position, press the or button one more time to set the air flow direction. The up/down and left/right tilting of the blade will stop. Remote controller display 16 PAC MIRAGE HPCO-AR-PH_IBIM_05321A-01_EN.
Setting the On/Off timer You can set the air conditioner to turn on/off automatically at desired time. Setting On timer while the air conditioner is off / Off timer while the air conditioner is on. When the air conditioner is off; ENGLISH 1. Press the Timer button to select (On). -- (On) indicator starts to blink and you can set the time. 2. Press the < or > button to set the time. -- You can set the time in 0.5 hour unit from 0.5 ~ 3 hours and 1 hour unit from 3~24 hours.
Setting the On/Off timer When the air conditioner is on; 1. Press the Timer button to select (Off). -- (Off) indicator starts to blink and you can set the time. 2. Press the < or > button to set the time. -- You can set the time in 0.5 hour unit from 0.5 ~ 3 hours and 1 hour unit from 3~24 hours. -- Time can be set from minimum 0.5 hours to maximum 24 hours. 3. Press the SET button to complete the Off timer setting.
Using the Turbo function You can set the Turbo function to provide fast and powerful cooling (heating). When the air conditioner is operating in Cool or Heat mode; ENGLISH 1. Press the Turbo button. -- (Turbo) will be displayed and the function will operate for 30 minutes. Cancel ffPress the Turbo Button. NOTE • Turbo function is only available in Auto/Cool/Heat mode* and the air conditioner will return to its previous operation mode after operating for 30 minutes in this function.
Locking the control panel You can lock the control panel on the indoor unit to prevent the children from playing with the air conditioner. Press the Temp and buttons for 3 seconds. ffYou will hear ring and the Lock ( ) icon will appear on the indoor unit display. ffOnce Lock is set, you cannot control the air conditioner with the control panel but you can only control it with the remote controller. Therefore this function will be useful to keep the children away from touching the control panel.
Using the air conditioner with the control panel You can control the air conditioner without the remote controller. 1. Press the Power button on the indoor unit control panel. ffThe air conditioner will turn on with ringing sound. To turn off the air conditioner, press the Power ENGLISH Stop button again. 2. Press the Temp and button to adjust the temperature. ffYou can increase/decrease the temperature by 1 °C. 3. Press the Fan Speed button to adjust the fan speed.
Cleaning and maintaining the air conditioner CAUTION Make sure to turn off the circuit breaker when cleaning the air conditioner. Cleaning the exterior 1. Wipe the surface of the unit with a slightly wet or dry cloth when needed. CAUTION Do not use Benzene, Thinner or CloroxTM. They may damage the surface of the air conditioner and can create a risk of fire. Cleaning the filter Air filter Washable air filter captures large particles from the air.
Maintaining your air conditioner Periodical checks Refer to the following chart to maintain the air conditioner properly.
Cleaning and maintaining the air conditioner Internal protections via the unit control system This internal protection operates if an internal fault occurs in the air conditioner. Type The internal fan will be off to against cold air when the heat pump is heating. Defrost cycle The internal fan will be off to against cold air when the heat pump is heating.
Appendix Troubleshooting Refer to the following chart if the air conditioner operates abnormally. This may save time and unnecessary expenses. SOLUTION ENGLISH PROBLEM The air conditioner does not operate immediately after it has been restarted. • Because of the protective mechanism, the appliance does not start operating immediately to keep the unit from overloading. The air conditioner will start in 3 minutes. The air conditioner does not work at all. • Check if the circuit breaker is switched off.
Appendix Operation ranges The table below indicates the temperature and humidity ranges the air conditioner can be operated within. Refer to the table for efficient use. OPERATIONAL TEMPERATURE INDOOR OUTDOOR INDOOR HUMIDITY IF OUT OF CONDITIONS COOLING 18˚C to 32˚C 21˚C to 52˚C 80% or less Condensation may occur on the indoor unit with risk to have either water blow off or drops on the floor. HEATING 27˚C or less 0˚C to 24˚C - Internal protection triggers and the air conditioner will stop.
Safety precautions Carefully follow the precautions listed as below because they are essential to guarantee the safety of SAMSUNG product. ENGLISH WARNING • Always disconnect the air conditioner from the power supply before servicing it or accessing its internal components. • Verify that installation and testing operations are performed by qualified personnel. • Verify that the air conditioner is not installed in an easily accessible area.
Installation manual Safety precautions ffOur units must be installed in compliance with the spaces indicated in the manual to ensure either accessibility from both sides or ability to perform routine maintenance and repairs. The units’ components must be accessible and that can be disassembled in conditions of complete safety either for people or things.
Accessory parts list ❋❋ Product illustration may look different from the actual product. No.
Selection of installation place Indoor unit ffInstall the unit at a place close to the wall facing the outside as it is necessary to perform piping connection with the outdoor unit. -- It is effective to install the unit at a window side to ensure uniform distribution of indoor temperature. ffInstall the unit at a place where there is no obstacle against the wind around the air intake and air outlet. ffInstall the unit horizontally at a stable, rigid place.
Outdoor unit Wall Strong wind Air outlet ❋❋ If there is any unavoidable reason to install the unit at such a place, take the following measures against the wind; 1) When installing the unit at a roadside concentrated with buildings, install it parallel with the road. 2) Install the unit so that the air outlet faces toward the wall at a place such as rooftop, which may be subjected to strong wind. ENGLISH ffA place free from the risk of combustible gas leakage.
Preparing the installation Selecting appropriate location for installation Decide the installation location based on the following condition and obtain the user’s approval. ffAvoid a place that may disturb your neighbor. Noise may occur from the outdoor unit and the discharged air may run into the neighborhood. (Be careful of the operation time in a residential area) ffInstall the outdoor unit on a hard and even area that can support its weight. ffChoose a flat place that rainwater does not settle or leak.
WARNING ENGLISH CAUTION • After installing the outdoor unit, apply rust inhibitor on the internal pipes and heat exchanger. -- If you don’t apply rust inhibitor, airborne corrosive gas (such as sulfur compounds, hydrogen sulfide and ammonia) and salty dust may cause pipe corrosion which will lead to refrigerant leakage. -- Inspect the outdoor unit at least once a year and re-apply the rust inhibitor where it is damaged (worn out).
Electrical work The electrical work should be performed by a specialist qualified for the work. ffUse the three phase power supply, and be sure to install the sub power distributing board for exclusive use with the unit (separately purchased by the user). ❋❋ Avoid multiple connecting wiring as it can cause a drop in voltage, thus resulting in poor performance of the automatic control circuit. ffBe sure to install circuit breaker (separately purchased by the user). ffBe sure to connect the grounding wire.
Indoor and outdoor connection wiring ffWhen connecting the wiring harness between the indoor and outdoor unit, align the outdoor side and the indoor side with the terminal board No. ❋❋ When the wiring harnesses of the indoor and outdoor unit are not properly connected, it may cause trouble. Be careful not to allow the indoor and outdoor wirings and power lines to get in contact with the service valve of the refrigerant system or to the pipe without an insulation.
Electrical work AP55M2✴ Series Using 4poles ELCB(Earth Leakage Circuit Breaker) 1. Remove the cover of electric box on side panel of the outdoor unit. 2. Connect the electric input wires [L1(R), L2(S), L3(T), N] to each terminal [L1(R), L2(S), L3(T), N] of the electric box on the outdoor unit respectively. (Input wires are purchased by the user separately.) 3. Connect the electric wires to each terminal on the indoor and outdoor unit respectively.
AF55GC1M✴✴ Series Outdoor Unit Indoor unit 1(L) 2(N) 3(C) 1(L) 2(N) 3(C) Earth L N Knife switch or automatic circuit breaker ENGLISH Using 2poles ELCB(Earth Leakage Circuit Breaker) 1. Remove the cover of electric box on side panel of the outdoor unit. 2. Connect the electric input wires [L, N] to each terminal [L, N] of the electric box on the outdoor unit respectively. (Input wires are purchased by the user separately.) 3.
Electrical work Electrical wiring ffConnect it to the terminal board N and L for power cable to the outdoor unit. In so doing, peel off the end of the power cord by about 5mm, and press the cord to the ring terminal for hooking. -- Make sure to install exclusive power supply. (If you use multiple connecting, there is a risk of electric shock or fire.) -- If the outdoor power supply has been selected, install circuit breaker(ELCB). (Purchase separately) -- Make sure to connect earth wire.
Installation method Outdoor unit When using the anchor bolt ENGLISH Anchor bolt fixing dimensions 403mm 670mm 427mm Fix the unit on a flat, rigid floor using the anchor bolt. (Anchor bolt : M10 x 4 points - separately purchased) When using the rubber leg Put the rubber leg to the outdoor unit leg. Outdoor unit leg Rubber leg 39 PAC MIRAGE HPCO-AR-PH_IBIM_05321A-01_EN.
Installation method Installation procedures 1. The piping of this unit can be connected to the right, left, and rear side. -- When you hit the area for piping connection slightly with a hammer, a hole is made. Holes for piping connection (4 points) Protective piping cover Protective piping cover Drain hose Piping Drain hose Piping When the hole on the wall is lower than the hole for piping connection. When the hole on the wall is higher than the hole for piping connection. 2.
ENGLISH 4. Install the high pressure pipe to the heat exchanger liquid pipe, and the low pressure pipe to the heat exchanger gas pipe respectively using the flare nut, taking care not to cause any leakage of refrigerant. 5. Be sure to insulate the pipe with appropriate insulation material; see page 42 6. Insert the extension drain hose to the drain connection port tightly, then fix them with a cable tie or a tape to prevent any water leakage; see page 43. 7.
Installation method Refrigerant pipe work Insulating the pipes ffMake sure to insulated the refrigerant pipes with an insulation tape. If the Pipe insulator pipe is not insulated, condensate may form and drop into the indoor. Vinyl ffWind the refrigerant pipes and the drain hose with vinyl tapes. tape Indoor/ ffWhen you bend the pipe, try to secure large bending radius (over 100 mm) outdoor unit communication to prevent the copper pipe from distorting.
Connection of refrigerant piping Flare processing 1. Cut the pipe using the pipe cutter. Rough Burr 2. Remove burr on the edge of pipe. -- If burr is not removed after cutting the pipe, there is a risk of refrigerant gas leakage. -- If foreign substance such as burr goes into the pipe, there is a risk of product breakdown. Face the pipe downward when doing the work. ENGLISH Oblique Pipe Reamer 3. Insert the flare nut into the pipe, and then perform the flare processing.
Installation method Pipe bending 1. Perform bending of the pipe using the bender which has a specified bending radius. 2. Be sure to take full care to perform bending of the pipe successfully at one time. Bending and unbending the pipe more than twice makes the bending work increasingly difficult. 3. You may use the spring inserted into the gas pipe instead of the bender to bend the pipe. 4.
Drain hose 1. Connect the drain hose by inserting the extension drain hose to the drain connection port tightly. 2. Insulate the extension drain hose, then fix it with a cable tie or a tape. Vinyl chloride(Inner diameter ø13mm) Insulation Foamed polyethylene ENGLISH Piping material Drain hose Drain hole for duct (polypropylene) Insulation (foamed polyethylene ) Connecting drain hose 3. Connect drain hose to the outdoor unit since water will be generated during heating or defrost operation.
Air purge ❋❋ Be sure that all valve cocks are closed. ffThe air in the indoor unit and in the pipe must be purged. Make sure to vacuum inside of the connection pipe using vacuum pump after connecting pipes.(Use vacuum pump as shown at the figure.) If air remains in the refrigeration pipes, it will affect the compressor, reduce to cooling capacity and could lead to a malfunction. 1. Connect each assembly pipe to the appropriate valve on the outdoor unit and tighten the flare nut. 2.
Refrigerant charging How to add refrigerant Connect manifold gauge to the gas side service valve. Take the trial operation with the cooling trial operation mode. Perform trial operation for longer than 10 minutes and add refrigerant based on the below pressure table. Purpose of pressure table : If additional refrigerant filling is needed due to the leakage of the refrigerant or re-installation, add refrigerant using pressure table.
Check and test operation Check ffBe sure to check the following again after completion of installation. 1. Check the piping connection area for any gas leakage. Indoor connection area Outdoor connection area 2. Is the drain hose properly connected? 3. Is the insulation of the piping in good condition? Pipe insulator (Over 7mm foamed polyethylene or EPDM foam) 30 mm Pipie connection part insulator (Over 5mm foamed polyethylene) 4.
Test operation CAUTION (1) Be sure to check whether the service valve is open before attempting to perform the test operation. (2) Be sure to perform the test operation after installation. It is easy to start the test operation in winter if you increase the sensor temperature to 23°C ~ 25°C by holding the indoor temperature sensor. (Cooling operation) ❋❋ When the outdoor temperature is below zero, do not test operation for more than 3 minutes. Otherwise, the compressor will be damaged.
Packing and unpacking guide Indoor unit Cushion-top ① Packing case ③ Cushion-mid ② Indoor unit ④ Cushion-bottom ⑤ ffPacking the unit as below procedure 1. Put the indoor unit ④ onto the cushion-bottom ⑤. 2. Assemble cushion-mid ② of indoor unit ④. 3. Put the cushion-top ① onto the indoor unit ④. 4. Put the packing case ③ from the top of set. 5. Seal the packing case ③. ffUnpacking the unit as below procedure 1. Take out the packing case ③ from the set. 2. Take out the cushion-top ①. 3.
Outdoor unit Cushion-top ⑤ ENGLISH Outdoor unit ④ Packing case ① 4 screws ③ Wood palette ② ffPacking the unit as below procedure 1. Fix the outdoor unit ④ and the wood palette ② by 4 screws ③. 2. Put the cushion-top ⑤ onto the outdoor unit ④. 3. Put the packing case ① from the top of set. 4. Seal the packing case ①. ffUnpacking the unit as below procedure 1. Take out the packing case ① from the set. 2. Take out the cushion-top ⑤. 3. Unscrew 4 screws ③ from the wood palette ② and then move the set.
How to connect your extended power cables ❋❋ Items to prepare (compressor and insulation tape should be prepared by an installation technician.) Tools Crimping plier Connection sleeve (mm) Insulation tape Contraction tube (mm) Spec MH-14 20 x ø7.0(H x OD) Width 18mm 50xØ8.0(LxOD) Shape 1. A s shown in the figure, peel off the shields from the rubber/wire of the power cable. -- Peel off 20 mm of the wire shields of the tube installed already.
Product specification MODEL COOL AF55GP1MBAP / AF55GP1MBEE AF55GC1MAAP / AF55GC1MAEE AF55GP1MAAP / AF55GP1MAEE 47,000 BTU/h 42,000 BTU/h 45,500 BTU/h 47,000 BTU/h 42,000 BTU/h 45,500 BTU/h SASO ISO SASO ISO HEAT - STANDARD ISO SOURCE 21.0 A HEAT OUTDOOR 13,770 W SASO 1 P, 220 V~, 60 Hz 26.0 A 21.0 A 21.5 A 26.0 A 22.0 A - 4,550 W 7.7 / - 9.9 / 3.0 26.0 A 21.5 A - 7.4 / 3.0 12,420 Kwh/year 2,900 g 2,800 g KIND INDOOR OUTDOOR UNIT ISO 12,150 Kwh/year 10.
QUESTIONS OR COMMENTS? COUNTRY CALL U.A.E 800-SAMSUNG (800 - 726 7864) OMAN 800-SAMSUNG (800 - 726 7864) KUWAIT 183-CALL (183-2255) BAHRAIN 8000-GSAM (8000-4726) QATAR 800-CALL (800-2255) EGYPT 08000-7267864 16580 ALGERIA 021 36 11 00 PAKISTAN 0800-Samsung (72678) OR VISIT US ONLINE AT www.samsung.com/ae/support (English) www.samsung.com/ae_ar/support (Arabic) www.samsung.com/eg/support www.samsung.com/n_africa/support www.samsung.com/pk/support TUNISIA 80-1000-12 www.samsung.
AP55M0✴ Series AP55M1✴ Series AP55M2✴ Series AF55GC1M✴✴ Series AF55GP1M✴✴ Series Air Conditioner user & installation manual imagine the possibilities Thank you for purchasing this Samsung product. EN AR DB68-05321A-01 PAC MIRAGE HPCO-AR-PH_IBIM_05321A-01_EN.