
Service manual
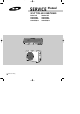


10
Set up the option code
ΙΙ
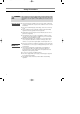
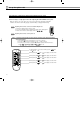
The method for setting up the model option with the remote control
◆ It is necessary to set up option codes after replacing the main PCB with service parts.
Make sure that you can set up option codes of the remote control after replacing the main PBA.
Otherwise, the unit won’t be working properly and all LED lamps on display will be flickering.
1. Remove the battery from the remote control.
2. Press the temperature button simultaneously and insert the battery again.
3. Make sure the remote control display shown as .
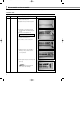
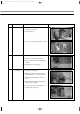
Step 1
Preparing for the remote control to the main PCB option set.
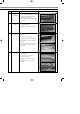
Step 2
Preparing for the remote control option set.
NN
NN
oo
oo
tt
tt
ee
ee
1) If the first number is , it is correct. Otherwise, press the button
until appears.
2) When pressing the button ~ on the display, select one of them.
3) When pressing the button ~ on the display, select one of them.
4) When pressing the button ~ on the display, select one of them.
5) When pressing the button ~ on the display, select one of them.
6) When pressing the button ~ on the display, select one of them.
In case that the wrong letter has been selected; continue to press the button until the
correct letter appears.
1. If the number “ ”appears on the display, proceed to the second stage.
2. Every time you press the 1) and 7) button, “ ” and “ ” continue to appear.
3. Every time you press the 2), 3), 4), 5), 6), 8), 9), 10), 11), 12) button, the number increases
from ~ ( , , , , , , , , , ) and , , , , , in order.
AS07AS(6)MA SM_E_15774 2/12/04 9:19 PM Page 10