
User Guide


67
Shooting Videos
Tip: When shooting video in direct sunlight or in bright
conditions, it is recommended that you provide your
subject with sufficient light by having the light source
behind you.
1. From the Home screen, touch Camera.
2. Touch the Camera or Camcorder Mode icon (
) to
switch to Camcorder mode ( ).
3. To shoot a video of yourself, touch the Front Facing
Camera icon ( ) to enable or disable the Front Facing
Camera.
4. Touch to turn on the camcorder’s light while
recording. Touch to turn the light off.
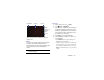
5. Using the phone’s main display screen as a viewfinder,
adjust the image by aiming the camcorder at the
subject.
6. Touch the screen to begin shooting video.
7. Touch the screen again to stop the recording and save
the video file to your Pictures folder.
Camera and Camcorder Settings
1. For photo options, touch Options ➔ photo
settings... The following options are available:
•Focus Mode: Set focus to Normal or Macro.
• White Balance: Set this option to Auto (default),
Cloudy, Daylight, Fluorescent, or Tungsten.
• Exposure Metering: Set the exposure metering to
Average, Center Weighted (default), or Center Spot.
•ISO: Determines how sensitive the image sensor is to
light. Valid values are: Auto (default), 100, 200, 400,
or 800.
• Effects: Change the color tone or apply special effects
to the photo. Options are: Off (default), Mono, Negative,
Sepia, Solarize, Posterize, Vintage Cold, Vintage Warm,
Point Blue, Point Green, and Point Red-Yellow.
•Contrast: Adjust the contrast of the photo.
Options are: 2 (maximum), 1 (high), 0 (default),
-1 (low), or -2 (minimum).
• Saturation: Adjust the color saturation of the
photo. Options are: 2 (maximum), 1 (high),
0 (default), -1 (low), or -2 (minimum).