SyncMaster BX1950/BX1950N/BX2050/BX2050N/BX2250/BX2250N/BX2350/BX2450/ BX2450L/BX2450N LCD Monitor User Manual The color and the appearance may differ depending on the product, and the specifications are subject to change without prior notice to improve the performance.
Table Of Contents MAJOR SAFETY PRECAUTIONS Before You Start . . . . . . . . . . . . . . . . . . . . . . . . . . . . . . . . . . . . . . . . . . . 1-1 Custody and Maintenance . . . . . . . . . . . . . . . . . . . . . . . . . . . . . . . . . . . 1-2 Safety Precautions . . . . . . . . . . . . . . . . . . . . . . . . . . . . . . . . . . . . . . . . . 1-3 INSTALLING THE PRODUCT Package Contents . . . . . . . . . . . . . . . . . . . . . . . . . . . . . . . . . . . . . . . . . 2-1 Installing the Stand . . . . . .
Specifications . . . . . . . . . . . . . . . . . . . . . . . . . . . . . . . . . . . . . . . . . . . . . 6-7 Power Saving Function . . . . . . . . . . . . . . . . . . . . . . . . . . . . . . . . . . . . . 6-8 Specifications . . . . . . . . . . . . . . . . . . . . . . . . . . . . . . . . . . . . . . . . . . . . . 6-9 Power Saving Function . . . . . . . . . . . . . . . . . . . . . . . . . . . . . . . . . . . . 6-10 Specifications . . . . . . . . . . . . . . . . . . . . . . . . . . . . . . . . . . . . . . . .
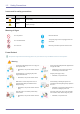
1 Major Safety Precautions 1-1 Before You Start Icons used in this manual ICON NAME MEANING Caution Indicates cases where the function may not work or the setting may be canceled. Note Indicates a hint or tip to operate a function. Using this Manual • Make yourself fully aware of the safety precautions before using this product. • If a problem occurs, refer to the 'Troubleshooting' section.
1-2 Custody and Maintenance External Surface and Screen Maintenance Clean the product with a soft dry cloth. • Do not clean the product with an inflammable substance such as benzene or thinner or with a wet cloth. This may result in a problem with the product. • Do not scratch the screen with your fingernails or a sharp object. This may result in scratches or damage to the product. • Do not clean the product directly by spraying water onto the product.
1-3 Safety Precautions Icons used for safety precautions ICON NAME MEANING Warning Failing to follow the precautions marked with this sign, may result in a serious injury or even a fatality. Caution Failing to follow the precautions marked with this sign, may result in a personal injury or property damage. Meaning of Signs Do not perform. Must be followed. Do not disassemble. The power plug must be unplugged from the wall outlet. Do not touch. Must be grounded to prevent electric shock.
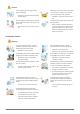
Caution Avoid unplugging the power plug while the product is operating. • Otherwise, it may damage the product due to electric shock. When unplugging the power plug from the wall outlet, make sure to hold it by the plug and not by the cord. • Make sure to use only the power cord supplied by our company. In addition, do not use the power cord of another electric appliance. • Otherwise, it may result in electric shock or fire. Connect the power plug to a wall outlet that can be easily reached.
Caution Do not let the product drop while moving it. • This may result in a problem with the product or injury. When installing the product on a console or shelf, make sure that the front of the product does not protrude out of the console or shelf. • Otherwise, this may cause the product to fall off and result in a malfunction or injury. • Make sure to use a cabinet or shelf suitable to the size of the product. Do not place the product face down on the floor.
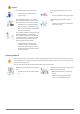
Caution Avoid spraying cleansing agent directly onto the product. • This may result in discoloration or cracking of the exterior of the product or the panel coming off. When cleaning the product, disconnect the power cord and clean the product with a soft dry cloth. • Avoid using chemicals such as wax, benzene, alcohol, thinner, mosquitorepellent, fragrance, lubrication or cleansing agent when cleaning the product. This may result in the exterior being deformed or the print being removed.
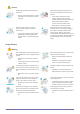
Avoid moving the product by pulling the power cord or antenna cable. • Otherwise, it may result in electric shock, fire or a problem with the product due to damage to the cable. When a gas leak occurs, do not touch the product or the power plug and ventilate immediately. • A spark may result in an explosion or fire. • During a thunder or lighting storm, do not touch the power cord or antenna cable. Avoid lifting up or move the product by holding only the power cord or signal cable.
Be careful that adaptor should not be in contact with water and therefore not be wet. • This may cause a malfunction, electric shock or fire. Do not use adaptor by the waterside or outside particularly when it rains or snows. Be careful that adaptor should not be wet while cleaning floor with water. Avoid using a humidifier or cooker near the product. • Watching the product from too close a distance continuously may damage your eyesight. Otherwise, it may result in electric shock or fire.
2 Installing the Product 2-1 Package Contents • Unpack the product and check if all of the following contents have been included. • Store the packaging box in case you need to move the Product at a later stage. Monitor Contents Installation Manual Power Cord Product Warranty User Manual (Not available in all locations) DC-Adapter D-Sub Cable Stand OPTIONAL PARTS HDMI Cable DVI Cable HDMI to DVI Cable Cleaning Cloth The cleaning cloth is supplied with black high-glossy models only.
2-2 Installing the Stand Before assembling the product, place the product down on a flat and stable surface so that the screen is facing downwards. Put the stand on a plane table. Hold the main body of the product with your hand as shown by the figure. Push the main body of the product into the stand in the direction of the arrow as shown in the figure. - Caution Avoid lifting the product holding only the stand. Disassembly is in the reverse order of the assembly.
2-3 Connecting with a PC The connecting part may differ depending on the product model. 1. Connect the product to a PC depending on the video output supported by the PC. • When the graphics card provides D-Sub () output • • Connect the [RGB IN] port of the product to the [D-Sub] port of the PC with the D-Sub cable. When the graphics card provides DVI() output • Connect the [DVI IN] port of the product to the [DVI] port of the PC with the DVI cable.
•Connect the [HDMI IN] port of the product to the [DVI] port on your PC using the HDMI to DVI cable. The [HDMI IN] terminal is supplied for the HDMI-dedicated models only. 2. Connect one end of the power cord to the [POWER] port of the product and connect the other end of the power cord to the 220V or 110V wall outlet. (The input voltage is switched automatically.) When the product is connected to a PC, you can turn the product on and use it.
2-4 Connecting an HDMI cable 1. Connect the HDMI output port of your digital output device to the [HDMI IN] port of the product using the HDMI cable. The [HDMI IN] terminal is supplied for the HDMI-dedicated models only. 2. Connect a speaker to the [AUDIO OUT] port of the product. This product won't make any sound when only the HDMI cable is connected without a speaker connected. When all the connections are complete, you can turn on and use the product and your DVD player (or digital output device).
2-5 Kensington Lock A Kensington Lock is an anti-theft device that enables users to lock the product so that they can safely use it in public locations. Since the shape and usage of the locking device may differ depending on the model and the manufacturer, for more information, refer to the User Manual supplied with the locking device for more information. You must purchase the Kensington Lock separately. To lock the product, follow these steps: 1.
3 Using the product 3-1 Setting the Optimal Resolution If you turn the power on after purchasing the product, a message regarding the optimal resolution setting appears on the screen. Select a language and the optimal resolution. ▲/▼ : You can select a language with these buttons. MENU : If you press this button, the message disappears. 3-1 • The message appears up to 3 times if the resolution has not been set to the optimal resolution.
3-2 Standard Signal Mode Table The LCD monitor has one optimal resolution for the best visual quality depending on the screen size due to the inherent characteristics of the panel, unlike for a CDT monitor. Therefore, the visual quality will be degraded if the optimal resolution is not set for the panel size. It is recommended setting the resolution to the optimal resolution of the product. If the signal from the PC is one of the following standard signal modes, the screen is set automatically.
3-3 Standard Signal Mode Table The LCD monitor has one optimal resolution for the best visual quality depending on the screen size due to the inherent characteristics of the panel, unlike for a CDT monitor. Therefore, the visual quality will be degraded if the optimal resolution is not set for the panel size. It is recommended setting the resolution to the optimal resolution of the product. If the signal from the PC is one of the following standard signal modes, the screen is set automatically.
3-4 Standard Signal Mode Table The LCD monitor has one optimal resolution for the best visual quality depending on the screen size due to the inherent characteristics of the panel, unlike for a CDT monitor. Therefore, the visual quality will be degraded if the optimal resolution is not set for the panel size. It is recommended setting the resolution to the optimal resolution of the product. If the signal from the PC is one of the following standard signal modes, the screen is set automatically.
3-5 Standard Signal Mode Table The LCD monitor has one optimal resolution for the best visual quality depending on the screen size due to the inherent characteristics of the panel, unlike for a CDT monitor. Therefore, the visual quality will be degraded if the optimal resolution is not set for the panel size. It is recommended setting the resolution to the optimal resolution of the product. If the signal from the PC is one of the following standard signal modes, the screen is set automatically.
3-6 Standard Signal Mode Table The LCD monitor has one optimal resolution for the best visual quality depending on the screen size due to the inherent characteristics of the panel, unlike for a CDT monitor. Therefore, the visual quality will be degraded if the optimal resolution is not set for the panel size. It is recommended setting the resolution to the optimal resolution of the product. If the signal from the PC is one of the following standard signal modes, the screen is set automatically.
DISPLAY MODE HORIZONTAL FREQUENCY (KHZ) VERTICAL FREQUENCY (HZ) PIXEL CLOCK (MHZ) SYNC POLARITY (H/ V) IBM, 640 x 350 31.469 70.086 25.175 +/- IBM, 720 x 400 31.469 70.087 28.322 -/+ MAC, 640 x 480 35.000 66.667 30.240 -/- MAC, 832 x 624 49.726 74.551 57.284 -/- MAC, 1152 x 870 68.681 75.062 100.000 -/- VESA, 640 x 480 31.469 59.94 25.175 -/- VESA, 640 x 480 37.861 72.809 31.500 -/- VESA, 640 x 480 37.500 75.000 31.500 -/- VESA, 800 x 600 35.156 56.250 36.
3-7 Standard Signal Mode Table The LCD monitor has one optimal resolution for the best visual quality depending on the screen size due to the inherent characteristics of the panel, unlike for a CDT monitor. Therefore, the visual quality will be degraded if the optimal resolution is not set for the panel size. It is recommended setting the resolution to the optimal resolution of the product. If the signal from the PC is one of the following standard signal modes, the screen is set automatically.
DISPLAY MODE HORIZONTAL FREQUENCY (KHZ) VERTICAL FREQUENCY (HZ) PIXEL CLOCK (MHZ) SYNC POLARITY (H/ V) IBM, 640 x 350 31.469 70.086 25.175 +/- IBM, 720 x 400 31.469 70.087 28.322 -/+ MAC, 640 x 480 35.000 66.667 30.240 -/- MAC, 832 x 624 49.726 74.551 57.284 -/- MAC, 1152 x 870 68.681 75.062 100.000 -/- VESA, 640 x 480 31.469 59.94 25.175 -/- VESA, 640 x 480 37.861 72.809 31.500 -/- VESA, 640 x 480 37.500 75.000 31.500 -/- VESA, 800 x 600 35.156 56.250 36.
3-8 Standard Signal Mode Table The LCD monitor has one optimal resolution for the best visual quality depending on the screen size due to the inherent characteristics of the panel, unlike for a CDT monitor. Therefore, the visual quality will be degraded if the optimal resolution is not set for the panel size. It is recommended setting the resolution to the optimal resolution of the product. If the signal from the PC is one of the following standard signal modes, the screen is set automatically.
DISPLAY MODE HORIZONTAL FREQUENCY (KHZ) VERTICAL FREQUENCY (HZ) PIXEL CLOCK (MHZ) SYNC POLARITY (H/ V) IBM, 640 x 350 31.469 70.086 25.175 +/- IBM, 720 x 400 31.469 70.087 28.322 -/+ MAC, 640 x 480 35.000 66.667 30.240 -/- MAC, 832 x 624 49.726 74.551 57.284 -/- MAC, 1152 x 870 68.681 75.062 100.000 -/- VESA, 640 x 480 31.469 59.94 25.175 -/- VESA, 640 x 480 37.861 72.809 31.500 -/- VESA, 640 x 480 37.500 75.000 31.500 -/- VESA, 800 x 600 35.156 56.250 36.
3-9 Standard Signal Mode Table The LCD monitor has one optimal resolution for the best visual quality depending on the screen size due to the inherent characteristics of the panel, unlike for a CDT monitor. Therefore, the visual quality will be degraded if the optimal resolution is not set for the panel size. It is recommended setting the resolution to the optimal resolution of the product. If the signal from the PC is one of the following standard signal modes, the screen is set automatically.
DISPLAY MODE HORIZONTAL FREQUENCY (KHZ) VERTICAL FREQUENCY (HZ) PIXEL CLOCK (MHZ) SYNC POLARITY (H/ V) IBM, 640 x 350 31.469 70.086 25.175 +/- IBM, 720 x 400 31.469 70.087 28.322 -/+ MAC, 640 x 480 35.000 66.667 30.240 -/- MAC, 832 x 624 49.726 74.551 57.284 -/- MAC, 1152 x 870 68.681 75.062 100.000 -/- VESA, 640 x 480 31.469 59.94 25.175 -/- VESA, 640 x 480 37.861 72.809 31.500 -/- VESA, 640 x 480 37.500 75.000 31.500 -/- VESA, 800 x 600 35.156 56.250 36.
3-10 Standard Signal Mode Table The LCD monitor has one optimal resolution for the best visual quality depending on the screen size due to the inherent characteristics of the panel, unlike for a CDT monitor. Therefore, the visual quality will be degraded if the optimal resolution is not set for the panel size. It is recommended setting the resolution to the optimal resolution of the product. If the signal from the PC is one of the following standard signal modes, the screen is set automatically.
DISPLAY MODE HORIZONTAL FREQUENCY (KHZ) VERTICAL FREQUENCY (HZ) PIXEL CLOCK (MHZ) SYNC POLARITY (H/ V) IBM, 640 x 350 31.469 70.086 25.175 +/- IBM, 720 x 400 31.469 70.087 28.322 -/+ MAC, 640 x 480 35.000 66.667 30.240 -/- MAC, 832 x 624 49.726 74.551 57.284 -/- MAC, 1152 x 870 68.681 75.062 100.000 -/- VESA, 640 x 480 31.469 59.94 25.175 -/- VESA, 640 x 480 37.861 72.809 31.500 -/- VESA, 640 x 480 37.500 75.000 31.500 -/- VESA, 800 x 600 35.156 56.250 36.
3-11 Standard Signal Mode Table The LCD monitor has one optimal resolution for the best visual quality depending on the screen size due to the inherent characteristics of the panel, unlike for a CDT monitor. Therefore, the visual quality will be degraded if the optimal resolution is not set for the panel size. It is recommended setting the resolution to the optimal resolution of the product. If the signal from the PC is one of the following standard signal modes, the screen is set automatically.
DISPLAY MODE HORIZONTAL FREQUENCY (KHZ) VERTICAL FREQUENCY (HZ) PIXEL CLOCK (MHZ) SYNC POLARITY (H/ V) IBM, 640 x 350 31.469 70.086 25.175 +/- IBM, 720 x 400 31.469 70.087 28.322 -/+ MAC, 640 x 480 35.000 66.667 30.240 -/- MAC, 832 x 624 49.726 74.551 57.284 -/- MAC, 1152 x 870 68.681 75.062 100.000 -/- VESA, 640 x 480 31.469 59.94 25.175 -/- VESA, 640 x 480 37.861 72.809 31.500 -/- VESA, 640 x 480 37.500 75.000 31.500 -/- VESA, 800 x 600 35.156 56.250 36.
3-12 Installing the Device Driver If you install the device driver, you can set up the appropriate resolution and frequency for the product. The device driver is included on the CD-ROM supplied with the product. If the supplied drive file is corrupted, please visit a service center or Samsung Electronics website(http://www.samsung.com/), and download the driver. 1. Insert the driver installation CD-ROM into the CD-ROM drive. 2. Click on "Windows Driver". 3.
3-13 Product Operating Buttons Product Operating Buttons ICON DESCRIPTION Press this button to view the On Screen Display (OSD). This button is also used to exit the OSD or to return to a higher-level OSD menu * OSD Adjustment Lock This function locks the OSD in order to maintain the current settings or to prevent the settings from being changed by another person On: If you press and hold the MENU button down for 5 seconds, the OSD Adjustment Lock function is activated.
ICON AUTO DESCRIPTION Press [AUTO] button to adjust the screen settings automatically This function is only available in Analog mode. If the resolution settings are changed in the Display Properties, the AUTO adjustment function is performed. Press this button to turn the product on or off • The buttons on the right of the product are touch-type buttons. • Touch the buttons lightly with your finger. Power LED This LED is turned on when the product works normally.
3-14 Using the Screen Adjustment Menu (OSD: On Screen Display) The Screen Adjustment Menu (OSD: On Screen Display) Structure Top Menus PICTURE COLOR SIZE & POSITION SETUP&RESET Sub Menus Brightness Contrast Sharpness MagicBright Picture Mode MagicAngle Coarse Fine Response Time HDMI Black Level MagicColor Red Green Blue Color Tone Color Effect Gamma H-Position V-Position Image Size Menu H-Position Menu V-Position Reset Language MagicReturn MagicEco Off Timer On/Off Off Timer S
Menu Description Controls the clarity of details of pictures displayed on the screen • This menu is unavailable when is set to or mode. • This menu is unavailable when is set to mode or mode. • This menu is unavailable when is set. Sharpness Provides preset picture settings optimized for various user environments such as editing a document, surfing the Internet, playing games,or movies and so on.
Menu Description This feature allows you to see optimal screen quality according to your viewing position. When viewing the screen at an angle from below, above or the side of the monitor, by setting the appropriate mode for each position you can obtain a similar picture quality as viewing the screen directly from the front. Set to when viewing directly in front of the screen. MagicAngle • - Select when viewing from the front position.
Menu Description Accelerates the response time of the LCD panel faster than the original response time so that moving pictures appear sharper and more natural. Response Time • • • • It is recommended setting the or when not viewing a movie. • Monitor functions may vary according to models. Please refer to actual product.
Menu Description Expresses natural colors more clearly without changing the picture quality using proprietary digital picture quality improvement technology developed by Samsung Electronics. MagicColor • - Turns the function off. • - You can compare the pictures processed by with the original pictures. • - Provides a clearer picture including areas corresponding to skin color.
SIZE & POSITION Menu Description Moves the position of the display area on the screen horizontally. H-Position • This function is only available in Analog mode. • When a 720P, 1080i or 1080P signal is input in AV mode ,select to adjust horizontal position in 0-6 levels. Moves the position of the display area on the screen vertically. V-Position • This function is only available in Analog mode.
SETUP&RESET Menu Reset Description Use this function to restore the visual quality and color settings to the factory defaults. • - Select a language for the OSD. Language The selected language is only applied to the product OSD. This setting does not affect the other functions of the PC. Only works in Windows 7 and recommended when using multiple monitors. • Whenis selected, thefunction is turned off.
Menu Off Timer On/Off Description You can turn the Off Timer on or off. • - Turns the power off automatically when the configured time is reached. Off Timer Setting When of is selected,This function is available only. Controls the repeat delay of a button. Key Repeat Time You can set to , <1 sec> or <2 sec>. If is selected, the button only responds once. You can set the function of the Customized Key to one of the following.
4 Installing the Software 4-1 Natural Color What is Natural Color ? This software works only for Samsung products and enables adjusting the displayed colors on the product and matches the colors on the product with the colors of the printed pictures. For more information, refer to the online help of the software (F1). The Natural Color is provided online. You can download it from the website below and install; http://www.samsung.com/us/consumer/learningresources/monitor/naturalcolorexpert/pop_download.
4-2 MagicTune What is MagicTune? MagicTune is a software program that helps with monitor adjustments by providing comprehensive descriptions of monitor functions and easy-to-understand guidelines. Users can adjust the product with the mouse and the keyboard without using the operating buttons of the product. Installing the Software 1. Insert the installation CD into the CD-ROM drive. 2. Select the MagicTune setup program.
3. In the [Add/Remove] window, find and select MagicTune™so that it is highlighted. 4. Click [Change or Remove Programs] to remove the software. 5. Select [Yes] to start removing MagicTune™. 6. Wait until a message box appears informing you that the software has been removed completely. For technical support, the FAQ (frequently asked questions) or information about the software upgrade for MagicTune™, please visit our website.
4-3 MultiScreen What is MultiScreen ? MultiScreen enables users to use the monitor by partitioning multiple sections. Installing the Software 1. Insert the installation CD into the CD-ROM drive. 2. Select the MultiScreen setup program. If the pop-up screen for the software installation does not appear on the main screen, find and double-click the MultiScreen setup file on the CD-ROM. 3. When the Installation Wizard appears, click [Next]. 4.
5 Troubleshooting 5-1 Monitor Self-Diagnosis • You can check if the product is working properly using the Self-Diagnosis function. • If a blank screen is displayed and the Power LED blinks even if the product and the PC are properly connected, perform the self-diagnosis function according to the procedures below. 1. Turn the product and the PC off. 2. Separate the signal cable from the product . 3. Turn the product on. 4. If the product is working properly, the message appears.
5-2 Before Requesting Service Please check the following before requesting After-Sales service. If the problem continues, please contact your nearest Samsung Electronics Service Center. A blank screen appears / I cannot turn the product on Is the power cord connected properly? Check the connection status of the power cord. Is the message displayed on the screen? (Connected using the D-sub cable) Check the cable connecting the PC and the product.
The display area suddenly moves to an edge or to the center. Did you change the graphics card or the driver? Please press the [AUTO] button to run the auto adjustment function. Did you change the resolution and frequency appropriate to the product? Set the resolution and the frequency to the appropriate values in the graphics card refer to the (Standard Signal Mode Table) Is the graphics card configured correctly? Set up the graphics card referring to the user manual. The pictures are out-of-focus.
5-3 FAQ FAQ! How can I change the frequency (refresh rate) of the video signal? PLEASE TRY THE FOLLOWING! You have to change the frequency of the graphics card. Windows XP : Change the frequency by selecting Control Panel → Appearance and Themes → Display → Settings → Advanced → Monitor, and then change the refresh rate under Monitor Settings.
6 More Information 6-1 Specifications MODEL NAME LCD Panel Synchronization Size 18.5 inches (47 cm) Display area 409.8 mm (H) x 230.4 mm (V) Pixel Pitch 0.300 mm (H) x 0.300 mm (V) Horizontal 30 ~ 81 kHz Vertical 56 ~ 75 Hz Display Color Resolution BX1950 16.7 M Optimum resolution 1360x768 @ 60 Hz Maximum resolution 1360x768 @ 60 Hz RGB Analog, DVI(Digital Visual Interface) Compliant Digital RGB Input Signal, Terminated 0.
6-2 Power Saving Function This monitor has a built-in power management system called PowerSaver. This system saves energy by switching your monitor to low-power mode when it has not been used for a certain amount of time. The monitor automatically returns to normal operation when you press a key on the keyboard. For energy conservation, turn your monitor OFF when it is not needed, or when leaving it unattended for long periods.
6-3 Specifications MODEL NAME LCD Panel Synchronization Size 18.5 inches (47 cm) Display area 409.8 mm (H) x 230.4 mm (V) Pixel Pitch 0.300 mm (H) x 0.300 mm (V) Horizontal 30 ~ 81 kHz Vertical 56 ~ 75 Hz Display Color Resolution BX1950N 16.7 M Optimum resolution 1360x768 @ 60 Hz Maximum resolution 1360x768 @ 60 Hz RGB Analog Input Signal, Terminated 0.7 Vp-p ± 5% separate H/V sync, Composite, SOG TTL level (V high ≥ 2.0V, V low ≤ 0.
6-4 Power Saving Function This monitor has a built-in power management system called PowerSaver. This system saves energy by switching your monitor to low-power mode when it has not been used for a certain amount of time. The monitor automatically returns to normal operation when you press a key on the keyboard. For energy conservation, turn your monitor OFF when it is not needed, or when leaving it unattended for long periods.
6-5 Specifications MODEL NAME LCD Panel Synchronization Size 20 inches (50 cm) Display area 442.8 mm (H) x 249.08 mm (V) Pixel Pitch 0.27675 mm (H) x 0.27675 mm (V) Horizontal 30 ~ 81 kHz Vertical 56 ~ 75 Hz Display Color Resolution BX2050 16.7 M Optimum resolution 1600x900 @ 60 Hz Maximum resolution 1600x900 @ 60 Hz RGB Analog, DVI(Digital Visual Interface) Compliant Digital RGB Input Signal, Terminated 0.7 Vp-p ± 5% separate H/V sync, Composite, SOG TTL level (V high ≥ 2.
6-6 Power Saving Function This monitor has a built-in power management system called PowerSaver. This system saves energy by switching your monitor to low-power mode when it has not been used for a certain amount of time. The monitor automatically returns to normal operation when you press a key on the keyboard. For energy conservation, turn your monitor OFF when it is not needed, or when leaving it unattended for long periods.
6-7 Specifications MODEL NAME LCD Panel Synchronization Size 20 inches (50 cm) Display area 442.8 mm (H) x 249.08 mm (V) Pixel Pitch 0.27675 mm (H) x 0.27675 mm (V) Horizontal 30 ~ 81 kHz Vertical 56 ~ 75 Hz Display Color Resolution BX2050N 16.7 M Optimum resolution 1600x900 @ 60 Hz Maximum resolution 1600x900 @ 60 Hz RGB Analog Input Signal, Terminated 0.7 Vp-p ± 5% separate H/V sync, Composite, SOG TTL level (V high ≥ 2.0V, V low ≤ 0.
6-8 Power Saving Function This monitor has a built-in power management system called PowerSaver. This system saves energy by switching your monitor to low-power mode when it has not been used for a certain amount of time. The monitor automatically returns to normal operation when you press a key on the keyboard. For energy conservation, turn your monitor OFF when it is not needed, or when leaving it unattended for long periods.
6-9 Specifications MODEL NAME LCD Panel Synchronization Size 21.5 inches (54 cm) Display area 476.64 mm (H) x 268.11 mm (V) Pixel Pitch 0.24825 mm (H) x 0.24825 mm (V) Horizontal 30 ~ 81 kHz Vertical 56 ~ 75 Hz Display Color Resolution BX2250 16.7 M Optimum resolution 1920x1080 @ 60 Hz Maximum resolution 1920x1080 @ 60 Hz RGB Analog, HDMI, Audio Out Input Signal, Terminated 0.7 Vp-p ± 5% separate H/V sync, Composite, SOG TTL level (V high ≥ 2.0V, V low ≤ 0.
6-10 Power Saving Function This monitor has a built-in power management system called PowerSaver. This system saves energy by switching your monitor to low-power mode when it has not been used for a certain amount of time. The monitor automatically returns to normal operation when you press a key on the keyboard. For energy conservation, turn your monitor OFF when it is not needed, or when leaving it unattended for long periods.
6-11 Specifications MODEL NAME LCD Panel Synchronization Size 21.5 inches (54 cm) Display area 476.64 mm (H) x 268.11 mm (V) Pixel Pitch 0.24825 mm (H) x 0.24825 mm (V) Horizontal 30 ~ 81 kHz Vertical 56 ~ 75 Hz Display Color Resolution BX2250N 16.7 M Optimum resolution 1920x1080 @ 60 Hz Maximum resolution 1920x1080 @ 60 Hz RGB Analog Input Signal, Terminated 0.7 Vp-p ± 5% separate H/V sync, Composite, SOG TTL level (V high ≥ 2.0V, V low ≤ 0.
6-12 Power Saving Function This monitor has a built-in power management system called PowerSaver. This system saves energy by switching your monitor to low-power mode when it has not been used for a certain amount of time. The monitor automatically returns to normal operation when you press a key on the keyboard. For energy conservation, turn your monitor OFF when it is not needed, or when leaving it unattended for long periods.
6-13 Specifications MODEL NAME LCD Panel Synchronization Size 23 inches (58 cm) Display area 509.76 mm (H) x 286.74 mm (V) Pixel Pitch 0.2655 mm (H) x 0.2655 mm (V) Horizontal 30 ~ 81 kHz Vertical 56 ~ 75 Hz Display Color Resolution BX2350 16.7 M Optimum resolution 1920x1080 @ 60 Hz Maximum resolution 1920x1080 @ 60 Hz RGB Analog, HDMI, Audio Out Input Signal, Terminated 0.7 Vp-p ± 5% separate H/V sync, Composite, SOG TTL level (V high ≥ 2.0V, V low ≤ 0.
6-14 Power Saving Function This monitor has a built-in power management system called PowerSaver. This system saves energy by switching your monitor to low-power mode when it has not been used for a certain amount of time. The monitor automatically returns to normal operation when you press a key on the keyboard. For energy conservation, turn your monitor OFF when it is not needed, or when leaving it unattended for long periods.
6-15 Specifications MODEL NAME LCD Panel Synchronization Size 24 inches (61 cm) Display area 531.36 mm (H) x 298.89 mm (V) Pixel Pitch 0.27675 mm (H) x 0.27675 mm (V) Horizontal 30 ~ 81 kHz Vertical 56 ~ 75 Hz Display Color Resolution BX2450 16.7 M Optimum resolution 1920x1080 @ 60 Hz Maximum resolution 1920x1080 @ 60 Hz RGB Analog, HDMI, Audio Out Input Signal, Terminated 0.7 Vp-p ± 5% separate H/V sync, Composite, SOG TTL level (V high ≥ 2.0V, V low ≤ 0.
6-16 Power Saving Function This monitor has a built-in power management system called PowerSaver. This system saves energy by switching your monitor to low-power mode when it has not been used for a certain amount of time. The monitor automatically returns to normal operation when you press a key on the keyboard. For energy conservation, turn your monitor OFF when it is not needed, or when leaving it unattended for long periods.
6-17 Specifications MODEL NAME LCD Panel Synchronization Size 23.6 inches (60 cm) Display area 521.28 mm (H) x 293.22 mm (V) Pixel Pitch 0.2715 mm (H) x 0.2715 mm (V) Horizontal 30 ~ 81 kHz Vertical 56 ~ 75 Hz Display Color Resolution BX2450L 16.7 M Optimum resolution 1920x1080 @ 60 Hz Maximum resolution 1920x1080 @ 60 Hz RGB Analog, HDMI, Audio Out Input Signal, Terminated 0.7 Vp-p ± 5% separate H/V sync, Composite, SOG TTL level (V high ≥ 2.0V, V low ≤ 0.
6-18 Power Saving Function This monitor has a built-in power management system called PowerSaver. This system saves energy by switching your monitor to low-power mode when it has not been used for a certain amount of time. The monitor automatically returns to normal operation when you press a key on the keyboard. For energy conservation, turn your monitor OFF when it is not needed, or when leaving it unattended for long periods.
6-19 Specifications MODEL NAME LCD Panel Synchronization Size 24 inches (61 cm) Display area 531.36 mm (H) x 298.89 mm (V) Pixel Pitch 0.27675 mm (H) x 0.27675 mm (V) Horizontal 30 ~ 81 kHz Vertical 56 ~ 75 Hz Display Color Resolution BX2450N 16.7 M Optimum resolution 1920x1080 @ 60 Hz Maximum resolution 1920x1080 @ 60 Hz RGB Analog Input Signal, Terminated 0.7 Vp-p ± 5% separate H/V sync, Composite, SOG TTL level (V high ≥ 2.0V, V low ≤ 0.
6-20 Power Saving Function This monitor has a built-in power management system called PowerSaver. This system saves energy by switching your monitor to low-power mode when it has not been used for a certain amount of time. The monitor automatically returns to normal operation when you press a key on the keyboard. For energy conservation, turn your monitor OFF when it is not needed, or when leaving it unattended for long periods.
6-21 Contact SAMSUNG WORLDWIDE •If you have any questions or comments relating to Samsung products, please contact the SAMSUNG customer care center. NORTH AMERICA U.S.A 1-800-SAMSUNG(726-7864) http://www.samsung.com CANADA 1-800-SAMSUNG(726-7864) http://www.samsung.com MEXICO 01-800-SAMSUNG(726-7864) http://www.samsung.com LATIN AMERICA ARGENTINA 0800-333-3733 http://www.samsung.com BRAZIL 0800-124-421 http://www.samsung.com 4004-0000 CHILE 800-SAMSUNG(726-7864) http://www.samsung.
EUROPE GERMANY 01805 - SAMSUNG (726-7864,€ 0,14/ Min) http://www.samsung.com HUNGARY 06-80-SAMSUNG(726-7864) http://www.samsung.com ITALIA 800-SAMSUNG(726-7864) http://www.samsung.com LATVIA 8000-7267 http://www.samsung.com LITHUANIA 8-800-77777 http://www.samsung.com LUXEMBURG 261 03 710 http://www.samsung.com NETHERLANDS 0900 - SAMSUNG (0900-7267864) (€ 0,10/Min) http://www.samsung.com NORWAY 815-56 480 http://www.samsung.com POLAND 0 801 1SAMSUNG (172678) http://www.samsung.
ASIA PACIFIC INDIA 3030 8282 http://www.samsung.com 1800 110011 1800 3000 8282 1800 266 8282 INDONESIA 0800-112-8888 http://www.samsung.com 021-5699-7777 JAPAN 0120-327-527 http://www.samsung.com MALAYSIA 1800-88-9999 http://www.samsung.com NEW ZEALAND 0800 SAMSUNG (0800 726 786) http://www.samsung.com PHILIPPINES 1-800-10-SAMSUNG(726-7864) http://www.samsung.com 1-800-3-SAMSUNG(726-7864) 1-800-8-SAMSUNG(726-7864) 02-5805777 SINGAPORE 1800-SAMSUNG(726-7864) http://www.samsung.
6-22 Correct Disposal of This Product (Waste Electrical & Electronic Equipment) - Europe only (Applicable in the European Union and other European countries with separate collection systems) This marking on the product, accessories or literature indicates that the product and its electronic accessories (e.g. charger, headset, USB cable) should not be disposed of with other household waste at the end of their working life.