CTI613EH series CTN364D001 Induction Hob user manual imagine the possibilities Thank you for purchasing this Samsung product. To receive more complete service, please register your product at www.samsung.com/global/register CTI613EH series_EN-00204A_XSA.
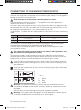
using this manual Please take the time to read this owner’s manual, paying particular attention to the safety information contained in the following section, before using your appliance. Keep this manual for future reference. If transferring ownership of the appliance, please remember to pass the manual on to the new owner. The following symbols are used in the text This is the safety alert symbol. Warning indicates information concerning your personal safety.
safety instructions The safety aspects of this appliance comply with all accepted technical and safety standards. However, as manufacturers we also believe it is our responsibility to familiarize you with the following safety instructions. • • • • Be sure the appliance is properly installed and grounded by a qualified technician. The appliance should be serviced only by qualified service personnel. Repairs carried out by unqualified individuals may cause injury or serious malfunction.
Safety during use • • • • • • • • • • • • • • • Metallic objects such as knives, forks, spoons and lids should not be placed on the hob surface since they can get hot. After use, switch off the hob element by its control and do not rely on the pan detector.
disposal instructions Disposing of the packaging material Proper disposal of your old appliance Warning: Before disposing of your old appliance, make it inoperable so that it cannot be a source of danger. To do this, have a qualified technician disconnect the appliance from the mains supply and remove the mains lead. • • The appliance may not be disposed of in the household rubbish.
contents installing the hob 7 7 8 9 Regulations and compliance Safety instructions for the installer Connecting to the mains power supply Installing into the countertop parts and features 11 11 12 12 13 14 14 15 Cooking zones Control panel Components Induction heating The key features of your appliance Safety shutoff Residual heat indicator Temperature detection before you begin 15 Initial cleaning hob use 16 16 16 17 17 18 18 18 19 19 20 21 21 22 Cookware for induction cooking zones Suitability
installing the hob Regulations and compliance This appliance meets the following standards: • EN 60335 - 1 and EN 60335 - 2 - 6, relating to the safety of electrical appliances for household use and similar purposes; • EN 60350, or DIN 44546 / 44547 / 44548, relating to the operating features of electric cookers, hobs, ovens, and grills for household use; • EN 55014-1 • EN 55014-2 • EN 61000 - 3 - 2; and • EN 61000 - 3 - 3, relating to basic requirements for electromagnetic compatibility (EMC).
Connecting to the mains power supply Before connecting, check that the nominal voltage of the appliance, that is, the voltage stated on the rating plate, corresponds to the available supply voltage. The rating plate is located on the lower casing of the hob. Shut off power to circuit before connecting wires to circuit. The heating element voltage is AC230 V~. The appliance also works perfectly on networks with AC220 V~ or AC240 V~.
Installing into the countertop Min. 50 mm Min. 5 mm installing the hob Make a note of the serial number on the appliance rating plate prior to installation. This number will be required in the case of requests for service and is no longer accessible after installation, as it is on the original rating plate on the underside of the appliance. Pay special attention to the minimum space and clearance requirements.
90° x 4 ø2 100 = 490 100 ±1 = 10_ installing the hob CTI613EH series_EN-00204A_XSA.
parts and features Cooking zones m m m 18 0 0 21 m 18 m m 0 m m 4 0 16 parts and features 2 1 3 5 1. 2. 3. 4. 5. Induction cooking zone 2200W with Power Boost 3200W Induction cooking zone 1800W with Power Boost 2600W Induction cooking zone 1400W with Power Boost 2000W Induction cooking zone 1800W with Power Boost 2600W Control panel control panel 1 8 1. 2. 3. 4. 5. 6. 7. 8.
Components Induction Hob Installation Brackets Screws Induction heating • The Principle of Induction Heating: When you place your cookware on a cooking zone and you turn it on, the electronic circuits in your induction hob produce “induced currents” in the bottom of the cookware which instantly raise cookware’s temperature.
The key features of your appliance • • • • • • • parts and features • Ceramic glass cooking surface: The appliance has a ceramic glass cooking surface and four rapid - response cooking zones. Touch control sensors: Your appliance is operated using touch control sensors. Easy cleaning: The advantage of the ceramic glass cooking surface and the control sensors is their accessibility for cleaning. The smooth, flat surface is easy to clean.
Safety shutoff If one of the cooking zones is not switched off or the heat setting is not adjusted after an extended period of time, that particular cooking zone will automatically switch itself off. Any residual warmth will be indicated with (for “hot”) in the digital displays corresponding to the particular cooking zones. The cooking zones switch themselves off at the following times. Heat setting Switch off 1-3 After 6 hours 4-6 After 5 hours 7-9 After 4 hours 10-15 After 1.
Temperature detection before you begin Initial cleaning before you begin If for any reason the temperatures on any of the cooking zones were to exceed the safety levels, should this happen then the cooking zone will automatically reduce to a lower power level. When you have finished using the hob, the cooling fan will continue to run until the hob’s electronics has cooled down. And the cooling fan switched itself on and off depending upon the termperature of the electronics.
hob use CookwarE for INDuCTIoN CookINg zoNEs The induction hob can only be turned on when a cookware with a magnetic base is placed on one of the cooking zones. You can use the following suitable cookware. Cookware material Cookware material suitable Steel, Enamelled steel Yes Cast iron Yes Stainless steel If appropriately labelled by the manufacturer Aluminium, Copper, Brass No Glass, Ceramic, Porcelain No Cookware for induction hob is labelled as suitable by the manufacturer.
Using suitable cookware hob use Better pans produce better results. • You can recognise good pans by their bases. The base should be as thick and flat as possible. • When buying new pans, pay particular attention to the diameter of the base. Manufacturers often give only the diameter of the upper rim. • Do not use pans which have damaged bases with rough edges or burrs. Permanent scratching can occur if these pan are slid across the surface.
Switching the appliance on 1. Touch the Lock control sensor for approximately 3 seconds. 2. The appliance is switched on using the On/Off control sensor. Touch the On/Off control sensor for 1 second. The digital displays will show . approx 1 sec. After the On/Off control sensor has been actuated to switch on your appliance, a heat setting must be selected within approximately 10 seconds. Otherwise, the appliance will switch itself off for safety reasons. Select cooking zone and heat setting 1.
After switching off a single cooking zone or the entire cooking surface, the presence of residual heat will be indicated in the digital displays of the corresponding cooking zones in the form of an (for “hot”). swITCHINg a CookINg zoNE off Hob usE To switch off a cooking zone, return the setting to by using the control panel’s control sensor. To switch off more quickly, touch the corresponding cooking zone’s key twice.
Timer There are two ways to use the timer: Using the timer as a safety shutoff: If a specific time is set for a cooking zone, the cooking zone will shut itself off once this period of time has elapsed. This function can be used for multiple cooking zones simultaneously. Using the timer to count down: The countdown timer cannot be used if a cooking zone has been switched on. Setting the safety shutoff The cooking zone(s) for which you want to apply the safety shutoff must be switched on. 1.
Countdown timer For the countdown timer to be used, the appliance must be switched on but all the cooking zones must be switched off. 1. Touch the Timer control sensor. will appear in the timer display. ). hob use or 2. Set the desired period of time using the Timer setting selectors ( The countdown timer function is now activated and the remaining time appears in the timer display. To adjust the remaining time, touch the Timer control sensor.
Suggested settings for cooking specific foods The figures in the table below are guidelines. The heat settings required for various cooking methods depend on a number of variables, including the quality of the cookware being used and the type and amount of food being cooked.
cleaning and care Hob Clean the ceramic glass surface after each use when it is still warm to the touch. This will prevent spillage from becoming burnt onto the surface. Remove scales, watermarks, fat drippings and metallic discolouration with the use of a commercially available ceramic glass or stainless steel cleaner.
Problem Dirt 1. Remove burnt-on sugar, melted plastic, aluminium foil or other materials with a glass scraper immediately and while still hot. Important: There is a risk of burning yourself when the glass scraper is used on a hot cooking zone: 2. Clean the hob as normal when it has cooled down. If the cooking zone on which something has melted has been allowed to cool, warm it up again for cleaning.
warranty and service FAQs and troubleshooting Warning: Repairs to the appliance are to be performed only by a qualified service technician. Improperly effected repairs may result in considerable risk to the user. If your appliance needs repair, please contact your customer service centre. What should I do if the cooking zones are not functioning? Check for the following possibilities: • The fuse in the house wiring (fuse box) is intact. If the fuses trip a number of times, call an authorised electrician.
What should I do if the display is illuminated? Check for the following: • The control panel is partially covered by a damp cloth or liquid. To reset, press the “On / Off” control sensor. What should I do if the display is illuminated? Check for the following: • The hob is overheated because of abnormal operation. • After hob is cooled down, press the “On / Off” control sensor for resetting.
technical data Technical data Worktop cut - out dimensions Width 575 mm Depth 505 mm Height 62 mm Width 560 mm Depth 490 mm Corner radius 3 mm 220 - 240 V ~ 50/60 Hz Connection voltage Maximum connected load power Weight technical data Appliance dimensions 7.2 kW Net 12.0 kg Gross 14.
Code No.: DG68-00204A CTI613EH series_EN-00204A_XSA.