To avoid injuries or damage to property, please read the following precautions carefully and use the product accordingly. Failure to follow the instructions marked with this symbol may cause personal injury or even fatality. Failure to follow the instructions marked with this symbol may cause personal injury or damage to the product or property. | Power Related | Installation Related | Cleaning and Use Related | [The images here are for reference only, and are not applicable in all cases (or countries).
z There is a danger of electric shock or fire. Always unplug the unit by holding the power plug. Pulling the power cable may damage the inside of it. z There is a danger of fire. Unplug the power plug before cleaning the product. z There is a danger of electric shock or fire. | Power Related | Installation Related | Cleaning and Use Related | TO PREVENT THE SPREAD OF FIRE, KEEP CANDLES OR OTHER OPEN FLAMES AWAY FROM THIS PRODUCT AT ALL TIMES. z There is a danger of fire.
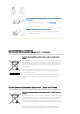
Do not install on an unstable location, or on a stand smaller than the product. z Make sure to keep the product out of the reach of children. The product may fall and cause personal injury. In case of thunder/lightning, disconnect the power cord from the wall outlet. z There is a danger of electric shock or fire. Make sure the product's vents are not blocked by a table cloth or curtain. z An increase in the internal temperature may cause a fire. Place the product on the ground carefully.
Do not use or keep the product near flammable sprays or other such substances. z There is a danger of fire or explosion. Do not place containers with water, vases, drinks, chemicals, small metal parts or heavy objects on the product. z If water enters the product, it may cause electric shock, or fire and when heavy objects fall, it may cause injury. Do not let children place objects such as toys or cookies on the product.
If the product is dropped or the casing is damaged, turn the product off and unplug the power cord. z This may cause electric shock or fire. Contact a Service Center. Make sure to place your remote control on a table or desk. z If you step on the remote control, you may fall and hurt yourself or the product may be damaged.
| Product Features | Product Views | Remote Control | Product Specifications | Optical engine with advanced DLP technology - 1024 x 768 panel has been adapted. - 4 segment color wheel to implement optimal colors. - 220W Lamp designed to improve luminance Vivid colors - Quality picture tuning focused on improving color - this unit aims at realizing color coordinates that meet broadcasting standards on video production.
1. Indicators 6. Zoom Knob - STAND BY (Blue LED) Used to enlarge or reduce image size. - LAMP (Blue LED) 7. POWER( - TEMP (Red LED) ※ Refer to the LED Indications. ) Button Used to turn the projector on or off. 2. Focus Ring 8. SOURCE Button Used for Focus Adjustment. Used to select input signals from the external sources. 3. Remote Control Signal Receiver 9. MENU Button 4. Lens Use this button to enter or exit a menu or to move forward in a menu. 5.
Remote Control/ 1 Batteries Power Cable Cleaning Cloth (Not available in all locations) Sold separately D-Sub Cable LED Indications ●:Light is On STAND ◐:Light is Blinking LAMP TEMP ● ○ ○ ● ● ○ ● ◐ ○ ○ ◐ ○ BY ○:Light is Off Information If you press the POWER button on the remote control or projector, the screen appears within 30 seconds. The projector is in normal operating condition.
normal operating condition. When temperature inside Action 3 of the projector becomes too high. Action 4 When the color wheel fails to operate. Adjust the installation state of your projector by referring to the Installation Precautions section listed above. Cool down your projector sufficiently and then operate it again. If the same problem occurs continually, contact your product distributor or service center. Disconnect and reconnect the power cord and start the projector again.
| Product Features | Product Views | Remote Control | Product Specifications | 1. ON ( 2. AUTO Button 3. MENU ( 4. Move (▲ ▼ ◀ ▶)/( 5. V.KEYSTONE(+/-) ) Button ) Button ) Button (VERTICAL KEYSTONE)Button 6. VIDEO Button 7. S-VIDEO Button 8. P.SIZE Button 9. COMP Button 10. OFF ( ) Button 11. RETURN ( 12. EXIT ( ) Button ) Button 13. INFO STILL Button 14. HDMI Button 15. INSTALL Button 16. P.MODE Button 17. PC Button 1. ON ( ) Used to turn on the projector. 2.
11. RETURN ( ) Returns to the previous menu. 12. EXIT ( ) Used to make Menu Screen disappear. 13. INFO STILL INFO: Used to check source signals, picture setup, PC screen adjustment and lamp lifespan. STILL: Used to see still images. 14. HDMI Used to switch to HDMI Mode. 15. INSTALL Used to flip or reverse the projected image. 16. P.MODE Used to select Picture Mode. 17. PC Used to switch to PC Mode.
Keystone Vertical Operating User Temperature Environment and Humidity Storage Temperature 32 °F ~ 104 °F (0 °C ~ 40 °C), Humidity (10 % ~ 80 %) Temperature -4 °F ~ 113 °F (-20 °C ~ 45 °C) , Humidity (5 % ~ 95 %) This Class B equipment is designed for home and office use. The equipment has been registered regarding EMI for residential use. It may be used in all areas. Class A is for office use. Class A is for business while class B emits less electromagnetic waves than class A.
1024X768 N 60 N 65 Sep. 60.02 P 75 P 78.75 Sep. 1280X768 47.78 N 60 P 79.5 Sep. 1280X960 60 P 60 P 108 Sep. 63.98 P 60 P 108 Sep. 79.98 P 75 P 135 Sep. 33.72 P 60 P 74.18 Sep. 28.125 P 50 P 74.25 Sep. 45 P 60 P 74.25 Sep. 37.5 P 50 P 74.25 Sep. 1280X1024 HDMI 48.36 1920x1080i 1280x720p 720x480p 31.5 P 60 P 27 Sep. 720x576p 31.25 P 50 P 27 Sep. 720x480i 15.73 P 60 P 13.5 Sep. 720x576i 15.63 P 50 P 13.5 Sep.
Component VIDEO & S-VIDEO SD SD HD SD PC 576p O O O O 480p O O O O 576i O O O O 480i O O O O 576i x x x x 480i x x x x 1080i O x x O 720p O x x O 576p O x x O 480p O x x O 576i O x x O 480i O x x O O x x O O x x O 16:9 16:9 PC Mode 4:3 Mode Overscan : On The position of the screen is not moved in PC input mode.
| Basic Settings | Connecting the Power | Connecting to video equipment | Installing the Projector Install the projector so that the beam from the projector is perpendicular to the screen. Place the projector so that the lens is at the center of the screen. If the screen is not vertically installed, the picture on the screen may not be a rectangle. Do not install the screen in bright surroundings. If the screen is too bright, the picture on the screen will not be displayed clearly.
You can adjust the size of image within zoom range by manipulating the Zoom Knob. Focus the picture on the screen using the Focus Ring. If your product is installed at a location out of the specified projection distance (refer to Screen Size and Projection Distance), the focus cannot be adjusted correctly. Leveling with Adjustable Feet For level placing of the projector, adjust the Adjustable Feet of the projector. You may adjust the level of the projector up to 12 mm (average 3.4°) degrees.
This projector is designed to show images optimally on a 80 ~ 120 inch sized screen. A. Screen Z: Throw Distance Y': Distance from Lens Center to Image Bottom Setting up the PC Environment - Check the following items before connecting your PC to your projector. 1. Click the right mouse button on the Windows desktop and click on [Properties]. tab will appear. 2.
5. Click the [OK] button to close the window, and click the [OK] button of the window to close the window. The computer may restart automatically. 6. Shut down the PC and connect to the projector. Process might vary depending on your type of computer or Windows versions. (For example, [Properties] appears instead of [Properties (R)] as shown in 1.) This unit appliance supports up to 24 bits per pixel in Color quality when it is used as a PC monitor.
Connecting a DVD player/Cable/Satellite Box to HDMI/DVI - Connecting using an HDMI/DVI cable Connect the [HDMI/DVI IN] terminal on the back of the projector and the DVI output terminal of the DVD player/Cable/Satellite box using a HDMI/DVI cable. - Connecting using an HDMI cable Connect the [HDMI/DVI IN] terminal on the back of the projector and the HDMI output terminal of the DVD player/Cable/Satellite box using a HDMI cable.
Component Ports are marked as (Y/PB/PR), (Y, B-Y, R-Y) or (Y, Cb, Cr) depending on the manufacturer. Connecting to VCR/Camcorder Connect [VIDEO IN(yellow)] input port of the projector to the VIDEO (yellow) OUT port of video equipment using the video cable. - If the video equipment has S-VIDEO OUT port, connect it to [S-VIDEO IN] input port of the projector. Using the S-VIDEO connection, provides a higher visual quality. When finishing connecting the devices, connect the power of the projector and the VCR.
Connect [PC IN] port on the rear side of the projector to the monitor output port of the PC using a PC video cable. When connections are all completed, connect both power cords of the projector and the PC. This product supports plug and play, therefore you do not need to install a driver on your PC. Using the Projector Turn on the projector and press the [PC] button to select . If PC Mode is not available, check PC video cable is in place. Turn on the PC and set the PC Environment when necessary.
[PC IN] input terminal.
| Input | Picture | Setup | Option | * Click the Play( Screen ) button in the table below to view the video file. Description Adjustment Source List )/Stop( Play/Stop You can select a device connected to the projector to display. 1) Component 4) PC 2) S-Video 5) HDMI 3) Video Edit Name You can edit the names of devices connected to the projector.
* Click the Play( Screen ) button in the table below to view the video file. Description Adjustment Mode )/Stop( Play/Stop Select a screen state which is customized to your projector or change the screen mode as required. 1) Mode - Dynamic Select this if you want the screen quality to be clearer than standard screen quality. - Standard You can comfortably view the projection screen if the surrounding is somewhat bright. - Movie1, Movie2 Select this if your surroundings are dark.
defaut setting for Dynamic Picture Mode. The sharpness and brightness are emphasized. R-Gain - 9300K : The color temperature appropriate to very bright places such as a shop. G-Gain B-Gain 1) Color Temperature 5) R-Offset R-Offset 2) R-Gain 6) G-Offset G-Offset 3) G-Gain 7) B-Offset B-Offset 4) B-Gain 8) Gamma : An image compensation function that controls the settings according to the video properties. - Film : The best setting for watching a film.
▶ Refer to "Size Support Mode". 1) Off 2) On Film Mode Using this function, you can set the display mode optimized for playing movies. ▶ Film Mode is only supported for [Video], [S-Video] and [Component]. 1) Off 2) On | Input | Picture | Setup | Option | * Click the Play( Screen ) button in the table below to view the video file. Description Adjustment Install )/Stop( Play/Stop To tailor the picture to the installation location, you can invert the projected images vertically/horizontally.
Test Pattern Generated by the projector itself. Utilized as standard to optimize the installation of the projector. 1) Crosshatch : You can check whether the picture is distorted or not. 2) Screen Size : You can refer to picture format sizes such as 1.33:1 or 1.78:1. 3) Red : Red Screen, only for color adjustment. 4) Green : Green Screen, only for color adjustment. 5) Blue : Blue Screen, only for color adjustment. 6) White : White Screen, only for color adjustment.
* Click the Play( Screen )/Stop( ) button in the table below to view the video file. Description Adjustment Language You can select the Language used for the menu screen. Menu Position You can move Menu Position up/down/left/right. Menu You can set the translucency of menu. Translucency 1) Opaque 2) Low 3) Medium 4) High Menu Display You can set the display time of the menu.
It is displayed in the form of an ellipse at the top of the projector . Blue sreen The Blue screen function causes the screen to change to the Blue screen if there is no signal input from the external device connected to your projector. 1) Off 2) On Information You can check external source signals, picture setup, PC picture adjustment and lamp use time.
| Before Contacting Service Personnel | Installation and Connection Symptoms Troubleshooting No Power. z Check the power cable connections. I want to install my projector on z The ceiling installation support is sold separately. Contact your local product distributor. the ceiling. External Source can not be z Be sure that the connection cable(s) (video) is properly connected to the proper port. If the device is not connected properly, it can not be selected. selected.
Default>from the menu.
| Care and Maintenance | Contact SAMSUNG WORLDWIDE | Other | Authority | To clean the exterior and lens of the projector Clean the projector using a soft dry cloth. Do not clean the projector with flammable substances such as benzene, thinners or a wet cloth, as these may cause problems. Do not touch the projector with a nail or any other sharp objects, as this may scratch the surface.
Contains Mercury, Dispose According to Local, State or Federal Laws Lamp Replacement Procedure The lamp is very hot and operates The lamp is located at the bottom with a high voltage. Allow it to cool of the product. direction of the arrow, as shown in down for at least 1 hour after Place the product so that its the figure. disconnecting the power cord bottom looks upward and remove before changing the lamp. the screws that hold the lamp Slide and open the cover in the cover in place.
COLOMBIA 01-8000112112 http://www.samsung.com/co COSTA RICA 0-800-507-7267 http://www.samsung.com/latin ECUADOR 1-800-10-7267 http://www.samsung.com/latin EL SALVADOR 800-6225 http://www.samsung.com/latin GUATEMALA 1-800-299-0013 http://www.samsung.com/latin HONDURAS 800-7919267 http://www.samsung.com/latin JAMAICA 1-800-234-7267 http://www.samsung.com/latin NICARAGUA 00-1800-5077267 http://www.samsung.com/latin PANAMA 800-7267 http://www.samsung.
ESTONIA 800-7267 http://www.samsung.ee LATVIA 8000-7267 http://www.samsung.com/lv LITHUANIA 8-800-77777 http://www.samsung.lt KAZAKHSTAN 8-10-800-500-55-500 http://www.samsung.com/kz_ru KYRGYZSTAN 00-800-500-55-500 RUSSIA 8-800-555-55-55 TADJIKISTAN 8-10-800-500-55-500 UKRAINE 8-800-502-0000 http://www.samsung.ua UZBEKISTAN 8-10-800-500-55-500 http://www.samsung.com/kz_ru http://www.samsung.ru Asia Pacific AUSTRALIA 1300 362 603 http://www.samsung.
ANTENNA IN Port This is the port for connecting a TV antenna using a coaxial cable. It is generally used to watch public broadcast programs. Black Level Black Level sets the light level of the darkest portion of the video signal to match that of the display's black level capability so that users can clearly view dark visuals. If the setting does not match the input signal, the dark screen is saturated and may not display properly or the dark screen looks milky-white.
sound quality. Approximately 100 channels including public broadcast channels are provided. To view satellite broadcasts, you have to install an additional receiver. | Care and Maintenance | Contact SAMSUNG WORLDWIDE | Other | Authority | Information in this document is subject to change without notice. ⓒ 2008 Samsung Electronics Co., Ltd. All rights reserved. Reproduction in any manner whatsoever without the written permission of Samsung Electronics Co., Ltd. is strictly forbidden.