DV203 Gas and Electric Dryer user manual imagine the possibilities Thank you for purchasing a Samsung product. To receive a more complete service, please register your product at www.samsung.com/global/register DV203AEW-02475A_EN.
features 1. Extra Large Capacity Ultra drying capabilities are at your fingertips! Now you can dry extra-large loads. Our ultralarge 7.0 cu.ft. capacity dryer circulates more air through your clothes getting them dry faster, for a wrinkle-free result. 2. Various Drying Cycles & Fuzzy Logic Algorithm Simply turn the Jog Dial to select one of the 7 automatic drying cycles, including normal and heavy duty, or let the Fuzzy Logic Control measure the degree of dampness and automatically set the drying time.
safety instructions Congratulations on your new Samsung Dryer. This manual contains valuable information on the installation, use, and care of your appliance. Please take the time to read this manual to take full advantage of your dryer’s many benefits and features. WHAT YOU NEED TO KNOW ABOUT SAFETY INSTRUCTIONS Warnings and Important Safety Instructions in this manual do not cover all possible conditions and situations that may occur.
safety instructions Read all instructions before using the appliance. To reduce the risk of fire or explosion: WARNING • • Do not dry items that have been previously cleaned, washed, soaked, or spotted with gasoline, dry cleaning solvents, or other flammable or explosive substances. They emit vapors that could ignite or explode.
Gas leaks may occur in your system, resulting in a dangerous situation. WARNING Gas leaks may not be detected by smell alone. Gas suppliers recommend you purchase and install a UL-approved gas detector. Install and use in accordance with the manufacturer’s instructions. Do not place items in your dryer that have been spotted or soaked with vegetable oil or cooking oil. Even after being washed, these items may contain significant amounts of these oils. The residual oil can ignite spontaneously.
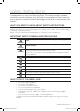
contents INSTALLING YOUR DRYER 7 7 8 9 9 9 10 10 11 12 12 13 13 14 15 16 17 Tools needed for installation See Exhaust Requirements Ducting requirements Important to installer location considerations Alcove or closet installation Mobile home installation Exhausting Gas requirements Electrical requirements Grounding Electrical connections Replacement parts and accessories Installation Final installation checklist Dryer Exhaust Tips Door Reversal OPERATING INSTRUCTIONS, TIPS 18 20 21 22 22 22 Overview of
installing your dryer TOOLS NEEDED FOR INSTALLATION SEE EXHAUST REQUIREMENTS 01 Installing your dryer Hire a professional to install this dryer properly. If there is a service call performed as a result of poor setup, adjustment, and connection, it is considered the responsibility of the installer. If you install the dryer you are responsible. Make sure you have everything necessary for proper installation. 1. A GROUNDED ELECTRICAL OUTLET is required. See Electrical Requirements. See page 12. 2.
installing your dryer DUCTING REQUIREMENTS • • • • • • • • • • • • • • • • • • Use a 4-inch (10.2 cm) diameter rigid aluminum or rigid galvanized steel duct. Do not use a smaller duct. Ducts larger than 4 inches (10.2 cm) in diameter can result in increased lint accumulation. Lint accumulation should be cleaned regularly. If a flexible metal duct must be used, use the type with a stiff sheet metal wall. Do not use a flexible duct with a thin foil wall.
If the new Dryer is installed into an existing exhaust system you must make sure: IMPORTANT TO INSTALLER 01 Installing your dryer • The exhaust system meets all local, state, and national codes. • That a flexible plastic duct is not used. • To Inspect and clean all lint buildup from inside the existing duct. • The duct is not kinked or crushed. • The exhaust hood damper opens and closes freely. The static pressure in any exhaust system must not exceed 0.83 inches of water column, or be less than 0.
installing your dryer MOBILE HOME INSTALLATION The installation of the Dryer in mobile homes must conform to the Manufactured Home Construction and Safety Standard Title 24 CFR, Part 32-80 {formerly the Federal Standard for Mobile Home Construction and Safety, Title 24, HUD (Part 280), 1975} for the United States) or CSA Standards Z240 (for Canada). When installing a Dryer in a mobile home, provisions for anchoring the Dryer to the floor must be made. Locate an area that has adequate fresh air.
GAS REQUIREMENTS • • 01 Installing your dryer Use only natural or LP (liquid propane) gases. THE INSTALLATION MUST CONFORM WITH LOCAL CODES, OR IN THE ABSENCE OF LOCAL CODES, WITH THE NATIONAL FUEL GAS CODE ANSI/Z223.1, LATEST REVISION (FOR THE UNITED STATES), OR WITH THE CAN/CGA-B149 INSTALLATION CODES (FOR CANADA). Gas dryers are equipped with a burner vent for use with natural gas.
installing your dryer ELECTRICAL REQUIREMENTS A Wiring diagram is located on a plate below the control panel. • WARNING • • Improper connection of the equipment grounding conductor can result in a risk of electric shock. Check with a qualified electrician or serviceman if you are in doubt as to whether your Dryer is properly grounded. Do not modify the plug provided with your Dryer – if it doesn’t fit the outlet, have a proper outlet installed by a qualified electrician.
ELECTRICAL CONNECTIONS Before operating or testing, follow all grounding instructions in the Grounding section. An individual branch (or separate) circuit serving only your Dryer is recommended. DO NOT USE AN EXTENSION CORD. Gas models – U.S. and Canada Electric models – U.S. only Most U.S. dryers require a 120/240 volt, 60 Hz AC approved electrical service. Some require 120/208 volt, 60 Hz approved electrical service.
installing your dryer INSTALLATION For proper installation, it is highly recommended to hire a professional. To install: 1. Move your Dryer to an appropriate location for installation. Consider installing the Dryer and Washer side-by-side, to allow access to gas, electrical, and exhaust connections. Lay two of the carton cushion-tops on the floor. Tip your Dryer on its side so it will lay across both cushion-tops. 2. Set your Dryer back in an upright position. 3.
3-WIRE system connections WARNING If converting from a 4-wire electrical system to a 3-wire, the ground strap must be reconnected to the terminal block support to ground the Dryer frame to the neutral conductor. 01 Installing your dryer 1. Loosen or remove the center terminal block screw. 2. Connect the neutral wire (white or center wire) of the power cord to the center, silver-colored terminal screw of the terminal block. Tighten screw. 3. Connect the other wires to outer terminal block screws.
installing your dryer DRYER EXHAUST TIPS Plastic or non-metal flexible duct presents a potential fire hazard. WARNING 1. Let your Dryer exhaust the air easily. 2. Use a 4” diameter rigid metal duct. Tape all joints, including at the dryer. Never use lint-trapping screws. 3. Keep ducts as straight as possible. 4. Clean all old ducts before installing your new Dryer. Be sure that the vent flap opens and closes freely. Inspect and clean the exhaust system annually.
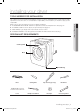
DOOR REVERSAL 8. Reassemble the black screw in the other hole. 4. Remove a screw on the Frame Front 9. Reassemble the screw (Step 4) on the Frame Front 5. Remove two screws on the opposite side of the door hinge. 10. Place the door on the other side and reattach it to the dryer. 6. Remove two screws from the holder lever. 11. Reassemble the holder lever. 7. Remove one black screw from the door hinge. 12. Reassemble the screws in the remaing holes. WARNING 01 Installing your dryer 1.
operating Instructions, tips OVERVIEW OF THE CONTROL PANEL 1 2 3 4 5 6 7 8 9 10 Digital Graphic Display The display window shows the estimated time remaining in the cycle after the Start/Pause button is pressed. The estimated time remaining may fluctuate as the cycle progresses. The Drying light will illuminate and remain lit until the cycle is complete. When your Dryer is in the cool-down phase, the Cooling light will illuminate.
Wrinkle Prevent Selection Button Wrinkle Prevent provides approximately 90 minutes of intermittent tumbling in unheated air at the end of the cycle to reduce wrinkling. Press the Wrinkle Prevent button to activate this feature. The indicator light above the pad will illuminate when Wrinkle Prevent is selected. The load is dry, and can be removed at any time during the Wrinkle Prevent cycle.
operating Instructions, tips CHILD LOCK A function to prevent children from playing with your dryer. Setting/Releasing If you want to set or release the Child Lock, press both the Time and Signal buttons simultaneously for 3 seconds. How to Set: 1. It can be set while your dryer is running. 2. Once you set the Child Lock function, no button, except for the Power button, can be controlled until you release the Child Lock function. 3. The Child Lock indicator will be lit. 1.
RACK DRY Installing the drying rack SUGGESTED ITEMS SUGGESTED TEMP. SETTINGS Washable sweaters (block to shape and lay flat on rack) Low or Extra Low Stuffed toys (cotton or polyester fiberfilled) Low or Extra Low Stuffed toys (foam or rubber-filled) Air Fluff Foam rubber pillows Air Fluff Sneakers Air Fluff or Heat (Extra Low) WARNING 02 Operating Instructions, Tips 1. Open the Dryer door. 2.
operating Instructions, tips CLEAN THE LINT FILTER • • • After each load. To shorten drying time. To operate more energy efficiently. Do not operate your Dryer without the lint filter in place. LOAD THE DRYER PROPERLY • • • • Place only one washload in your Dryer at a time. Mixed loads of heavy and lightweight fabrics will dry differently, which may result in lightweight fabrics being dry while heavy fabrics remaining damp at the end of a drying cycle.
care and cleaning CONTROL PANEL TUMBLER Remove any stains such as crayon, ink, or fabric dye (from new items such as towels or jeans) with an allpurpose cleaner. Tumble old towels or rags to remove any excess stain or cleaning substance. Once these steps are done, stains may still be visible, but should not transfer to subsequent loads. 03 Care and cleaning Clean with a soft, damp cloth. Do not use abrasive substances. Do not spray cleaners directly on the panel.
special laundry tips Please follow the care label or manufacturer’s instructions for drying special items. If care label instructions are not available, use the following information as a guide. Bedspreads & Comforters • • • Blankets • • Curtains & Draperies • • Follow the care label instructions or dry on the Normal cycle and High temperature. Make sure the item is thoroughly dry before using or storing. May require repositioning to ensure even drying.
troubleshooting CHECK THESE POINTS IF YOUR DRYER… SOLUTION doesn’t run. • • • • Be sure the door is latched shut. Be sure the power cord is plugged into a live electrical outlet. Check the home’s circuit breaker and fuses. Press the Start/Pause button again if the door is opened during the cycle. doesn’t heat. • • • • • Check the home’s circuit breaker and fuses. Select a heat setting other than Air Fluff. On a gas dryer, check that the gas supply is on. Clean the lint filter and exhaust duct.
troubleshooting • dries unevenly. • • has an odor. • shuts off before load is dry • • Seams, pockets, and other similarly heavy areas may not be completely dry when the rest of the load has reached the selected dryness level. This is normal. Select the More Dry setting if desired. If one heavy item is dried with a lightweight load, such as one towel with sheets, it is possible that the heavy item will not be completely dry when the rest of the load has reached the selected dryness level.
appendix FABRIC CARE CHART Wash Cycle Special Instructions Warning Symbols for Laundering Normal Line Dry/ Hang to Dry Do Not Wash Permanent Press / Wrinkle Resistant / Wrinkle Control Drip Dry Do Not Wring Gentle/Delicates Dry Flat Do Not Bleach Hand Wash Heat Setting Do Not Tumble Dry High No Steam (added to iron) Hot Medium Do Not Iron Warm Low Cold Any Heat Dry Clean No Heat/Air Do Not Dry Clean Water Temperature** Bleach Any Bleach (when needed) Iron-Dry or Steam Temperatu
appendix PROTECTING THE ENVIRONMENT This appliance is manufactured from recyclable materials. If you decide to dispose of this appliance, please observe local waste disposal regulations. Cut off the power cord so that the appliance cannot be connected to a power source. Remove the door so that animals and small children cannot get trapped inside the appliance. DECLARATION OF CONFORMITY This appliance complies with UL2158.
CYCLE CHART Default Cycle Cooling Wrinkle prevent Sensor dry level Time Time Time Time Normal High (Medium) Normal dry 44 min 39 min 5 min 90 min Heavy Duty High (No change) Normal dry 60 min 55 min 5 min 90 min Perm Press Medium Low (No change) Normal dry 34 min 24 min 10 min 90 min Delicates Low (No change) Normal dry 29 min 24 min 5 min 90 min Time Dry High - 40 min 35 min 5 min Wrinkle Release Medium - 25 min 20 min 5 min Air Fluff - (No change) - 20 mi
warranty SAMSUNG DRYER LIMITED WARRANTY TO ORIGINAL PURCHASER This SAMSUNG brand product, as supplied and distributed by SAMSUNG ELECTRONICS AMERICA, INC.
EXCEPT AS SET FORTH HEREIN, THERE ARE NO WARRANTIES ON THIS PRODUCT EITHER EXPRESS OR IMPLIED, AND SAMSUNG DISCLAIMS ALL WARRANTIES INCLUDING, BUT NOT LIMITED TO, ANY IMPLIED WARRANTIES OF MERCHANTABILITY, INFRINGEMENT OR FITNESS FOR A PARTICULAR PURPOSE. NO WARRANTY OR GUARANTEE GIVEN BY ANY PERSON, FIRM, OR CORPORATION WITH RESPECT TO THIS PRODUCT SHALL BE BINDING ON SAMSUNG.
QUESTIONS OR COMMENTS? Country CALL OR VISIT US ONLINE AT IN THE USA 1-800-SAMSUNG (726-7864) www.samsung.com WRITE Samsung Electronics America, Inc. Code No. DC68-02475A_EN DV203AEW-02475A_EN.