
User's Manual


Table Of Contents
- Health and safety information
- Basic troubleshooting
- Quick reference
- Contents
- Basic functions
- Extended functions
- Shooting options
- Playback/Editing
- Wireless network (DV300F/DV305F only)
- Connecting to a WLAN and configuring network settings
- Sending photos or videos to a smart phone
- Using a smart phone as a remote shutter release
- Using photo or video sharing websites
- Sending photos or videos via email
- Uploading photos to a cloud server
- Using Auto Backup to send photos or videos
- Viewing photos or videos on a TV Link-enabled TV
- Sending photos using Wi-Fi Direct
- About the Wake on LAN (WOL) feature
- Settings
- Appendixes
Playback/Editing
103
Transferring files to your Windows computer
No. Description
1
Open menus.
2
Display files in the selected folder.
3
Switch to the Photo edit mode.
4
Switch to the Video edit mode.
5
Switch to the Sharing mode (to send files by email or
upload files to websites, such as Flickr or YouTube).
6
Download short animations for use in Children mode.
7
Enlarge or reduce the thumbnails in the list.
8
Select a file type.
9
View files in the selected folder on your computer.
0
Show or hide files on the connected camera.
!
View files in the selected folder on the camera.
@
View files as thumbnails or on a map.
#
Browse folders stored on the camera.
$
Browse folders stored on your computer.
:
Move to the previous or next folder.
^
Print files, view files on a map, store files in My Folder, or
register faces.
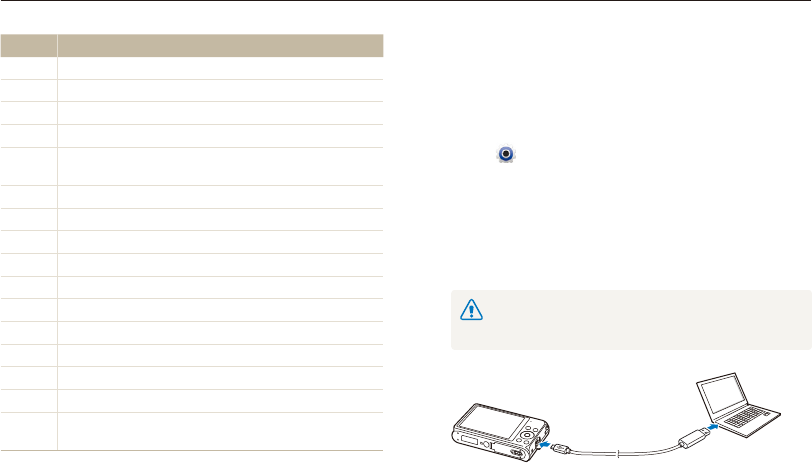
Transferring files by connecting the camera
as a removable disk
Connect the camera to your computer as a removable disk.
1
On the Home screen, scroll to <Basic>.
2
Select .
3
Select Connectivity PC Software Off.
4
Turn off the camera.
5
Connect the camera to your computer with the USB
cable.
You must plug the small end of the USB cable into your camera. If the
cable is reversed, it may damage your files. The manufacturer is not
responsible for any loss of data.