
User's Manual


Table Of Contents
- Health and safety information
- Basic troubleshooting
- Quick reference
- Contents
- Basic functions
- Extended functions
- Shooting options
- Playback/Editing
- Wireless network (DV300F/DV305F only)
- Connecting to a WLAN and configuring network settings
- Sending photos or videos to a smart phone
- Using a smart phone as a remote shutter release
- Using photo or video sharing websites
- Sending photos or videos via email
- Uploading photos to a cloud server
- Using Auto Backup to send photos or videos
- Viewing photos or videos on a TV Link-enabled TV
- Sending photos using Wi-Fi Direct
- About the Wake on LAN (WOL) feature
- Settings
- Appendixes
Basic functions
18
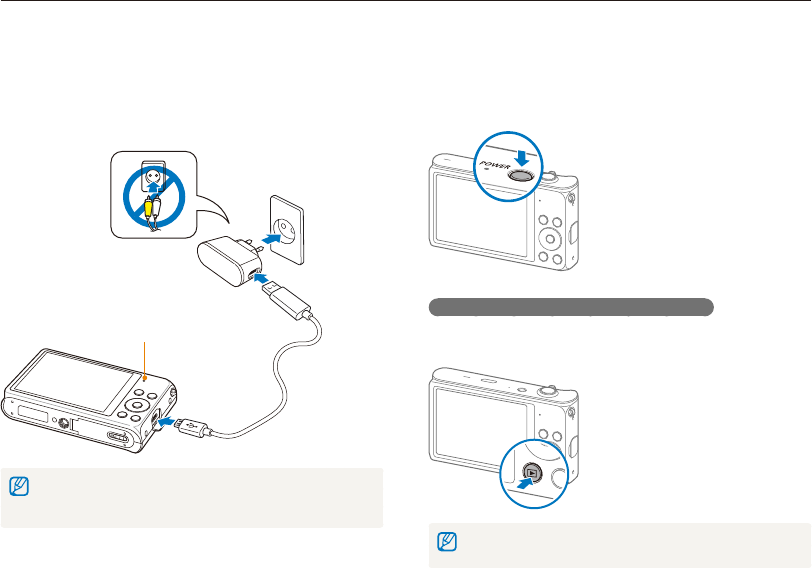
Charging the battery and turning on your camera
Turning on your camera
Press [POWER] to turn your camera on or off.
• The initial setup screen appears when you turn on the camera
for the first time. (p. 19)
Turning on your camera in Playback mode
Press [P]. The camera turns on and immediately accesses
Playback mode.
If you turn on your camera by pressing and holding [
P
] until the status lamp
blinks, the camera does not emit any sounds.
Charging the battery
Before you use the camera for the first time, you must charge the
battery. Plug the small end of the USB cable into your camera,
and then plug the other end of the USB cable into the AC
adapter.
Status lamp
•
Red light on: Charging
•
Red light off: Fully charged
•
Red light blinking: Error
Use only the AC adapter and USB cable supplied with your camera. If you
use another AC adapter (such as SAC-48), the camera battery may not
charge or work properly.