DV365* Gas and Electric Dryer user manual This manual is made with 100% recycled paper. imagine the possibilities Thank you for purchasing this Samsung product. To receive more complete service or accessory parts, please register your product at or contact www.samsung.com/register 1-800-SAMSUNG (726-7864) DV365_03064C-04_EN.
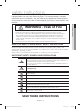
contents 3 3 5 What you need to know about Safety Instructions Important safety symbols and precautions What to do if you smell gas : INSTALLING YOUR DRYER 7 7 8 8 8 9 10 10 10 11 11 12 13 13 14 15 17 18 19 20 Unpacking your dryer The dryer’s exterior Key installation requirements Tools needed for installation Replacement parts and accessories Ducting requirements Important to installer Location considerations Alcove or closet installation Mobile home installation Exhausting Gas requirements Electrical
safety instructions Congratulations on your new Samsung Dryer. This manual contains valuable information on the installation, use, and care of your appliance. Please take the time to read this manual to take full advantage of your dryer’s many benefits and features. • Clothes dryer installation must be performed by a qualified installer. • Install the clothes dryer according to the manufacturer’s instructions and local codes. • Do not install a clothes dryer with flexible plastic venting materials.
safety instructions IMPORTANT SAFTY INSTRUCTION WARNING WARNING: To reduce the risk of fire, electric shock, or injury to persons when using your appliance, follow basic precautions, including the following: 1. Read all instructions before using this appliance. 2. Do not dry articles that have been previously cleaned in, washed in, soaked in, or spotted with gasoline, dry-cleaning solvents, or other flammable or explosive substances, as they give off vapors that could ignite or explode. 3.
WHAT TO DO IF YOU SMELL GAS : Do not try to light any appliance. Do not turn on the appliance. Do not touch any electrical switch. Do not use any phone in your building. Clear the room, building or area of all occupants. Immediately call your gas supplier from a neighbor’s phone. Follow the gas supplier’s instructions. • If you cannot reach your gas supplier, call the fire department. Installation and service must be performed by a qualified installer, service agency, or the gas supplier.
safety instructions This appliance must be properly grounded. Never plug the power cord into a receptacle that is not grounded adequately and in accordance with local and national codes. See the installation instructions for information about grounding this appliance. Do not sit on top of the dryer. Because of continuing product improvements, Samsung reserves the right to change specifications without notice.
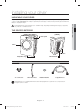
installing your dryer UNPACKING YOUR DRYER Unpack your Dryer and inspect it for shipping damage. If your Dryer was damaged during shipping, contact 1-800-SAMSUNG (726-7864).To prevent personal injury or strain, wear protective gloves whenever lifting or carrying the dryer. Packing materials can be dangerous to children. Keep all packing material (plastic bags, polystyrene, etc.) well out of children’s reach.
installing your dryer KEY INSTALLATION REQUIREMENTS Hire a professional to install this dryer properly. If a service call has to be made as a result of poor setup, adjustment, or connection, it is considered the responsibility of the installer. If you install the dryer, you are responsible. Make sure you have everything necessary for proper installation: • • • • A GROUNDED ELECTRICAL OUTLET. See Electrical Requirements. See page 15. A POWER CORD for electric dryers (except Canada). See page 16.
DUCTING REQUIREMENTS • • • • • • • • • • • • • • • • • • 02 installing your dryer • Use a 4-inch (10.2 cm) diameter rigid aluminum or rigid galvanized steel duct. Do not use a smaller duct. Ducts larger than 4 inches (10.2 cm) in diameter can cause increased lint accumulation. Lint accumulation should be cleaned regularly. If a flexible metal duct must be used, use the type with a stiff sheet metal wall. Do not use a flexible duct with a thin foil wall.
installing your dryer If the new Dryer is being installed into an existing exhaust system, you must make sure: • The exhaust system meets all local, state, and national codes. • That a flexible plastic duct is not used. • To Inspect and clean all lint buildup from inside the existing duct. • The duct is not kinked or crushed. • The exhaust hood damper opens and closes freely. The static pressure in any exhaust system must not exceed 0.83 inches of water column or be less than 0.
MOBILE HOME INSTALLATION 02 installing your dryer The installation of the Dryer in mobile homes must conform to the Manufactured Home Construction and Safety Standard Title 24 CFR, Part 32-80 {formerly the Federal Standard for Mobile Home Construction and Safety, Title 24, HUD (Part 280), 1975} for the United States) or CSA Standards Z240 (for Canada). When installing a Dryer in a mobile home, you must make provisions for anchoring the dryer to the floor.
installing your dryer GAS REQUIREMENTS Use only natural or LP (liquid propane) gases. THE INSTALLATION MUST CONFORM WITH LOCAL CODES, OR IN THE ABSENCE OF LOCAL CODES, WITH THE NATIONAL FUEL GAS CODE ANSI/Z223.1, LATEST REVISION (FOR THE UNITED STATES), OR WITH THE CAN/CGA-B149 INSTALLATION CODES (FOR CANADA). Gas dryers are equipped with a burner vent for use with natural gas.
ELECTRICAL REQUIREMENTS A Wiring diagram is located on the back of the dryer. • • • Improper connection of the equipment grounding conductor can result in a risk of electric shock. Check with a qualified electrician or serviceman if you are in doubt as to whether your Dryer is properly grounded. Do not modify the plug provided with your Dryer – if it doesn’t fit the outlet, have a proper outlet installed by a qualified electrician.
installing your dryer ELECTRICAL CONNECTIONS Before operating or testing, follow all grounding instructions in the Grounding section. An individual branch (or separate) circuit serving only your Dryer is recommended. DO NOT USE AN EXTENSION CORD. Gas models – U.S. and Canada A 120 volt, 60 Hz AC approved electrical service, with a 15-amp fuse or circuit breaker is required. Electric models – U.S. only Most U.S. dryers require a 120/240 volt, 60 Hz AC approved electrical service.
Installation - General procedure For proper installation, we recommend that you hire a qualified installer. Read these instructions completely before you begin the installation. To move the dryer easily, lay two of the carton cushion-tops on the floor. Tip your dryer on its side so it lies across both cushion-tops. Push the dryer so that it is near its final location. Set your dryer upright. Leave enough room around the dryer so you can attach the duct work, power cord, etc. 2.
installing your dryer 6. Review the Electrical Requirements section, then follow the 3 Wire system connection instructions (Step 7) or 4 Wire system instructions (Step 8) below. 7. Three Wire system instructions: a. Loosen or remove the center terminal block screw. b. Connect the neutral wire (white or center wire) of the power cord to the center, silver-colored terminal screw of the terminal block. Tighten screw. c. Connect the other wires to outer terminal block screws. Tighten screws. d.
U.S. MODELS: IMPORTANT – All U.S. models are designed for a 3-WIRE SYSTEM CONNECTION. The dryer frame is grounded to the neutral conductor at the terminal block. A 4-WIRE SYSTEM CONNECTION is required for new or remodeled construction, mobile homes, or if local codes do not permit grounding through neutral. If you use the 4-wire system, you cannot ground the dryer frame to the neutral conductor at the terminal block.
installing your dryer DRYER EXHAUST TIPS Plastic or non-metal flexible duct presents a potential fire hazard. WARNING 1. Make sure your dryer is installed properly so it exhausts air easily. 2. Use a 4” diameter rigid metal duct. Tape all joints, including at the dryer. Never use lint-trapping screws. 3. Keep ducts as straight as possible. 4. Clean all old ducts before installing your new dryer. Be sure the vent flap opens and closes freely. Inspect and clean the exhaust system annually.
DOOR REVERSAL 8. Reinsert the black screw in the other hole. 4. Remove a screw on the Frame Front. 9. Reinsert the screw (Step 4) on the Frame Front. 5. Remove the two screws on the opposite side of the door hinge. 10. Place the door on the other side and reattach it to the dryer. 6. Remove two screws from the holder lever. 11. Reattach the holder lever. 7. Remove one black screw from the door hinge. 12. Reattach the screws in the remaining holes. 02 installing your dryer 1. Unplug the power cord.
installing your dryer CONNECTING THE INLET HOSE Method1 - Using the Y Connector and Long Hose The dryer must be connected to the cold water faucet using the new inlet hoses. Do not use old hoses. 1. Turn off the cold water faucet. 2. If you have a washer water hose attached to the cold water Y-Connector faucet, unscrew and remove the hose. 3. If space permits, attach the brass female end of the “Y”connector to the cold water faucet. Turn by hand until tight. Water Hose 4.
Method2 - Using the Short Hose, Long Hose, and Y Connector Do not overtighten. You can damage the coupling. 02 installing your dryer The dryer must be connected to the cold water faucet using the new inlet hoses. Do not use old hoses. If the “Y” connector cannot be attached directly to the cold Short hose water faucet, then you must use the short hose. (Inlet to cold 1. Turn off the cold water faucet. water) 2.
operating Instructions, tips WARNING To reduce the risk of fire, electric shock, or injury to persons, read the IMPORTANT SAFTY INSTRUCTION before operating this appliance. OVERVIEW OF THE CONTROL PANEL 1 1 Cycle Selector 2 3 4 5 6 7 8 9 To select a cycle, rotate the Cycle Selector dial to the desired cycle. The indicator light by the cycle name will illuminate. The Normal, Heavy Duty, Perm Press, Delicates and Sanitize cycles are Sensor Dry cycles.
Digital Graphic Display 3 Wrinkle Prevent Selection Button Wrinkle Prevent provides approximately 180 minutes of intermittent tumbling in unheated air at the end of the cycle to reduce wrinkling. Press the Wrinkle Prevent button to activate this feature. The indicator light above the pad will illuminate when you select Wrinkle Prevent. The load is dry and you can remove it at any time during the Wrinkle Prevent cycle.
operating Instructions, tips CHILD LOCK Child Lock prevents children from playing with your dryer. Turning On and Off To turn Child Lock on or off, press the Temp. and Time buttons simultaneously for 3 seconds. Child Lock Details: - You can set Child Lock while your dryer is running. Once you turn Child Lock on, no button, except for the Power button, will respond until you release the Child Lock function. The Child Lock indicator will be lit.
DRYING RACK (OPTIONAL PART) Installing and using the drying rack SUGGESTED ITEMS SUGGESTED TEMP. SETTINGS Washable sweaters (block to shape and lay flat on rack) Extra Low Stuffed toys (cotton or polyester fiberfilled) Extra Low WARNING 03 operating Instructions, tips 1. Open the Dryer door. 2. Position the drying rack in the tumbler, placing the front lip of the drying rack on top of the lint filter. 3.
operating Instructions, tips CLEAN THE LINT FILTER • • • After each load. To shorten drying time. To operate more energy efficiently. Do not operate your dryer without the lint filter in place. LOAD THE DRYER PROPERLY • • • • Place only one washload in your dryer at a time. In mixed loads, heavy and lightweight fabrics will dry differently. This may result in lightweight fabrics being dry while heavy fabrics remain damp at the end of a drying cycle.
care and cleaning CONTROL PANEL TUMBLER Remove any stains such as crayon, ink, or fabric dye (from new items such as towels or jeans) with an allpurpose cleaner. Tumble old towels or rags to remove any excess stain or cleaning substance. Once these steps are followed, stains may still be visible, but should not transfer to subsequent loads. 04 care and cleaning Clean with a soft, damp cloth. Do not use abrasive substances. Do not spray cleaners directly on the panel.
special laundry tips SPECIAL LAUNDRY TIPS Please follow the care label or manufacturer’s instructions for drying special items. If care label instructions are not available, use the following information as a guide. Bedspreads & Comforters • • • Blankets • • Curtains & Draperies • • Follow the care label instructions or dry using the Normal cycle with the temperature set to High. Make sure the item is thoroughly dry before using or storing. May require repositioning to ensure even drying.
troubleshooting CHECK THESE POINTERS IF YOUR DRYER… SOLUTION Doesn’t run. • • • • Be sure the door is latched shut. Be sure the power cord is plugged into a live electrical outlet. Check your home’s circuit breakers or fuses. Press the Start/Pause button again if the door is opened during the cycle. Doesn’t heat. • • • • Check your home’s circuit breakers or fuses. On a gas dryer, see if the gas supply is on. Clean the lint filter and exhaust duct.
troubleshooting Lint on clothes • Make sure the lint filter is cleaned before every load. With some loads that produce high amounts of lint, it may be necessary to clean the filter during the cycle. Some fabrics are lint producers (for example, a fuzzy white cotton towel) and they should be dried separately from clothes that are lint trappers(for example, a pair of black linen pants). Divide larger loads into smaller loads for drying. Check pockets thoroughly before washing and drying clothes.
appendix FABRIC CARE CHART Wash Cycle Special Instructions Warning Symbols for Laundering Normal Line Dry/ Hang to Dry Do Not Wash Permanent Press / Wrinkle Resistant / Wrinkle Control Drip Dry Do Not Wring Gentle/Delicates Dry Flat Do Not Bleach Hand Wash Heat Setting Do Not Tumble Dry High No Steam (added to iron) Hot Medium Do Not Iron Warm Low Cold Any Heat Dry Clean No Heat/Air Do Not Dry Clean Water Temperature** Bleach Any Bleach (when needed) Iron-Dry or Steam Temperatu
appendix PROTECTING THE ENVIRONMENT This appliance is manufactured from recyclable materials. If you decide to dispose of this appliance, please observe local waste disposal regulations. Cut off the power cord so that the appliance cannot be connected to a power source. Remove the door so that animals and small children cannot get trapped inside the appliance. DECLARATION OF CONFORMITY This appliance complies with UL2158.
CYCLE CHART ( : factory setting, : selectable) Functions Cycle Recommended Item Max Load Size Normal Cottons, Work clothes, Linen, Mixed Loads Normal dry Heavy Duty Heavy Fabrics such as jean, corduroys, heavy work clothes Normal dry Perm Press Shirts, Synthetic Fabrics, Knits, Wrinkle-free cottons, Permanent Normal dry Delicates Underwear, Blouses, Lingerie Normal dry Sanitize Bedding, Curtains, Children` clothing Very dry (No change) Time Dry Any load - Quick Dry Small loads - W
warranty (U.S.A) SAMSUNG DRYER LIMITED WARRANTY TO ORIGINAL PURCHASER This SAMSUNG brand product, as supplied and distributed by SAMSUNG ELECTRONICS AMERICA, INC.
Except as set forth herein, there are no warranties on this product either express or implied, and samsung disclaims all warranties including, but not limited to, any implied warranties of merchantability, infringement or fitness for a particular purpose. No warranty or guarantee given by any person, firm, or corporation with respect to this product shall be binding on samsung.
warranty (CANADA) SAMSUNG DRYER LIMITED WARRANTY TO ORIGINAL PURCHASER This SAMSUNG brand product, as supplied and distributed by SAMSUNG ELECTRONICS CANADA, INC.
EXCEPT AS SET FORTH HEREIN, THERE ARE NO WARRANTIES ON THIS PRODUCT EITHER EXPRESS OR IMPLIED, AND SAMSUNG DISCLAIMS ALL WARRANTIES INCLUDING, BUT NOT LIMITED TO, ANY IMPLIED WARRANTIES OF MERCHANTABILITY, INFRINGEMENT OR FITNESS FOR A PARTICULAR PURPOSE. NO WARRANTY OR GUARANTEE GIVEN BY ANY PERSON, FIRM, OR CORPORATION WITH RESPECT TO THIS PRODUCT SHALL BE BINDING ON SAMSUNG.
note DV365_03064C-04_EN.
note DV365_03064C-04_EN.
bit.ly/samsungwashers QUESTIONS OR COMMENTS? COUNTRY CALL OR VISIT US ONLINE AT U.S.A 1-800-SAMSUNG (726-7864) www.samsung.com MEXICO 01-800-SAMSUNG (726-7864) www.samsung.com CANADA 1-800-SAMSUNG (726-7864) www.samsung.com/ca (English) www.samsung.com/ca_fr (French) DC68-03064C-04 DV365_03064C-04_EN.
DV365* Sèche-linge à gaz et électrique manuel d'utilisation Ce manuel est en papier recyclé à 100%. Un monde de possibilités Nous vous remercions d'avoir choisi ce produit Samsung. Afin de bénéficier d'un service plus complet ou de pièces accessoires, veuillez enregistrer votre produit à l'adresse suivante ou contacter le www.samsung.com/register 1-800-SAMSUNG (726-7864) DV365_03064C-04_CFR.
table des matières CONSIGNES DE SÉCURITÉ 3 7 INSTALLATION DU SÈCHE-LINGE 3 3 5 12 12 13 14 14 15 16 19 20 21 22 Déballer le sèche-linge Extérieur du sèche-linge Conditions d’installation principales Outils requis pour l'installation Pièces de rechange et accessoires Conditions requises en matière de conduits Remarque importante pour l’installateur Choix de l’emplacement d’installation Encastrement dans une niche ou installation dans un placard Installation en mobile home Évacuation Systèmes fonctionnan
consignes de sécurité Félicitations pour l’achat de votre nouveau sèche-linge Samsung. Ce manuel contient de précieuses informations sur l’installation, l’utilisation et l’entretien de votre appareil. Prenez le temps de le lire pour tirer pleinement profit de tous les avantages et de toutes les fonctionnalités de votre sèche-linge. • L'installation du sèche-linge doit être effectuée par un technicien qualifié.
consignes de sécurité CONSIGNES IMPORTANTES DE SÉCURITÉ AVERTISSEMENT AVERTISSEMENT : afin de réduire les risques d'incendie, d'électrocution ou de blessures physiques lors de l'utilisation de l'appareil, des précautions de base doivent être prises : 1. Lisez toutes les consignes de sécurité avant d'utiliser l’appareil. 2.
QUE FAIRE EN CAS D’ÉMANATION DE GAZ : Ne tentez pas d'allumer un appareil électrique. Ne mettez pas l’appareil sous tension. Ne touchez à aucun interrupteur électrique. N’utilisez aucun téléphone dans le bâtiment. Faites évacuer tous les occupants de la pièce, du bâtiment ou du secteur. Appelez immédiatement votre fournisseur de gaz depuis le téléphone d'un voisin. Suivez les consignes que vous recevrez. • Si vous ne pouvez pas joindre votre fournisseur de gaz, appelez les pompiers.
consignes de sécurité Cet appareil doit être correctement mis à la terre. Ne branchez jamais le cordon d’alimentation sur une prise qui n’est pas correctement reliée à la terre et qui n’est pas conforme aux réglementations locales et nationales en vigueur. Consultez les consignes d’installation pour relier cet appareil à la terre. Ne vous asseyez pas sur le sèche-linge. Dans le cadre de l’amélioration constante de ses produits, Samsung se réserve le droit de modifier les spécifications sans préavis.
installation du sèche-linge DÉBALLER LE SÈCHE-LINGE AVERTISSEMENT Les matériaux d’emballage peuvent être dangereux pour les enfants. Tenez tous les emballages (sacs en plastique, polystyrène, etc.) hors de portée des enfants. EXTÉRIEUR DU SÈCHE-LINGE [ ARRIÈRE ] Panneau de commande 02 installation du sèche-linge Déballez votre sèche-linge et vérifiez qu'il n'a pas été endommagé pendant le transport. Si votre sèche-linge a été endommagé pendant le transport, appelez le 1-800-SAMSUNG (726-7864).
installation du sèche-linge CONDITIONS D’INSTALLATION PRINCIPALES Laissez un professionnel installer correctement votre sèche-linge. Si vous contactez le service aprèsvente suite à une installation, des réglages ou un branchement mal exécutés, la responsabilité relève de l’installateur. Si c’est vous qui avez installé le sèche-linge, la responsabilité vous incombe.
CONDITIONS REQUISES EN MATIÈRE DE CONDUITS • • • • • • • • • • • • • • • • • • 02 installation du sèche-linge • Utilisez un conduit en aluminium ou en acier galvanisé rigide d’un diamètre de 4 pouces (10,2 cm). N’utilisez pas de conduit plus petit. Les conduits dont le diamètre est supérieur à 4 pouces (10,2 cm) peuvent provoquer une trop grande accumulation de peluches. Vous devez nettoyer régulièrement les peluches accumulées.
installation du sèche-linge Si un nouveau sèche-linge est relié à un système d’évacuation existant, vous devez veiller à ce que : • Le système d’évacuation soit conforme aux réglementations locales, régionales et nationales. • Aucun conduit flexible en plastique ne soit utilisé. • Le conduit existant soit contrôlé et les peluches accumulées à l’intérieur retirées. • Le conduit ne doit être ni entortillé ni écrasé. • Le registre de la hotte s’ouvre et se ferme sans problème.
INSTALLATION EN MOBILE HOME 02 installation du sèche-linge L’installation du sèche-linge dans des mobiles homes doit respecter la réglementation sur les normes de sécurité et de construction de bien manufacturé, titre 24 CFR, partie 32-80» {précédemment, norme fédérale sur la sécurité et la construction de maison mobile, titre 24, HUD (partie 280), 1975} pour les EtatsUnis ou la norme CSA Standards Z240 pour le Canada. Lorsque vous installez le sèche-linge dans un mobile home, il doit être fixé au sol.
installation du sèche-linge SYSTÈMES FONCTIONNANT AU GAZ Utilisez uniquement du gaz naturel ou du propane liquide (PL). L’INSTALLATION DOIT ÊTRE CONFORME AUX RÉGLEMENTATIONS LOCALES EN VIGUEUR OU, EN L’ABSENCE DE DISPOSITIONS SPÉCIFIQUES, À LA RÉGLEMENTATION NATIONALE SUR LE GAZ COMBUSTIBLE ANSI/Z223.1 (NATIONAL FUEL GAS CODE), DERNIÈRE RÉVISION (POUR LES ÉTATS-UNIS) OU AUX DISPOSITIONS D’INSTALLATION CAN/CGA-B149 (POUR LE CANADA).
NORMES ÉLECTRIQUES Le schéma de câblage est situé à l'arrière du sèche-linge. • • • Un branchement incorrect du conducteur de mise à la terre peut représenter un risque de surtension électrique. Demandez conseil à un électricien ou un réparateur agréé si vous avez des doutes quant à la mise à la terre correcte de l’appareil. Ne modifiez pas la prise fournie avec le sèche-linge ; si celle-ci ne correspond pas à la prise secteur, demandez à un électricien qualifié d’installer une prise adéquate.
installation du sèche-linge RACCORDEMENT ÉLECTRIQUE Avant toute mise en marche ou test, observez les consignes de mise à la terre présentées dans la section Mise à la terre. Nous vous recommandons de relier votre sèche-linge à une dérivation individuelle ou à un circuit distinct. N’UTILISEZ PAS DE RALLONGE AVEC CET APPAREIL. Modèles au gaz : États-Unis et Canada Vous devez utiliser une alimentation électrique de 120 V, 60Hz CA et un fusible de 15 A ou un coupe-circuit.
Installation : procédure générale Pour une installation optimale, nous vous recommandons de faire appel à un installateur qualifié. Lisez intégralement les consignes avant de commencer l'installation. Posez deux des plateaux en carton sur le sol pour déplacer le sèche-linge plus facilement. Inclinez le sèche-linge sur le côté pour le poser sur les deux plateaux. Faites glisser le sèche-linge jusqu'à l'endroit où vous voulez l'installer. Replacez le sèche-linge à la verticale.
installation du sèche-linge 6. Consultez la section Normes électriques, puis suivez les consignes sur Système à trois fils les branchements à 3 fils (Étape 7) ou à 4 fils (Étape 8) ci-dessous. 7. Consignes sur les branchements à trois fils : BWR a. Desserrez ou retirez la vis centrale du bornier. b. Reliez le fil neutre (blanc ou central) du cordon d’alimentation à la borne à vis argentée centrale du bornier. Serrez la vis. c. Reliez les autres fils aux bornes à vis extérieures. Serrez les vis. d.
MODÈLES POUR LES ÉTATS-UNIS : IMPORTANT : tous les modèles destinés aux État-Unis sont conçus pour un BRANCHEMENT 3 FILS. Le châssis du sèche-linge est relié à la terre par un conducteur neutre au niveau du bornier. Un BRANCHEMENT À 4 FILS est requis dans les cas suivants : nouvelles constructions, habitations rénovées, mobil homes, réglementations locales n’autorisant pas la mise à la terre via le conducteur neutre.
installation du sèche-linge CONSEILS POUR L’ÉVACUATION DU SÈCHE-LINGE Les conduits en plastique ou non métalliques représentent un danger potentiel d’incendie. AVERTISSEMENT 1. Assurez-vous que le sèche-linge a été installé de manière à ce que l’évacuation de l’air se fasse sans problème. 2. Utilisez un conduit d’évacuation métallique rigide de 4”. Scellez tous les joints à l’aide d’un ruban adhésif, y compris au niveau du sèche-linge. N’utilisez jamais de vis, qui entraînent l’accumulation de peluches.
INVERSION DU HUBLOT 8. Ré-engagez la vis noire dans l’autre trou. 4. Retirez une vis de l'avant du cadre. 9. Ré-engagez la vis (étape 4) à l'avant du cadre. 5. Retirez les deux vis sur le côté opposé de la charnière du hublot. 10. Placez le hublot de l’autre côté et refixez-le sur le sèche-linge. 6. Retirez les deux vis du dispositif de fermeture. 11. Remontez le dispositif de fermeture. 7. Retirez une vis noire de la charnière du hublot. 12. Ré-engagez les vis dans les trous restants.
installation du sèche-linge RACCORDEMENT DU TUYAU D’ARRIVÉE D’EAU Méthode 1 : avec un raccord en Y et un tuyau long Le sèche-linge doit être connecté au robinet d’eau froide à l’aide d’un tuyau d’arrivée neuf. N’utilisez jamais de tuyaux usagés. 1. Fermez le robinet. 2. Si le tuyau d’eau du lave-linge est raccordé au robinet Raccord en Y d’eau froide, débranchez-le. 3. Si l’espace libre est suffisant, branchez l’extrémité femelle en laiton du raccord en Y au robinet d’eau froide. Serrez fermement à la main.
Méthode 2 : avec un tuyau court, un tuyau long et un raccord en Y Tuyau long Ne serrez pas à l’excès ; vous risqueriez d’endommager le raccord. 02 installation du sèche-linge Le sèche-linge doit être connecté au robinet d’eau froide à l’aide d’un tuyau d’arrivée neuf. N’utilisez jamais de tuyaux usagés. Si vous ne pouvez brancher directement le raccord en Y sur le robinet d’eau froide, vous devez utiliser le tuyau court fourni avec le sèche-linge. 1. Fermez le robinet. Tuyau court 2.
instructions et conseils d’utilisation AVERTISSEMENT Afin de limiter les risques d’incendie, d’électrocution ou de blessures, consultez la section CONSIGNES IMPORTANTES DE SÉCURITÉ avant d’utiliser cet appareil. PRÉSENTATION DU PANNEAU DE COMMANDES 1 1 Sélecteur de programme 2 3 4 5 6 7 8 9 Pour choisir un cycle, positionnez le sélecteur sur le programme de votre choix. Le témoin lumineux s’allume en regard du programme.
Affichage numérique 3 Bouton Wrinkle Prevent (Antifroissage) 4 Bouton Dry Level (Niveau de séchage) 5 Bouton Temp (Température) 6 Bouton Time (Temps) 7 Réglage du temps 03 instructions et conseils d’utilisation 2 La fenêtre d’affichage montre la durée estimée restante du programme une fois que vous avez appuyé sur le bouton Start/Pause (Démarrer/Pause). La durée estimée restante peut varier au fur et à mesure de la progression du programme.
instructions et conseils d’utilisation CHILD LOCK (SÉCURITÉ ENFANT) Cette fonction empêche les enfants de jouer avec le sèche-linge. Activation/Désactivation Pour activer ou désactiver la sécurité enfant, appuyez simultanément sur les boutons Temp. (Température) et Time (Temps) pendant 3 secondes. Informations sur la sécurité enfant : - - Vous pouvez activer cette fonction alors que le sèche-linge fonctionne.
GRILLE DE SÉCHAGE (PIÈCE EN OPTION) Installation et utilisation de la grille de séchage ARTICLES TEMPÉRATURES CONSEILLÉES Pulls lavables (mettre en forme et poser à plat sur le support) Très bas Peluches (garnies de fibres coton ou polyester) Très bas AVERTISSEMENT 03 instructions et conseils d’utilisation 1. Ouvrez le hublot du sèche-linge. 2. Placez la grille de séchage dans le tambour, en positionnant son bord avant sur le dessus du filtre à peluches. 3.
instructions et conseils d’utilisation NETTOYAGE DU FILTRE À PELUCHES • • • Après chaque séchage. Pour réduire la durée de séchage. Pour un meilleur rendement énergétique. ne faites pas fonctionner le sèche-linge si le filtre à peluches n'est pas remis en place. CHARGEMENT DU SÈCHE-LINGE • • • • N'introduisez qu'une seule charge de linge lavé à la fois dans votre sèche-linge.
entretien et nettoyage PANNEAU DE COMMANDES TAMBOUR Retirez les taches de crayon, d'encre ou de teinture (sur les articles neufs comme les serviettes ou les jeans), à l'aide d'un détachant universel. Frottez ensuite avec une vieille serviette ou un chiffon, pour retirer toute substance en excès (tache ou détachant). Une fois ces étapes terminées, il est possible que les taches soient encore visibles mais elles ne devraient pas salir le reste du linge.
conseils d'entretien du linge CONSEILS D'ENTRETIEN DU LINGE Respectez les symboles textiles ou les consignes du fabricant concernant le séchage des articles spéciaux. Si aucun symbole textile n'est fourni, observez les consignes suivantes.
dépannage VÉRIFIEZ LES POINTS SUIVANTS SI VOTRE SÈCHE-LINGE... SOLUTION • • • • Assurez-vous que la porte est bien fermée. Vérifiez que le cordon d'alimentation est branché sur une prise électrique opérationnelle. Vérifiez le disjoncteur et les fusibles de votre domicile. Appuyez de nouveau sur le bouton Start/Pause (Départ/Pause) en cas d'ouverture du hublot en cours de programme. Ne chauffe pas. • • • • Vérifiez le disjoncteur et les fusibles de votre domicile.
dépannage Les vêtements sont pelucheux. • • • • Les vêtements sont encore froissés après le programme Anti-froissement. Les vêtements gardent une odeur après le programme Rafraîch. De l’eau s’écoule par la buse au démarrage du programme Steam (Vapeur). L’eau vaporisée est invisible lors du programme Steam (Vapeur). Assurez-vous que le filtre est propre avant chaque cycle. Sur les charges produisant beaucoup de peluches, il peut être nécessaire de nettoyer le filtre en cours de cycle.
annexe TABLEAU DES SYMBOLES TEXTILES Lavage Consignes spéciales Symboles de nettoyage Normal Séchage en suspension Ne pas laver Infroissable / Antifroissement Séchage sans essorage Ne pas tordre Délicat Séchage à plat Agent de blanchiment interdit Lavage main Température de l'eau** Séchage Pas de séchage machine Élevée Pas de vapeur Très chaude Moyenne Pas de repassage Tiède Faible Froide Toutes températures Nettoyage à sec autorisé Pas de séchage Nettoyage à sec interdit Agent d
annexe PROTECTION DE L’ENVIRONNEMENT Cet appareil a été fabriqué à partir de matériaux recyclables. Si vous décidez de le jeter, veuillez respecter les normes locales en matière d’évacuation des déchets. Coupez le cordon d’alimentation de façon à ce que l’appareil ne puisse pas être raccordé à une source électrique. Enlevez le hublot pour que des animaux et des jeunes enfants ne se retrouvent pas piégés à l’intérieur de l’appareil. DÉCLARATION DE CONFORMITÉ Cet appareil est conforme à la norme UL2158.
TABLEAU DES PROGRAMMES ( : réglage usine, : sélectionnable) Programme Séchage manuel Fonctions Niveau du séchage par capteur Normal Coton, vêtements de travail, lin, charges mixtes Séchage normal Grand rendement Pièces au tissu épais, tels que les jeans, les velours côtelés ou les vêtements de travail Séchage normal Repassage facile Chemises, tissus synthétiques, lainages, tissus infroissables en coton, tissus infroissables Séchage normal Délicat Sous-vêtements, chemisiers, lingerie Séchage
garantie (U.S.A) SÈCHE-LINGE SAMSUNG GARANTIE LIMITÉE À L'ACHETEUR INITIAL Ce produit de la marque SAMSUNG, fourni, distribué par SAMSUNG ELECTRONICS AMERICA, INC.
Sauf exception mentionnée dans le présent document, Samsung ne fournit aucune garantie expresse ou implicite quant à cet appareil, y compris, mais sans s'y limiter, les garanties implicites de qualité marchande, de contrefaçon ou d'aptitude à un usage particulier. Aucune garantie, qu'elle soit donnée par un tiers, une entreprise ou une personne morale, ne pourra être considérée comme un engagement vis-à-vis de Samsung.
garantie (CANADA) SÈCHE-LINGE SAMSUNG GARANTIE LIMITÉE À L’ACHETEUR INITIAL Ce produit de la marque SAMSUNG, fourni, distribué par SAMSUNG ELECTRONICS CANADA, INC.
Cette garantie limitée ne couvre pas les problèmes résultant d’un courant, d’une tension ou d’une alimentation électrique incorrects, ainsi que d’ampoules électriques, de fusibles ou de câblage inappropriés. Elle ne couvre pas non plus le coût des appels au service d’assistance pour obtenir des instructions ou la réparation des erreurs d’installation. SAMSUNG ne garantit pas que l’appareil sera exempt de tout problème ou qu’il fonctionnera sans interruption.
mémo DV365_03064C-04_CFR.
mémo DV365_03064C-04_CFR.
DES QUESTIONS OU DES COMMENTAIRES ? PAYS APPELEZ LE OU RENDEZ-VOUS SUR LE SITE U.S.A 1-800-SAMSUNG (726-7864) www.samsung.com MEXICO 01-800-SAMSUNG (726-7864) www.samsung.com CANADA 1-800-SAMSUNG (726-7864) www.samsung.com/ca (English) www.samsung.com/ca_fr (French) DC68-03064C-04 DV365_03064C-04_CFR.
DV365* Secadora a gas y eléctrica manual del usuario Este manual está impreso en papel 100% reciclado. imagine las posibilidades Gracias por adquirir este producto Samsung. Para recibir un servicio más completo o los accesorios, registre su producto en o contacte con www.samsung.com/register 1-800-SAMSUNG(726-7864) DV365_03064C-04_MES.
contenido INSTRUCCIONES DE SEGURIDAD 3 7 INSTALACIÓN DE LA SECADORA 3 3 5 11 11 12 13 13 14 15 17 18 19 20 Desembalaje de la secadora Exterior de la secadora Requisitos de instalación importantes Herramientas necesarias para la instalación Reemplazo de las piezas y los accesorios Requisitos para el tendido de conductos Importante para el instalador Consideraciones acerca de la ubicación Instalación del electrodoméstico en un gabinete o en un hueco Instalación en casas rodantes Drenaje Requisitos en cua
instrucciones de seguridad Felicitaciones por la compra de la nueva secadora Samsung. Este manual contiene información importante acerca de la instalación, el uso y el cuidado del electrodoméstico. Lea detenidamente estas instrucciones a fin de aprovechar al máximo los múltiples beneficios y funciones de la secadora. • La instalación de la secadora de ropa debe estar a cargo de un instalador calificado. • Instale la secadora de ropa según las instrucciones del fabricante y los códigos locales.
instrucciones de seguridad INSTRUCCIONES DE SEGURIDAD IMPORTANTES ADVERTENCIA ADVERTENCIA: Para reducir el riesgo de incendio, descargas eléctricas o lesiones físicas cuando usa este electrodoméstico, siga las instrucciones de seguridad básicas que figuran a continuación: 1. Lea todas las instrucciones antes de usar este electrodoméstico. 2.
QUÉ HACER SI PERCIBE OLOR A GAS: No intente encender ningún electrodoméstico. No encienda este electrodoméstico. No toque ningún interruptor eléctrico. No utilice ningún teléfono de su edificio. Haga que todos los ocupantes se retiren de la habitación, edificio o área. Comuníquese inmediatamente con el proveedor de gas desde el teléfono de un vecino. Siga las instrucciones del proveedor de gas. • Si no puede comunicarse con el proveedor de gas, llame al departamento de bomberos.
instrucciones de seguridad Este electrodoméstico debe conectarse a tierra correctamente. Nunca enchufe el cable de alimentación a un receptáculo que no esté conectado a tierra correctamente ni guarde conformidad con los códigos locales y nacionales. Consulte las instrucciones de instalación para obtener información sobre cómo conectar este electrodoméstico a tierra. No se siente encima de la secadora.
instalación de la secadora DESEMBALAJE DE LA SECADORA ADVERTENCIA Los materiales de embalaje pueden ser peligrosos para los niños. Mantenga todos los materiales de embalaje (bolsas de plástico, poliestireno, etc.) lejos del alcance de los niños. EXTERIOR DE LA SECADORA [ PARTE POSTERIOR ] Panel de control 02 instalación de la secadora Desembale la secadora e inspecciónela para controlar que no se hayan producido daños durante el transporte.
instalación de la secadora REQUISITOS DE INSTALACIÓN IMPORTANTES Contrate a un profesional para instalar la secadora adecuadamente. En caso de que sea necesaria una visita del servicio técnico como consecuencia de una mala configuración, ajuste y conexión, se considerará responsabilidad del instalador. Si usted mismo instala la secadora, usted es el responsable. Asegúrese de tener todo lo necesario para realizar una instalación adecuada: • • • • UN TOMACORRIENTE CON CONEXIÓN A TIERRA.
REQUISITOS PARA EL TENDIDO DE CONDUCTOS • • • • • • • • • • • • • • • • • • 02 instalación de la secadora • Utilice un conducto de acero galvanizado rígido o de aluminio rígido, de 4 pulgadas (10,2 cm) de diámetro. No utilice un conducto de menor tamaño. Los conductos de más de 4 pulgadas (10,2 cm) de diámetro pueden ocasionar una mayor acumulación de pelusa. Periódicamente, debe retirar la pelusa acumulada.
instalación de la secadora Si la nueva secadora se está instalando dentro de un sistema de drenaje existente, debe asegurarse de que: • el sistema de drenaje cumpla con todos los códigos locales, estaduales y nacionales; • no se utilice un conducto flexible de plástico; • se controle y limpie toda la pelusa acumulada del interior del conducto existente; • Compruebe que el conducto no esté enroscado o aplastado; • el regulador de tiro de la tapa de drenaje se abra y se cierre sin inconvenientes.
INSTALACIÓN EN CASAS RODANTES 02 instalación de la secadora La instalación de la secadora en casas rodantes debe cumplir con la Norma de Construcción y Seguridad de Casas Fabricadas, Título 24 CFR, Parte 32-80 [denominada anteriormente Norma Federal para la Construcción y la Seguridad de Casas Rodantes, Título 24, HUD (Parte 280), 1975] (para los Estados Unidos) o las Normas CSA Z240 (para Canadá).
instalación de la secadora REQUISITOS EN CUANTO AL GAS Utilice únicamente gas natural o gas LP (gas licuado de propano). LA INSTALACIÓN DEBE REALIZARSE EN CONFORMIDAD CON LOS CÓDIGOS LOCALES, O EN AUSENCIA DE ELLOS, CON EL CÓDIGO NACIONAL PARA GAS Y COMBUSTIBLES ANSI/Z223.1, LA REVISIÓN MÁS RECIENTE (PARA LOS ESTADOS UNIDOS), O CON LOS CÓDIGOS DE INSTALACIÓN CAN/CGA-B149 (PARA CANADÁ). Las secadoras a gas están equipadas con un orificio para el quemador de modo que puedan ser utilizadas con gas natural.
REQUISITOS ELÉCTRICOS En la parte posterior de la secadora se encuentra un diagrama del cableado. • • • La conexión inadecuada del conductor de conexión a tierra del equipo puede generar una descarga eléctrica. Consulte a un electricista o técnico calificado si le surgen dudas acerca de si la conexión a tierra de su secadora es correcta. No modifique el enchufe provisto con la secadora; si no entra en el tomacorriente, solicite a un electricista calificado que instale el tomacorriente adecuado.
instalación de la secadora CONEXIONES ELÉCTRICAS Antes de poner al electrodoméstico en funcionamiento o realizar pruebas, siga las instrucciones de conexión a tierra de la sección Conexión a tierra. Se recomienda que se destine un circuito derivado individual (o separado) sólo para la secadora. NO UTILICE UN CABLE PROLONGADOR. Modelos a gas – EE.UU. y Canadá Se requiere un servicio eléctrico aprobado de CA de 120 voltios, 60 Hz, con un fusible o disyuntor de 15 A. Modelos eléctricos – Sólo EE.UU.
Instalación - procedimiento general Para realizar una instalación adecuada, recomendamos contratar a un instalador calificado. Lea estas instrucciones en su totalidad antes de iniciar la instalación. Para mover la secadora con facilidad, coloque dos de las protecciones superiores de cartón en el piso. Incline la secadora hacia uno de los laterales, de modo tal que quede atravesando ambas protecciones. Empuje la secadora de modo que quede cerca de su ubicación definitiva.
instalación de la secadora 6. Consulte la sección Requisitos Eléctricos, luego siga las instrucciones para conexión de sistemas de 3 cables (Paso 7) o las instrucciones para el sistema de 4 cables (Paso 8) a continuación. 7. Instrucciones para el sistema de tres cables: a. Afloje o retire el tornillo central del bloque de terminales. b. Conecte el cable neutro (cable blanco o central) del cable de alimentación a la terminal de tornillo central de color plateado del bloque de terminales. Ajuste el tornillo.
MODELOS ESTADOUNIDENSES: IMPORTANTE – Todos los modelos estadounidenses están diseñados para una CONEXIÓN DE SISTEMAS DE 3 CABLES. El armazón de la secadora está conectado a tierra al conductor neutro del bloque de terminales. Se requiere una CONEXIÓN DE SISTEMAS DE 4 CABLES para las construcciones nuevas o remodeladas, las casas rodantes o si los códigos locales no permiten la conexión a tierra a través del neutro.
instalación de la secadora SUGERENCIAS ACERCA DEL DRENAJE DE LA SECADORA ADVERTENCIA Un conducto flexible de plástico o de un material que no sea el metal presenta un potencial riesgo de incendio. 1. Asegúrese de que su secadora esté instalada correctamente para que extraiga el aire fácilmente. 2. Utilice un conducto de metal rígido, de 4” Coloque cinta en todas las uniones, incluso en la secadora. Nunca use tornillos que atrapen pelusa. 3. Mantenga los conductos lo más recto posible. 4.
INVERSIÓN DE LA PUERTA 8. Vuelva a colocar los tornillos negros en los otros orificios. 4. Retire un tornillo del frente delantero. 9. Vuelva a colocar el tornillo (paso 4) en el marco delantero. 5. Retire los dos tornillos del lado opuesto de la bisagra de la puerta. 10. Coloque la puerta sobre el lado contrario y vuelva a fijar a la secadora. 6. Retire los dos tornillos de la placa de apoyo. 11. Vuelva a conectar la placa de apoyo. 7. Retire un tornillo negro de la bisagra de la puerta. 12.
instalación de la secadora CONEXIÓN DE LA MANGUERA DE ENTRADA Método1 - Uso del conector en forma de “Y” y manguera larga La secadora debe conectarse a la llave de agua fría mediante las nuevas mangueras de entrada. No utilice mangueras viejas. 1. Cierre la llave de agua fría. 2. Si tiene una manguera de agua de la lavadora conectada a Conector Y la llave de agua fría, desatornille y quite la manguera. 3.
Método2 - Uso de la manguera corta, la manguera larga y el conector en forma de “Y” No la ajuste en exceso. Puede dañar la unión. 02 instalación de la secadora La secadora debe conectarse a la llave de agua fría mediante las nuevas mangueras de entrada. No utilice mangueras viejas. Si el conector en forma de “Y” no puede conectarse directamente a la llave de agua fría, debe utilizar la manguera corta. 1. Cierre la llave de agua fría. Manguera corta 2.
manual de instrucciones, sugerencias ADVERTENCIA Para reducir el riesgo de incendio, descarga eléctrica o lesiones personales, lea las INSTRUCCIONES DE SEGURIDAD IMPORTANTES antes de poner en funcionamiento el aparato. DESCRIPCIÓN GENERAL DEL PANEL DE CONTROL 1 1 Selector de ciclos 2 3 4 5 6 7 8 9 Para seleccionar un ciclo, gire el disco Selector de ciclos hasta llegar al ciclo deseado. La luz del indicador junto al nombre del ciclo se iluminará.
Pantalla gráfica digital 3 Botón de selección Prevención de arrugas Botón de selección Nivel de secado Para seleccionar el nivel de secado en los ciclos Normal (Normal), Heavy Duty (Servicio pesado), u otros ciclos Sensor Dry (Secado con sensor), presione el botón Dry Level (Nivel de secado). Se iluminará una luz en el indicador junto al nivel de secado deseado. Presione el botón repetidamente para desplazarse por las opciones.
manual de instrucciones, sugerencias 8 Botón de selección Inicio/ Pausa Presiónelo para detener y reiniciar los programas. 9 Botón Encendido Presiónelo una vez para encender la secadora. Vuelva a presionarlo para apagarla. Si enciende su secadora y no toca ningún botón durante 10 minutos, se apagará automáticamente. CHILD LOCK (SEGURO PARA NIÑOS) La función Child Lock (Seguro para niños) evita que los niños jueguen con la secadora.
ESTANTE DE SECADO (PIEZA OPCIONAL) Instalación y uso del estante de secado PRENDAS SUGERIDAS OPCIONES DE TEMP. SUGERIDAS Suéteres lavables (dóblelos y colóquelos en posición horizontal sobre el estante) Extra Low (Extrabaja) Muñecos de peluche (rellenos con fibras de algodón o poliéster) Extra Low (Extrabaja) ADVERTENCIA 03 manual de instrucciones, sugerencias 1. Abra la puerta de la secadora. 2.
manual de instrucciones, sugerencias LIMPIE EL FILTRO PARA PELUSAS • • • Después de cada carga. Para reducir el tiempo de secado. Para hacer uso de la energía con mayor eficacia. No haga funcionar la secadora sin el filtro para pelusas colocado. CARGUE LA SECADORA DE MANERA ADECUADA • • • • Coloque sólo una carga de ropa en la secadora por vez. En cargas mixtas, las telas pesadas y livianas se secan en forma diferente.
cuidado y limpieza PANEL DE CONTROL TAMBOR Elimine todas las manchas, tales como las de crayón, tinta o tintura de la tela (proveniente de artículos nuevos, tales como toallas o jeans) con un limpiador común. Posteriormente, seque las toallas o prendas viejas para eliminar todo exceso de manchas o solución de limpieza. Una vez que se hayan seguido estos pasos, es posible que las manchas aún sean visibles, pero no se transferirán a las cargas subsiguientes.
sugerencias para prendas especiales SUGERENCIAS PARA PRENDAS ESPECIALES Siga las instrucciones del fabricante o de la etiqueta de indicaciones para secar prendas especiales. Si no se dispone de etiquetas con indicaciones, use la siguiente información como guía. Cubrecamas y edredones • • • Ropa de cama • • Cortinas y paños de tela • • Siga las instrucciones de la etiqueta o seque en el ciclo Normal (Normal) con la temperatura establecida en High (Alta).
guía de solución de problemas CONTROLE ESTAS INDICACIONES SI SU LAVADORA... SOLUCIÓN • • • • Asegúrese de que la puerta esté cerrada con traba. Asegúrese de que el cable de alimentación esté enchufado a un tomacorriente que funcione. Controle los disyuntores o fusibles de su casa. Presione el botón Start/Pause (Inicio/Pausa) nuevamente si la puerta se abre durante el ciclo. No calienta. • • • • Controle los disyuntores o fusibles de su casa.
guía de solución de problemas Se apaga antes de que la carga esté seca • • Pelusa en las prendas • • • • Prendas arrugadas después • del ciclo Antiarrugas • Quedan olores en la ropa después de Refrescar. Gotea agua de la boquilla cuando comienza Proceso de vapor No se ve el agua rociada durante Proceso de vapor La carga de la secadora es demasiado pequeña. Agregue más prendas o algunas toallas y reinicie el ciclo. La carga de la secadora es demasiado grande.
apéndice TABLA DE INDICACIONES SOBRE LA TELA Ciclo de lavado Instrucciones especiales Símbolos de advertencia para el lavado Normal (Normal) Secar colgado/tender No lavar Plancha permanente / Antiarrugas / Control de arrugas Colgar para que escurra No retorcer Prendas suaves / delicadas Secar en posición horizontal No usar lejía Lavado a mano Secado con calor No secar en secadora Alto Sin vapor (agregado a la plancha) Caliente Medium (Mediana) No planchar Tibia/Tibia Bajo Fría Cualqu
apéndice PROTECCIÓN DEL MEDIO AMBIENTE Este electrodoméstico se fabrica con materiales reciclables. Si decide desechar este electrodoméstico, siga la normativa local relacionada con la eliminación de desechos. Corte el cable de alimentación para que el electrodoméstico no pueda conectarse a una fuente de alimentación. Quite la puerta para que los animales y los niños pequeños no puedan quedar atrapados dentro del electrodoméstico. DECLARACIÓN DE CONFORMIDAD Este electrodoméstico cumple con la norma UL2158.
TABLA DE CICLOS ( : configurado en fábrica, : seleccionable) Ciclo Potencia extra Secado manual Plancha permanente Funciones Nivel de secado con sensor Algodón, ropa de trabajo, ropa de cama, carga mezclada Secado normal Telas resistentes, tales como jeans, corderoy y ropa de trabajo pesado Camisas, telas sintéticas, tejidos, prendas de algodón sin arrugas y telas que requieren planchado permanente Secado normal Secado normal Delicada Ropa interior, blusas, lencería Secado normal Desinfección
garantía (U.S.A) SECADORA SAMSUNG GARANTÍA LIMITADA PARA EL COMPRADOR ORIGINAL El presente producto de la marca SAMSUNG, tal como lo provee y distribuye SAMSUNG ELECTRONICS AMERICA, INC.
Excepto lo establecido en el presente, no existen garantías sobre este producto, ya sean expresas o tácitas, y samsung desconoce todas las garantías que incluyen, aunque no en carácter taxativo, cualquier garantía tácita de que el producto se encuentra en condiciones aptas para la venta, de defraudación de derechos o de que el producto se adecua a los fines específicos para los cuales se adquiere.
garantía (CANADA) SECADORA SAMSUNG GARANTÍA LIMITADA PARA EL COMPRADOR ORIGINAL El presente producto de la marca SAMSUNG, tal como lo provee y distribuye SAMSUNG ELECTRONICS CANADA, INC.
SALVO LO ESTABLECIDO EN LA PRESENTE GARANTÍA, NO EXISTEN GARANTÍAS SOBRE EL PRESENTE PRODUCTO, YA SEAN EXPRESAS O TÁCITAS, Y SAMSUNG DESCONOCE TODAS LAS GARANTÍAS QUE INCLUYEN, AUNQUE NO EN CARÁCTER TAXATIVO, CUALQUIER GARANTÍA TÁCITA DE QUE EL PRODUCTO SE ENCUENTRA EN CONDICIONES APTAS PARA LA VENTA, DE DEFRAUDACIÓN DE DERECHOS O DE QUE EL PRODUCTO SE ADECUA A LOS FINES ESPECÍFICOS PARA LOS CUALES SE ADQUIERE.
memo DV365_03064C-04_MES.
memo DV365_03064C-04_MES.
¿TIENE PREGUNTAS O COMENTARIOS? PAÍS LLAME AL O VISÍTENOS EN LÍNEA EN U.S.A 1-800-SAMSUNG (726-7864) www.samsung.com MEXICO 01-800-SAMSUNG (726-7864) www.samsung.com CANADA 1-800-SAMSUNG (726-7864) www.samsung.com/ca (English) www.samsung.com/ca_fr (French) DC68-03064C-04 DV365_03064C-04_MES.