
User manual


35
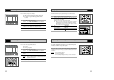
The Timer Programming feature allows you to preset the DVD-VCR
to record a programme up to one month before that programme is
to be broadcast. Up to six programmes can be preset.
☛ Before presetting a recording, check that the date and
time are correct.
1 Insert the cassette and press TIMER on the remote control.
Result
: The TIMER PROGRAMMING menu is displayed.
2 Press
❿
to select the input source.
3 Select the required station by pressing the
,
❷
buttons or
INPUT SEL.
to select the LINE1, LINE2 input sources.
4 Press
❿
to select the recording day.
5 Select the required day by pressing the
or
❷
buttons.
6 Press
❿
to select the recording start time.
7 Select the required hour value by pressing the
or
❷
buttons.
8 Press
❿
to select the minutes.
9 Select the required minute value by pressing the
or
❷
buttons.
10 Press
❿
to select the recording stop time.
11 Select the required recording stop time by pressing the
or
❷
buttons, following the same procedure as when selecting the
recording start time.
12 Press
❿
to select the recording speed.
13 Press the
or
❷
buttons to select the SP (Standard Play), LP
(Long Play), Auto (Auto Tape Speed Select) recording speeds.
14 When you have finished, press the RETURN button.
15 Press the STANDBY/ON button to activate the timer.
Result: Before starting recording, the DVD-VCR compares the
timer duration with the remaining time on the cassette.
➢ Auto Tape Speed Select. The DVD-VCR’s “Auto Tape
Speed Select” function compares the duration of the timer
recording to the actual recording time remaining on the
tape loaded. If there is insufficient tape to complete a
timer recording in AUTO mode, the DVD-VCR
automatically switches to LP mode to record the whole
programme.
Using the Timer Programming Feature
OPEN/CLOSE
STANDBY/ON
15
Standard
Timer Method
34
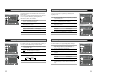
Recording a Programme with Automatic Stop
This function enables you to record up to nine hours (LP) of
programmes.
Your DVD-VCR stops automatically after the requested length of
time.
1 Switch on the television.
2 To monitor the programme being recorded, select the television
channel reserved for use with your DVD-VCR (or the AV input if
used).
3 Insert the cassette on which the programme is to be recorded,
with the window visible and the safety tab intact or the opening
covered with adhesive tape.
Result
: The DVD-VCR is switched on automatically.
4 Select:
◆
The station to be recorded using the
PROG ( or )
buttons
or
◆ The LINE1, LINE2 source using the INPUT SEL. button for a
satellite tuner or external video source
Result: The channel number is displayed and the programme
can be seen on the television.
5 Select the recording speed by pressing the SPEED button as
many times as required (see page 32).
6 Hold the REC button (
●
) down for a while to start recording.
Result
: The record indicator appears on the television screen
and DVD-VCR display. An index is recorded on the
tape (see page 40).
7 Press the REC button (
●
) several times to increase the
recording time in:
◆ 30-minute intervals up to four hours
◆ 1-hour intervals up to nine hours
Result
: The length is displayed on the television displays. The
selected programme is recorded for the length of time
requested. At the end of that time, the DVD-VCR stops
recording automatically and power off.
8 If you wish to cancel the recording before the end, press
STANDBY/ON.
☛ If the end of the tape is reached while recording:
◆ The recording stops and power off.
☛ This function is not available in DVD recording
EJECT
STANDBY/ON
DVD
PROG
VCR
LINE2
3
OK
6
4
4
5
LENGTH 2:30
SET LENGTH :
PRESS REC
●
VCR VCR