DW80N3030 Series Dishwasher user manual imagine the possibilities Thank you for purchasing this Samsung product.
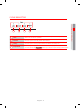
contents SETTING UP YOUR DISHWASHER 6 6 7 9 10 Unpacking your dishwasher Checking parts Control panel Cycle selector Meeting installation requirements USING YOUR DISHWASHER 11 13 13 14 14 15 16 17 Basic guidelines Adjusting the height of the upper rack Removing the upper rack Loading the lower rack Loading the upper rack Using the 3rd rack Using the cutlery rack Using detergent CLEANING AND MAINTAINING YOUR DISHWASHER 19 19 19 19 20 21 Cleaning the exterior Cleaning the interior Cleaning the filter
safety information Congratulations on your new Samsung dishwasher. This manual contains important information on the installation, use, and care of your appliance. Please take time to read this manual to take full advantage of your dishwasher's many benefits and features. What the icons and signs in this user manual mean: WARNING Hazards or unsafe practices that may result in severe personal injury or death CAUTION Hazards or unsafe practices that may result in personal injury or property damage.
safety information WARNING - When using the dishwasher, follow basic precautions, including the following: Read all instructions before using the dishwasher. As with any equipment using electricity, water, and moving parts, potential hazards exist. Use the dishwasher only for its intended function. 01 safety information Use only detergents or wetting agents recommended for use in a dishwasher, and keep them out of the reach of children.
Your dishwasher must be properly grounded. Never connect it to an ungrounded outlet. See page 10 for more information on grounding your dishwasher. • Connect the ground wire to the green ground connector in the terminal box. • After the dishwasher is installed, check that the drain hose is properly connected and that there is no leakage from the hose connectors. If the drain hose is loose, it may cause property damage. • The water supply line is susceptible to breakage.
setting up your dishwasher Be sure to have your installer follow these instructions closely so that your new dishwasher works properly and that you’re not at risk of injury when washing dishes. 02 setting up your dishwasher UNPACKING YOUR DISHWASHER Once your new dishwasher has been delivered to you, carefully unpack it and check for any damage. If the dishwasher has been damaged, make note of it on the waybill and keep a copy.
CONTROL PANEL 1 2 5 3 6 7 1 Power 2 Cycle Selector 3 Hi-Temp Wash When you press the Power button, the entire display turns on and off, and then the light of the most recently finished cycle lights up. When the selected cycle is complete, the dishwasher powers off automatically. Select the appropriate wash cycle depending on the soil level of your dishes. After you select a cycle, the Cycle On light for that cycle lights up.
setting up your dishwasher 7 Start To start a cycle, press the Start button before closing the door. To cancel the cycle, press and hold the Start button for 3 seconds or press the Power button to power off the dishwasher. 02 setting up your dishwasher You can select options (Hi-Temp Wash, S anitize, Heated Dry) before starting a cycle. If you change the cycle after selecting an option, the original cycle is reset.
CYCLE SELECTOR 1 2 3 4 1 Auto This cycle detects the level of soil and automatically initiates the optimal cycle after a few minutes of operation. 2 Normal Use this cycle for normally soiled dinner dishes. 3 Heavy Use this cycle for heavily soiled dishes and dishes with heavy soil. 4 Express 60 Use this cycle for lightly soiled dishes. There's no drying time in Express 60, so you can choose the Heated Dry option if you want to improve drying performance.
setting up your dishwasher MEETING INSTALLATION REQUIREMENTS Electrical supply and grounding 02 setting up your dishwasher To prevent the risk of fire, electric shock, or personal injury, all wiring and grounding must be done in accordance with the National Electrical Code ANSI/FNPA, No. 70 Latest Revision and local codes and ordinances. It is the personal responsibility of the appliance owner to provide adequate electrical service for this appliance. CAUTION WARNING Never use an extension cord.
using your dishwasher BASIC GUIDELINES If "Low Rinse" ( ) is illuminated, the temperature and time of the final rinse can be increased to improve drying performance. 4. Select an appropriate cleaning cycle depending on the soil level of the dishes. (See pages 9 and 22.) - Press the appropriate cycle button. - When you press a cycle button, the cycle indicator lights up. 5. Press the Start button, and then close the door within 3 seconds.
using your dishwasher Touch controls 03 using your dishwasher Touch controls allow you to operate the dishwasher easily. They: Are convenient to operate, requiring only a soft touch. Have a simple and stylish design. Are easy to clean. If you have children or you want to clean the Control Interface, we recommend activating the Control Lock feature to lock the control buttons. See page 7. - Children will not be able to accidently start the dishwasher by touching the controls with this option selected.
ADJUSTING THE HEIGHT OF THE UPPER RACK You can adjust the height of the upper rack in your Samsung dishwasher so that the lower rack can accommodate larger sized dishes. With the upper rack set at the highest position, the lower rack can accommodate plates up to 12 in. (30 cm) in diameter and the upper rack can accommodated plates up to 8 in. (20 cm) in diameter. 2. To raise the upper rack, remove the upper rack as shown in Removin Removing the Upper Rack below.
using your dishwasher LOADING THE LOWER RACK 03 using your dishwasher The lower rack has been especially designed for dinner dishes, soup bowls, plates, pots, lids, casserole dishes, and plates. Load large items such as pans and pots into the dishwasher so their open sides face downwards. We recommend loading cups, stemware, and small plates into the upper rack. See the recommended loading patterns below.
USING THE 3RD RACK * NOTE: The cutlery rack can be removed if you need more space on the upper rack to clean larger items. English - 15 03 using your dishwasher - The cutler rack is best for flatware and cooking or serving utensils. Use the cutlery rack to organize flatware or utensils. - For best results, place heavily soiled items in the standard cutlery basket.
using your dishwasher USING THE CUTLERY RACK You can place each knife, spoon, or fork separately into the spoon stands in the basket’s covers to prevent chipping and discoloration. You can use the cutlery rack with the cover open. Refer to the illustration below. 03 using your dishwasher 10 place setting 12 place setting The spoon stands as seen from above with the suggested placement of cutlery items. Match the numbers in the diagram to the numbers in the list of cutlery items below.
using your dishwasher USING DETERGENT All dishwasher cycles require detergent in the detergent compartment. Add the correct amount of detergent for the selected cycle to ensure the best performance. WARNING WARNING Use dishwasher detergent only. Regular detergent produces too much foam, which may decrease the dishwasher’s performance or cause it to malfunction. Do not swallow dishwasher detergent. Avoid breathing in the fumes.
The cover opens automatically to dispense the detergent during the wash. CYCLE AMOUNT OF DETERGENT 03 using your dishwasher Main wash dispenser Onto the door for pre-wash 20 g 10 g 30 g 15 g Auto, Normal Heavy, Express 60 The numbers inside the dispenser refer to grams. Filling the rinse aid reservoir Your dishwasher has been designed to use liquid rinse aid only. Using a powdered rinse aid will clog the reservoir opening and cause the dishwasher to malfunction.
cleaning and maintaining your dishwasher Keeping your dishwasher clean improves its performance, reduces unnecessary repairs, and lengthens its life. It’s best to clean spills on the outside of your dishwasher as they occur. Use a soft, damp cloth on the control panel to gently wipe away spills and dust. Do not use benzene, wax, thinner, chlorine bleach, or alcohol. These materials may discolor the inner walls and cause stains.
4. Remove any dirt or other remains from the filter, and then rinse it under running water. 04 cleaning and maintaining 5. Reassemble the filter in the reverse order of disassembly, re-insert the filter insert, and then rotate it clockwise as shown until closed. CAUTION If the filter insert is not closed properly, its performance will be decreased. CLEANING THE NOZZLES If your dishwasher does not seem to be cleaning adequately or the nozzles seem clogged, you can clean each of the nozzles.
cleaning and maintaining your dishwasher Middle nozzle 04 cleaning and maintaining 1. Pull the upper rack towards the front and remove it. 2. Check whether the nozzle holes are clogged by food particles. 3. If cleaning is needed, remove the nozzle. 4. To remove the nozzle, unfasten and remove the nut, and then remove the nozzle. 5. Clean the nozzle, re-insert it, and fasten the nut. 6. When fastening the nut, turn it firmly by hand. 7. Check whether the nozzle is engaged correctly by rotating it by hand.
cycles CYCLE CHART Cycle 05 cycles Auto Pre- PreMain wash wash1 wash2 118-126 °F (48-52 °C) Water [gal(l)] CycleTime (min) 136°F-144°F/158°F (58-62 °C/70 °C ) 3-6 (11.8-22.7) 109-143 136°F-144°F/158°F (58-62 °C/70 °C ) 3-6 (11.8-22.7) 119-144 7.3 (27.4) 162 4 (15.
troubleshooting CHECK THESE POINTS IF YOUR DISHWASHER… PROBLEM An operation or cycle is taking too long. There are food particles remaining on dishes. (Not cleaning properly.) SOLUTION The door is not closed completely. Check if the door is latched and closed completely. No cycle is selected. Select a proper cycle. The power cable is not connected. Connect the power cable properly. The Control Panel is locked. Unlock the child lock A circuit breaker is open. Reset the circuit breaker.
troubleshooting PROBLEM Leaves glasses with a dull film. Leaves a yellow or brown film on the inside of the dishwasher. Does not dry dishes well. POSSIBLE CAUSE SOLUTION The water supplied is soft and too much detergent was used. Underload the dishwasher and use a rinse aid to minimize this. Aluminum dishes were included in the wash load. Remove the marks on the dishes using a low sensitivity cleaner. This is caused by coffee and tea soils. Remove the soils using a spot cleaner.
PROBLEM SOLUTION Nozzle holes are clogged with food particles. Clean the nozzle holes. See page 17. The nozzle is blocked by a dish or pot and cannot rotate. After placing the dishes into the racks, rotate the nozzles by hand to check whether any of the dishes interfere with them. Water won’t pump out of the dishwasher. The drain is clogged. Contact a qualified service technician to remove any obstruction from the drain hose and check the drain pump operation.
troubleshooting INFORMATION CODES The Control Panel displays information codes to help you understand what is occurring with your dishwasher. If your dishwasher has a problem, the CODE SYMBOL lights blink as shown below. Possible Th e water tap isn't opened. 60 Th e pressure switch is broken. T he wash pump i sn't work ing . No water There is a problem with the Main PBA . Th e high water switch was activated 5 times for 5 s econds. 60 60 The high water switch was on continuously for 120 seconds.
appendix HELPING THE ENVIRONMENT SPECIFICATIONS Model DW80N3030U* Type Built-in Dishwasher Wash capacity 15 place settings Power 120 V, 60 Hz only Used water pressure 20 - 120 psi (140 - 830 kPa) Wash Motor 50 W Heater 840 W Rated power uasge Dimensions (Width × Depth × Height) 23 ¾ x 24 ⁄4 x 33 ¾ in. Weight Unpacked 3 70.5 lb (32 kg) English - 27 07 appendix Your dishwasher is manufactured from recyclable materials.
warranty (U.S.A) SAMSUNG DISHWASHER LIMITED WARRANTY TO ORIGINAL PURCHASER WITH PROOF OF PURCHASE This SAMSUNG brand product, as supplied and distributed by SAMSUNG ELECTRONICS AMERICA, INC.
warranty (U.S.A) The cost of repair or replacement under these excluded circumstances shall be the customer’s responsibility. Visits by an authorized servicer to explain product functions, maintenance or installation are not covered by this limited warranty. Please contact SAMSUNG at the number below for assistance with any of these issues.
warranty (CANADA) SAMSUNG DISHWASHER LIMITED WARRANTY TO ORIGINAL PURCHASER This SAMSUNG brand product, as supplied and distributed by SAMSUNG ELECTRONICS CANADA, INC. (SAMSUNG) and delivered new, in the original carton to the original consumer purchaser, is warranted by SAMSUNG against manufacturing defects in materials and workmanship for a limited warranty period of: One (1) Year All Parts and Labor.
warranty (CANADA) EXCEPT AS SET FORTH HEREIN, THERE ARE NO WARRANTIES ON THIS PRODUCT EITHER EXPRESS OR IMPLIED, AND SAMSUNG DISCLAIMS ALL WARRANTIES INCLUDING, BUT NOT LIMITED TO, ANY IMPLIED WARRANTIES OF MERCHANTABILITY, INFRINGEMENT OR FITNESS FOR A PARTICULAR PURPOSE. NO WARRANTY OR GUARANTEE GIVEN BY ANY PERSON, FIRM, OR CORPORATION WITH RESPECT TO THIS PRODUCT SHALL BE BINDING ON SAMSUNG.
memo
memo
bit.ly/samsungdishwashers Questions or Comments? COUNTRY U.S.A CALL OR VISIT US ONLINE AT 1-800-SAMSUNG (726-7864) www.samsung.com/us/support CANADA 1-800-SAMSUNG (726-7864) www.samsung.com/ca/support (English) www.samsung.com/ca_fr/support (French) MEXICO 01-800-SAMSUNG (726-7864) www.samsung.
Cancer et effets nocifs sur la reproduction-www.P65Warnings.ca.gov.
garantie (États-Unis) LAVE-VAISSELLE SAMSUNG GARANTIE LIMITÉE POUR L'ACHETEUR INITIAL AVEC PREUVE D'ACHAT Ce produit de la marque SAMSUNG, fourni, distribué par SAMSUNG ELECTRONICS, INC.
garantie (États-Unis) Le coût des réparations ou du remplacement dans de telles circonstances exclues sera à la charge au client. Les interventions effectuées par un agent d'entretien agréé dans le but d'expliquer les fonctions de l'appareil ou les procédures de maintenance ou d'installation ne sont pas couvertes par la présente garantie limitée. Veuillez communiquer avec SAMSUNG en composant le numéro indiqué ci-dessous pour obtenir de l'aide si vous rencontrez l'un de ces problèmes.
garantie (CANADA) LAVE-VAISSELLE SAMSUNG GARANTIE LIMITÉE À L'ACHETEUR INITIAL Ce produit de la marque SAMSUNG, fourni, distribué par SAMSUNG ELECTRONICS CANADA, INC. (SAMSUNG) et livré neuf, dans son carton d'origine à l'acheteur et consommateur initial, s'accompagne d'une garantie de SAMSUNG contre tout vice de fabrication au niveau des pièces et de la main d'œuvre pendant une période limitée de : un (1) an pour toutes les pièces et la main-d'oeuvre.
garantie (CANADA) À L'EXCEPTION DE CELLES EXPOSÉES DANS LA PRÉSENTE, IL N'EXISTE AUCUNE AUTRE GARANTIE SUR CE PRODUIT, QU'ELLE SOIT EXPRESSE OU IMPLICITE, ET SAMSUNG REJETTE TOUTE AUTRE GARANTIE Y COMPRIS, MAIS SANS S'Y LIMITER, TOUTE GARANTIE IMPLICITE RELATIVE À LA QUALITÉ MARCHANDE, À L'ABSENCE DE CONTREFAÇON OU À L'ADAPTATION À UN USAGE PARTICULIER. SAMSUNG NE SERA TENU D'HONORER AUCUNE AUTRE GARANTIE DONNÉE PAR UNE PERSONNE, UNE FIRME OU UNE SOCIÉTÉ QUELCONQUE EN REGARD DE CE PRODUIT.
DW80N3030 Series Lavavajillas manual de usuario Imagine las posibilidades Gracias por adquirir este producto Samsung.
contenido CONFIGURACIÓN DE LA LAVAVAJILLAS 6 6 6 7 9 10 Desembalaje de su lavavajillas Comprobación de piezas Panel de control Selector de ciclos Cumplimiento de los requisitos de instalación USO DEL LAVAVAJILLAS 11 Directrices básicas 11 13 13 14 14 15 16 17 Ajuste de la altura de la rejilla superior Extracción de la rejilla superior Carga de la rejilla inferior Carga de la rejilla superior Uso de la estante 3 Uso de la rejilla para cubiertos Uso de detergente LIMPIEZA Y MANTENIMIENTO DE SU LAVAVAJ
información de seguridad Felicidades por su nuevo lavaplatos Samsung. Este manual contiene información sobre la instalación, uso y cuidado de su electrodoméstico. Por favor, tómese tiempo para leer este manual para aprovechar al máximo los muchos beneficios y características de su lavavajillas.
información de seguridad 01 información de seguridad ADVERTENCIA - Cuando utilice el lavavajillas, siga las precauciones básicas, siguientes: Lea todas las instrucciones antes de usar el lavavajillas. Como con cualquier equipo que usa electricidad, agua y partes móviles, existen peligros potenciales. Utilice el lavavajillas solamente para la función que se desea. Utilice sólo detergentes o agentes humectantes recomendados para su uso en un lavavajillas y mantenga fuera del alcance de los niños.
• Su lavavajillas debe estar debidamente conectado a tierra. Nunca lo conecte a una • • • • Para operar con seguridad este aparato, familiarícese con sus operaciones y tenga cuidado cuando se utiliza. • No ponga gasolina, disolventes u otros materiales inflamables dentro del lavavajillas. No lave los platos expuestos a estos materiales. • Mantenga su detergente para lavavajillas fuera del alcance de los niños. El detergente tiene efectos adversos sobre los órganos humanos.
configuración de su lavavajillas Asegúrese de que su instalador siga estas instrucciones para que su nuevo lavavajillas funcione correctamente y para que no está en riesgo de lesiones al lavar los platos. DESEMBALAJE DE SU LAVAVAJILLAS 02 configuración de su lavavajillas Una vez que se le haya entregado su nuevo lavavajillas, desembale cuidadosamente y compruebe si hay algún daño.Si el lavavajillas se ha dañado, anótelo en la hoja de ruta y guarde una copia.
PANEL DE CONTROL 1 2 5 3 6 7 1 Potencia 2 Selector de ciclos 3 Lavado alta temperatura 4 Higienizado Cuando presione el botón de encendido, la pantalla entera se enciende y entonces se enciende la luz del último ciclo terminado. Cuando el ciclo seleccionado se ha completado, el lavavajillas se apaga automáticamente. Seleccione el ciclo de lavado apropiado dependiendo del nivel de suciedad de sus platos. Después de seleccionar un ciclo, se enciende la luz de ciclo activado para ese ciclo.
configuración de su lavavajillas 7 Para iniciar un ciclo, pulse el botón Inicio antes de cerrar la puerta. Para cancelar el ciclo, mantenga presionado el botón de inicio durante 3 segundos o presione el botón de encendido para apagar. Iniciar 02 configuración de su lavavajillas Puede seleccionar opciones ( Lavado alta temperatura, Higienizado, Calentamiento en seco) antes de iniciar un ciclo. Si cambia el ciclo después de seleccionar una opción, el ciclo original se restablece.
SELECTOR DE CICLO 1 2 3 4 1 Auto Este ciclo detecta el nivel de suciedad e inicia automáticamente el ciclo óptimo después de algunos minutos de funcionamiento. 2 Normal Utilice este ciclo para platos sucios. 3 Pesado Use este ciclo para platos muy sucios y platos con suciedad pesada. 4 Expresar 60 Utilice este ciclo para platos ligeramente sucios. No hay tiempo de secado en "Expresar 60", por lo qu e puede elegir la opción "Calentamiento en seco" si desea mejorar el rendimiento de secado.
configuración de su lavavajillas CUMPLIMIENTO DE LOS REQUISITOS DE INSTALACIÓNINST Suministro eléctrico y puesta a tierra 02 configuración de su lavavajillas Para evitar el riesgo de incendio, descarga eléctrica o lesiones personales, todo el cableado debe estar hecho de acuerdo con el Código Eléctrico Nacional ANSI / FNPA, No. 70 Última Revisión y los códigos y ordenanzas locales. Es responsabilidad personal del propietario del aparato proporcionar el servicio eléctrico adecuado para este aparato.
Uso de su lavavajillas DIRECTRICES BÁSICAS - Si el "Low Rinse" ( de l avado y secado. ) está iluminado, debe volver a llenar el dispensador de abrillantador para mejorar el rendimiento - Si el "Low Rinse" ( ) está iluminado, se puede aumentar la temperatura y el tiempo de enjuague final para mejorar el rendimiento de secado. 4. Seleccione un ciclo de limpieza apropiado dependiendo del nivel de suciedad de los platos. (Véanse las páginas 9 y 22.) - Presione el botón de ciclo apropiado.
Uso de su lavavajillas Controles táctiles 03 Uso de su lavavajillas Los controles táctiles le permiten manejar el lavavajillas. Conveniente de operar, requiriendo solamente un toque suave. Tienen un diseño simple y con estilo. Son fáciles de limpiar. Si tiene hijos o desea limpiar la Interfaz de Control, le recomendamos que active la función de bloqueo para bloquear los botones de control. Vea la página 7.
AJUSTE DE LA ALTURA DE LA REJILLA SUPERIOR 2. Para levantar el estante superior, quite el estante superior como se muestra en Extracción del bastidor superior a continuación. Después, vuelva a colocar la rejilla de modo que las tres ruedas inferiores de cada lado estén a cada lado del riel de guía. Vea la ilustración de la posición superior a la derecha. PRECAUCIÓN Recomendamos ajustar la altura de la superior antes de cargar los platos en la rejilla.
Uso de su lavavajillas CARGA DE LA REJILLA INFERIOR 03 Uso de su lavavajillas La rejilla inferior ha sido especialmente diseñada para platos de cena, cuencos de sopa, platos, ollas, tapas, cazuelas y platos. Cargue objetos grandes como cacerolas y cazuelas en el lavavajillas para que sus lados abiertos estén hacia abajo. Recomendamos cargar vasos, tazas y pequeños platos en el estante superior. Consulte los patrones de carga recomendados a continuación.
Uso de la eatante 3 * NOTA : Puede retirar la bandeja para cubiertos si necesita disponer de más espacio en la cesta superior para utensilios más voluminosos. Español - 15 03 Uso de su lavavajillas - Esta bandeja es adecuada para cubiertos de mesa y de cocina o de servir.Utilice la bandeja para cubiertos para organizar la ubertería. - Para obtener los mejores resultados, coloque los elementos muy sucios en la cesta para cubiertos estándar.
Uso de su lavavajillas USO DE LA REJILLA PARA CUBIERTOS Puede colocar cada cuchillo, cuchara o tenedor por separado en los soportes de la cuchara en las cubiertas de la cesta para evitar el desbastado y la decoloración. Puede utilizar el portacubiertos con la tapa abierta. Consulte la ilustración de la derecha. 03 Uso de su lavavajillas 10 cubiertos 12 cubiertos La cuchara está como se ve desde arriba con la colocación sugerida de los cubiertos.
Uso de su lavavajillas USO DE DETERGENTE Todos los ciclos de lavavajillas requieren detergente en el compartimento de detergente. Agregue la cantidad correcta de detergente para el ciclo seleccionado para asegurar el mejor rendimiento. ADVERTENCIA ADVERTENCIA Utilice solamente detergente para lavavajillas. El detergente regular produce demasiada espuma, lo que puede hacer disminuir el rendimiento del lavavajillas o hacer que funcione mal. No trague el detergente del lavavajillas.
La cubierta se abre automáticamente para dispensar el detergente durante el lavado. CANTIDAD DE DETERGENTE CICLO Dispensador de lavado principal 03 using your dishwasher Auto, Normal Pesado, Express 60 En la puerta para prelavado 20 g 10 g 30 g 15 g Los números dentro del dispensador se refieren a gramos. Llenado del depósito de abrillantador Su lavavajillas ha sido diseñado para usar sólo abrillantador líquido.
Limpieza y mantenimiento de su lavavajillas Mantener su lavavajillas limpio mejora su rendimiento, reduce las reparaciones innecesarias y alarga su vida útil. Es mejor limpiar derrames en el exterior de su lavavajillas cuando ocurren. Utilice un paño suave y húmedo en el panel de control para limpiar con cuidado los derrames y el polvo. No utilice benceno, cera, diluyente, cloro o alcohol. Estos materiales pueden decolorar las paredes internas y causar manchas.
4. Retire la suciedad u otros restos del filtro y luego enjuáguelos con agua corriente. 04 Limpieza y mantenimiento de su lavavajillas 5. Vuelva a montar el filtro en el orden inverso al desensamblaje, vuelva a insertar el inserto del filtro y gírelo en el sentido de las agujas del reloj como se muestra hasta que esté cerrado. Si el inserto del filtro no se cierra correctamente, su rendimiento disminuirá.
Limpieza y mantenimiento de su lavavajillas Boquilla central 04 Limpieza y mantenimiento de su lavavajillas 1. Tire de la rejilla superior hacia el frente y retírela. 2. Compruebe si los orificios de la boquilla están obstruidos por las partículas de alimentos. 3. Si la limpieza es necesaria, quite la boquilla. 4. Para quitar la boquilla, suelte y retire la tuerca y, a continuación, la boquilla. 5. Limpie la boquilla, vuelva a insertarla y apriete la tuerca. 6.
Ciclos TABLA DE CICLOS Ciclo 05 Ciclos Auto Normal PrePreLavado lavado 1 lavado 2 principal Último enjuague [Higienizado] Seco Agua [gal(l)] Tiempo de ciclo con(mín) 3-6 (11.8-22.7) 109-143 118-126 °F (48-52 °C) 136-144°F/158°F 58-62 °C/ 70 °C 108-126 °F (42-52 °C) 136-144°F/158°F 58-62 °C/ 70 °C 3-6 (11.8-22.7) 119-144 131°F (55 °C) 149 °F/ 158°F 65 °C/ 70 °C 7.3 (27.4) 162 126 °F (52 °C) 136 °F/ 158°F 58 °C/ 70 °C 4 (15.
solución de problemas COMPRUEBE ESTOS PUNTOS SI SU LAVAVAJILLAS... PROBLEMA SOLUCIÓN La puerta no está completamente cerrada. Compruebe si la puerta está cerrada y cerrada completamente. No se ha seleccionado ningún ciclo. Seleccione un ciclo adecuado. El cable de alimentación no está conectado. Conecte el cable de alimentación correctamente. El panel de control está bloqueado. Desbloquee el bloqueo para niños Un interruptor automático está abierto. Reinicie el disyuntor.
solución de problemas PROBLEMA Deje las gafas con un film opaco. Deja una película amarilla o marrón en el interior del lavavajillas. No seca los platos bien. CAUSA POSIBLE SOLUCIÓN El agua suministrada es suave y demasiada se utilizó mucho detergente. Cargue menos el lavavajillas y use un abrillantador para minimizar esto. Se incluyeron platos de aluminio en la carga de lavado. Retire las marcas de los platos usando un limpiador de baja sensibilidad. No hay abrillantador en el dispensador.
PROBLEMA SOLUCIÓN El orificio de la boquilla está obstruido con partículas de alimentos. Limpie el orificio de la boquilla. Vea la página 17. La boquilla está bloqueada por un plato u olla y no puede girar. Después de colocar los platos en las rejillas, gire las boquillas con la mano para comprobar si alguno de los platos interfiere con ellos. El agua no bombea fuera del lavavajillas. El drenaje está obstruido.
solución de problemas CÓDIGOS DE INFORMACIÓN El panel de control muestra códigos de información para ayudarle a entender lo que está ocurriendo con su lavavajillas. Si su lavavajillas tiene un problema, las luces del SÍMBOLO DE CÓDIGO parpadean como se muestra a continuación. Posibles causas El grifo de agua no está abierto. Heavy Express 60 El interruptor de presión está roto. Sin agua La bomba de lavado no funciona. Hay un problema con la PBA principal.
apéndice AYUDAR AL MEDIO AMBIENTE ESPECIFICACIONES Modelo DW80N3030U* Tipo Lavavajillas incorporado Capacidad de lavado Potencia 120 V, 60 Hz solamente Presión de agua usada Motor de lavado 50 W Calentador 840 W Uso de potencia nominal Dimensiones (Ancho × Profundidad × Altura) 23 ¾ x 24 ⁄4 x 33 ¾ in. [604 x 629 x 858mm] Peso Desempaquetado 3 Español - 27 15 posiciones 07 apéndice Su lavavajillas está fabricado con materiales reciclables.
garantía (EE.UU.) LAVAVAJILLAS SAMSUNG GARANTÍA LIMITADA PARA EL COMPRADOR ORIGINAL CON PRUEBA DE COMPRA El presente producto de la marca SAMSUNG, tal como lo provee y distribuye SAMSUNG ELECTRONICS AMERICA, INC.
garantía (EE.UU.) El costo de reparación o reemplazo bajo estas circunstancias excluidas será responsabilidad del cliente. Las visitas de un técnico de servicio autorizado para explicar las funciones, el mantenimiento o la instalación del producto no están cubiertas por esta garantía limitada. Comuníquese con SAMSUNG al número que figura a continuación si necesita asistencia en los casos mencionados.
garantía (CANADÁ) LAVAVAJILLAS SAMSUNG GARANTÍA LIMITADA PARA EL COMPRADOR ORIGINAL El presente producto de la marca SAMSUNG, tal como lo provee y distribuye SAMSUNG ELECTRONICS CANADA, INC. (SAMSUNG) y lo entrega como nuevo, en su empaque de cartón original al comprador o consumidor original, está garantizado por SAMSUNG contra defectos de fabricación de los materiales y la mano de obra durante el período de la garantía limitada de: Un (1) ano para todas las piezas y la mano de obra.
garantía (CANADÁ) SALVO LO ESTABLECIDO EN LA PRESENTE GARANTÍA, NO EXISTEN GARANTÍAS SOBRE EL PRESENTE PRODUCTO, YA SEAN EXPRESAS O TÁCITAS, Y SAMSUNG DESCONOCE TODAS LAS GARANTÍAS QUE INCLUYEN, AUNQUE NO EN CARÁCTER TAXATIVO, CUALQUIER GARANTÍA TÁCITA DE QUE EL PRODUCTO SE ENCUENTRA EN CONDICIONES APTAS PARA LA VENTA, DE DEFRAUDACIÓN DE DERECHOS O DE QUE EL PRODUCTO SE ADECUA A LOS FINES ESPECÍFICOS PARA LOS CUALES SE ADQUIERE.
memorándum
memorándum
Escanee el código QR* o visite www.samsung.com/spsn para ver nuestros útiles vídeos y muestras en vivo. * Requiere que el lector se instale en su smartphone. bit.ly/samsungdishwashers ¿Tiene alguna pregunta o algún comentario PAÍS LLAME AL O VISÍTENOS EN LÍNEA EN U.S.A 1-800-SAMSUNG (726-7864) www.samsung.com/us/support CANADA 1-800-SAMSUNG (726-7864) www.samsung.com/ca/support (Español) www.samsung.com/ca_fr/support (French) MEXICO 01-800-SAMSUNG (726-7864) www.samsung.