
User manual


Table Of Contents
- Galaxy Camera
- Table of Contents
- Section 1: Getting Started
- Section 2: Understanding Your Camera
- Section 3: Camera Operation
- Section 4: Entering Text
- Section 5: Contacts and Your Address Book
- Section 6: Multimedia
- Section 7: Messaging
- Section 8: Changing Your Settings
- Accessing Settings
- Wi-Fi Settings
- Bluetooth settings
- Data Usage
- More Settings
- Blocking Mode
- Sound Settings
- Display Settings
- Storage
- Power
- Battery
- Application Manager
- Location Services
- Lock Screen Settings
- Security
- Language and input
- Back up and reset
- Add Account
- Motion
- Accessory Settings
- Date and time
- Accessibility
- Developer options
- About Device
- Section 9: Connections
- Section 10: Applications
- AllShare Play
- AT&T Locker
- Calculator
- Calendar
- Camera
- ChatON
- Chrome
- Clock
- Connect To AT&T
- Contacts
- Downloads
- Gallery
- Gmail
- Google +
- Group Cast
- Internet
- Latitude
- Local
- Maps
- Messenger
- Music Player
- My Files
- Navigation
- Paper Artist
- Photo Wizard
- Play Books
- Play Magazines
- Play Movies & TV
- Play Music
- Play Store
- S Suggest
- S Voice
- Settings
- Talk
- Video Editor
- Video Player
- Voice Search
- YouTube
- Section 11: Health and Safety Information
- Exposure to Radio Frequency (RF) Signals
- Specific Absorption Rate (SAR) Certification Information
- FCC Part 15 Information to User
- Smart Practices While Driving
- Battery Use and Safety
- Samsung Mobile Products and Recycling
- UL Certified Travel Charger
- Display / Touch-Screen
- GPS
- Care and Maintenance
- Responsible Listening
- Operating Environment
- Restricting Children's Access to Your Mobile Device
- FCC Notice and Cautions
- Other Important Safety Information
- Section 12: Warranty Information
- Section 13: Samsung Product Registration
- Index
Camera Operation 42
Viewing your Pictures
After you take a photo, you can access various options from
the Image Viewer. The Image Viewer uses your Gallery. For
more information, refer to “Gallery” on page 63.
Using the Camcorder
In addition to taking photos, the camera also doubles as a
camcorder that also allows you to record, view, and send
videos.
Note:
The camera may not be able to properly record videos to
a memory card with a slow transfer speed.
Shooting Video
Tip:
When shooting video in direct sunlight or in bright
conditions, it is recommended that you provide your
subject with sufficient light by having the light source
behind you.
1. From the main Home screen, tap
Camera
to
activate the camera mode.
2. Using the camera’s main display screen as a
viewfinder, adjust the image by aiming the camcorder
at the subject.
3. Before you take a video, use the Zoom button to zoom
in or out. You can magnify the video up to x21 (2100
percent).
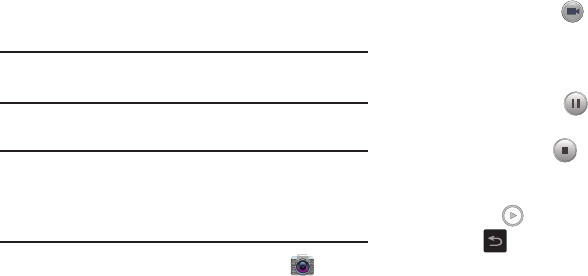
4. Tap the Video key ( ) to begin shooting video. The
red light will blink while recording.
5. You can tap the screen to move the focus to the area
you touch.
6. Tap the Pause key ( ) to stop the recording and
save the video file to your Camera folder.
7. Tap the Stop key ( ) to stop the recording and save
the video file to your Camera folder.
8. Once the file has been saved, tap the image viewer,
then tap to play your video.
9. Press to return to the viewer.