Operating Instructions and Cooking Guide SPEED COOK OVEN FQ159ST / FQ159UST Owner’s Manual FQ159UST_ELE-03150G_EN.
FQ159UST_ELE-03150G_EN.
Contents Using This Manual . . . . . . . . . . . . . . . . . . . . . . . . . . . . . . . . . . . . . . . 2 Important Safety Instructions. . . . . . . . . . . . . . . . . . . . . . . . . . . . . . . . . . 2 Precautions to Avoid Possible Exposure to Excessive Microwave . . . . . . . . . . . . 2 Installation and Connection . . . . . . . . . . . . . . . . . . . . . . . . . . . . . . . . . . 6 Setting the Clock . . . . . . . . . . . . . . . . . . . . . . . . . . . . . . . . . . . . . . . . 7 Oven Features . . .
Using This Manual EN Thank you for purchasing a SAMSUNG speed cook oven. Your Owner’s Manual contains important safety instructions and essential information on using and caring for your new speed cook oven. Before using your oven, please read all the information in this manual and keep it for future reference. A handy quick look-up guide explaining basic cooking operations is provided inside the front cover for your convenience.
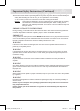
Important Safety Instructions (Continued) Read Carefully and keep for future reference. Before cooking food or liquids in your oven, please check that the following safety precautions are taken. EN 1. DO NOT use any metallic cookware when using microwave function: ● Metallic containers ● Dinnerware with gold or silver trimmings ● Skewers, forks, etc. Reason Electric arcing or sparking may occur and may damage the oven. 2. DO NOT heat: ● Airtight or vacuum-sealed bottles, jars, containers.
Important Safety Instructions (Continued) EN 8. Take particular care when heating liquids and baby foods using microwaves function. ● ALWAYS allow a standing time of at least 20 seconds after the oven has been switched off to allow the temperature to equalize. ● Stir during heating if necessary and ALWAYS stir after heating. ● To prevent eruptive boiling and possible scalding, you should stir before, during, and after heating.
Important Safety Instructions (Continued) 13.If the microwave mode is operating without any load, the power will cut off automatically for safety. After standing for over 30 min, you can operate the oven normally. ● Do not worry is the oven continues to work after cooking has finished. Reason This product is designed to run the cooling fan for 5 minutes after the cooking has finished to cool down internal electronic parts. When cooking has finished, the oven will beep and flash “0” four times.
Installation and Connection EN ● This appliance is NOT intended for use in a commercial environment. ● This appliance should be positioned at least 85cm above the floor. ● Please observe the installation instructions provided and note that this appliance should only be installed by a qualified technician. ● The appliance is fitted with a plug and must only be connected to a properly installed earthed socket. The fuse protection must be rated at 16 amps (L or B-type miniature circuit breakers).
Setting the Clock When the appliance is first plugged in, the DISPLAY lights up. After three seconds, the Clock symbol and “12:00” blink on the DISPLAY. EN Setting the Clock 1 Press CLOCK . The “12” starts blinking. 2 Turn MULTI-FUNCTION SELECTOR to set hour. 3 Press CLOCK again. The “00” starts blinking. 4 Turn MULTI-FUNCTION SELECTOR to set minute. 5 Press CLOCK again. The clock sets by itself within 5 seconds. 7 FQ159UST_ELE-03150G_EN.
Oven Features EN Contro Panel Top Heating Elements Oven Light Level 5 Level 4 Oven Levels Level 3 Level 2 Microwave Level 1 Safety Door Lock Door Door Handle Note ● Shelf levels are numbered from the bottom up. ● The levels 4 and 5 are mainly used for grill function. ● The microwave level is mainly used for microwave function. ● Please refer to Cooking Guides provided throughout this booklet to determine appropriate shelf level for your dishes. 8 FQ159UST_ELE-03150G_EN.
Accessories The following accessories are provided with your microwave oven: 1 Ceramic Tray (Useful for Microwave Mode) EN 2 Two Baking Trays (DO NOT use for Microwave Mode.) 4 Oven Rack (DO NOT use for Microwave Mode.) Grill insert Ceramic Tray 3 Grill Insert for Ceramic Tray (Useful for Speed Menu and Grill Mode) Note Please refer to Cooking Guides provided throughout this booklet to determine appropriate accessory for your dishes. 9 FQ159UST_ELE-03150G_EN.
Control Panel EN 1 6 16 7 23 4 5 8 9 10 11 12 13 14 15 1. OFF 9. CLOCK 2. OVEN MODE 10.COOK TIME 3. SPEED MENU MODE 11. END TIME 4. SPEED DEFROST MODE 12.TEMPERATURE 5. MICROWAVE MODE 13.POWER LEVEL/ENTER 6. MODE SELECTOR 14.MULTI-FUNCTION SELECTOR 7. DISPLAY 15.STOP / CANCEL 8. STEAM CLEAN 16.START Using Pop Up Dials Note The MODE SELECTOR (6) and MULTI-FUNCTION SELECTOR (14) are pop up dials. Simply press and turn to desired setting. 10 FQ159UST_ELE-03150G_EN.
Types of Heating The following chart summarizes the various heating modes and settings available on your oven. Use the Cooking Guides in the pages that follow to determine the appropriate mode and setting for all your recipes. EN OVEN MODE Dual Convection Setting Food is heated by hot air from the left and right sides of the oven. This setting provides uniform heating and is ideal for baking.
Using Oven Mode EN Five settings are available under this mode. Check Cooking Guides on pages 14 - 18 to determine appropriate setting. Setting Oven Mode 1 2 Turn MODE SELECTOR Dial to oven mode position. Turn MULTI-FUNCTION SELECTOR Dial to desired oven mode. The oven mode and recommended temperature will be displayed.
Using Oven Mode (Continued) EN 5 Press START. ► The TEMPERATURE indicator on display will be lit and the indicator will blink after the temperature is reached. Note 1) During cooking, COOK TIME and TEMPERATURE are available to change the setting. 2) In Oven Mode settings, the convection heater and top and bottom heating elements switch off and on throughout cooking to regulate the temperature.
Using Oven Mode (Continued) EN Dual Convection ( ) Setting Food is heated by hot air from the left and right sides of the oven. This setting provides uniform heating and is ideal for baking. When you cook on two baking trays at the same time, place the trays on level , and level . * Please ensure that glass baking dishes are suitable for 40 ~ 250 °C cooking temperatures. Cooking Guide Use temperatures and times in this table as guidelines for baking.
Using Oven Mode (Continued) Convection + Top Heat ( ) Setting Hot air and top heating element combine, making this setting ideal for crisping and browning. This setting is especially recommended for cooking meats. EN When cooking meat, place on rack on Level and set baking tray on Level to catch drippings. * Please ensure that glass baking dishes are suitable for 40 ~ 250 °C cooking temperatures. Cooking Guide Use temperatures and times in this table as guidelines for roasting.
Using Oven Mode (Continued) EN Conventional Heat ( ) Setting Heat comes from top and bottom heating elements. This setting is suitable for baking and roasting. Baking tray or oven rack is usually placed on Level . * Please ensure that glass baking dishes are suitable for 40 ~ 250 °C cooking temperatures. Cooking Guide Use temperatures and times in this table as guidelines for baking. We recommend to preheat the oven with Conventional Heat mode.
Using Oven Mode (Continued) Grill ( ) Setting Food is heated by the top heating elements. EN For grilling, ceramic tray with grill insert is usually placed on Level . * Please ensure that glass baking dishes are suitable for 40 ~ 250 °C cooking temperatures. Cooking Guide Use temperatures and times in this table as guidelines for grilling. Set 220 °C grill temperature, preheat for 3 minutes.
Using Oven Mode (Continued) EN Convection + Bottom Heat ( ) Setting Hot air and the bottom heating element combine to heat food. This is a useful setting for crisping and browning. Baking tray or oven rack is often used on Level * . Please ensure that glass baking dishes are suitable for 40 ~ 250 °C cooking temperatures. Cooking Guide Use temperatures and times in this table as guidelines for baking. We recommend to preheat the oven with Convection + Bottom Heat mode.
Setting Cook Time EN 1 Select the desired oven function and temperature. (See also section “Changing the oven function and temperature) Note : If there is no further entry on the control panel for 5 seconds, start key will blink. 2 Press COOK TIME. 3 4 Press START the oven will start promptly. Turn MULTI-FUNCTION SELECTOR to set desired cook time. 1) After 5 seconds, setting cook time ends automatically and START blinks. 2) Press COOK TIME to end setting cook time.
Setting End Time EN 1 Select the desired oven function and temperature. 2 Turn MULTI-FUNCTION SELECTOR to set desired hour and minute. (14:00). Example Desired time is 14:00. 4 Press END TIME. The current time will be shown blinking on the DISPLAY. Example Current time is 13:00 The current time’s digit “13:00” will blink. 3 5 Press END TIME again. Example Current time is 13:00. Desired end time is 14:00. Cooking time “1:00” is displayed. Press START to start the oven.
Cooking Time Reservation Function Example : Current time : 12:00 Cook time :2:00 if you wish to end cooking at 18:00 1 2 Select Oven Mode and desired function. 3 EN Select Cook Time and enter the desired cook time. (2:00) 4 Press END TIME. ► “14:00”, which cook time is added to current time, is displayed. ► Enter the desired End Time. (18:00) Press END TIME. ► The oven automatically starts at the reserved time of 16:00. ► The Cook Time is displayed at the start of cooking.
Using Speed Menu Mode EN Speed Menu Mode allows you to choose from twelve pre-programmed settings to conveniently cook, roast or bake your favourite foods. Cooking time and power level are automatically set. Simply select one of the twelve settings and set the weight to start cooking. Setting Speed Menu Mode 1 Turn MODE SELECTOR to Speed Menu position. 2 Turn MULTI-FUNCTION SELECTOR to select desired Speed Menu setting. Refer to table on pages 23 - 24 for a description of the 12 Speed Menu settings.
Using Speed Menu Mode (continued) Guide to Auto Speed Menu Settings EN The following table presents 12 Auto Programmes for Speed Cooking, Roasting and Baking. It contains its quantities, standing times and appropriate recommendations.These auto programmes contain special cook modes, which have been developed for your convenience. No Food Item Weight (kg) 0.1 - 0.2 0.2 - 0.3 0.3 - 0.4 0.4 - 0.5 0.2 - 0.4 0.4 - 0.6 0.6 - 0.8 0.4 - 0.5 0.5 - 0.6 0.6 - 0.7 0.7 - 0.8 0.3 - 0.4 0.5 - 0.6 0.7 - 0.8 0.9 - 1.
Using Speed Menu Mode (continued) EN No Food Item Weight/kg Accessory Shelf Level 9 Roast Beef 0.7 - 0.8 0.9 - 1.0 1.1 - 1.2 1.3 -1.5 Grill insert with ceramic tray 3 10 Baked Potatoes 0.2 - 0.4 0.4 - 0.6 0.6 - 0.8 0.8 - 1.0 Grill insert with ceramic tray 4 11 Cake 0.5 - 0.6 0.7 - 0.8 0.9 - 1.0 Ceramic tray 3 12 Muffins 0.5 - 0.6 0.7 - 0.8 Oven rack 3 Recommendation Marinate roast beef and put on grill insert, set on ceramic tray with the fat side down.
Using Speed Defrost Mode Setting Speed Defrost Mode EN Choose from five pre-programmed microwave settings for defrosting. Defrosting time and power level are automatically set. Simply select the setting and weight to start defrosting. Open the door. Place the frozen food in the centre of the ceramic tray. Position is level 1. Close the door. 1 Turn MODE SELECTOR to the Speed Defrost ( ) symbol. 2 Turn MULTI-FUNCTION SELECTOR to choose desired defrost item.
Using Speed Defrost Mode (Continued) EN Guide to Auto Speed Defrost Settings The following table presents the various Auto Defrost programmes, quantities, standing times and appropriate recommendations. These programmes use microwave energy only. Remove all packaging material before defrosting. Place meat, poultry and fish on the ceramic tray. 1 Food Item Meat Weight (kg) 0.2 - 2.0 Accessory Ceramic tray Shelf Level 1 2 Poultry 0.2 - 2.0 Ceramic tray 1 3 Fish 0.2 -.2.
How a Microwave Oven Works Microwaves are high-frequency electromagnetic waves; the energy released enables food to be cooked or reheated without changing either the form or the colour. You can use your microwave to: • Defrost • Cook EN Cooking Principle 1. The microwaves generated by the magnetron are distributed uniformly by using stirrer distribution system. The food is thus cooked evenly. 2. The microwaves are absorbed by the food up to a depth of about 1 inch (2.5 cm).
Using Microwave Mode EN Microwaves are high frequency electromagnetic waves. In microwave cooking, microwave energy penetrates food, attracted and absorbed by its water, fat and sugar content. The microwaves cause the molecules in the food to move rapidly. The rapid movement of these molecules creates friction and the resulting heat cooks the food. Setting Microwave Mode 1 Turn MODE SELECTOR to microwave position. Time and power level will appear on DISPLAY.
Using Microwave Mode (Continued) Guide to Microwave Power Levels EN PERCENTAGE (%) OUTPUT POWER (W) HIGH 100 900 For heating up liquids. HIGH LOW 83 750 For heating up and cooking food. MEDIUM HIGH 67 600 For heating up and cooking food. MEDIUM 50 450 MEDIUM LOW 33 300 For cooking meat and heating up delicate foods. DEFROST 20 180 For defrosting and continued cooking. LOW 11 100 For defrosting delicate foods. POWER LEVEL REMARK 29 FQ159UST_ELE-03150G_EN.
Using Microwave Mode (Continued) EN Microwave Cookware Guide Cookware used for Microwave Mode must allow microwaves to pass through and penetrate food. Metals such as stainless steel, aluminum and copper reflect microwaves. Therefore, do not use cookware made of metallic materials. Cookware marked microwave-safe is always safe for use. For additional information on appropriate cookware refer to following guide and always use ceramic tray on shelf Level 1 when using microwave mode.
Using Microwave Mode (Continued) COOKWARE MICROWAVESAFE EN COMMENTS Paper • Plates, cups, napkins and Kitchen paper For short cooking times and warming. Also to absorb excess moisture. • Recycled paper May cause arcing. Plastic • Containers Particularly if heat-resistant thermoplastic. Some other plastics may warp or discolour at high temperatures. Do not use Melamine plastic. • Cling film Can be used to retain moisture. Should not touch the food.
Using Microwave Mode (Continued) EN Microwave Cooking Guide GENERAL GUIDELINES Food Suitable for Microwave Cooking Many kinds of food are suitable for microwave cooking, including fresh or frozen vegetables, fruit, pasta, rice, grains, beans, fish, and meat. Sauces, custard, soups, steamed puddings, preserves, and chutneys can also be cooked in a microwave oven. Generally speaking, microwave cooking is ideal for any food that would normally be prepared on a hob.
Using Microwave Mode (Continued) COOKING GUIDE FOR FRESH VEGETABLES EN Use a suitable glass Pyrex bowl with lid. Add 30 - 45 ml cold water (2 - 3 tbsp) for every 250 g unless another water quantity is recommended (see table). Cook covered for the minimum time (see table). Continue cooking to get the result you prefer. Stir once during and after cooking. Add salt, herbs or butter after cooking. Cover during the 3 minute standing time. Hint : Cut fresh vegetables into even sized pieces.
Using Microwave Mode (Continued) EN COOKING GUIDE FOR RICE AND PASTA Rice Pasta Use a large glass Pyrex bowl with lid. (Note that rice doubles in volume during cooking.) Cook covered. After cooking time is over, stir before letting stand. Add salt or herbs and butter. Note that rice may not have absorbed all water after the cooking time is finished. Use a large glass Pyrex bowl. Add boiling water, a pinch of salt and stir well. Cook uncovered. Stir occasionally during and after cooking.
Using Microwave Mode (Continued) REHEATING LIQUIDS EN Take special care when heating liquids. To prevent eruptive boiling and possible scalding, place a spoon or glass stick in the beverage. Stir during heating and always stir after heating. Allow a standing time of at least 20 seconds after the oven has been switched off to allow the temperature to even out. REHEATING BABY FOOD Baby Food Extra caution should also be exercised when reheating baby foods. Put food into deep ceramic plate.
Using Microwave Mode (Continued) EN Portion Time (Min) Standing Time (Min) 250 g 500 g 250 g 6-7 10 - 12 7-8 15 - 30 Place the meat on the ceramic plate. Shield thinner edges with aluminium foil. Turn over after half of defrosting time! 12 - 14 15 - 60 Whole Chicken 500 g (2 pcs) 1200 g First, put chicken pieces first skin-side down, whole chicken breast-sidedown on ceramic plate. Shield the thinner parts like wings and ends with aluminium foil.
Using Microwave Mode (Continued) QUICK & EASY EN Melting Butter Put 50 g of butter into a small deep glass dish. Cover with plastic lid. Heat for 30 - 40 seconds using 900 W. Melting Chocolate Put 100 g of chocolate into a small deep glass dish. Heat for 3 - 5 minutes using 450 W. Stir once or twice during melting. Melting Crystallized Honey Put 20 g crystallized honey into a small deep glass dish. Heat for 20 - 30 seconds using 300 W.
Switching Off the Beeper EN The oven beeps at the end of cooking, “End” blinks 4 times on the display. 1 2 To switch beeper off, press STOP / CANCEL( ) and START( ) at the same time and hold for one second. To switch beeper back on, press STOP / CANCEL( ) and START ( ) again at the same time and hold for one second. 38 FQ159UST_ELE-03150G_EN.
Child Safety Lock The oven’s Child Safety Lock allows you to lock the control panel to protect the oven against unintended use. EN To Lock Oven 1 Press STEAM CLEAN and CLOCK at the same time and hold for 3 seconds. 2 Lock symbol appears on DISPLAY indicating all functions locked. 2 Lock symbol disappears indicating functions unlocked. To Unlock Oven 1 Press STEAM CLEAN and CLOCK at the same time and hold for 3 seconds. 39 FQ159UST_ELE-03150G_EN.
Using the Steam Clean Feature EN The Steam Clean feature allows you to sanitize your oven in just 15 minutes. 1 2 Turn MODE SELECTOR to “Off” position. ► Pour about 100 ml water onto the floor of the empty oven. Press STEAM CLEAN. The oven will start automatically. ► After 15 minutes, the oven will stop automatically. Wipe it out with a dry cloth. Important ● Use this feature only when oven has cooled completely to room temperature. ● Do NOT use distilled water. 40 FQ159UST_ELE-03150G_EN.
Cleaning Your Microwave Oven Clean your oven regularly to prevent grease and food particles from building up, especially on inside and outside surfaces, door and door seals. EN 1. Clean outside surfaces with a soft cloth and warm soapy water. Rinse and dry. 2. Remove any splashes or stains on inside surfaces with a soapy cloth. Rinse and dry. 3. To loosen hardened food particles and remove smells, place a cup of diluted lemon juice on the floor of the empty oven and heat for ten minutes at maximum power.
Troubleshooting EN If you have problems with your oven, try the solutions suggested below. They may save you the time and inconvenience of an unnecessary service call. Food remains uncooked. ● Ensure timer has been set correctly and START button pressed. ● Firmly close door. ● Make sure you have not blown a fuse or triggered a circuit breaker. Food is either overcooked or undercooked. ● Make sure appropriate cook time was used. ● Make sure appropriate power level was used.
Error Code Error Code EN General Functions TEMP SENSOR OPEN In case the value of a temperature sensor is more than 250 °C during operation / cancellation. TEMP SENSOR SHORT In case the value of a temperature sensor is less than 5 °C during operation / cancellation. OVER 210 °C DURING OPERATION OF MWO In case the temperature rises over 210 °C during operation of MWO (FIRE sensed) DAMPER S/W In case it fails to sense DAMPER whether to open or close for 2 minutes. 43 FQ159UST_ELE-03150G_EN.
Technical Specifications EN “Samsung strives to improve its products at all times. Both the design specifications and these user instructions are thus subject to change without notice.
Note EN 45 FQ159UST_ELE-03150G_EN.
Code No.:DE68-03150G FQ159UST_ELE-03150G_EN.