670/673/675 LED TV Installation manual imagine the possibilities Thank you for purchasing this Samsung product. To receive more complete service, please register your product at www.samsung.com/register Model [HB670-XC]Install Guide-ENG.indd 1 Serial No.
Figures and illustrations in this User Manual are provided for reference only and may differ from actual product appearance. Product design and specifications may be changed without notice. Instruction This TV is provided with interactive functionality through a set-back box (SBB/STB) connected to the TV, and with other TVs in a computer controlled system for hotels and other hospitality businesses.
Contents ENGLISH yy Accessories............................................................................................................................................................... 4 yy Installing the LED TV Stand........................................................................................................................................ 4 yy Assembling the swivel (32 inch TVs or larger).....................................................................................................
Accessories ✎✎Please make sure the following items are included with your LED TV. If any items are missing, contact your dealer. ✎✎The items’ colour and shapes may vary depending on the models. yy Remote Control & Batteries (AAA x 2) yy Quick Set up Guide yy Safety Guide (Not available in all locations) yy Power Cord / Data Cable yy RF Signal Gender (DIN,F Type) ✎✎The stand and stand screw may not be included depending on the model. ✎✎The Data Cable may not be included depending on the SI Vendor.
1 2 x4 C Top View (M4 X L12) B Front A ATTENTION Rear DO NOT USE DO NOT USE DO NOT USE CHEMICALS GREASE OIL ✎✎ ✎✎ 3 4 Side View 28 ~ 32inch Place a soft cloth over the table to protect the TV, and then place the TV on the cloth screen side down. Insert the Stand Guide into the slot of TV bottom side.
Assembling the swivel (32 inch TVs or larger) The TV stand more than 32inch supports the swivel function. The swivel angle support all of 20°, 60° and 90° and you can change the swivel angle by using BRACKET HOLDER SWIVEL. ¦¦ 20° ~ 60° swivel If you assemble the wedge on the bottom of the stand to the hole of BRACKET HOLDER SWIVEL where 20° or 60° is marked, the swivel angle becomes each 20° ~ 60° in the left and right side.
Viewing the Connection Panel Power Input $ @ # COMPONENT / AV IN ! HDMI IN 1 ! DATA COMPONENT / AV IN ! 2 3 HOSPITALITY TV HDMI IN 2 (DVI) HDMI IN 3 (ARC) HDMI IN 1 0 USB (5V 0.5A) / CLONING % PC IN PC IN 0 HDMI IN 2 (DVI) VIDEO VIDEO CLOCK 1 USB (5V 0.5A) / CLONING 9 DIGITAL AUDIO OUT PC / DVI (OPTICAL) AUDIO IN DATA HDMI IN 3 (ARC) DIGITAL AUDIO OUT PC / DVI (OPTICAL) AUDIO IN HOSPITALITY TV ! $ # 1 HDMI IN 2 (DVI) ! HDMI IN 1 ! USB (5V 0.
7 EXT (RGB) Input Connector Output Video Audio (L/R) RGB Video + Audio (L/R) 0 0 0 Only TV or DTV output is available EXT ✎✎Inputs or outputs for external devices, such as VCR, DVD, video game device or video disc players. 8 RJP: This port is an RJP (Remote Jack Pack) communication port that enables connecting different devices to additional module so as to improve device use convenience.
✎✎Optimal resolution is 1920 X 1080 @ 60 Hz.
Using the TV's Controller The TV’s Controller, a small joy stick like button on the rear right side of the TV, lets you control the TV without the remote control. Selecting the Media Play Selecting the Menu Selecting a Source Function menu Return Remote control sensor TV Controller The image is drawn by facing the front side of the TV. Power off ✎✎The product color and shape may vary depending on the model. ✎✎Exits the menu when pressing the controller more than 1 second.
Viewing the Remote Control ✎✎This is a special remote control for the visually impaired persons and has Braille points on the Power, Channel and Volume buttons. Display and select the available video sources. Turns the TV on and off. Have direct access to channels. Alternately selects Teletext, Double or Mix. GUIDE Electronic Programme Guide (EPG) display. Cut off the sound temporarily. Adjust the volume. Change channels. Display channel list on the screen. Switch to the HOME screen.
Connecting the TV with SBB TV Rear Panel ETH MODEM Data Cable HOSPITALITY TV DATA COMPONENT / AV IN HDMI IN 3 (ARC) CLOCK Hotel Server STB(Set Top Box) or SBB(Set Back Box) 1. Connect the DATA jack of the TV to the [ETH MODEM] jack of the STB(SBB) with the Data cable. ✎✎ Use data communication. 12 English [HB670-XC]Install Guide-ENG.
¦¦ List of Vendors and Compatible Data Cables Supplied with the TV yy Confirm you are using the correct data cable for your vendor. Refer to the code label on the data cables. English [HB670-XC]Install Guide-ENG.
Connecting the Bathroom Speakers You can connect the Bathroom Speakers in the following method. ¦¦ Connecting through the Variable Output (available without an external amplifier) TV Rear Panel 1 AUDIO VARIABLE AUDIO OUT VOL-CTRL Speaker 2 VOL+ VOL- Volume Control Box 1. Connect the VARIABLE AUDIO OUT port of the TV to the Bathroom Wall Speakers of the hotel. Speaker + Speaker - N/C 2. Connect the VOL-CTRL jack of the TV to the Volume Control Box Switch port on the Bathroom Wall of the hotel.
¦¦ HP-ID An additionally created Headphone Box can be installed on a bed or business desk so that users can use it conveniently. The installation procedures are given below. yy Detailed Drawing of the Headphone Box. TV Rear Panel HEADPHON BOX EXT HP-ID Headphone Box Shield wire Red Wire (Audio-R) Red wire + White wire TV Headphones jack Whitewire (Audio-L) Shield Wire TV HP-ID jack English [HB670-XC]Install Guide-ENG.
Connecting the MediaHub HD Output of any external source connected to MediaHub HD on hotel desk. ✎✎The color and shape may vary depending on the model. TV Rear Panel MediaHub HD Rear HDMI DATA COMPONENT / AV IN HDMI IN 3 (ARC) VIDEO CLOCK DIGITAL AUDIO OUT PC / DVI (OPTICAL) AUDIO IN HOSPITALITY TV PC IN AUDIO RJP VARIABLE AUDIO OUT VOL-CTRL HP-ID USB RS/232 HDMI IN 2 (DVI) HDMI IN 1 2 HDMI cable USB (5V 0.5A) / CLONING ANT IN AIR/CABLE 1 RS-232 Data Cable 1.
Connecting the RJP (Remote Jack Pack) Output of any external source connected to RJP on hotel desk. ✎✎The color and shape may vary depending on the model. 3 Video Cable TV Rear Panel USB HDMI VIDEO AUDIO AUDIO/PC RS/232 RJP Rear DATA COMPONENT / AV IN HDMI IN 3 (ARC) CLOCK VIDEO 4 HDMI cable DIGITAL AUDIO OUT PC / DVI (OPTICAL) AUDIO IN HOSPITALITY TV PC IN AUDIO RJP VARIABLE AUDIO OUT VOL-CTRL HP-ID HDMI IN 2 (DVI) 4 HDMI cable HDMI IN 1 USB (5V 0.
yy The RJP can be returned to the factory default settings by pressing the A/V and HDMI buttons simultaneously for 10 seconds. All LEDs blink 5 times to Acknowledge that the rest has been performed. yy The RJP will automatically turn off any LEDs after 5 minutes to avoid unnecessary light pollution in the hotel room. The LEDs that were turned off will turn on again if the guest touches any of the buttons and the 5 minute timer will restart.
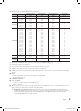
Setting the Hotel Option Data To Enter: Press the MUTE → 1 → 1 → 9 → ENTERE buttons in order. (From the Hospitality mode, the Standalone mode is set.) To Exit from this menu : power off and turn on again. No Item Sub item initial value Standalone Interactive Description Standalone Select the Hospitality mode.
No Item Sub item initial value Standalone Interactive Channel Setup *** Channel Editor *** Channel Bank Editor *** (Remark) n/a Mixed Channel Map On / Off (Remark) n/a Dynamic SI On / Off ON n/a Channel Rescan Message On / Off OFF OFF Pan Euro MHEG On / Off ON ON My channel En On / Off OFF n/a Genre Editor *** - n/a User can set channel option. Such as Auto Tunning, Manual Tunning, Antenna setting. Provided option for editing Channel Name and Number and video.
No Item Sub item initial value Standalone Interactive Unlock / Lock / OnlyPower / Menu/Source Unlock Unlock Subtitle Auto On On / Off Off Off Clock Type Off/SW Clock/ Ext. Clock Off Off Local time Standalone : Manual / TTX Interactive : Manual / TTX / Auto Manual Auto 12 Hour / 24 Hour 24 Hour 24 Hour Failure / Success Failure Failure 0~4 4 4 Set Ext.Clock brightness in Picture on state. (Enable when Clock Type is "Ext. Clock") 0~4 1 1 Set Ext.
No Item 10 External Device Sub item USB Media Mode External Source Banner On / Off Off Off Default / Automatic / Disable Default Default On / Off ON ON On / PC / Off OFF OFF Power On Src / Last Source / Each model source list(AV1, COMP, PC, HDMI1…) Power On Src Power On Src External Source Auto source Anynet+Return Source 22 Description 7610 Priority AV 1~3 This option defines the priorities in which 7610 Priority 1~3 2 2 the External sources (AV/PC/HDMI) will be PC switched in TV
No Item Bathroom 12 Speaker 13 Eco Solution Sub item Logo/ Message Description Bathroom speaker can be operated in three different ways by setting Sub Amp Mode in standalone menu. • 0 : Mode 0 disables bathroom speaker. • 1 : In mode 1 Bathroom speaker follows TV Main speaker. Bathroom speaker sound is controlled from Samsung RCU and volume keys available on TV panel. Speaker volume = (Main speaker volume)/3 If user presses mute key from Samsung RCU then bathroom speaker shall also be muted.
No Item 16 REACH Server 17 Service Sub item initial value Standalone Interactive Description REACH Server update Time OFF / 1hour / 2hour / 12:00 am / 2:00 am / 12:00 pm / 2:00 pm 1hour n/a Select SIRCH update Time. In SIRCH update time , we have the option to do automatic upgrade at 12:00 AM/PM or at 2:00 AM/PM.
¦¦ Welcome Message Welcome message is a feature to display custom message on TV, every time TV is turned on by Guest in Hotel room. –– Welcome message settings are placed in Hotel Option Menu. –– Welcome message should be ON in order to display the message on power on. Hospitality Mode Standalone SI Vendor OFF REACH Server Service Power On Channel My Channel Menu OSD Welcome Message Operation Edit Welcome Message r Clock Music Mode Hospitality Logo External Device ON ON Hospitality Logo DL .
¦¦ Hospitality Logo The Hospitality Logo function displays the Hotel's picture image when the TV is powered on. –– Hospitality Logo settings are in the Hospitality mode menus. –– The Logo Download and Logo Display Menu items are enabled when you turn the Hospitality Logo option on. –– If there is a logo image stored in the memory and Hospitality Logo option is on, the Hospitality logo is displayed when the TV is turned on.
¦¦ Cloning USB Cloning is a function to download user configured settings (Picture, Sound, Input, Channel, Setup, and Hotel Setup) from one TV set and upload the same to other TV sets. All the user-defined settings from the TV (Master Set) can be copied to the USB device. yy Clone TV to USB: It is an operation to copy the stored data from the specific area on the EEPROM from the TV set to the USB device. 1. Insert a USB drive into the USB port on the rear of the TV. 2.
¦¦ Plug & Play Hotel Plug & Play is a function that automatically performs the Hotel mode selection, Country Setup, Clock Setup and Picture mode Setup once. –– Hotel Plug & Play is available only one time when power is first turned ON. –– After setting up first TV and Clone TV to USB –– Next TV only needs to exit Hotel Plug & Play, connect USB, then Clone USB to TV. Setup > Start Local Set Change Locat Set if Located in North America, Latin America and Europe.
1. LocalSet –– Check the Current Localset. –– If you want to change the localset, select the Change. –– If you select the Skip, the Start screen appears. 2. Start - Easy Set Up –– If you select the Standalone Only, the Standalone hotel mode is set by default. –– When you select the Interactive, Interactive Setup Menu is displayed. Press power off button to exit from Interactive menu. –– Select the Standalone Plug & Play to go next step. 3.
¦¦ SW Clock The SW Clock shows the current time on the screen when the user presses the Info remote control key in standby mode. –– If a user presses the Info key when the TV is in standby mode, the TV is turned on and shows the current time on the screen for 10 seconds and then returns to standby mode. –– The time is displayed as a digital clock at the normal banner size. The 12 or 24 hour time format of is determined according to the format of the Information.
¦¦ Multi Code Remocon Multi Code Remocon is a special transmitter which is designed to control each TVs with one remote. This function is useful where there is more than one TV in one location like hospital Set ID number will be displayed in source osd. It is possible to support up to 9 different remote key transmission for multi code. Initial ID code which each TV has is “0”. –– ID code could be set and reset in Analog TV mode or PC mode.
¦¦ Channel Bank Editor (Smoovie TV Only) Channel Bank Editor is a function to edit the channel with 3 different Bank Options. Depending on the Bank card, there are specific channels Hotel customer can enjoy. Setting the Channel Bank Editor under Stand-alone Mode 1. Enter the Hotel Standalone menu by “MUTE+1+1+9+Enter” 2. Please select SI vendor : “Smoovie” 3. You will be able to find new menu option “Channel Bank Editor” 4.
¦¦ Channel Editor Channel Editor is a function to edit channel number and name. –– Use Channel Editor to sort the channels as user-desired channel numbers.
¦¦ My Channel Determines the country and genre for the channels provided by the hotel, and if the user selects a country and genre, shows the corresponding channels. yy You must select the country first, or you can NOT set a genre. yy If you select the genre that NOT added any channels, Channel list display all of channels. yy My Channel works in Standalone mode only. yy SI Vendor in Standalone mode: This des not work if Smoovie is selected.
✎✎Notes xx This section describes the layout of Front UI that appears when TV is turned on. (Factory Mode > Genre Mode: Enable) xx The genre is sub-list of each country. xx The broadcast screen that was being displayed the last memorial channel. –– If user want to keep previous country & genre channel map, presses ‘BLUE’, RETURN, EXIT remote-control key to close the Front UI. ✎✎Etc.
Highlight Interaction [Country Items] • This page is only for interaction. Each screen may not be exactly identical to actual one. ✎✎Notes xx User can navigate the list items in each country & genre list by pressing the up or down remote control keys. xx Circular navigation is supported.
Highlight Interaction [Default Genre] • This page is only for interaction. Each screen may not be exactly identical to actual one.
Mode Change Interaction 1 (1/2) • This page is only for interaction. Each screen may not be exactly identical to actual one.
Mode Change Interaction 1 (2/2) • This page is only for interaction. Each screen may not be exactly identical to actual one. 5 1 6 My Channel Current status : All Country/Sports Country 1 Genre ▲ ENTER Info Genre Mode change to Austria/News. OK All Country All Austria News Belgium (Dutch) Entertainment Belgium (French) Hotel Czech France Germany ▼ Navigation Help Area yy The genre mode change complete message is displayed. yy Timeout(5 sec.
Mode Change Interaction 2 (1/2) • This page is only for interaction. Each screen may not be exactly identical to actual one.
Power On Scenario [Last Memory] • This page is only for interaction. Each screen may not be exactly identical to actual one. 1 Current Status : Austria / News POWER Power Off yy Current Genre Mode : Austria / News POWER My Channel Current status : All Country/Sports Country Genre ▲ All Country All Austria News Belgium (Dutch) Entertainment Belgium (French) Hotel Czech France Germany ▼ Navigation Help Area yy Current Genre Mode : Austria / News English [HB670-XC]Install Guide-ENG.
Genre Editor (This configures the genres of each of the hotel TV channels.) yy This can be used through the Hotel Menu (Factory). yy Supported genres include News, Radio, Entertainment, Sports and Hotel. yy More than one genre can be selected for each channel at the same time. yy Country Editor (Channel Editor): This is the editor that configures the country for each of the hotel TV channels.
Elements No Name Description yy When the user enters this screen, the currently selected default item is highlighted. yy The Country Icon + Category Name are provided. (If the highlight is in the Main Frame, only the icon is displayed.) yy Moving the highlight –– Pressing the up or down button moves the highlight. –– If the items cannot be displayed on one page, up and down indicators are provided.
✎✎Notes xx This is a definition of the Tools menu in the Left Frame Category. xx Only the Info item for each Register/Country is provided. Elements Category Tools menu Descriptions Registered, Country Information Registered Channels. The number of channels of each country. • The items are displayed without ‘Channel’. Error Cases ✎✎Notes xx This is the message for when there are no saved channels in the Registered Channels list.
✎✎Notes xx This is the component for when there are no channels registered to the country category. Elements No Description Description yy The message is displayed when the currently selected country does not contain any items. Main Frame [Channel Browser] English [HB670-XC]Install Guide-ENG.
Key Guide Button Action Nav. Help < CH > Moves the page. Page ENTER Selects or enters the corresponding Channel Browser area. Select RETURN Returns to the previous step (Factory Mode). Return ▲/▼ Moves the highlight up or down. (No Guide) ► Moves the highlight to the Channel Browser area. (No Guide) INFO Shows the Category Info. (No Guide) TOOLS Shows the utility function menus. Tools EXIT Cancels and returns to the previous step (Factory Mode).
Add to Countries / Edit Countries (1/2) Key Guide Button Action Nav. Help ENTER Selects the highlighted item. Enter RETURN Cancels and returns to the previous screen (Tools). Return ▲/▼ Moves the highlight over country items. Move ◄/► Moves the highlight. Move INFO N/R N/R TOOLS Closes the current window and displays the ‘Tools’ menu. (No Guide) EXIT Cancels and returns to the previous step (Factory Mode). (No Guide) ✎✎Note. xx This is the definition of Add to Countries.
Elements No Name Description 1 Add to Countries Window • If there are no channels that have been registered to the country list in the selected channels, “Add to Countries” is displayed as the title. • A check box is displayed depending on whether the country that was selected when entering the screen is registered or not. 2 Guide • The number of the selected channel or the channel name.
✎✎Notes xx This is the definition for Edit Countries. xx The highlighted channel item or more than one selected channel item is added or deleted from the Country category. ✎✎Etc. xx Timeout (60 sec) Elements No Name Description 1 Add to Countries 2 Guide 3 Complete Message yy If there is a registered channel among the selected channels, Edit Countries is displayed as the title. yy A check box is displayed depending on whether the selected country is registered or not.
✎✎Etc. xx Vertical circulation is supported. Elements No 1 2 Name Description Edit Channel Number Window yy Both the numeric keys and the Up/Down keys are supported. –– Selected Channel: Shows the currently selected channel name. –– Number: Shows the new channel number. (The currently allocated channel name is also displayed.) –– Name: Shows the currently allocated channel name. (If there are no channels, it is displayed as “(Empty)”.
Key Guide Button Action Nav. Help RED If a user presses the button, the channel number is initialized. Reset ENTER Applies the changes and closes the window. Enter RETURN Cancels or returns to the previous screen (Tools). Return ▲/▼ Changes the channel number of the selected channel. Adjust 0~9 Enters a digit. Number INFO N/R N/R TOOLS Closes the current window and displays the ‘Tools’ menu. (No Guide) EXIT Cancels and returns to the previous step (Factory Mode).
Edit Channel Name • Channel Manager > Browser > Tools > Edit Channel Name Key Guide Button Action Nav. Help GREEN Saves the changes and returns to the Channel Manager. Done ENTER Saves the channel name and moves the cursor to the next field. Enter RETURN Cancels and returns to the previous screen (Tools). Return ▲/▼/◄/► Navigates on the keyboard. Move 0~9 Enters a digit. (No Guide) INFO N/R N/R TOOLS Closes the current window and displays the ‘Tools’ menu.
Tools [Edit Mode] Edit Mode Content Highlight (when the number of the checked item is 0 or 1) Add to Countries Edit Countries (when an already-registered item is checked.) Channel Name Edit Edit Channel Number Video Mute Channel Copy (Astra HD +) Reorder (Satellite) Select All Deselect All (this is only displayed when 1 or more items are selected) Delete When there is more than one checked item. Add to Countries Edit Countries (when an already-registered item is checked.
CH Banner [when a channel number is allocated to an external input] ✎✎Notes xx The TV channel banner specifications are applied. xx When there is an unsupported item or there is no corresponding information, the item values are not displayed. xx The channel name is represented as the ‘external input name’. Elements No Name 1 External Input Name Description The Channel List provides some functions of the GenreTV. yy Country Mode yy Changes the genre mode.
yy Features of "Hotel MODE" in Sound-BAR –– –– –– –– –– Synchronized power on/off with TV. HDMI_CEC enabled. Accessible “HDMI OUT” port only. (Other inputs are disabled) Synchronized “power-on”&“max” volume with TV’s one. (Sound-Bar’s volume is set as the half of TV’s one) Adjustable “power-on”&“max” volume acquired from TV’s hotel option menu. (Sound-Bar volume=TV volume/2) Ex.
Securing the TV to the Wall Caution: Pulling, pushing, or climbing onto the TV may cause the TV to fall. In particular, ensure that your children do not hang over or destabilize the TV; doing so may cause the TV to tip over, resulting in serious injuries or death. Follow all safety precautions provided on the included Safety Flyer. For added stability, install the anti-fall device for safety purposes, as follows. To avoid the TV from falling 1.
Specifications Items TV System Speaker out Data Comment 28inch : 5W x 2 32inch / 39inch / 42inch / 46inch : 10W x 2 Audio out Input Specification PAL, SECAM, DVB-TC, DVB-T2CS2 Variable Audio 4W mono 8 ohm SPK' Digital audio out Optical Component Y, Pb, Pr, Audio-L/R PC D-sub, Audio-L/R A/V Audio Video Jack EXT Scart Jack HDMI Compatible with the HDMI Specifications Antenna 75 ohm Unbalanced, Din Jack , F Jack DATA RJ-12 RJP RS232 Operating temperature 10°C ~ 40°C (50°F ~ 104°F)
This page is intentionally left blank. [HB670-XC]Install Guide-ENG.
Contact SAMSUNG WORLDWIDE If you have any questions or comments relating to Samsung products, please contact the SAMSUNG customer care center. Country Customer Care Centre Web Site ALBANIA 42 27 5755 www.samsung.com AUSTRIA 0810 - SAMSUNG (7267864, € 0.07/min) BELGIUM 02-201-24-18 www.samsung.com www.samsung.com/be (Dutch) BOSNIA 05 133 1999 www.samsung.com/be_fr (French) www.samsung.com BULGARIA 07001 33 11 www.samsung.com CROATIA www.samsung.com www.samsung.