BP68-00617A-00Eng(cover) 8/11/06 4:25 PM Page 3 Owner’s Instructions HL-S4676S Register your product at www.samsung.
BP68-00617A-00Eng(002~015) 8/11/06 4:28 PM Page 2 A Guide to Digital TV • What is Digital Television? Digital television (DTV) is a new way of transmitting high quality video and audio to your TV set. Using DTV, broadcasters can transmit high definition TV (HDTV) images, Dolby digital surround audio, and new services such as multicasting (transmitting more than one program on the same TV channel) and datacasting. Several of these services can be combined into a single digital broadcast.
BP68-00617A-00Eng(002~015) 8/11/06 4:28 PM Page 3 Q&A 1. Is the antenna I use for existing TV reception good enough for DTV? Over-the-air (OTA) digital TV broadcasting uses the same channels as analog TV and works well with many existing TV antennas. However, DTV broadcast channel assignments are different than analog channels. You should find out whether your local DTV broadcasts are on VHF (channels 2-13) or UHF (channels 14-69) to see if you need a different antenna.
BP68-00617A-00Eng(002~015) 8/11/06 4:28 PM Page 4 Table of Contents Your New Wide TV...................................................................................8 Viewing Position ......................................................................................................8 List of Features.........................................................................................................9 Checking Accessories...........................................................................
BP68-00617A-00Eng(002~015) 8/11/06 4:28 PM Page 5 Picture Control ........................................................................................62 Picture Control.......................................................................................................62 Changing the Picture Size.......................................................................................65 Digital Noise Reduction ..........................................................................................
BP68-00617A-00Eng(002~015) 8/11/06 4:28 PM Page 6 SAMSUNG
BP68-00617A-00Eng(002~015) 8/11/06 4:28 PM Page 7 Your New Wide TV
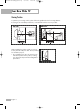
BP68-00617A-00Eng(002~015) 8/11/06 4:28 PM Page 8 Your New Wide TV Viewing Position To optimize your viewing comfort, please follow the guidelines below for viewing distance. If viewing for an extended period of time, sit as far back from the screen as possible. When installing the product, make sure to keep it away from the wall (more than 10 cm/4 inches) for ventilation purposes.
BP68-00617A-00Eng(002~015) 8/11/06 4:28 PM Page 9 List of Features Your TV was designed and engineered using the latest technology. It is a full-featured, high-performance unit that exceeds industry standards.
BP68-00617A-00Eng(002~015) 8/11/06 4:28 PM Page 10 Your New Wide TV Right Side Buttons The buttons on the right side panel control your TV’s basic features, including the on-screen menu system To use the more advanced features, you must use the remote control. The product color and shape may vary depending on the model. Press to switch between viewing TV programs and signals from connected components. Press to see the on-screen menu.
BP68-00617A-00Eng(002~015) 8/11/06 4:28 PM Page 11 Front Panel LED Indicators The three lights on the front panel indicate the status of your TV. The product color and shape may vary depending on the model. Indicator Lights POWER Press to turn the TV on and off. Remote Control Sensor Aim the remote control towards this spot on the TV. Indicator Light Key : Light is On : Light is Blinking : Light is Off STAND BY/TEMP TIMER LAMP Indication Standby state.
BP68-00617A-00Eng(002~015) 8/14/06 2:21 PM Page 12 Your New Wide TV Side Panel Jacks Use the side panel jacks to connect components such as a VCR. You can connect different components such as VCRs, Set-Top Box and a DVD player etc., because there are two sets of video input jacks and two sets of component video input jacks on the side panel of your TV. For more information, see “Connections”. Œ ANTENNA terminals Two independent cables or antennas can be connected to these terminals.
BP68-00617A-00Eng(002~015) 8/29/06 1:33 PM Page 13 Remote Control You can use your remote control within a distance of 23 feet and an angle of 30 degrees from the left and right sides of the TV’s remote control receiver. You can also use your remote control to operate your VCR, Cable box, DVD player and Set-top box. See pages 36~42 for details. 1. POWER Turns the TV on and off. 2. Channel Number Press to directly tune to a particular channel. 3.
BP68-00617A-00Eng(002~015) 8/11/06 4:28 PM Page 14 Your New Wide TV Installing Batteries in the Remote Control With normal use, the batteries in the remote control should last about a year. If you notice a performance degradation while using the remote, the batteries may need to be replaced. Make sure you replace both batteries and do not mix old and new batteries in the remote control. If you won’t be using the remote control for a long time, remove the batteries and store them in a cool, dry place.
BP68-00617A-00Eng(002~015) 8/11/06 4:28 PM Page 15 Connections
BP68-00617A-00Eng(016~027) 8/11/06 4:28 PM Page 16 Connections Connecting VHF and UHF Antennas If you do not have a cable system, you will need to connect an antenna to your TV. Antennas with 75-ohm Round Leads If your antenna looks like this: 1 Plug the antenna lead into the ANT 2 IN (AIR) on the side panel of your TV. English - 16 it has 75-ohm round leads.
BP68-00617A-00Eng(016~027) 8/11/06 4:28 PM Page 17 Connecting Cable TV You can connect different cable systems to your TV, including cable without a Cable box, and cable with a Cable box that descrambles some or all channels. Cable without a Cable Box 1 Plug the incoming cable into the ANT 1 IN (CABLE) on the side panel of your TV. Cable with a Cable Box that Descrambles All Channels 1 Find the cable connected to the ANTENNA OUT terminal on your Cable box.
BP68-00617A-00Eng(016~027) 8/11/06 4:28 PM Page 18 Connections Cable with a Cable Box that Descrambles Some (But Not All) Channels To complete this connection you will need a two-way splitter, an RF (A/B) switch, and four coaxial cables (which you can buy from your Samsung dealer or any electronics store). 1 Find and disconnect the cable that is connected to the ANTENNA IN terminal of your Splitter. This terminal might be labeled “ANT IN”, “VHF IN” or simply, “IN”.
BP68-00617A-00Eng(016~027) 8/29/06 2:23 PM Page 19 Connecting a VCR Connecting a VCR to the Video or S-Video/Audio jack 1 Connect a video or S-video cable between the VIDEO IN (1 or 2) (or S-VIDEO IN) jack on the TV and the VIDEO (or S-VIDEO) output jack on the VCR. 2 Connect a set of audio cables between the AUDIO IN (1 or 2) jacks on the TV and the AUDIO output jacks on the VCR. TV Side Panel or 2 1 NOTES • For better video, use an S-Video cable.
BP68-00617A-00Eng(016~027) 8/29/06 2:23 PM Page 20 Connections Connecting a Camcorder The side panel jacks on your TV make it easy to connect a Camcorder to your TV. You can use your camcorder to view tapes without using a VCR. 1 2 3 Locate the A/V output jacks on the camcorder. They are usually found on the side or back of the camcorder. Connect a set of audio cables between the AUDIO IN (1 or 2) jacks on the TV and the AUDIO output jacks on the camcorder.
BP68-00617A-00Eng(016~027) 8/29/06 2:23 PM Page 21 Connecting a DVD Player The side panel jacks on your TV make it easy to connect a DVD player to your TV. Connecting to HDMI (High Definition Multimedia Interface) 1 TV Rear Panel Connect an HDMI cable between the HDMI IN 2 (or HDMI 1/DVI IN) jack on the TV and the HDMI OUT jack on the DVD player. NOTE • Make sure the DVD player is turned on when connected via HDMI in order to select it in the TV menu’s source list.
BP68-00617A-00Eng(016~027) 8/11/06 4:28 PM Page 22 Connections Connecting to Audio and Video Jacks 1 TV side Panel Connect a set of audio cables between the AUDIO IN (1 or 2) jacks on the TV and the AUDIO OUT jacks on the DVD player. Connect a video cable between the VIDEO IN (1 or 2) jack on the TV and the VIDEO OUT jack on the DVD player. 2 Incoming Cable or Antenna NOTES • Component Video separates the video into Y(Luminance (Brightness)), PB (Blue) and PR (Red) for enhanced video quality.
BP68-00617A-00Eng(016~027) 8/11/06 4:28 PM Page 23 Connecting to HDMI (High Definition Multimedia Interface) 1 TV Side Panel Connect an HDMI cable between the HDMI 1/DVI IN jack on the TV and the HDMI OUT jack on the Set-Top Box. NOTE 1 • Make sure the HDMI/DVI source’s (DTV Set-top box) power is on, or you will be unable to select it in the TV menu’s source list.
BP68-00617A-00Eng(016~027) 8/11/06 4:28 PM Page 24 Connections Connecting a Digital Audio System There are many types of digital audio systems on the market today. A simplified illustration of an audio system is shown below. For more information, see your audio system owner’s manual. 1 If your audio system has an optical digital audio input, connect to the DIGITAL AUDIO OUT (OPTICAL) jack on the TV.
BP68-00617A-00Eng(016~027) 8/14/06 11:11 AM Page 25 Connecting to an Analog Amplifier 1 The AV OUT (AUDIO L/R) terminals cannot be used for external speakers. You must hook them up to an amplifier. TV Side Panel When an audio amplifier is connected to the AV OUT (AUDIO L/R) terminals: Decrease the gain (volume) of the TV, and adjust the volume level with the volume control audio amplifier.
BP68-00617A-00Eng(016~027) 8/11/06 4:28 PM Page 26 SAMSUNG
BP68-00617A-00Eng(016~027) 8/11/06 4:28 PM Page 27 Operation
BP68-00617A-00Eng(028~049) 8/23/06 2:37 PM Page 28 Operation Turning the TV On and Off Press the POWER button on the remote control. You can also use the (Power) button on the front panel. Plug & Play Feature When the TV is initially powered On, basic settings proceed automatically and subsequently: Setting the language, checking the antenna input, memorizing the channels, and setting the time. NOTE • The Plug & Play function operates after plugging in the TV for the first time.
BP68-00617A-00Eng(028~049) 4 8/14/06 11:07 AM Page 29 Press the … or † button to memorize the channels of the selected connection. Press the ENTER button to select “Start”. • If the antenna is connected to ANT 1 IN (CABLE), select “Cable” and if it is connected to ANT 2 IN (AIR), select “Air”. • If both ANT 1 IN (CABLE) and ANT 2 IN (AIR) are connected, select the “Air + Cable”. 5 Press the ENTER button to start the auto program. By default, the cable TV system is set to “STD”.
BP68-00617A-00Eng(028~049) 8/14/06 11:07 AM Page 30 Operation Option 1: Setting the Clock Automatically If you set “Clock Mode” to “Auto” in step 7, follow the instructions below. 8 Press the ENTER button to select “DST”(Daylight Saving Time). Press the … or † button to select “Off” or “On”, then press the ENTER button. Plug & Play Set to daylight saving time. Off On DST Move 9 Enter Skip Plug & Play Press the … or † button to select time zone, then press the ENTER button.
BP68-00617A-00Eng(028~049) 8/11/06 4:27 PM Page 31 Viewing the Menus and On-Screen Displays The on-screen menu system allows you to control the settings of your TV. Access the on-screen menu system by pressing the MENU button on the remote control. Once the on-screen menu appears, use the …/†/œ/√/ENTER buttons on your remote control to select menu items and make adjustments. You can also view the on-screen menu system and make some adjustments using the TV’s side panel buttons.
BP68-00617A-00Eng(028~049) 8/11/06 4:27 PM Page 32 Operation Selecting a Menu Language 1 Press the MENU button. Press the … or † button to select “Setup”, then press the ENTER button. Setup Language Time Game Mode V-Chip Caption Menu Transparency Blue Screen † More Move 2 Press the ENTER button to select “Language”. Press the … or † button to select “English”, “Español” or “Français”, then press the ENTER button.
BP68-00617A-00Eng(028~049) 8/11/06 4:27 PM Page 33 Memorizing the Channels Your TV can memorize and store all of the available channels for both “off-air” (antenna) and cable channels. After the available channels are memorized, use the CH and CH buttons to scan through the channels. This eliminates the need to change channels by entering the channel digits.
BP68-00617A-00Eng(028~049) 8/11/06 4:27 PM Page 34 Operation 4 Press the … or † button to select the Antenna connection, then press the ENTER button. • Air : “Air” antenna signal Cable : “Cable” antenna signal Air+Cable : “Air” and “Cable” antenna signals When selecting Cable TV system: Press the ENTER button to start the auto program. By default, the cable TV system is set to “STD”.
BP68-00617A-00Eng(028~049) 8/11/06 4:27 PM Page 35 Changing Channels Using the Channel Buttons Press the CH or CH button to change channels. When you press the CH or CH button, the TV changes channels in sequence. You will see all the channels that the TV has memorized. (The TV must have memorized at least three channels.) You will not see channels that were either erased or not memorized. Using the Number Buttons Use the number buttons to quickly switch to any channel.
BP68-00617A-00Eng(028~049) 8/11/06 4:27 PM Page 36 Operation Customizing Your Remote Control After it has been set up properly, your remote control can operate in five different modes: TV, VCR, Cable, DVD, or Set-Top Box. Pressing the corresponding button on the remote control allows you to switch between these modes, and control whichever piece of equipment you choose. NOTE • The remote control might not be compatible with all DVD Players, VCRs, Cable boxes, and Set-Top Boxes.
BP68-00617A-00Eng(028~049) 8/11/06 4:27 PM Page 37 Setting Up the Remote to Operate Your Cable Box 1 2 3 4 Turn off your Cable box. 5 Press the POWER button on the remote control. Your cable box should turn on if your remote is set up correctly. Press the CABLE button on your TV’s remote control. Press the SET button on your TV's remote control. Using the number buttons on your remote control, enter three digits of the cable box code listed on page 41 of this manual for your brand of cable box.
BP68-00617A-00Eng(028~049) 8/11/06 4:27 PM Page 38 Operation Setting Up the Remote to Operate Your DVD 1 2 3 4 Turn off your DVD. 5 Press the POWER button on the remote control. Your DVD should turn on if your remote is set up correctly. Press the DVD button on your TV’s remote control. Press the SET button on your TV's remote control. Using the number buttons on your remote control, enter three digits of the DVD code listed on page 42 of this manual for your brand of DVD.
BP68-00617A-00Eng(028~049) 8/11/06 4:27 PM Page 39 Setting Up the Remote to Operate Your Set Top Box 1 2 3 4 Turn off your Set Top Box. 5 Press the POWER button on the remote control. Your STB should turn on if your remote is set up correctly. Press the STB button on your TV’s remote control. Press the SET button on your TV's remote control. Using the number buttons on your remote control, enter three digits of the STB code listed on page 41 of this manual for your brand of STB.
BP68-00617A-00Eng(028~049) 8/11/06 4:27 PM Page 40 Operation Remote Control Codes VCR Brand SAMSUNG ADMIRAL AIWA AKAI AUDIO DYNAMICS BELL&HOWELL BROKSONIC CANDLE CANON CITIZEN COLORTYME CRAIG CURTIS MATHES DAEWOO DB DIMENSIA DYNATECH ELECTROHOME EMERSON FISHER FUNAI GENERAL ELECTRIC GO VIDEO LG(Goldstar) HARMAN KARDON HITACHI INSTANT REPLAY JC PENNEY JCL KENWOOD KLH LIOYD LOGIK LXI JVC MAGNAVOX MARANTZ MARTA KONIA ORION MEI MEMOREX MGA MIDLAND MINOLTA Code 000 001 002 003 004 005 077 078 079 020 025 00
BP68-00617A-00Eng(028~049) 8/11/06 4:27 PM Page 41 Remote Control Codes CABLE BOX Brand SAMSUNG GI HAMLIN HITACHI JERROLD MACOM MAGNAVOX OAK PANASONIC PHILIPS PIONEER RCA REGAL Code 000 001 002 003 004 005 006 007 041 003 024 031 025 030 038 039 025 030 019 023 028 026 003 022 027 037 044 019 021 023 028 004 018 020 044 014 022 040 003 Brand REGENCY SA SCIENTIFIC ATLAN SPRUCER STARGATE 2000 SYLVANIA TEXSCAN TOCOM UNIVERSAL VIEWSTAR WARNER AMEX ZENITH Code 015 023 042 043 042 043 022 036 016 016 032 0
BP68-00617A-00Eng(028~049) 8/11/06 4:27 PM Page 42 Operation Remote Control Codes SAMSUNG DVD Product DVD DVDR BD Record VCR COMBO VCR Record DHR COMBO Code 000 001 002 003 004 005 006 007 008 009 010 011 012 013 Product Home Theater VCR COMBO HDD Record COMBO TWIN TRAY COMBO STB DVD COMBO DVD Receiver AV Receiver Code 014 015 016 017 018 019 020 021 Code 030 075 085 072 070 071 074 086 083 084 088 111 112 114 062 074 122 123 027 065 077 078 079 082 080 125 081 095 066 146 067 068 090 060 061 089 13
BP68-00617A-00Eng(028~049) 8/11/06 4:28 PM Page 43 Setting the Clock Setting the clock is necessary in order to use the various timer features of the TV. Also, you can check the time while watching the TV. (Just press the INFO button.) Option 1: Setting the Clock Manually 1 Press the MENU button. Press the … or † button to select “Setup”, then press the ENTER button.
BP68-00617A-00Eng(028~049) 8/11/06 4:28 PM Page 44 Operation Option 2: Setting the Clock Automatically The Clock can be set automatically if you are receiving a digital signal. 1 Press the MENU button. Press the … or † button to select “Setup”, then press the ENTER button. Setup Language Time Game Mode V-Chip Caption Menu Transparency Blue Screen † More : Off : Medium : Off Move 2 Press the … or † button to select “Time”, then press the ENTER button. Press the ENTER button to select “Clock”.
BP68-00617A-00Eng(028~049) 8/11/06 4:28 PM Page 45 Setting the On/Off Timer 1 Press the MENU button. Press the … or † button to select “Setup”, then press the ENTER button. Setup Language Time Game Mode V-Chip Caption Menu Transparency Blue Screen † More Move 2 Press the … or † button to select “Time”, then press the ENTER button. Press the … or † button to select “On Timer”, then press the ENTER button. Press the … or † button to adjust “Hour”, then press the √ button to move to the next step.
BP68-00617A-00Eng(028~049) 8/29/06 2:56 PM Page 46 Operation Setting the Sleep Timer The sleep timer automatically shuts off the TV after a preset time (from 30 to 180 minutes). 1 Press the MENU button. Press the … or † button to select “Setup”, then press the ENTER button. Setup Language Time Game Mode V-Chip Caption Menu Transparency Blue Screen † More Move 2 Press the … or † button to select “Time”, then press the ENTER button.
BP68-00617A-00Eng(028~049) 8/11/06 4:28 PM Page 47 Viewing an External Signal Source Use the remote control to switch between viewing signals from connected equipment, such as a VCR, DVD, Set-Top Box or the TV source (broadcast or cable). Setting the Signal Source 1 Input Press the MENU button. Press the ENTER button to select “Input”. Source List Edit Name WISELINK : TV Move 2 Enter √ √ √ Return Source List Press the ENTER button to select “Source List”.
BP68-00617A-00Eng(028~049) 8/11/06 4:28 PM Page 48 Operation Assigning Names to External Input Mode This feature enables you to name the input source you have connected. 1 Press the MENU button. Press the ENTER button to select “Input”. Input Source List Edit Name WISELINK Move 2 Press the … or † button to select “Edit Name”, then press the ENTER button.
BP68-00617A-00Eng(028~049) 8/11/06 4:28 PM Page 49 Channel Control
BP68-00617A-00Eng(050~061) 8/11/06 4:27 PM Page 50 Channel Control Selecting Your Favorite Channels You can store your favorite channels for each available input source (such as TV and Cable box). Then, when you press the FAV.CH button on the remote control, the TV displays only the favorite channels you previously stored, allowing you to quickly and easily find frequently watched channels. Preset : To use the Channel Manager function, first run Auto Program (see page 33).
BP68-00617A-00Eng(050~061) 8/11/06 4:27 PM Page 51 To View Your Favorite Channels list: 1 Press the MENU button. Press the … or † button to select “Channel”, then press the ENTER button. Channel Move 2 Press the … or † button to select “Channel Manager”, then press the ENTER button. 3 • The favorite channel list will appear. Enter Return Channel Manager √ √ √ √ All Added Favorite Default List mode : All Move Press the … or † button to select “Favorite”, then press the ENTER button.
BP68-00617A-00Eng(050~061) 8/11/06 4:27 PM Page 52 Channel Control Viewing the Channel Lists You can display a list of all channels or your favorite channels. Preset : To use the Channel Manager function, first run Auto Program (see page 33). 1 Press the MENU button. Press the … or † button to select “Channel”, then press the ENTER button.
BP68-00617A-00Eng(050~061) 8/11/06 4:27 PM Page 53 Editing the Channel Lists You can edit channels to be added or deleted. Preset : To use the Channel Manager function, first run Auto Program (see page 33). 1 Press the MENU button. Press the … or † button to select “Channel”, then press the ENTER button. Channel Move 2 Press the … or † button to select “Channel Manager”, then press the ENTER button. 3 • All channels on the Channel Manager are added and displayed.
BP68-00617A-00Eng(050~061) 8/11/06 4:27 PM Page 54 Channel Control 4 Press the ▲ or ▼ button to select “Delete” to delete a channel, then press the ENTER button; the mark next to the channel will disappear. To select the deselected channel, select “Add” to add a channel by pressing the ▲ or ▼ button. The mark will appear next to the channel.
BP68-00617A-00Eng(050~061) 8/11/06 4:27 PM Page 55 Default List mode You can set All, Added or Favorite to be the Default List that appears when you press the CH MGR button. 1 Channel Press the MENU button. Press the … or † button to select “Channel”, then press the ENTER button. Move 2 Enter Return Channel Manager Press the … or † button to select “Channel Manager”, then press the ENTER button.
BP68-00617A-00Eng(050~061) 8/11/06 4:27 PM Page 56 Channel Control Labeling the Channels Use this feature to assign an easy-to-remember label to analog channels (i.e., “CBS”, “ESPN”, “PBS2”, CNN02”, etc.) A label consists of five fields, where each field is a letter, a number or a blank. When the INFO button is pressed, the channel label will appear below the channel number. 1 Press the CH or CH will be labeled. 2 Press the MENU button.
BP68-00617A-00Eng(050~061) 8/11/06 4:27 PM Fine Tuning Analog Channels Page 57 Analog Use fine tuning to manually adjust a particular channel for optimal reception. 1 Channel Press the MENU button. Press the … or † button to select “Channel”, then press the ENTER button. Move 2 Enter √ √ √ √ √ √ √ Antenna : Air Auto Program Channel Manager Name Fine Tune Signal Strength LNA : On Move 3 Return Channel Press the … or † button to select “Fine Tune”, then press the ENTER button.
BP68-00617A-00Eng(050~061) 8/11/06 4:27 PM Page 58 Channel Control Checking the Digital-Signal Strength Digital Unlike analog channels, which can vary in reception quality from “snowy” to clear, digital (HDTV) channels have either perfect reception quality or you will not receive them at all. So, unlike analog channels, you cannot fine tune a digital channel. You can, however, adjust your antenna to improve the reception of available digital channels. 1 Press the MENU button.
BP68-00617A-00Eng(050~061) 8/11/06 4:27 PM Page 59 LNA (Low Noise Amplifier) If the TV is operating in a weak-signal area, sometimes the LNA function can improve the reception (a low-noise preamplifier boosts the incoming signal). 1 Press the MENU button. Press the … or † button to select “Channel”, then press the ENTER button. Channel Move 2 Press the … or † button to select “LNA”, then press the ENTER button.
BP68-00617A-00Eng(050~061) 8/11/06 4:27 PM Page 60 SAMSUNG
BP68-00617A-00Eng(050~061) 8/11/06 4:27 PM Page 61 Picture Control
BP68-00617A-00Eng(062~075) 8/11/06 4:42 PM Page 62 Picture Control Picture Control You can select the type of picture which best corresponds to your viewing requirements. Changing the Picture Standard 1 2 Press the MENU button. Press the … or † button to select “Picture”, then press the ENTER button. Press the ENTER button again to select “Mode”.
BP68-00617A-00Eng(062~075) 8/11/06 4:42 PM Page 63 Customizing the Picture Settings You can use the on-screen menus to change the “Contrast”, “Brightness”, “Sharpness”, “Color”, “Tint”, and “Color Tone” according to personal preference. You can select “Standard” which automatically recalls your personalized picture settings. 1 Picture Press the MENU button. Press the … or † button to select “Picture”, then press the ENTER button.
BP68-00617A-00Eng(062~075) 8/11/06 4:42 PM Page 64 Picture Control 5 Press the ENTER button to return to “Mode”. Press the … or † button to select “Color Tone”, then press the ENTER button. Mode Mode Contrast Brightness Sharpness Color Tint (G/R) G50 Color Tone Reset Move 6 Press the … or † button to select a particular option (Cool2, Cool1, Normal, Warm1, or Warm2), then press the ENTER button.
BP68-00617A-00Eng(062~075) 8/14/06 11:08 AM Page 65 Changing the Picture Size You can select the picture size which best corresponds to your viewing requirements. 1 2 Press the MENU button. Press the … or † button to select “Picture”, then press the ENTER button. Press the … or † button to select “Size”, then press the ENTER button.
BP68-00617A-00Eng(062~075) 8/11/06 4:42 PM Page 66 Picture Control Digital Noise Reduction If the broadcast signal received by your TV is weak, you can activate the Digital Noise Reduction feature to help reduce any static and ghosting that may appear on the screen. 1 Press the MENU button. Press the … or † button to select “Picture”, then press the ENTER button.
BP68-00617A-00Eng(062~075) 8/29/06 2:24 PM Page 67 Viewing the DNIe Demonstration This TV includes the DNIe function to provide high visual quality. If you set DNIe to on, you can view the screen with the DNIe feature activated. If you set the DNIe to Demo, you can view the applied DNIe and normal pictures on the screen, for demonstration purposes. Using this function, you can view the difference in the visual quality. 1 Press the MENU button.
BP68-00617A-00Eng(062~075) 8/11/06 4:42 PM Page 68 Picture Control Setting the My Color Control Mode My Color Control allows you to adjust colors according to your preference, by adjusting skin, sky, and grass tones using the predefined settings (“Blue”, “Green”, “Pink”, “Standard”, and “Custom”) without affecting other colors on the screen. Using the Easy Control Menu 1 Picture Press the MENU button. Press the … or † button to select “Picture”, then press the ENTER button.
BP68-00617A-00Eng(062~075) 8/11/06 4:42 PM Page 69 Custom Settings 1 2 Picture Press the MENU button. Press the … or † button to select “Picture”, then press the ENTER button. Press the … or † button to select “My Color Control”, then press the ENTER button.
BP68-00617A-00Eng(062~075) 8/11/06 4:42 PM Page 70 Picture Control Using the Color Weakness Enhancement Feature This feature adjusts the Red, Green or Blue color to enhance the picture according to the user’s particular color weakness. 1 Setup Press the MENU button. Press the … or † button to select “Setup”, then press the ENTER button.
BP68-00617A-00Eng(062~075) 8/11/06 4:42 PM Page 71 Setting the Film Mode The TV can automatically sense and process film signals from all sources and adjust the picture for optimum quality. 1 Press the MENU button. Press the … or † button to select “Picture”, then press the ENTER button. Picture Mode : Size : Digital NR : DNIe : My Color Control Film Mode : Move 2 Press the … or † button to select “Film Mode”, then press the ENTER button. 3 Press the EXIT button to exit.
BP68-00617A-00Eng(062~075) 8/11/06 4:42 PM Page 72 Picture Control Freezing the Picture Press the STILL button to freeze a moving picture. (Normal sound will still be heard.) To cancel this function, press the STILL button again or press any button on the remote control.
BP68-00617A-00Eng(062~075) 8/11/06 4:42 PM Page 73 Setting the Blue Screen Mode If no signal is being received or the signal is very weak, a blue screen automatically replaces the noisy picture background. If you wish to continue viewing the poor picture, you must set the “Blue Screen” mode to “Off”. 1 Press the MENU button. Press the … or † button to select “Setup”, then press the ENTER button.
BP68-00617A-00Eng(062~075) 8/11/06 4:42 PM Page 74 SAMSUNG
BP68-00617A-00Eng(062~075) 8/11/06 4:42 PM Page 75 Sound Control
BP68-00617A-00Eng(076~085) 8/11/06 4:26 PM Page 76 Sound Control Sound Control You can control and customize the sound levels and settings of the TV with the remote control. Adjusting the Volume Press the VOL+ or VOL– button to increase or decrease the volume. Using the MUTE Button At any time, you can temporarily cut off the sound. Press the MUTE button on the remote control. The message “Mute” is displayed and the sound cuts off.
BP68-00617A-00Eng(076~085) 3 8/11/06 4:26 PM Page 77 Press the œ or √ button to select a particular item to be changed. Press the … or † button to increase or decrease the selected frequency. Equalizer R + 0 - L Press the EXIT button to exit. Balance 100Hz 300Hz 1KHz 3KHz 10KHz Move Adjust Return NOTES • If you make any changes to the equalizer settings, the sound mode is automatically switched to the custom mode.
BP68-00617A-00Eng(076~085) 8/11/06 4:26 PM Page 78 Sound Control Auto Volume Each broadcasting station has its own signal conditions, and it is inconvenient to adjust the volume every time the channel is changed. “Auto Volume” automatically adjusts the volume of the desired channel by lowering the sound output when the modulation signal is high or by raising the sound output when the modulation signal is low. 1 Press the MENU button.
BP68-00617A-00Eng(076~085) 8/11/06 4:26 PM Page 79 Choosing a Multi-Channel Sound (MTS) track Digital The digital-TV transmission system is capable of simultaneous transmission of many audio tracks (for example, simultaneous translations of the program into foreign languages). The availability of these additional “multitracks” depends upon the program. 1 Press the MENU button. Press the … or † button to select “Sound”, then press the ENTER button.
BP68-00617A-00Eng(076~085) 8/11/06 4:26 PM Page 80 Sound Control Choosing a Multi-Channel Sound (MTS) track Analog Depending on the particular program being broadcast, you can listen to Mono, Stereo or SAP. 1 Press the MENU button. Press the … or † button to select “Sound”, then press the ENTER button.
BP68-00617A-00Eng(076~085) 8/14/06 11:09 AM Page 81 Selecting the Internal Mute When using a device such as a Home Theater or Amplifier with external speakers, you can set Internal Mute to On to cut off sound from the TV’s internal speakers. 1 Press the MENU button. Press the … or † button to select “Sound”, then press the ENTER button.
BP68-00617A-00Eng(076~085) 8/11/06 4:26 PM Page 82 Sound Control Setting the On/Off Melody A melody sound can be set to come on when the TV is powered on or off. 1 Press the MENU button. Press the … or † button to select “Sound”, then press the ENTER button. Sound Mode : Equalizer SRS TruSurround XT : Multi-Track Options Auto Volume : Internal Mute : Melody : Reset Move 2 Press the … or † button to select “Melody”, then press the ENTER button.
BP68-00617A-00Eng(076~085) 8/14/06 2:15 PM Page 83 Setting the SRS TSXT TruSurround XT is a patented SRS technology that solves the problem of playing 5.1 multichannel content over two speakers. Trusurround delivers a compelling and virtual surround sound experience through any two-speaker playback system, including internal television speakers. It is fully compatible with all multichannel formats. 1 Press the MENU button. Press the … or † button to select “Sound”, then press the ENTER button.
BP68-00617A-00Eng(076~085) 8/29/06 2:25 PM Page 84 Sound Control Sound Reset If Game Mode is set to On (Refer to page 88), the Sound Reset function is available. Selecting the Reset function resets the equalizer to the Game mode factory defaults. 1 Press the MENU button. Press the … or † button to select “Sound”, then press the ENTER button.
BP68-00617A-00Eng(076~085) 8/11/06 4:26 PM Page 85 Special Features
BP68-00617A-00Eng(086~105) 8/11/06 4:23 PM Page 86 Special Features Setting the Function Help Displays Help on the menu functions. 1 Setup Press the MENU button. Press the … or † button to select “Setup”, then press the ENTER button. Language Time Game Mode V-Chip Caption Menu Transparency Blue Screen † More Move 2 : English : Off : Medium : Off Enter √ √ √ √ √ √ √ Return Setup Press the … or † button to select “Function Help”, then press the ENTER button.
BP68-00617A-00Eng(086~105) 8/11/06 4:23 PM Page 87 Menu Transparency Level Adjusts the transparency of the menu screen. 1 Press the MENU button. Press the … or † button to select “Setup”, then press the ENTER button. Setup Language Time Game Mode V-Chip Caption Menu Transparency Blue Screen † More Move 2 Press the … or † button to select “Menu Transparency”, then press the ENTER button. Press the … or † button to select level, then press the ENTER button.
BP68-00617A-00Eng(086~105) 8/29/06 2:25 PM Page 88 Special Features Using Game Mode When connecting to a game console such as PlayStationTM or XboxTM, you can enjoy a more realistic gaming experience by setting the game mode to on. 1 Press the MENU button. Press the … or † button to select “Setup”, then press the ENTER button. Setup Language Time Game Mode V-Chip Caption Menu Transparency Blue Screen † More Move 2 Press the … or † button to select “Game Mode”, then press the ENTER button.
BP68-00617A-00Eng(086~105) 8/11/06 4:23 PM Page 89 Using the V-Chip Access to channels and programs is controlled by a password (i.e., a 4-digit secret code that is defined by the user). The on-screen menu will instruct you to assign a password (you can change it later, if necessary). How to Change Your Password 1 2 Press the MENU button. Press the … or † button to select “Setup”, then press the ENTER button. Press the … or † button to select “V-Chip”, then press the ENTER button.
BP68-00617A-00Eng(086~105) 8/11/06 4:23 PM Page 90 Special Features How to Enable/Disable the Rating Controls 1 2 Press the MENU button. Press the … or † button to select “Setup”, then press the ENTER button. Press the … or † button to select “V-Chip”, then press the ENTER button. Press the number buttons to enter your current 4-digit PIN. (The default PIN for a new TV set is “0000”.) “V-Chip” menu is displayed.
BP68-00617A-00Eng(086~105) 8/11/06 4:23 PM Page 91 How to Set up Restrictions Using “TV Parental Guidelines” The parental restrictions can be set up using either of two methods: “TV Parental Guidelines” or “MPAA Rating”. 1 2 Press the MENU button. Press the … or † button to select “Setup”, then press the ENTER button. Press the … or † button to select “V-Chip”, then press the ENTER button. Press the number buttons to enter your current 4-digit PIN. (The default PIN for a new TV set is “0000”.
BP68-00617A-00Eng(086~105) 8/11/06 4:23 PM Page 92 Special Features 4 TV Parental Guidelines You can independently lock the TV ratings. The locked TV (FCC) ratings are indicated by the symbol “ ”. To unlock a locked channel, press the ENTER button again. Press the …/†/œ/√ buttons and the ENTER button to activate the appropriate restrictions for TV (FCC) rating system. TV-Y TV-Y7 TV-G TV-PG TV-14 TV-MA : : : : : : Young children. Children 7 and over. General audience. Parent guidance.
BP68-00617A-00Eng(086~105) 8/11/06 4:23 PM Page 93 How to Set up Restrictions Using “MPAA Rating” The Movie rating system uses “MPAA” (Motion Picture Association of America) system, and its main application is for movies. When the rating control is on, the TV will automatically block any programs that are coded with objectionable ratings (either “MPAA Rating” or “TV Parental Guidelines”). 1 2 Press the MENU button. Press the … or † button to select “Setup”, then press the ENTER button.
BP68-00617A-00Eng(086~105) 8/11/06 4:23 PM Page 94 Special Features Important Notes About Parental Locks Explanation of the MPAA and TV (FCC) Rating Systems: TV (FCC) Age-Based Ratings TV-Y All children. The themes and elements in this program are specifically designed for a very young audience, including children from ages two to six. TV-Y7 Directed to older children. The Themes and elements in this program may include mild physical or comedic violence, or may frighten children under the age of seven.
BP68-00617A-00Eng(086~105) 8/11/06 4:24 PM Page 95 How to Set up Restrictions Using Canadian English 1 Press the MENU button. Press the … or † button to select “Setup”, then press the ENTER button. Press the … or † button to select “V-Chip”, then press the ENTER button. 2 Press the number buttons to enter your current 4-digit PIN. (The default PIN for a new TV set is “0000”.) “V-Chip” menu is displayed.
BP68-00617A-00Eng(086~105) 8/11/06 4:24 PM Page 96 Special Features 4 Canadian English Press the … or † button to select a appropriate restriction. Block E Press the EXIT button to exit. Block All C C8+ G PG 14+ 18+ Press the ENTER button to activate the restriction selected. “ ” symbol is indicated. To unlock a locked channel, press the ENTER button again. Allow All Move Enter Return NOTES • Allow All : Press to unlock all TV ratings. • Block All : Press to lock all TV ratings.
BP68-00617A-00Eng(086~105) 8/11/06 4:24 PM Page 97 How to Set up Restrictions Using Canadian French 1 Press the MENU button. Press the … or † button to select “Setup”, then press the ENTER button. Press the … or † button to select “V-Chip”, then press the ENTER button. 2 Press the number buttons to enter your current 4-digit PIN. (The default PIN for a new TV set is “0000”.) “V-Chip” menu is displayed.
BP68-00617A-00Eng(086~105) 8/11/06 4:24 PM Page 98 Special Features 4 Canadian French Press the … or † button to select a appropriate restriction. Block E Block All Press the ENTER button to activate the restriction selected. “ ” symbol is indicated. To unlock a locked channel, press the ENTER button again. Press the EXIT button to exit. Allow All G 8 ans+ 13 ans+ 16 ans+ 18 ans+ Move Enter Return NOTES • Allow All : Press to unlock all TV ratings. • Block All : Press to lock all TV ratings.
BP68-00617A-00Eng(086~105) 8/11/06 4:24 PM Page 99 Using the V-Chip for Digital channels Parental restriction information can be used while watching DTV channels. 1 2 Press the MENU button. Press the … or † button to select “Setup”, then press the ENTER button. Press the … or † button to select “V-Chip”, then press the ENTER button. Press the number buttons to enter your current 4-digit PIN. (The default PIN for a new TV set is “0000”.) “V-Chip” menu is displayed.
BP68-00617A-00Eng(086~105) 8/11/06 4:24 PM Page 100 Special Features Rating title 4 You can independently lock the TV ratings. The locked TV ratings are indicated by the symbol “ ”. To unlock a locked channel, press the ENTER button again. Press the …/†/œ/√ buttons and the ENTER button to activate the appropriate restrictions for TV rating system. Downloadable U.S. Rating √ Violence Level Allow All NV MV V VV EV Move 1/2 Block All Enter Return Press the EXIT button to exit.
BP68-00617A-00Eng(086~105) 8/11/06 4:24 PM Page 101 Viewing Closed Captions (On-Screen Text Messages) Analog The Analog Caption function operates in either analog TV channel mode or external signal mode. (Depending on the broadcasting signal, the Analog Caption function may operate on digital channels.) 1 Press the MENU button. Press the … or † button to select “Setup”, then press the ENTER button.
BP68-00617A-00Eng(086~105) 8/11/06 4:24 PM Page 102 Special Features 4 Press the … or † button to select “Caption Mode”, then press the ENTER button. Press the … or † button to select submenu (CC1~CC4 or Text1~Text4) you want, then press the ENTER button. Caption Caption Caption Mode Caption Options : On Default : Default CC1 CC2 CC3 CC4 Text1 Text2 ▼ Press the EXIT button to exit. Move Enter Return NOTES • The default is “CC1”. CC1 : The Primary Synchronous Caption Service.
BP68-00617A-00Eng(086~105) 8/11/06 4:24 PM Page 103 Viewing Closed Captions (On-Screen Text Messages) Digital The Digital Captions function operates on digital channels. 1 Press the MENU button. Press the … or † button to select “Setup”, then press the ENTER button. Setup Language Time Game Mode V-Chip Caption Menu Transparency Blue Screen † More Move 2 Press the … or † button to select “Caption”, then press the ENTER button.
BP68-00617A-00Eng(086~105) 8/11/06 4:24 PM Page 104 Special Features 6 Press the … or † button to select “Size”, then press the ENTER button. Press the … or † button to select the size you want, then press the ENTER button. Set other listed options below using the same method as above. Press the EXIT button to exit.
BP68-00617A-00Eng(086~105) 8/11/06 4:24 PM Page 105 PC Display
BP68-00617A-00Eng(106~129) 8/30/06 2:10 PM Page 106 PC Display Using Your TV as a Computer (PC) Display How to Connect Your PC to the TV This figure shows the Standard Connector-jack panel. The actual configuration on your TV may be different, depending on the model. Connecting a PC (15p D-SUB) to the TV 1 Connect a D-Sub cable between the PC IN (PC) jack on the TV and the PC output jack on your computer.
BP68-00617A-00Eng(106~129) 8/11/06 4:24 PM Page 107 Setting up Your PC Software (Based on Windows XP) The Windows display-settings for a typical computer are shown below. But the actual screens on your PC will probably be different, depending upon your particular version of Windows and your particular video card. But even if your actual screens look different, the same, basic set-up information will apply in almost all cases. (If not, contact your computer manufacturer or Samsung Dealer.) 1.
BP68-00617A-00Eng(106~129) 8/17/06 2:55 PM Page 108 PC Display Display Modes Mode VGA Resolution 640 x 350 720 x 400 640 x 480 SVGA 800 x 600 XGA 1024 x 768 VESA 640 x 480 720 x 400 800 x 600 1024 x 768 Horizontal Frequency [KHz] 31.47 31.47 31.47 35.00 37.86 37.50 35.16 37.88 48.08 46.87 48.36 56.40 60.02 35.000 43.269 37.927 43.750 57.672 68.677 Vertical Frequency [Hz] 70.00 70.00 60.00 66.70 72.80 75.00 56.30 60.30 72.20 75.00 60.00 70.10 75.00 70.000 85.008 85.039 70.000 72.000 84.
BP68-00617A-00Eng(106~129) 8/11/06 4:24 PM Page 109 Adjusting the Picture Quality The purpose of picture quality adjustment is to remove or reduce picture noise. If the noise is not removed by fine tuning alone, then do the frequency adjustments to the utmost and fine tune again. After the noise has been reduced, re-adjust the picture so that it is aligned to the center of screen. 1 Press the SOURCE button to select “PC”. 2 Press the MENU button.
BP68-00617A-00Eng(106~129) 8/11/06 4:24 PM Page 110 PC Display Changing the Picture Position After connecting the TV to your PC, adjust the position of picture if it is not well-aligned. 1 Press the SOURCE button to select “PC”. 2 Press the MENU button. Press the … or † button to select “Setup”, then press the ENTER button.
BP68-00617A-00Eng(106~129) 8/11/06 4:25 PM Page 111 Adjusting the Picture Quality and Position Automatically This feature allows the TV to self-adjust to the incoming video signal. The values of fine, coarse and position are adjusted automatically. 1 Press the SOURCE button to select “PC”. 2 Press the MENU button. Press the … or † button to select “Setup”, then press the ENTER button.
BP68-00617A-00Eng(106~129) 8/23/06 2:42 PM Page 112 PC Display Changing the Picture Size (PC Mode) You can select the picture size which best corresponds to your viewing requirements. 1 Press the SOURCE button to select “PC”. 2 Press the MENU button. Press the … or † button to select “Picture”, then press the ENTER button. Press the … or † button to select “Size”, then press the ENTER button.
BP68-00617A-00Eng(106~129) 8/14/06 11:13 AM Page 113 Viewing the Current Resolution You can get the resolution information of your PC. 1 Press the SOURCE button to select “PC”. 2 Press the MENU button. Press the … or † button to select “Setup”, then press the ENTER button. Setup Language Time Game Mode V-Chip Caption Menu Transparency Blue Screen † More : English : Off : Medium : Off Move 3 Press the … or † button to select “PC”, then press the ENTER button.
BP68-00617A-00Eng(106~129) 8/11/06 4:25 PM Page 114 PC Display Initializing the Picture Settings You can replace all picture settings with the factory default values. 1 Press the SOURCE button to select “PC”. 2 Press the MENU button. Press the … or † button to select “Setup”, then press the ENTER button.
BP68-00617A-00Eng(106~129) 8/11/06 4:25 PM Page 115 WISELINK
BP68-00617A-00Eng(106~129) 8/11/06 4:25 PM Page 116 WISELINK Using the WISELINK Function This function enables you to view and listen to photo (JPEG) and audio files (MP3)saved on a USB Mass Storage Class (MSC) device. TV Side Panel Press the power button on the remote control or front panel. Connect a USB device containing JPEG and/or MP3 files to the WISELINK jack (USB jack) on the side of the TV. Example NOTES • If you enter the WISELINK mode with no USB device connected.
BP68-00617A-00Eng(106~129) 8/31/06 9:20 AM Page 117 Using the WISELINK Menu 1 Press the MENU button. Press the ENTER button to select “Input”. Input Source List Edit Name WISELINK Move 2 Press the … or † button to select “WISELINK”, then press the ENTER button. Enter √ √ √ : TV Enter Return Press the … or † button to select the corresponding MSC Memory Device, then press the ENTER button. • The WISELINK menu displays differently depending on the MSC Memory Device connected to your TV.
BP68-00617A-00Eng(106~129) 8/14/06 11:14 AM Page 118 WISELINK Using the PHOTO (JPEG) List This menu shows JPEG files and folders saved on an MSC memory device. 1 Complete Steps 1 to 4 of Using the WISELINK Menu. (Refer to page 117) 2 Press the œ or √ button to move to “Photo”, then press the ENTER button. The saved file information is displayed as a folder or file. Move 3 Press the …, †, œ and √ buttons to select a file, then press the ENTER button.
BP68-00617A-00Eng(106~129) 8/11/06 4:25 PM Page 119 Selecting a Photo and Slide Show 1 Complete Steps 1 to 4 of Using the WISELINK Menu. (Refer to page 117) 2 Press the œ or √ button to move to “Photo”, then press the ENTER button. The saved file information is displayed as a folder or file. Move 3 Press the INFO button to display “View” or “Slide Show”. Enter Return 709x531 2006-1-30 1/14 View Slide Show Exit 4 Press the … or † button to select “Slide Show”, then press the ENTER button.
BP68-00617A-00Eng(106~129) 8/11/06 4:25 PM Page 120 WISELINK 5 Press the INFO button during “Slide Show” to set the option(Slide Show Speed, Background Music On/Off, Background Music Setting, List). Slide Show Speed Background Music On/Off Press the … or † button to select the option, then press the ENTER button. 6 Background Music Setting List Exit To change the sub option, press the INFO button again to open the options window and select option you want to change, then press the ENTER button.
BP68-00617A-00Eng(106~129) 8/11/06 4:25 PM Page 121 List: The saved file information is displayed as folder or JPEG file. 1200x748 2006-2-6 4/14 To exit WISELINK mode, press the WISELINK button on the remote control. Move Enter Photo menu Return Slideshow function information icon (Displayed at the top left of the screen). Icon Play Current OSD Function (Photo) SlideShow Photo SlideShow is in progress.
BP68-00617A-00Eng(106~129) 8/11/06 4:25 PM Page 122 WISELINK Rotating 1 Complete Steps 1 to 4 of Using the WISELINK Menu. (Refer to page 117) 2 Press the œ or √ button to move to “Photo”, then press the ENTER button. The saved file information is displayed as a folder or file. Move 3 Press the …, †, œ and √ buttons to select a file, then press the ENTER button. Pressing the button over a photo thumbnail displays the photo in full screen.
BP68-00617A-00Eng(106~129) 8/11/06 4:25 PM Page 123 Zooming-in 1 Complete Steps 1 to 4 of Using the WISELINK Menu. (Refer to page 117) 2 Press the œ or √ button to move to “Photo”, then press the ENTER button. The saved file information is displayed as a folder or file. Move 3 Press the …, †, œ and √ buttons to select a file, then press the ENTER button. Pressing the button over a photo thumbnail displays the photo in full screen.
BP68-00617A-00Eng(106~129) 8/11/06 4:25 PM Page 124 WISELINK • Zoom(x 2): Zoom-in to the photo x2. • Zoom(x 4): Zoom-in to the photo x4. • Zoom(x 1): Restore the photo to its original size. To move to pan up/down/left/right, press the …, †, œ and √ buttons. To exit WISELINK mode, press the WISELINK button on the remote control. The Rotating function information icon (Displayed at the top left of the screen).
BP68-00617A-00Eng(106~129) 8/11/06 4:25 PM Page 125 Using the MP3 List This menu shows MP3 files among the files saved on an MSC memory device. 1 Complete Steps 1 to 4 of Using the WISELINK Menu. (Refer to page 117) 2 Press the œ or √ button to move to “Music”, then press the ENTER button. The saved file information is displayed as a folder or file. Move 3 Press the … or † button to select a file, then press the ENTER button.
BP68-00617A-00Eng(106~129) 8/11/06 4:25 PM Page 126 WISELINK 4 Press the PLAY/PAUSE button while playing an MP3 file to pause the file. Press the STOP button to exit Play mode. Nat King Cole-Fly me to the moon 2006-2-10 6/14 00:04:00 Upper Folder Folder 1 Swan Song feat.
BP68-00617A-00Eng(106~129) 8/23/06 2:44 PM Page 127 Using the Setup Menu Setup displays the user settings of the WISELINK menu. 1 Complete Steps 1 to 4 of Using the WISELINK Menu. (Refer to page 117) 2 Press the œ or √ button to move to “Setup”, then press the ENTER button. Move 3 Press the … or † button to select an item you want, then press the ENTER button.
BP68-00617A-00Eng(106~129) 8/11/06 4:25 PM Page 128 WISELINK Slide Show Speed: Select to control the slide show speed. You can select Slow, Normal or Fast. Slide Show Speed : Slow Fast Slide Show Repeat : Normal Off Background Music On/Off : Fast On Music Repeat : On Screen Saver : 5 min Move Slide Show Repeat: • On: Repeats the slide show from the beginning when all the files in the folder have been displayed. • Off: Exit a slide show.
BP68-00617A-00Eng(106~129) 8/11/06 4:25 PM Page 129 Appendix
BP68-00617A-00Eng(130~135) 8/11/06 4:26 PM Page 130 Appendix Replacing the Lamp • Why do I need to replace the lamp? The lamp used in a DLP TV has a limited lifespan. For the best screen quality it needs to be replaced periodically. After replacing the lamp, the screen quality will be bright and clear as new. • When do I need to replace it? It should be replaced when the screen becomes darker, less clear or when all three LEDs on the front (STAND BY/TEMP, LAMP, and TIMER) are flashing.
BP68-00617A-00Eng(130~135) 8/11/06 4:26 PM Page 131 • For replacement, you will need a 5.91-Inch screwdriver and a pair of gloves. 1 Unplug the TV, then use a screwdriver to remove the screws. 2 Remove the Lamp cover. 3 Push the clip and pull down the Lamp holder. 4 Separate the Lamp from the engine by holding the handle and pulling it out. NOTES • Be sure the replacement Lamp is the same type. • After replacing the lamp, align the lamp cover with the groove and secure the screws.
BP68-00617A-00Eng(130~135) 8/11/06 4:26 PM Page 132 Appendix Troubleshooting If the TV seems to have a problem, first try this list of possible problems and solutions. If none of these troubleshooting tips apply, then call your nearest Samsung authorized service center. Problem Possible Solution Poor picture quality. Try another channel. Adjust the antenna. Check all wire connections. Poor sound quality. Try another channel. Adjust the antenna. Make sure the MUTE button is off.
BP68-00617A-00Eng(130~135) 8/11/06 4:26 PM Page 133 Cleaning and Maintaining Your TV Please follow these guidelines to get the maximum performance from your TV. Placement • Do not put the TV near extremely hot, cold, humid or dusty places. • Do not place the TV near appliances with electric motors that create magnetic fields, such as vacuum cleaners. • Keep the ventilation openings clear; do not place the TV on a soft surface, such as cloth or paper. • Place the TV in a vertical position only.
BP68-00617A-00Eng(130~135) 8/11/06 4:26 PM Page 134 Specifications HL-S4676S Model Dimensions (W x D x H) 41.26 x 11.14 x 29.17 inches 1048 x 283 x 741 mm 21 Kg / 46.
BP68-00617A-00Eng(130~135) 8/11/06 4:26 PM Page 135 This page is intentionally left blank.
BP68-00617A-00Eng(cover) 8/25/06 10:02 AM Page 2 Contact SAMSUNG WORLD-WIDE If you have any questions or comments relating to Samsung products, please contact the SAMSUNG customer care center. Country Customer Care Center CANADA 1-800-SAMSUNG (7267864) www.samsung.com/ca U.S.A 1-800-SAMSUNG (7267864) www.samsung.com Web Site Address Samsung Electronics Canada Inc., Customer Service 55 Standish Court Mississauga, Ontario L5R 4B2 Canada Samsung Electronique Canada Inc.