HT-E6750W 7.1CH Blu-ray™ Home Entertainment System user manual imagine the possibilities Thank you for purchasing this Samsung product. To receive more complete service, please register your product at www.samsung.com/register HT-E6750W_XU_0222.
Safety Information Warning TO REDUCE THE RISK OF ELECTRIC SHOCK, DO NOT REMOVE THE COVER(OR BACK). NO USER-SERVICEABLE PARTS ARE INSIDE. REFER SERVICING TO QUALIFIED SERVICE PERSONNEL. CAUTION RISK OF ELECTRIC SHOCK DO NOT OPEN This symbol indicates “dangerous voltage” inside the product that presents a risk of electric shock or personal injury. CAUTION: TO PREVENT ELECTRIC SHOCK, MATCH WIDE BLADE OF PLUG TO WIDE SLOT, FULLY INSERT.
Disc Storage & Management 01 Safety Information • Holding Discs - Fingerprints or scratches on a disc may reduce sound and picture quality or cause skipping. - Avoid touching the surface of a disc where data has been recorded. - Hold the disc by the edges so that fingerprints will not get on the surface. - Do not stick paper or tape on the disc. • Cleaning Discs - If you get fingerprints or dirt on a disc, clean it with a mild detergent diluted in water and wipe with a soft cloth.
Safety Information • Do not use the 3D function or 3D Active Glasses while walking or moving around. Using the 3D function or 3D Active Glasses while moving around may cause you to bump into objects, trip, and/or fall, and cause serious injury.C • If you want to enjoy 3D content, connect a 3D device (3D compliant AV receiver or TV) to the product’s HDMI OUT port using a high-speed HDMI cable. Put on 3D glasses before playing the 3D content.
Safety Information • Oracle and Java are registered trademarks of Oracle and/or its affiliates. Other names may be trademarks of their respective owners. • Open Source Licence Notice - In the case of using open source software, Open Source Licences are available on the product menu. 01 • The terms HDMI and HDMI High-Definition Multimedia Interface, and the HDMI Logo are trademarks or registered trademarks of HDMI Licensing LLC in the United States and other countries.
Contents SAFETY INFORMATION 2 3 3 3 4 4 Warning Disc Storage & Management Handling Cautions Using the 3D function Copyright Licence SETTINGS 23 25 26 27 32 32 37 The Initial Settings Procedure The Home Screen Accessing the Settings Screen Settings Menu Functions Auto Sound Calibration Networks and the Internet Upgrading Software GETTING STARTED 7 8 11 12 12 13 Disk and Format Compatibility Logos of Discs the product can play Accessories Front Panel Rear Panel Remote Control CONNECTIONS 15 15 16 16 17
Getting Started Disk and Format Compatibility 02 Disc types and contents your product can play Disc Type Blu-ray Disc 3D Blu-ray Disc VIDEO DVD-VIDEO, DVD-RW, DVD-R, DVD+RW, DVD+R Details BD-ROM or BD-RE/-R disc recorded in the BD-RE format. DVD-VIDEO, recorded DVD+RW/DVD-RW(V)/DVD-R/+R discs that have been recorded and finalised, or a USB storage media containing DivX, MKV, MP4 contents.
Getting Started Region Code Logos of Discs the product can play Both products and discs are coded by region. These regional codes must match for a disc to play. If the codes do not match, the disc will not play. The Region Number for this product is displayed on the rear panel of the product. Disc Type Blu-ray Disc DVD-VIDEO Region Code Area A North America, Central America, South America, Korea, Japan, Taiwan, Hong Kong and South East Asia.
Video File Support *.mkv *.asf *.wmv *.mp4 Frame rate (fps) Bit rate (Mbps) DivX 3.11/4.x /5.1/6.0 AVI H.264 BP/MP/HP MPEG4 SP/ASP DivX 3.11/4.x /5.1/6.0 MKV H.264 BP/MP/HP MPEG4 SP/ASP DivX 3.11/4.x /5.1/6.0 ASF H.264 BP/MP/HP MPEG4 SP/ASP Media WMV (wmv9) Window Video v9 H.
Getting Started Video decoder - Supports up to H.264 Level 4.1 - Does not support H.264 FMO/ASO/RS, VC1 SP/MP/AP L4 and AVCHD - MPEG4 SP, ASP : Below 1280 x 720 : 60 frames max Above 1280 x 720 : 30 frames max - Does not support GMC 2 or higher Audio decoder - Supports WMA 7, 8, 9 and STD - Does not support WMA 9 PRO multi-channel files if the number of channels is more than 2 or the files require lossless audio decoding.
Accessories 02 Check for the supplied accessories below.
Getting Started Front Panel VOLUME CONTROL VACUUM TUBE AMP OPEN/CLOSE ENTER PLAY/PAUSE DISC TRAY STOP FUNCTION POWER ASC IN 5V 500mA DISPLAY REMOTE CONTROL SENSOR ASC IN USB HOST | NOTE | If Cellular phone or mobile device is near vacuum tube amp, or put other electronic products on the top of the product would cause noise from the audio. Please be careful that children do not touch the product's surface When the set is on working. It would be hot.
Remote Control 02 Tour of the Remote Control FUNCTION TV SOURCE To change to TV mode, press the TV button. To open and close the disc tray. RECEIVER To change to Home Cinema, press the BD button. Press numeric buttons to operate options. SLEEP BD TV RDS DISPLAY TA 1 2 3 PTY- PTY SEARCH PTY+ 4 5 6 7 8 TITLE MENU Press to view the disc menu. 0 POPUP Press to stop/play a disc. MUTE VOL S/W LEVEL TUNING / CH Press to move to the Home screen.
Getting Started Installing batteries in the Remote Control Battery size: AAA 1 2 | NOTE | Make sure to match the “+” and “–” ends of the batteries with the diagram inside the compartment. Assuming typical TV usage, the batteries last for about one year. The remote control can be used up to approximately 7 meters from the product in a straight line. Setting the Remote Control You can control certain functions of your TV with this remote control.
Connections This section describes various methods of connecting the product to other external components. Before moving or installing the product, be sure to turn off the power and disconnect the power cord. 03 Attaching the Toroidal Ferrite Core to the Power Cord of the Main Unit Connections If you attach a Toroidal ferrite core to the power cord of the main unit, it will help to prevent RF interference from radio signals. SPEAKERS OUT CENTER FRONT SUBWOOFER FRONT 1.
Connections Speaker Components SWA-5000 SCREW (5X15): 4EA SCREW (5X20): 12EA FRONT/FRONT TOP SURROUND STAND STAND BASE (L) (R) (L) Wireless Receiver Module (R) SPEAKER CABLE Speaker Cable (2EA) FRONT/FRONT TOP SURROUND CENTRE TX Card SUBWOOFER Installing the Speakers on the Tallboy Stand 1. Straighten the speaker cable and put it into the hole on the Stand Base. 2. Turn the Stand Base upside-down and connect it to the Stand. 1 2 Stand Base Stand 3.
Connecting The Speakers Red Connections LAN 03 1. Match each speaker cable bundle to the correct speaker by matching the colour coded plug on each bundle to the coloured sticker on the bottom of each speaker. 2. To attach speaker wire to each speaker: Black a. Press down the red tab on the back of the speaker, insert the red wire, and then release the tab. b. Press down the black tab on the back of the speaker, insert the black wire, and then release the tab. 3.
Connections | CAUTION | If you want to install the product on the wall, fasten the screws or nails on the wall firmly and use the holes on the rear of speaker to install. However, when you install it, accessories (nails or screws) and installation is not provided by the company. Do not let children play with or near the speakers. They could get hurt if a speaker falls. When connecting the speaker wires to the speakers, make sure that the polarity (+/–) is correct.
Connecting to an iPod/iPhone 03 Using a USB Cable Connections Connect an iPod/iPhone using the USB cable to the front USB port. ASC IN 5V 500mA 5V 500mA Using a Dock Composite cable must be connected to play a video. AUX IN SPEAKERS OUT CENTER FRONT SUBWOOFER FRONT VIDEO OUT FM ANT FRONT TOP FRONT TOP SPEAKER IMPEDANCE : 3 OPTICAL iPod LAN WIRELESS HDMI OUT 1 HDMI IN 2 DIGITAL AUDIO IN iPod | NOTE | Make sure to connect the dock connector so that the label “” faces upward.
Connections Connecting to a TV Select either Method 1 or Method 2. • If you have set the product's remote control to operate your TV, press the TV SOURCE button on the remote control, and then select the correct external source from the TV's source list (HDMI, Video In, etc.) to view video from the home cinema.
Connecting to External Devices W Red AUX IN White Connections R 03 To select the correct mode for an external device, press the FUNCTION button. Each time you press the button, the mode changes in this order : BD/DVD D. IN AUX R.
Connections Connecting to a Network Router Wireless Network You can connect your product to your network router using one of the methods illustrated below.
Settings The Initial Settings Procedure If you skip wireless network setup here, go to "Wireless Network" on page 33 to set up the product's wireless network connection later. Settings 1 . Turn on your TV after connecting the product, and then turn on the product. When you turn on the product for the first time, the product automatically displays the Initial Settings Language screen. The product starts the wireless network connection procedure by default.
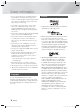
Settings Initial Settings > Network Settings (4/5) Enter security key. 0 entered - WPS PIN a b c d e f 1 2 3 Previous g h i j k l 4 5 6 Next m n o p q r 7 8 9 s t u v w x y z 0 A/a Space Skip 8 . Enter your network's security key. When done, use the ▲▼◄► buttons to select Next, and then press the E button. | NOTE | Enter numbers by pressing the number buttons on your remote.
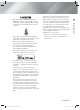
The Home Screen Initial Settings > Auto Sound Calibration 04 AllShare Play Previous Place calibration mic. here User Play videos or music, or view photos from discs or connected devices. Next Skip 2 3 4 1 Smart Hub Function 13 . The Auto Sound Calibration screen appears. Plug the ASC microphone into the ASC IN jack on the product. 14 . Press the E button to select the Next button. Setting the Auto Sound Calibration function takes about 3 minutes. Select Next, and then press the E button.
Settings Accessing the Settings Screen 1 . Select Settings on the Home screen, and then press E. The Settings screen appears. 3 E (Enter) / DIRECTION Button : ~ Press ▲▼◄► to move the cursor or select an item. ~ Press the E button to activate the currently selected item or confirm a setting. 4 EXIT Button : Press to exit the current menu.
Settings Menu Functions TV Aspect Ratio Lets you adjust the output of the product to the screen size of your TV. See page 24, Step 12 for a description of the screen size options. Smart Hub Screen Size Lets you select the optimal size for the Smart Hub Screen. BD Wise BD Wise is Samsung’s latest inter-connectivity feature.
Settings Speaker Settings Audio Auto Sound Calibration Equaliser You can set the speaker options. The product automatically recognize the sound field optimized for your environment. Let you configure the Equaliser settings manually. Smart Volume Lets you set the product so that the volume remains stable when a scene change occurs or when you change the channel. Speaker Selection Lets you select which speakers you want active, either the TV's speakers or the Home theater's speakers.
Network Network Status Let you check whether a connection to the network and the Internet have been established. Wi-Fi Direct Lets you connect a Wi-Fi Direct device to the product using a Peer-to-Peer network, without a wireless router. You can use the device to control the product. Soft AP Lets you connect other types of Wi-Fi devices to the product wirelessly. Requires that you create a security key which you must enter into the other Wi-Fi devices when you are connecting them to the network.
Settings System Initial Settings Lets you re-run the Initial Settings procedure. See page 23 for details. You can connect a wireless USB keyboard or mouse to the USB port on the front of the product. Keyboard Settings: Lets you configure a wireless USB keyboard connected to the product. | NOTE | You can use the keyboard only when a QWERTY keyboard screen or window appears in the Web Browser. Mouse Settings: Lets you configure a wireless USB mouse connected to the product.
The default PIN is 0000. Enter the default PIN to access the security function if you haven't created your own password. 04 Settings Security BD Parental Rating: Prevents playback of Blu-ray Discs with a rating equal to or above a specific age rating you enter unless the PIN is entered. DVD Parental Rating: Prevents playback of DVDs with a rating above a specific numerical rating you select unless the PIN is entered. Change PIN: Change the 4-digit PIN used to access security functions.
Settings Auto Sound Calibration By setting the Auto Sound Calibration (ASC) function just once when you relocate or install the product, you can have the product automatically recognize the distance between speakers, levels between channels, and frequency characteristics to create a 7.1-channel sound field optimized for your environment.
< Getting the Network Settings Values > Wired - Manual If you have a static IP address or the Automatic procedure does not work, you'll need to set the Network Settings values manually. You can view your Network Settings values on most Windows computers. To view the Network Settings values, follow these steps: 04 After following Steps 1 to 3 above: • Windows XP 1 . Select Start in the Network Settings screen, and then press the E button. The Network Status screen appears.
Settings Wireless (General) - Automatic After following Steps 1 to 3 in "Configuring Your Network Connection" on page 32. 1 . Select Start in the Network Settings screen, and then press the E button. The product searches for and then displays a list of the available networks. Network Settings Select your wireless router from the list. 1/10 iptime23 Refresh ELT WPS(PBC) JSY Previous KT_WLAN_C361 Mirhenge_edu Next Cancel SO070VOIP 2 . Select the desired network, and then press the E button. 3 .
5 . You have three ways to complete the Wi-Fi connection: WPS(PBC) 1 . Open the Home screen. Each is covered below. 2 . Press the BLUE (D) button on the remote control. 3 . Press the WPS(PBC) button on your router within two minutes. Your product automatically acquires all the network settings values it needs and connects to your network. The Network Status screen appears. The product connects to the network after the network connection is verified.
Settings 4 . The Connecting pop-up appears, followed by the Connected pop-up. When it closes, you should see the device listed on the Wi-Fi Direct screen as connected. | NOTE | The wired or wireless network connection will be disconnected when you use the Wi-Fi Direct function. Soft AP Soft AP lets you connect other Wi-Fi devices to your network through the product and lets them access the Internet.
Upgrading Software 1 . In the Home menu, select the Settings, and then press the E button. 6 . If you select Don’t update, the product cancells the upgrade. 2 . Select Support, and then press the E button. By USB 3 . Select Software Update, and then press the E button. 1 . Visit www.samsung.com. 4 . Select one of the following methods: • Online 3 . Enter the product's model number into the search field, and then click Find Product. • By USB • By Disc 2 . Click SUPPORT on the top right of the page.
Settings By Disc 4 . When the update is complete, the product turns off automatically, and then turns on. 1 . Visit www.samsung.com. | NOTE | 2 . Click SUPPORT on the top right of the page. When the system upgrade is done, check the software details in the Software Update menu. 3 . Enter the product's model number into the search field, and then click Find Product. 4 . Click Get downloads in the centre of the page below the Downloads header.
Media Play Playing Video, Photo, or Music Content To access the AllShare Play screen, select the AllShare Play icon on the Main screen, and then press the E button. 1 . Make sure that the source of the content you want to play or view is connected to or inserted into the product. Using the AllShare Play Screen 2 . Use the ▲▼ buttons to select Videos, Photos, or Music, and then press the E button. The first source selection on the right side is highlighted. AllShare Play / My list / 3 .
Media Play Playing Files on a USB Storage Device or iPod/iPhone You can play multimedia files located on a connected USB device. 1 . With the product turned off, connect a USB storage device or an iPod/iPhone. 2 . Turn on the product. When the Main screen appears, select AllShare Play > Videos, Photos or Music > Connected Device, and then press the E button. 3 . The kind of content you selected on the connected device is displayed.
The Function Screen You can also change sources by pressing the Function button in the upper right of the remote. AllShare Play / Music / To access the Function Screen, select the Function icon on the Main screen, and then press the E button. Options on the Function Screen To select, highlight an option using the ▲▼ buttons, and then press the E button.
Media Play Playing a Disc with User Recorded Content You can play mulitmedia files you have recorded on DVD or CD discs. 1 . Place a user recorded disc into the disc tray with the disc’s label facing up, and then close the tray. The Device Connected pop-up appears. For more information about playing photo contents, go to Playing Photo Contents and Using the Tools Menu when a File is Highlighted on pages 49~51.
Playing Content Located on Your PC or DLNA Device through the Product Product PC Product Play back PC's files Play back PC's files AllShare Connection 1 . Connect the product, your PC, and/or your DLNA compatible cell phone to the same wireless network. 2 . Follow the directions in the AllShare software Installation/Instruction manual to set up devices and files for playing or viewing. 3 . Select AllShare Play in the product's Home screen, and then press the E button. The AllShare Play screen appears.
Media Play Controlling Video Playback You can control the playback of video files located on Blu-ray, DVD, and CD discs, and on USB storage devices. Depending on the disc, some of the functions described in this manual may not be available. Buttons on the Remote Control used for Video Playback DISC MENU TITLE MENU 0 POPUP Using the disc menu, title menu, popup menu and title list DISC MENU During playback, press this button to display the Disc menu.
Menu that appears only when BD/DVD disc During playback, press the TOOLS button. plays Repeat Mode Select to repeat a specific Title, Chapter (BD/DVD discs only) or marked section. Works the same as the REPEAT button. See page 44. Full Screen Select to set the desired full screen size. You can select Original, Mode1 (larger), and Mode2 (largest). Picture Mode Select to set the picture mode. - Dynamic : Choose this setting to increase sharpness.
Media Play Shuffling Tracks on an Audio CD Controlling Music Playback You can control the playback of music content located on a DVD, CD, or a USB storage device. You can set the product to play tracks on an audio CD (CD-DA/MP3) at random. Buttons on the Remote Control used for Music Playback 1 . During playback, use the ► button to select in the lower right corner of the screen, and then press the E button.
• Cancel cancells any changes you made on the Play Select screen. When you return to the Playback screen, the Playlist will be unchanged. Ripping You can rip music from a music CD to a USB device inserted in the USB jack. 1 . Insert a USB device into the USB jack on the front of the product, and then press the RETURN (') button on your remote. 2 . Insert the disc you want to rip from into the product and close the disc tray. 3 . With the Playback screen displayed, press the TOOLS button.
Media Play To connect the Home Cinema to a Bluetooth device Connect Bluetooth device Check if the Bluetooth device supports the Bluetoothcompliant stereo headset function. 1 . Press the FUNCTION button on the remote control of product to display the BT message. • You will see WAIT for 2 seconds and then READY on the front display of the Home Cinema. 2 . Select the Bluetooth menu on Bluetooth device you want to connect. (refer to Bluetooth device's user manual) 3 .
Playing Photo Contents During playback, press the TOOLS button. Go to Photos List Select to go to the list of photos on the current media. Start Slide Show Select to start the slide show. Slide Show Speed Select to set a slide show's speed. Slide Show Effect Select to set a slide show's special effects. Background Music On Select to listen to music while viewing a slide show. Background Music Setting Picture Mode Select to set the background music setting. Select to set the picture settings.
Media Play Earliest Date Appears on the View function screen. Select to sort and then display all photo or video files on a storage device from the earliest to latest date. Monthly Appears on the View function screen. Select to sort all photo or video files on a storage device by the month created. Play selection lets you select specific music, video, and photo files to play. It works essentially the same for all media. The example below is for photos. 1.
Select Edit playlist to remove files or tracks from an existing playlist. The storage device containing the playlist must be inserted into or attached to the product. Edit playlist 1. Use the ▲▼◄► buttons to select a file, and then press the E button. 2. Repeat for each track or file you want to remove. | NOTE | You can also move to Select All on the right, and then press the E button to select all tracks or files. 3. Select Remove on the right side, and then press the E button.
Media Play Presetting Stations Example : Presetting FM 89.10 into memory. 1 . Press the FUNCTION button to select FM. 2 . Press the TUNING/CH (,.) button to select <89.10>. 3 . Press the TUNER MEMORY button. • NUMBER flashes on the display. 4 . Press the TUNER MEMORY button again. • Press the TUNER MEMORY button before NUMBER disappears from the display on its own. • After you press the TUNER MEMORY button, NUMBER disappears from the display and the station is stored in memory. 5 .
PTY (Program Type) indication and PTY-SEARCH function 05 Media Play One of the advantages of the RDS service is that you can locate a particular kind of program from the preset channels by specifying the PTY codes. Using the Special Effects Remote Control Buttons 3D Sound To search for a program using the PTY You can enjoy more natural and vivid surround sound with enriched tones by adjusting the depth of sound using the level options.
Media Play SOUND SOUND EFFECT Function EFFECT • Philharmonic Hall in Bratislava (Hall 2) : Provides also a clear vocal as if listening in a concert hall but, less powerful than HALL1. • Jazz Club in Seoul B : Recommended setting for Jazz. Lets you select a mode that optimizes the sound. 1. Press the SOUND EFFECT button. 2. Press the ▲▼ button to select the desired mode: DSP, Dolby Pro Logic II or SFE Mode. 3. Press the ◄► buttons to select the desired sound effect.
Network Services Smart Hub at a Glance 1 34 Network Services To use network services, you must first: 2 06 You can enjoy various network services such as Smart Hub or BD-LIVE by connecting the product to your network. Search 1 . Connect the product to the network. (See page 22) 2 . Configure the network settings.
Network Services 9 My Applications : Displays your personal gallery of applications which you can add to, modify, and delete. 0 Samsung Apps : Open Samsung Apps to download various for pay or free-of-charge application services. Web Browser at a Glance 1 http://www.google.com/ Using the Web Browser You can access the internet using the Web Browser application which is installed in the Smart Hub screen by default. Google Search b Control Panel Link Browsing / Tools ' Exit 1 .
06 2 Navigation Help : Displays the remote control buttons you can use to navigate in Web Browser. • GREEN (B) : To display the Control Panel. • YELLOW (C) : To search a link. • Tools : To display Tools window. • Exit : To return to the previous menu. Network Services BD-LIVE™ Once the product is connected to your network, you can enjoy various movie-related service contents available on BD-LIVE compliant discs. 1 .
Appendix Additional Information Note HDMI OUT Connections • Certain HDMI output resolutions may not work, depending on your TV. • You must have an HDMI connection to enjoy videos with 3D technology. • A long HDMI cable may cause screen noise. If this occurs, set HDMI Deep Colour to Off in the menu. 3D Settings • For some 3D discs, to stop a movie during 3D playback, press the 5 button once. The movie stops and the 3D mode option is de-activated.
Anynet+ (HDMI-CEC) Appendix BD Data Management 07 • Depending on your TV, certain HDMI output resolutions may not work. Please refer to the user manual of your TV. • This function is not available if the HDMI cable does not support CEC. • If your Samsung TV has an Anynet+ logo, then it supports the Anynet+ function. • In the external memory mode, disc playback may be stopped if you disconnect the USB device in the middle of playback. • Only those USB devices formatted in the FAT file system (DOS 8.
Appendix Playing a Video files • Video files with high bit rates of 20Mbps or more strain the product’s capabilities and may stop playing during playback. Selecting the Audio Language • The ◄► indicator will not appear on the screen if the BONUSVIEW section does not contain any BONUSVIEW audio settings. • The languages available through the Audio Language function depend on the languages that are encoded on the disc. This function or certain languages may not be available.
Playing Music AllShare Play • You must have the VIDEO output (Composite) connected to your TV to view iPod video (See page 20). • If you want to play iPod video via VIDEO output, set Anynet+ (HDMI-CEC) to off. • Only the playback screen will appear on the TV. View other iPod screens on the iPod player. • If you want to return to the iPod menus while the iPod player is connected using the dock, press FUNCTION on the remote control or press on the front panel of the system and select R. IPOD.
Appendix Resolution according to the output mode Blu-ray Disc/E-contents/Digital Contents playback HDMI/connected Output Setup HDMI/not connected HDMI Mode Blu-ray Disc E-contents/ Digital contents VIDEO Mode VIDEO Mode BD Wise Resolution of Bluray Disc 1080p@60F 576i/480i - Auto Max. Resolution of TV input Max.
Digital Output Selection PCM Bitstream (Re-encoded Dolby D) HDMI supported AV receiver PCM DTS re-encoded Re-encoded Dolby Digital * Dolby Digital Up to PCM 7.1ch Dolby Digital DTS re-encoded Re-encoded Dolby Digital * Dolby Digital Up to PCM 7.
Appendix Troubleshooting Refer to the table below when this product does not function properly. If the problem you are experiencing is not listed below or if the instructions below do not help, turn off the product, disconnect the power cord and contact the nearest authorized dealer or Samsung Electronics Service Centre. Symptom Check/Remedy I cannot eject the disc. • Is the power cord plugged securely into the outlet? • Turn off the power and then turn it back on. The iPod fails to connect.
Symptom Check/Remedy • Are you using a disc that does not contain menus? The aspect ratio cannot be changed. • You can play 16:9 Blu-ray/DVD discs in 16:9 Full mode, 4:3 Letter Box mode, or 4:3 Pan-Scan mode, but 4:3 Blu-ray/DVD discs are played in 4:3 ratio only. Refer to the Blu-ray Disc jacket and then select the appropriate function. • The product is not working. (Example: The power goes out or a strange noise is heard.) • Press and hold the remote control's 5 button for 5 seconds in STANDBY mode.
Appendix Symptom Check/Remedy AllShare Play function I can see folders shared through AllShare Play, but I cannot see the files. • AllShare Play shows only files corresponding to the Photo, Music, and Movie categories. Files that do not correspond to these categories may not be displayed. Video is played intermittently. • Check if the network is stable. • Check if the network cable is properly connected and if the network is not overloaded.
Specifications FM Tuner 430 (W) x 65 (H) x 353.5 (D) mm Operating Temperature Range +5°C to +35°C Operating Humidity Range 10 % to 75 % Signal/noise ratio 55 dB Usable sensitivity 12 dB Total harmonic distortion 0.5 % BD (Blu-ray Disc) Reading Speed : 9.834 m/sec DVD (Digital Versatile Disc) Disc CD : 12cm (COMPACT DISC) CD : 8cm (COMPACT DISC) Video Output Composite Video Video/Audio Amplifier 3.9 kg Dimensions HDMI Reading Speed : 6.98 ~ 7.68 m/sec. Approx.
Appendix 7.
Contact SAMSUNG WORLD WIDE If you have any questions or comments relating to Samsung products, please contact the SAMSUNG customer care centre. Area ` Europe Albania Austria Contact Centre 42 27 5755 0810 - SAMSUNG (7267864, € 0.07/min) 02-201-24-18 Bosnia Bulgaria Croatia 05 133 1999 07001 33 11 062 SAMSUNG (062 726 7864) 800-SAMSUNG (800-726786) Samsung Zrt.
HT-E6750W Système Home Entertainment Blu-ray™ 7,1 canaux Manuel d'utilisation imaginez les possibilités Merci d'avoir acheté ce produit Samsung. Pour obtenir notre service complet, veuillez enregistrer votre produit sur www.samsung.com/register HT-E6750W_XU_FRA_0223.
Consignes de Sécurité Avertissement POUR RÉDUIRE LES RISQUES D’ÉLECTROCUTION, NE RETIREZ JAMAIS LE CAPOT (NI L’ARRIÈRE). LES PIÈCES DE CE PRODUIT NE SONT PAS RÉPARABLES PAR L’UTILISATEUR. VEUILLEZ CONTACTER UN TECHNICIEN QUALIFIÉ POUR TOUTE RÉPARATION. ATTENTION RISQUE D’ÉLECTROCUTION NE PAS OUVRIR Ce symbole indique la présence d’une tension dangereuse dans l’appareil, présentant un risque d’électrocution ou de blessures.
Rangement et gestion des disques • Évitez toute projection d’eau sur l’appareil. Ne posez jamais d’objet contenant un liquide (ex : un vase) dessus. • Pour éteindre complètement l'appareil, vous devez retirer le cordon d'alimentation de la prise murale. Par conséquent, le cordon d'alimentation doit être facilement accessible à tout moment. • Ne tenez pas le cordon d'alimentation avec les mains mouillées. Vous risquez de vous exposer à un choc électrique.
Consignes de Sécurité • N'utilisez pas la fonction 3D ou les lunettes Active 3D en marchant ou en bougeant. En utilisant la fonction 3D ou en portant des lunettes Active 3D en cours de marche ou de mouvement, vous risquez de vous cogner contre des objets, de trébucher et/ou de tomber, et de vous blesser gravement.
Consignes de Sécurité • Oracle et Java sont des marques déposées de Oracle et/ou ses filiales. D'autres noms mentionnés peuvent être des marques de commerce de leurs propriétaires respectifs. • Ce produit intègre la technique de protection contre la copie applicable aux brevets américains ainsi que d’autres droits de propriété intellectuelle de Rovi Corporation. Il est interdit de tenter de démonter l’appareil et d’en étudier le fonctionnement en vue de le reproduire.
Sommaire CONSIGNES DE SÉCURITÉ 2 3 3 3 4 4 Avertissement Rangement et gestion des disques Précautions de manipulation Utilisation de la fonction 3D Copyright Licence MISE EN ROUTE 7 8 11 12 12 13 Compatibilité des disques et des formats Logos des disques pouvant être lus sur cet appareil Accessories Panneau avant Panneau arrière Télécommande BRANCHEMENTS 15 15 16 16 17 18 19 19 19 20 20 20 21 21 21 21 22 22 22 Fixation du noyau torique en ferrite au cordon d’alimentation de l'unité principale Conne
Mise en Route Compatibilité des disques et des formats Type de disque Disque Blu-ray Disque Blu-ray 3D VIDÉO Mise en Route Support 02 Types de disques et contenus pouvant être lus sur cet appareil Détails Disque BD-ROM ou BD-RE/-R disc enregistré au format BD-RE. DVD-VIDEO, DVD-RW, DVD-VIDEO, disques DVD+RW/DVD-RW(V)/DVD-R/+R enregistrés qui ont été DVD-R, DVD+RW, enregistrés et finalisés, ou un support de stockage USB possédant des contenus DivX, MKV, MP4.
Mise en Route Code régional Les produits et les disques sont codés par région. Ces codes régionaux doivent correspondre pour que le disque puisse être lu. Si les codes ne correspondent pas, le disque ne sera pas lu. Le code régional de ce lecteur figure sur le panneau arrière de l’appareil. Type de disque Code régional A Disque Blu-ray Disque Blu-ray Disque Blu-ray 3D BD-LIVE Dolby DTS DivX Norme de lecture PAL au Royaume-Uni, en France, en Allemagne, etc.
Prise en charge des fichiers vidéo *.mkv *.asf *.wmv *.mp4 *.3gp *.vro *.mpg *.mpeg *.ts *.tp *.trp Vitesse de défilement (FPS) Débit binaire (Mbps) DivX 3.11/4.x /5.1/6.0 H.264 BP/MP/HP MPEG4 SP/ASP DivX 3.11/4.x /5.1/6.0 MKV H.264 BP/MP/HP MPEG4 SP/ASP DivX 3.11/4.x /5.1/6.0 ASF H.264 BP/MP/HP MPEG4 SP/ASP Media WMV (wmv9) Window Video v9 H.
Mise en Route Décodeur vidéo - Prend en charge le format H.264 de niveau 4.1 - Ne prend pas en charge les formats H.264 FMO/ASO/RS, VC1 SP/MP/AP L4 et AVCHD - MPEG4 SP, ASP : Inférieure à 1280 x 720 : 60 images maxi. Supérieure à 1280 x 720 : 30 images maxi.
Accessoires 02 Vérifiez que les accessoires ci-dessous sont fournis.
Mise en Route Panneau avant AMPLIFICATEUR À TUBE À VIDE RÉGLAGE DU VOLUME OUVERTURE/FERMETURE ENTRÉE MARCHE/ARRÊT ARRÊT TIROIR DISQUE MARCHE/ ARRÊT FONCTION ASC IN 5V 500mA ÉCRAN ENTRÉE ASC HÔTE USB CAPTEUR DE LA TÉLÉCOMMANDE | REMARQUE | Des interférences risquent de se produire si un téléphone portable ou tout autre appareil mobile ou électronique est posé à proximité ou sur l’amplificateur à tube à vide.
Télécommande 02 Boîtier de la télécommande Pour passer en mode TV, appuyez sur la touche TV. Pour passer en mode Home Cinéma, appuyez sur la touche BD. Appuyez sur les touches numériques pour commander les options. Appuyez sur cette touche pour visualiser le menu du disque. Appuyez sur ces touches pour effectuer un saut vers l'arrière ou l'avant. Appuyez ici pour arrêter ou démarrer la lecture d'un disque. Permet de couper le son momentanément. Permet de régler le volume.
Mise en Route Insertion des piles dans la télécommande Code Marque Code Admiral (M.Wards) 56, 57, 58 Mitsubishi/MGA 18, 40, 59, 60, 75 A Mark 01, 15 Anam 01, 02, 03, 04, 05, 06, 07, 08, 09, 10, 11, 12, 13, 14 AOC 01, 18, 40, 48 Marque Taille des piles : AAA 1 Codes TV utilisables 2 | REMARQUE | Veillez à faire correspondre les extrémités « + » et « - » des piles avec le dessin situé à l’intérieur du compartiment.
Branchements Fixez un noyau torique en ferrite au cordon d’alimentation de l'unité principale, afin d’empêcher la génération d’interférences RF à partir de signaux radio. 1. Tirez sur la languette de fixation du noyau torique en ferrite pour l’ouvrir. 2. Enroulez en boucle le cordon d’alimentation de l'unité principale deux fois. 3. Reliez le noyau torique en ferrite au cordon d’alimentation de l'unité principale, tel qu’indiqué sur la figure puis appuyez dessus jusqu’à ce qu’il s’enclenche.
Branchements Accessoires des enceintes SWA-5000 VIS (5X15) : 4EA VIS (5X20) : 12EA ENCEINTES AVANT/SUPÉRIEUR AMBIOPHONIQUES AVANT PIED SOCLE (G) (D) (G) (D) Module de réception sans fil CÂBLE POUR ENCEINTE Câble pour enceinte Carte TX (2EA) AVANT/SUPÉRIEUR ENCEINTES AVANT AMBIOPHONIQUES CENTRE CAISSON DE GRAVES Installation des enceintes sur le pied type Tallboy 1. Redressez le câble pour enceinte et insérezle dans l’orifice sur le socle. 2. Retournez le socle et emboîtez-le sur le pied.
Connexion des enceintes Enceinte centrale Rouge Branchements LAN 03 1. Chaque ensemble de câble d'enceinte doit être relié à l'enceinte correspondante. Pour cela, la prise avec le codage couleur sur chaque ensemble doit correspondre à l'autocollant coloré situé sur la face inférieure de chaque enceinte. 2. Pour fixer le câble d'enceinte à chaque enceinte : a. Appuyez sur la languette rouge située à l’arrière de l’enceinte, insérez le câble Noir rouge, puis relâchez la languette. b.
Branchements | ATTENTION | Si vous souhaitez installer l'appareil au mur, fixez les vis ou les clous fermement au mur et utilisez pour l'installation les orifices situés à l'arrière de l'enceinte. Cependant, lorsque vous installez l'appareil au mur, les accessoires (clous ou vis) et l'installation ne sont pas fournis par notre entreprise. Ne laissez pas jouer des enfants avec ou à proximité des enceintes. Ils peuvent se blesser en cas de chute d'une enceinte.
Connexion à l’iPod/iPhone 03 Utilisation d'un câble USB Branchements Branchez un iPod/iPhone à l'aide d'un câble USB sur le port USB avant. ASC IN 5V 500mA 5V 500mA Utilisation d’un dock Le câble composite doit être branché pour pouvoir lire une vidéo.
Branchements Connexion de l'appareil à un téléviseur Sélectionnez la méthode 1 ou la méthode 2. • Si vous avez réglé la télécommande de l'appareil pour commander votre téléviseur, appuyez sur la touche TV SOURCE de la télécommande puis sélectionnez la source externe correcte parmi la liste des sources du téléviseur (HDMI, Entrée vidéo, etc.) pour visualiser une vidéo à partir du Home cinéma.
Connexion de périphériques externes W Rouge AUX IN Blanc VIDEO OUT Branchements R 03 Pour sélectionner le mode correct pour un périphérique externe, appuyez sur la touche FUNCTION. Chaque appui sur cette touche change le mode selon cet ordre : BD/DVD D. IN AUX R.
Branchements Connexion à un routeur réseau Réseau sans fil Vous pouvez connecter votre appareil à votre routeur réseau en utilisant l'une des méthodes illustrées ci-dessous.
Paramètres | REMARQUE | Procédure de réglage des paramètres initiaux Paramètres 1 . Mettez votre téléviseur sous tension après avoir connecté l'appareil, puis mettez ce dernier à son tour sous tension. Lorsque vous mettez l'appareil sous tension pour la première fois, il affiche automatiquement l'écran Langue des paramètres initiaux.
Paramètres Configuration > Paramètres réseau (4/5) Entrez clé de sécurité. 0 entré. a b c d e 1 2 3 Précédent Suivant g h i j k l 4 5 6 m n o p q r 7 8 9 s t u v w x y z 0 A/a PIN WPS f Espace Ignorer 8 . Saisissez le code de sécurité de votre réseau. Puis, sélectionnez Suivant à l’aide des boutons ▲▼◄►, et appuyez sur le bouton E. | REMARQUE | Saisissez les nombres en appuyant sur les touches numériques de votre télécommande.
L'écran Accueil Configuration > Etalonnage automatique du son 1/4 04 AllShare Play Précédent Appuyez sur Suivant pour définir le meilleur niveau de sortie du hautparleur. App. sur Ignorer pour configurer ultérieurement. Placez le micro d'étalonnage ici Utilisateur Lisez des vidéos, des photos ou de la musique à partir du disque ou des périphériques connectés. Suivant Ignorer 2 3 4 1 Smart Hub 13 . L’écran Calibrage automatique du son apparaît.
Paramètres Accéder à l'écran Paramètres 1 . Sélectionnez Paramètres sur l'écran Accueil, puis appuyez sur E. L'écran Paramètres apparaît. Paramètres 3D Affichage Format TV 16:9 Original Taille écran Smart Hub Audio Réseau Système Assistance Taille 3 BD Wise Arrêt Résolution Auto. Trame vidéo (24Fs) Auto. Format couleur HDMI Auto. Couleur intense HDMI Auto. Mode progressif Auto. 3 Touche E (Entrée) / DIRECTION : ~ Appuyez sur ▲▼◄► pour déplacer le curseur ou sélectionner un élément.
Fonctions du menu Paramètres Vous permet de régler la sortie de l'appareil sur la taille de l'écran de votre téléviseur. Pour obtenir une description des options de la taille de l'écran, reportez-vous à la page 24, Étape 12. Taille écran Smart Hub Vous permet de sélectionner la taille optimale pour l'écran Smart Hub. BD Wise BD Wise est la fonctionnalité d’interconnectivité de Samsung la plus récente.
Paramètres Audio Paramètre haut-parleur Cette option vous permet de régler les options des enceintes. Etalonnage automatique du son L’appareil reconnaît automatiquement le champ acoustique adapté à votre environnement. Egaliseur Cette option vous permet de configurer manuellement les réglages de l'égaliseur. Vol. intelligent Cette option vous permet de régler l'appareil de sorte que le volume demeure stable lorsqu'un changement de scène se produit ou lorsque vous changez de chaîne. Sélect.
Réseau Pour obtenir de plus amples informations sur les Paramètres réseau et les fonctions réseau, reportez-vous à la section « Réseaux et Internet » à partir de la page 32. 04 Paramètres réseau Cette option vous permet de vérifier si la connexion au réseau et à Internet a été établie. Wi-Fi Direct Cette option vous permet de connecter à l'appareil un périphérique directement par Wi-Fi en utilisant un réseau point à point, sans utiliser un routeur sans fil.
Paramètres Système Configuration Cette option vous permet de relancer la procédure de réglage des paramètres initiaux. Reportez-vous à la page 23 pour les détails. Vous pouvez brancher une souris ou un clavier USB sans fil au port USB situé à l'avant de l'appareil. Paramètres clavier: cette option vous permet de configurer un clavier USB sans fil connecté à l'appareil.
Paramètres Sécurité Contrôle parent. BD: cette option empêche la lecture des disques Blu-ray ayant une classification égale ou supérieure à une classification d'âge particulière que vous avez définie jusqu'à la saisie du code PIN. Contrôle parent. DVD: cette option empêche la lecture des disques DVD ayant une classification supérieure à une classification numérique particulière que vous avez sélectionnée jusqu'à la saisie du code PIN.
Paramètres Calibrage automatique du son En réglant la fonction ASC (Calibrage automatique du son) lorsque vous déplacez ou installez l’appareil pour la première fois, l’appareil reconnaît automatiquement la distance entre les enceintes, les niveaux entre les canaux et les caractéristiques de la fréquence pour créer un champ acoustique 7.1 canaux adapté à votre environnement.
< Obtenir les valeurs des paramètres réseau > Câblé – Manuel • Windows XP 1 . Cliquez avec le bouton droit sur l'icône Réseau, située en bas à droite du bureau de Windows. 2 . Dans le menu contextuel, cliquez sur État. Paramètres Vous pouvez visualiser les valeurs de vos paramètres réseau sur la plupart des ordinateurs Windows.
Paramètres Sans fil (Général) - Automatique Après avoir suivi les Étapes 1 à 3 dans « Configuration de votre connexion réseau » en page 32. 1 . Sélectionnez Démarrer sur l'écran Paramètres réseau puis appuyez sur le bouton E. L'appareil recherche puis affiche une liste des réseaux disponibles. Paramètres réseau Sélectionnez routeur sans fil dans la liste. 1/10 iptime23 Rafraîchir ELT WPS(PBC) JSY Précédent KT_WLAN_C361 Mirhenge_edu Suivant Annuler SO070VOIP 2 .
WPS(PBC) 2 . Appuyez sur le bouton BLEU (D) de la télécommande. 3 . Appuyez sur le bouton WPS(PBC) situé sur votre routeur dans les deux minutes qui suivent. L'appareil obtient automatiquement toutes les valeurs des paramètres réseau nécessaires et se connecte au réseau. L'écran État du réseau apparaît. L'appareil se connecte au réseau une fois que la connexion réseau a été confirmée.
Paramètres 4 . La fenêtre contextuelle de connexion s’affiche, suivie de la fenêtre contextuelle Connecté. Lorsqu’elle se ferme, vous devez voir le périphérique listé sur l’écran Wi-Fi Direct en tant que connecté. | REMARQUE | La connexion au réseau câblée ou sans fil sera déconnectée lorsque vous utilisez la fonction Wi-Fi Direct. Soft AP La fonction Soft AP vous permet de connecter d’autres périphériques Wi-Fi à votre réseau via l'appareil et leur permet un accès à Internet.
Mise à niveau du logiciel 1 . Sur l'écran Accueil, sélectionnez Paramètres, puis appuyez sur le bouton E. 2 . Sélectionnez Assistance puis appuyez sur le bouton E. 3 . Sélectionnez Mise à jour du logiciel, puis appuyez sur le bouton E. 4 . Sélectionnez l’une des méthodes suivantes : • En ligne • USB • Via disque • Par téléch. • Mise à niveau en mode veille 5 . Appuyez sur le bouton E. Les instructions concernant chaque méthode commencent ci-dessous.
Paramètres Via disque 1 . Connectez-vous sur www.samsung.com. 2 . Cliquez sur SUPPORT en haut à droite de la page. 3 . Saisissez le numéro de modèle de l'appareil dans le champ de recherche, puis cliquez sur Find Product. 4 . Cliquez sur Get downloads au centre de la page sous l’en-tête Téléchargements. 5 . Cliquez sur Firmware au centre de la page. 6 . Cliquez sur l’icône ZIP dans la colonne Fichier sur le côté droit de la page. 7 .
Media Play Pour accéder à l’écran AllShare Play, sélectionnez l’icône AllShare Play sur l’écran principal, puis appuyez sur le bouton E. Utilisation de l’écran AllShare Play AllShare Play / Ma List / Dern. lectures Vidéos Les fichiers récemment lus s'afficheront ici. Nouveautés M.à.j. récente 09.Jan.2012 Développer Photos SAM_0001 SAM_0002 SAM_0003 SAM_0004 Aucune liste de lecture créée. Créez une liste lecture pour accès facile et rapide au contenu.
Media Play Lecture des fichiers sur un périphérique de stockage USB ou sur l'iPod/iPhone Vous pouvez lire les fichiers multimédia situés sur un périphérique USB connecté. 1 . L’appareil étant hors tension, connectezlui un périphérique de stockage USB ou un iPod/iPhone. 2 . Mettez l'appareil sous tension. Lorsque l’écran principal s’affiche, sélectionnez AllShare Play > Vidéos, Photos ou Musique > Périph. connecté, puis appuyez sur le bouton E. 3 .
L’écran Fonction 1 . Placez un disque audio pré-enregistré du commerce dans le tiroir disque en veillant à ce que l'étiquette du disque soit orientée vers le haut puis fermez le tiroir disque. L’écran Musique Lecture AllShare s’affiche listant les pistes de lecture. La lecture démarre automatiquement à la première piste. AllShare Play / Musique / Options de l’écran Fonction Pour sélectionner, mettez une option en surbrillance à l’aide des touches ▲▼ puis appuyez sur le bouton E.
Media Play Lecture d’un disque dont le contenu est enregistré par l’utilisateur Vous pouvez lire les fichiers multimédia que vous avez enregistrés sur des disques DVD ou CD. 1 . Placez un disque enregistré par l'utilisateur dans le tiroir disque en veillant à ce que l'étiquette du disque soit orientée vers le haut puis fermez le tiroir disque. La fenêtre contextuelle du périphérique connecté s’affiche. 2 .
Commander la lecture du contenu de votre ordinateur avec votre Smartphone 05 Lecture du contenu situé sur votre ordinateur ou un périphérique DLNA via l'appareil Ordinateur Appareil Appareil Connexion AllShare Lecture des fichiers de l’ordinateur Lecture des fichiers de l’ordinateur Connexion AllShare Commande des fichiers de l’ordinateur sur l'appareil Smartphone 1 . Connectez l'appareil, votre ordinateur, et/ou votre téléphone mobile compatible DLNA au même réseau sans fil.
Media Play Contrôle de la lecture Vidéo Vous pouvez contrôler la lecture des fichiers vidéo situés dans les disques Blu-ray, DVD et CD et sur les périphériques de stockage USB. En fonction du disque, certaines fonctions décrites dans ce manuel peuvent ne pas être disponibles.
Menu qui s’affiche uniquement lors de la Durant la lecture, appuyez sur le bouton TOOLS. lecture d’un disque BD/DVD Mode Répétition Sélectionnez cette option pour répéter un titre, un chapitre spécifique (uniquement pour les disques BD/DVD) ou la section repérée. Fonctionne de la même façon que la touche REPEAT. Reportez-vous à la page 44. Plein écran Sélectionnez cette option pour régler la taille plein écran désirée. Vous pouvez sélectionner Original, Mode1 (plus grand) et Mode2 (le plus grand).
Media Play Contrôle de la lecture de Musique Lecture aléatoire des pistes d’un CD Audio Vous pouvez contrôler la lecture du contenu musical situé sur un DVD, CD ou un périphérique de stockage USB. Vous pouvez régler l'appareil pour lire les pistes d’un CD audio (CD-DA/MP3) de façon aléatoire. 1 . Pendant la lecture, utilisez la touche ► pour sélectionner dans le coin à droite en bas de l’écran, puis appuyez sur le bouton E. 2 .
Vous pouvez extraire de la musique d’un CD ou d’un périphérique USB inséré dans la prise USB. 1 . Insérez un périphérique USB dans la prise USB située à l'avant de l'appareil, puis appuyez sur le bouton RETURN (') de votre télécommande. 2 . Insérez le disque que vous souhaitez extraire dans l'appareil et fermez le tiroir disque. 3 . Lorsque l’écran Lecture est affiché, appuyez sur TOOLS. Le menu Outils s’affiche. 4 . Utilisez les touches ▲▼ pour sélectionner Extract., puis appuyez sur le bouton E.
Media Play Pour connecter le Home cinéma à un périphérique Bluetooth Connecter Périphérique Bluetooth Vérifiez que le périphérique Bluetooth prend en charge la fonction écouteurs stéréo compatible Bluetooth. 1 . Appuyez sur la touche FUNCTION de la télécommande de l'appareil pour afficher le message BT. • Le message WAIT reste affiché pendant 2 secondes, puis le message READY apparaît sur la façade du Home cinéma. 2 . Sélectionnez le menu Bluetooth de l’appareil Bluetooth que vous désirez connecter.
Visionnage des photos Durant la lecture, appuyez sur le bouton TOOLS. Liste des photos Sélectionnez cette option pour accéder à la liste des photos du support actuel. Lancer le diaporama Sélectionnez cette option pour démarrer le diaporama. Vit. diaporama Sélectionnez cette option pour régler la vitesse du diaporama. Effet du diaporama Sélectionnez cette option pour régler les effets spéciaux du diaporama. Musique de fond activ.
Media Play S’affiche sur l’écran de la fonction Vue. Sélectionnez cette option pour trier Date + ancienne de la date la plus ancienne à la plus récente les fichiers photo ou vidéo d’un périphérique de stockage. Mensuel Lire sélection Sélectionnez l’option Envoyer pour télétransmettre des fichiers à Picasa, Facebook, Cloud Storage, N Drive ou Family Story. Pour utiliser Envoyer, vous devez ouvrir un compte avec le site en ligne, puis vous connecter en utilisant la fonction Se connecter. 1.
Sélectionnez Modif liste lec pour retirer des fichiers ou des pistes d’une liste de lecture existante. Le périphérique de stockage contenant la liste de lecture doit être inséré dans ou connecté à l'appareil. Modif liste lec 1. Utilisez les touches ▲▼◄► pour sélectionner un fichier, puis appuyez sur le bouton E. 2. Répétez pour chaque piste ou fichier que vous voulez retirer. | REMARQUE | Vous pouvez aussi accéder à Sélect.
Media Play Préréglage des stations Exemple : Préréglage de FM 89.10 dans la mémoire. 1 . Appuyez sur la touche FUNCTION pour sélectionner FM. 2 . Appuyez sur la touche TUNING/CH (,.) pour sélectionner <89.10>. 3 . Appuyez sur la touche TUNER MEMORY. • NUMBER clignote sur l’écran. 4 . Appuyez à nouveau sur la touche TUNER MEMORY. • Appuyez sur la touche TUNER MEMORY avant que NUMBER disparaisse lui-même de l’écran.
Indication PTY (Type de programme) et fonction PTY-SEARCH (RECHERCHER Utilisation des touches de contrôle d’effets spéciaux de la télécommande 05 TYPE DE PROGRAMME) Pour rechercher un programme à l'aid e des codes PTY Son 3D Vous pouvez profiter d’un son plus naturel et ambiophonique clair avec des tonalités enrichies par ajustement de la profondeur du son à l’aide des options de niveau.
Media Play SOUND Fonction EFFET SONORE EFFECT Vous permet de sélectionner un mode qui optimise le son. 1. Appuyez sur la touche SOUND EFFECT. 2. Appuyez sur les touches ▲▼ pour sélectionner le mode souhaité. DSP, Dolby Pro Logic II ou Mode SFE. 3. Appuyez sur les touches ◄► pour sélectionner l’effet sonore souhaité. • Philharmonic Hall à Bratislava (Salle 2) : Produit un son vocal aussi claire que dans une salle de concert mais le son est ici moins puissant que dans le réglage précédent HALL 1.
Services Réseau Smart Hub d'un coup d'œil 1 34 Search 1 . Connectez l'appareil au réseau. (Voir page 22) 2 . Configurez les paramètres réseau. (Reportez-vous aux pages 32 à 36) 2 Services Réseau Pour utiliser les services réseau, vous devez d’abord : 06 Vous pouvez profiter de différents services réseau tels que Smart Hub ou BD-LIVE en connectant l'appareil au réseau.
Services Réseau 9 Mes applications : affiche votre galerie personnelle d'applications au sein de laquelle vous pouvez ajouter, modifier ou supprimer des éléments. 0 Samsung Apps : ouvrez Samsung Apps pour télécharger des services d'applications payants ou gratuits. Navigateur Web d’un coup d’œil 1 http://www.google.com/ Utilisation de Navigateur Web Vous pouvez accéder à Internet en utilisant l’application Navigateur Web qui est installée par défaut sur l’écran Smart Hub. Google Search 1 .
06 Services Réseau 2 Aide à la navigation : Affiche les touches de la télécommande que vous pouvez utiliser pour naviguer dans Navigateur Web. • VERT (B) : permet d'afficher le panneau de commande. • JAUNE (C) : Recherche d'un lien. • Tools : permet d'afficher la fenêtre Outils. • Exit : permet de revenir au menu précédent. BD-LIVE™ Une fois que l'appareil est connecté au réseau, vous pouvez profiter de différents contenus de services liés aux films en utilisant des disques compatibles BD-LIVE. 1 .
Annexes Informations complémentaires Remarque SORTIE HDMI Branchements • Selon votre téléviseur, il est possible que certaines résolutions de sortie HDMI ne fonctionnent pas. • Vous devez disposer d'une connexion HDMI pour visionner les vidéos en 3D. • Un câble HDMI trop long peut provoquer du bruit à l'écran. Si tel est le cas, réglez Couleur intense HDMI sur Arrêt dans le menu.
Anynet+ (HDMI-CEC) Annexes Gestion données BD • En mode mémoire externe, la lecture du disque pourra s’arrêter si vous déconnectez le périphérique USB en cours d'exécution. • Seuls les périphériques USB formatés selon le système de fichiers FAT (label de volume DOS 8.3) sont pris en charge. Nous vous recommandons d'utiliser des périphériques USB prenant en charge le protocole USB 2.0 avec une vitesse de lecture/d'écriture supérieure ou égale à 4 Mo/s.
Annexes Lecture des fichiers vidéo • La lecture des fichiers vidéo au débit binaire élevé, égal ou supérieur à 20 Mbps, exerce une forte charge sur les capacités du lecteur et risque, de ce fait, de s’interrompre en cours d’exécution. Sélection de la langue de la bande son • L’indicateur ◄► ne s’affichera pas à l’écran si la section BONUSVIEW ne contient pas de réglages BONUSVIEW audio.
Lire des fichiers musicaux AllShare Play • Vous devez relier la sortie VIDEO (VIDÉO) (Composite) à votre téléviseur pour visionner une vidéo iPod (voir page 20). • Si vous voulez lire une vidéo iPod via la sortie VIDEO (VIDÉO), désactivez Anynet+ (HDMI-CEC). • Seul l'écran de lecture apparaît sur le téléviseur. Affichez d'autres écrans iPod sur le lecteur iPod.
Annexes Résolution selon le mode de sortie Lecture du disque Blu-ray/des e-contenus/des contenus numériques HDMI/connecté Sortie HDMI/non connecté Mode HDMI Disque Blu-ray E-content/Contenus numériques Mode VIDÉO Mode VIDÉO BD Wise Résolution du disque Bluray 1080p@60F 576i/480i - Auto Résolution optimale de l'entrée du téléviseur Résolution optimale de l'entrée du téléviseur 576i/480i - 1080p@60F 1080p@60F 1080p@60F 576i/480i - Trame vidéo : Auto (24Fs) 1080p@24F 1080p@24F 576i/
Sélections des sorties numériques Connexion Récepteur AV prenant en charge l'interface HDMI DTS réencodé Dolby D. Réencodé * Dolby Digital DTS réencodé Dolby D. Réencodé * Dolby Digital Plus DTS réencodé Dolby D. Réencodé * Dolby TrueHD DTS réencodé Dolby D. Réencodé * DTS DTS réencodé Dolby D. Réencodé * DTS-HD High DTS-HD High Resolution Resolution Jusqu'à PCM 7,1 ca Audio Audio DTS réencodé Dolby D.
Annexes Dépannage Reportez-vous au tableau ci-dessous lorsque cet appareil ne fonctionne pas correctement. Si le problème que vous rencontrez n’est pas répertorié ci-dessous ou si les consignes ne vous sont d’aucune aide, éteignez l’appareil, débranchez le cordon d’alimentation et contactez le revendeur agréé le plus proche ou un centre de dépannage Samsung Electronics. Problème Vérification/Solution Le disque ne peut pas être éjecté.
Problème • La lecture des disques Blu-ray/DVD 16:9 est possible en mode 16/9 Plein écran, 4/3 Boîte aux lettres ou 4/3 Panoramique – Balayage en revanche, les disques Blu-ray/DVD 4:3 peuvent être lus au format 4:3 uniquement. Reportez-vous à la pochette du disque Blu-ray et sélectionnez la fonction appropriée. • L'appareil ne fonctionne pas. (exemple : l’appareil s’éteint ou émet un bruit anormal). • L'appareil ne fonctionne pas normalement.
Annexes Problème Vérification/Solution Fonction de lecture AllShare Je peux visualiser les dossiers partagés via AllShare mais pas les fichiers. • La lecture AllShare affiche uniquement les fichiers correspondant aux catégories suivantes : photo, musique et cinéma. Les fichiers ne qui correspondent à aucune de ces trois catégories peuvent ne pas s'afficher. La vidéo est lue par intermittence. • Vérifiez si le réseau est stable.
Caractéristiques techniques 430 (L) x 65 (H) x 353,5 (P) mm Plage de températures de fonctionnement +5°C à +35°C Plage de taux d'humidit 10 % à 75 % Rapport signal/bruit Sensibilité utilisable 55 dB 12 dB Distorsion harmonique totale 0.
Annexes Système d’enceintes 7.
Contacter SAMSUNG WORLD WIDE Pour toutes questions ou observations concernant les produits Samsung, veuillez contacter le service clientèle de SAMSUNG. Area ` Europe Albania Austria Contact Centre 42 27 5755 0810 - SAMSUNG (7267864, € 0.07/min) 02-201-24-18 Bosnia Bulgaria Croatia 05 133 1999 07001 33 11 062 SAMSUNG (062 726 7864) 800-SAMSUNG (800-726786) Samsung Zrt.
HT-E6750W 7.1CH Blu-ray™ Heimkino-System Bedienungsanleitung Erleben Sie die Möglichkeiten Vielen Dank, dass Sie sich für dieses Produkt von Samsung entschieden haben. Um unseren umfassenden Service nutzen zu können, registrieren Sie Ihr Produkt unter www.samsung.com/register HT-E6750W_XU_GER-0223.
Sicherheitsinformationen Warnung ZUR VERMEIDUNG VON STROMSCHLÄGEN DARF DIESES GERÄT NICHT GEÖFFNET WERDEN. ES ENTHÄLT KEINE BAUTEILE, DIE VOM BENUTZER GEWARTET WERDEN KÖNNEN. LASSEN SIE REPARATUREN NUR VON QUALIFIZIERTEM FACHPERSONAL DURCHFÜHREN. ACHTUNG STROMSCHLAGGEFAHR! NICHT ÖFFNEN! Dieses Symbol weist auf „gefährliche Netzspannung“ im Inneren des Geräts hin. Es besteht somit die Gefahr von Stromschlägen und Verletzungen.
Lagerung und Handhabung der Disks Vorsichtsmaßnahmen für den Betrieb • Das Gerät keinem Spritz- oder Tropfwasser aussetzen. Keine mit Flüssigkeit gefüllten Behälter, wie Vasen auf das Gerät stellen. • Um das Gerät vollständig auszuschalten, muss der Netzstecker aus der Steckdose gezogen werden. Somit muss der Netzstecker immer bequem erreichbar sein. • Berühren Sie den Netzstecker nicht mit nassen Händen. Es besteht die Gefahr eines Stromschlags.
Sicherheitsinformationen • Verwenden Sie die 3D Funktion oder die 3D Aktiv Brille nicht während Sie herumlaufen oder sich bewegen. Wenn Sie die 3D Funktion oder die 3D Aktiv Brille verwenden während Sie sich umher bewegen, können Sie gegen Gegenstände laufen, stolpern und/oder hinfallen und sich ernsthaft Verletzungen zuziehen. • Wenn Sie 3D Inhalte erleben möchten, müssen Sie ein 3D Gerät (3D fähiger AV-Receiver oder Fernsehgerät) an den HDMI OUT Ausgang mit Hilfe eine High-Speed HDMI-Kabels anschließen.
Sicherheitsinformationen • Oracle und Java sind registrierte Warenzeichen von Oracle und/oder ihrer Tochterunternehmen. Andere Namen sind Markenzeichen ihrer entsprechenden Eigentümer. • Dieses Gerät nutzt eine durch U.S. Patente und andere Schutz- und Urheberrechte geschützte Kopierschutztechnologie der Rovi Corporation. Reverse Engineering und Disassemblierung sind verboten. • Blu-ray Disc™, Blu-ray™, und die Logos sind Warenzeichen der Blu-ray Disc Association.
Inhalt SICHERHEITSINFORMATIONEN 2 3 3 3 4 4 Warnung Lagerung und Handhabung der Disks Vorsichtsmaßnahmen für den Betrieb Verwendung der 3 D Funktion Copyright Lizenz ERSTE SCHRITTE 7 8 11 12 12 13 Disk und Format Kompatibilität Logos von Disks, die vom Gerät wiedergegeben werden können Zubehör Beschreibung Rückseite Fernbedienung ANSCHLÜSSE 15 15 16 16 17 18 19 19 19 20 20 20 21 21 21 21 22 22 22 Anbringen des Ferrit Ringkerns am Netzkabel des Hauptgeräts Anschließen der Lautsprecher Lautsprecherkom
Erste Schritte Disk und Format Kompatibilität 02 Disktypen und Inhalte, die von Ihrem Gerät wiedergegeben werden können Disktyp Blu-ray Disc 3D Blu-ray Disc VIDEO DVD-VIDEO, DVD-RW, DVD-R, DVD+RW, DVD+R Erste Schritte Medium Details BD-ROM oder BD-RE/-R Disk aufgenommen im BD-RE Format. DVD-VIDEO, DVD-RW, DVD-R, DVD+RW, DVD+R DVD-VIDEO, aufgenommene DVD+RW/DVD-RW(V)/DVD-R/+R Disks, die aufgenommen und abgeschlossen wurden, oder USB-Speichergeräte mit DivX, MKV, MP4 Inhalten.
Erste Schritte Regionalcode Geräte und Disks sind nach Regionen codiert. Für die Wiedergabe müssen diese Regionalcodes zusammenpassen. Wenn dies nicht der Fall ist, kann die Disk nicht wiedergegeben werden. Der Regionalcode dieses Geräts ist auf der Geräterückseite angebracht. Disktyp Regionalcode A Blu-ray-Disc DVD-VIDEO Nordamerika, Mittelamerika, Südamerika, Korea, Japan, Taiwan, Hongkong und Südostasien.
Unterstützte Videodatei *.mkv *.asf *.wmv *.mp4 Video Codec Auflösung Bildrate (fps) Bitrate (Mbps) Audio Codec 1920x1080 6 ~ 30 8 1920x1080 1920x1080 6 ~ 30 6 ~ 30 25 8 MP3 AC3 LPCM DTS Core 1920x1080 6 ~ 30 8 1920x1080 1920x1080 6 ~ 30 6 ~ 30 25 8 1920x1080 6 ~ 30 8 1920x1080 1920x1080 6 ~ 30 6 ~ 30 25 8 MP3 AC3 LPCM WMA 1920x1080 6 ~ 30 25 WMA 1920x1080 1920x1080 6 ~ 30 6 ~ 30 25 8 MP3 AAC H.
Erste Schritte Videodecoder - Unterstützt bis H.264 Level 4.1 - H.264 FMO/ASO/RS, VC1 SP/MP/AP L4 und AVCHD wird nicht unterstützt - MPEG4 SP, ASP : Unter 1280 x 720 : max. 60 Bilder Über 1280 x 720 : max. 30 Bilder - GMC 2 oder höher wird nicht unterstützt Audiodecoder - Unterstützt WMA 7, 8, 9 und STD - WMA 9 PRO Mehrkanal Dateien werden nicht unterstützt, wenn die Anzahl der Kanäle mehr als 2 beträgt oder die Datei eine verlustfrei Audiodecodierung erfordert.
Zubehör 02 Überprüfen Sie das Vorhandensein der unten angeführten Zubehörteile.
Erste Schritte Beschreibung LAUTSTÄRKEREGLER ÖFFNEN/SCHLIESSEN RÖHRENVERSTÄRKER ENTER WIEDERGABE/PAUSE STOPP DISK-LADE FUNKTION NETZSCHALTER ASC IN 5V 500mA ANZEIGE FERNBEDIENUNGSSENSOR ASC EINGANG USB-HOST | HINWEIS | Wenn sich ein Mobiltelefon oder mobiles Gerät in der Nähe eines Röhrenverstärkers befindet oder andere elektronische Geräte auf das Gerät gelegt werden, kann dies zu Störungen der Audiowiedergabe führen.
Fernbedienung 02 Übersicht der Fernbedienung FUNCTION TV SOURCE RECEIVER Um in den Heimkino-Modus zu wechseln, die BD-Taste drücken. Drücken Sie die Nummerntasten, um die Optionen zu bedienen. Zum Ansehen des Diskmenüs diese Taste drücken. Zum Vorwärts- oder Rückwärtsspringen. Zum Wiedergeben/Beenden einer Disk. Damit schalten Sie den Ton vorübergehend aus. Lautstärke regeln. Drücken, um den Home Bildschirm aufzurufen.
Erste Schritte Batterien in die Fernbedienung einsetzen Batteriegröße: AAA 1 2 | HINWEIS | Achten Sie darauf, dass der "+" und "-" Pol der Batterien wie im Batteriefach angezeigt ausgerichtet sind. Bei normaler Nutzung des Fernsehers halten die Batterien ungefähr ein Jahr. Die Fernbedienung hat eine Reichweite von bis zu ca. 7 Metern Luftlinie. Fernbedienung einrichten Sie können mit dieser Fernbedienung bestimmte Funktionen Ihres Fernsehgeräts steuern.
Anschlüsse Anschlüsse Anbringen des Ferrit Ringkerns am Netzkabel des Hauptgeräts Das Anbringen eines Ferrit Ringkerns am Netzkabel des Hauptgeräts hilft dabei, Störungen durch Radiofunksignale zu unterbinden. SPEAKERS OUT CENTER 1. Am Befestigungsband des Ferrit Ringkerns ziehen, um diesen zu öffnen. 2. Machen Sie mit dem Netzkabel des Hauptgeräts zwei Schlingen. 3. Bringen Sie den Ferrit Ringkern - wie abgebildet am Netzkabel des Hauptgeräts an und drücken Sie solange, bis er einrastet.
Anschlüsse Lautsprecherkomponenten SWA-5000 SCHRAUBE (5X15): 4 STCK. SCHRAUBE (5X20): 12 STCK. FRONT/FRONT TOP SURROUND STANDFUSS BODENPLATTE (L) (R) (L) Kabelloses Empfängermodul (R) LAUTSPRECHERKABEL Lautsprecherkabel (2 Stck.) FRONT/FRONT TOP SURROUND CENTER TX-Karte SUBWOOFER Zum Installieren der Lautsprecher auf dem Tallboy-Stand. 1. Biegen Sie das Lautsprecherkabel gerade und führen Sie es in die Öffnung im Standfuß ein. 2.
Anschließen der Lautsprecher Rot Anschlüsse LAN 03 1. Ordnen Sie jedes Lautsprecherkabel dem entsprechenden Lautsprecher zu, indem Sie die mit einer bestimmten Farbe gekennzeichneten Stecker den farbigen Aufklebern am Boden eines jeden Lautsprechers zuordnen. 2. Anschließen der Lautsprecherkabel an die Lautsprecher: a. Drücken Sie die rote Anschlussklemme auf der Rückseite des Lautsprechers Schwarz herunter, führen Sie das rote Kabel ein und lassen Sie die Klemme los. b.
Anschlüsse | ACHTUNG | Wenn Sie die Lautsprecher an der Wand befestigen möchten, bringen Sie die Schrauben oder Nägel fest in der Wand an und verwenden Sie zum Aufhängen die Öffnungen auf der Rückseite der Lautsprecher. Das Zubehör (Schrauben oder Nägel) für die Wandinstallation ist nicht im Lieferumfang enthalten. Achten Sie darauf, dass Kinder nicht mit den Lautsprechern oder in deren Nähe spielen. Sie können durch umkippende Lautsprecher verletzt werden.
Anschließen eines iPods/iPhones 03 Anschluss über USB-Kabel Anschlüsse Schließen Sie den iPod/iPhone mit Hilfe des USB-Kabels an den USB-Anschluss auf der Vorderseite des Geräts an. ASC IN 5V 500mA 5V 500mA Anschluss über die Docking-Station Für die Wiedergabe von Videos muss ein Composite Kabel verwendet werden.
Anschlüsse Anschluss an ein Fernsehgerät Wählen Sie entweder die Methode 1 oder Methode 2 • Wenn Sie die Fernbedienung des Geräts für die Bedienung Ihres Fernsehgeräts eingestellt haben, die TV SOURCE Taste auf der Fernbedienung drücken und anschließend die entsprechende externe Quelle aus der Liste des Fernsehgeräts auswählen (HDMI, Video In, usw.), um Video über das Heimkino abzuspielen.
Externe Geräte anschließen W Rot AUX IN Weiß Anschlüsse R 03 Um den richtigen Modus für ein externes Gerät zu wählen, die FUNCTION Taste drücken. Durch wiederholtes Drücken, wird der Modus in folgender Reihenfolge umgeschaltet : BD/DVD D. IN AUX R.
Anschlüsse Anschließen an einen Netzwerk Router Wireless-Netzwerk Sie können das Gerät mit Hilfe einer der im Folgenden beschriebenen Methoden mit Ihrem Netzwerk Router verbinden.
Einstellungen Ersteinstellungen konfigurieren 5 . Das Gerät sucht nach Netzwerken und zeigt alle verfügbaren WLAN-Netzwerke an. Ersteinstellung > Netzwerkeinstellungen (2/5) Wählen Sie den drahtl. Router aus d. Liste aus. KIMING_VTOWER TIAS Initial Settings > On-Screen Language si-ap Select a language for the on-screen displays. Nederlands English Eesti keel Suomi Français Deutsch Ελληνικά Hausa 1/4 Aktual. WPS(PBC) Zurück surlwang5 Weiter ▲ Dansk Einstellungen 1 .
Einstellungen Ersteinstellung > Netzwerkeinstellungen (4/5) Sicherh.-Schl. eing. 0 einge. a b c d e f 1 2 3 g h i j k l 4 5 6 m n o p q r 7 8 9 u v w x s t A/a Leertaste y z 0 WPS-PIN Zurück Weiter Überspr 11 . Wenn eine Software Aktualisierung zur Verfügung steht, lädt das Gerät die Aktualisierung herunter und installiert diese. Dies kann einige Zeit in Anspruch nehmen.
Der Home Bildschirm Ersteinstellung > Autom. Tonkalibrierung 04 AllShare Play Zurück Kalibrierungsmikrofon hier platzieren Benutzer Wiedergabe von Videos, Fotos oder Musik von Disk oder von angeschlossenen Geräten Weiter Überspr 2 3 4 1 Smart Hub 13 . Der Bildschirm für die Automatische Klangkalibrierung erscheint. Stecken Sie das ASC-Mikrofon in die ASC IN Buchse des Geräts. 14 . Drücken Sie die E Taste, um die Weiter Taste auszuwählen.
Einstellungen Zugriff auf den Einstellungen Bildschirm 1 . Auf dem Home Bildschirm Einstell. auswählen und anschließend die E Taste drücken. Der Einstellungen Bildschirm wird angezeigt. 3D-Einstell. Anzeige TV-Format Netzwerk System Unterstützung 4 EXIT Taste: Verlassen des Menüs. 16:9 Original Smart Hub-Bildschirmgröße Audio-Opt. 3 E (Enter) / RICHTUNGSTASTEN Taste : ~ Mit Hilfe der ▲▼◄► Tasten den Cursor bewegen oder eine Position auswählen.
Einstellungen Menü Funktionen TV-Format Mit dieser Funktion kann die Bildausgabe des Geräts an die Bildschirmgröße Ihres Fernsehgeräts angepasst werden. Siehe Seite 24 Schritt 12 für eine Beschreibung der Optionen für die Bildschirmgröße. Smart HubBildschirmgröße Mit dieser Funktion könne Sie die optimale Größe des Smart Hub Bildschirms einstellen.
Einstellungen Audio-Opt. Lautsprechereinst. Sie können die Optionen für die Lautsprecher einstellen. Autom. Tonkalibrierung Das Gerät erkennt automatisch das für ihre Umgebung optimierte Klangfeld. Equalizer Int. Lautst. Reg. Hier können die Equaliser Einstellungen von Hand konfiguriert werden. Sie können das Gerät so einstellen, dass die Lautstärke unverändert bleibt, wenn ein Szenenwechsel stattfindet oder Sie den Sender wechseln. Lautsprecher ausw.
Netzwerk Netzwerkstatus Hier können Sie prüfen, ob eine Verbindung zu einem Netzwerk und zum Internet hergestellt wurde. Wi-Fi-Direkt Mit dieser Funktion können Sie ein Wi-Fi Direkt Gerät an Ihr Gerät über ein Peer-to-Peer Netzwerk ohne einen WLANRouter anschließen. Sie können das Gerät zur Steuerung Ihres Players verwenden. Soft-AP Mit dieser Funktion können Sie andere Arten von Wi-FiGeräten ohne Kabel an das Gerät anschließen.
Einstellungen System Ersteinstellung Mit dieser Funktion können Sie die Ersteinstellungen erneut konfigurieren. Siehe Seite 23 für weitere Informationen. Sie können eine USB-Tastatur oder eine Maus an den USBAnschluss auf der Vorderseite des Geräts anschließen. Tastatureinstell.: Hier können die Einstellungen für eine an das Gerät angeschlossene kabellose USB-Tastatur vorgenommen werden.
Einstellungen Sicherheit BD-Sicherungsstufe: Verhindert die Wiedergabe von Bluray-Disks mit festgelegter Altersbeschränkung, bis die PIN eingegeben wurde. DVD-Sicherungsstufe: Verhindert die Wiedergabe von DVDs mit festgelegter Altersbeschränkung, bis die PIN eingegeben wurde. PIN ändern: Ändern der 4-stelligen PIN für den Zugriff auf Sicherheitsfunktionen. 04 Die voreingestellte PIN lautet 0000.
Einstellungen Automatischer Klangkalibrierung Nach der Einstellung der Auto Sound Calibration(Automatischer Klangkalibrierung) (ASC) Funktion kann das Gerät bei Installation oder Neuplatzierung des Geräts automatisch die Entfernung zwischen den Lautsprechern, die die Pegel zwischen den Kanälen und die Frequenzeigenschaften ermitteln, die notwendig sind, um ein optimal an Ihre Umgebung angepasstes 7.1-Kanal-Klangfeld zu schaffen.
Kabelnetzwerk - Manuell • Windows XP 1 . Klicken Sie mit der rechten Maustaste auf das Netzwerk Symbol in der unteren rechten Ecke des Arbeitsplatzes. Einstellungen < Abrufen der Werte für die Netzwerkeinstellungen > Sie können sich die Werte für die Netzwerkeinstellungen auf den meisten Windows Computern anzeigen lassen.
Einstellungen WLAN (Allgemein) - Automatisch Befolgen Sie die Schritte 1 bis 3 unter "Konfigurieren Ihrer Netzwerkverbindung" auf Seite 32. 1 . Wählen Sie Start auf dem Netzwerkeinstellungen Bildschirm und drücken Sie anschließend die E Taste. Das Gerät sucht nach verfügbaren Netzwerken und zeigt diese in einer Liste an. Netzwerkeinstellungen Wählen Sie den drahtl. Router aus d. Liste aus. 1/10 iptime23 Aktual. ELT WPS(PBC) JSY Zurück KT_WLAN_C361 Mirhenge_edu Weiter Abbr. SO070VOIP 2 .
WPS(PBC) Wi-Fi-Direkt Die Wi-Fi Direkt Funktion ermöglicht es Ihnen, WiFi Direkt Geräte und alle anderen, ein Peer-toPeer Netzwerk verwendenden Geräte ohne einen WLAN-Router an dieses Gerät anzuschließen. 1 . Schalten Sie das Wi-Fi Direkt Gerät ein und aktivieren Sie dessen Wi-Fi direkt Funktion. 2 . Wählen Sie auf dem Home Bildschirm Einstell., und drücken Sie die E Taste. 3 . Wählen Sie Netzwerk, und drücken Sie die E Taste. 4 . Wählen Sie Wi-Fi-Direkt, und drücken Sie die E Taste.
Einstellungen 4 . Das Popup-Fenster für den Verbindungsaufbau gefolgt vom Popup-Fenster für die hergestellte Verbindung erscheinen. Wenn das Fenster geschlossen wird, sollte das Gerät auf dem Wi-Fi Direkt Bildschirm als verbunden aufgelistet werden. | HINWEIS | Die Kabelnetzwerkverbindung oder die WLAN Netzwerkverbindung wird unterbrochen, wenn Sie die WiFi Direkt Funktion nutzen.
Aktualisieren der Software 1 . Wählen Sie auf dem Home Bildschirm Einstell., und drücken Sie die E Taste. 2 . Wählen Sie Unterstützung, und drücken Sie die E Taste. 3 . Wählen Sie Software-Update, und drücken Sie die E Taste. 4 . Wählen Sie eine der folgenden Methoden: • Online • PER USB • Über Disk • Über Download • Update im Standby 5 . Drücken Sie die E Taste. Anweisungen für jede Methode finden Sie im Folgenden.
Einstellungen Über Disk 1 . Besuchen Sie die Webseite www.samsung. com. 2 . Klicken Sie am oberen Rand der Seite auf SUPPORT. 3 . Geben Sie den Produktnamen oder die Artikelnummer in das Suchfeld ein und klicken Sie anschließend auf Find Product. 4 . Klicken Sie im mittleren Teil der Seite auf den Tab Get downloads. 5 . Klicken Sie auf Firmware. 6 . Klicken Sie in der Spalte Datei auf der rechten Seite auf das ZIP Symbol. 7 .
Media Play Um auf den AllShare Play Bildschirm zuzugreifen, wählen Sie AllShare Play auf dem Hauptbildschirm und drücken Sie anschließend die E Taste. Zugriff auf den AllShare Play Bildschirm AllShare Play / Liste / Zuletzt verw. Liste Videos Recent afgespeelde bestanden worden hier weergeg. Neues Kürzl. aktual. 09.Jan..2012 Mehr anze... Fotos SAM_0001 SAM_0002 SAM_0003 SAM_0004 SAM_0005 W.-Liste Musik Wiedergabe von Video, Foto oder Musik Inhalten 1 .
Media Play Wiedergabe von Dateien auf einem USB-Speichergerät oder iPod/iPhone Sie können Multimedia Dateien von einem angeschlossenen USB-Gerät wiedergeben. 1 . Bei ausgeschaltetem Gerät das USBSpeichergerät oder den iPod/iPhone anschließen. 2 . Schalten Sie das Gerät ein. Wenn der Hauptbildschirm erscheint, AllShare Play > Videos, Fotos oder Musik > Angeschl. Gerät auswählen und anschließend die E Taste drücken. 3 . Die Art des Inhalts, den Sie auf dem angeschlossenen Gerät gewählt haben, wird angezeigt.
Der Funktion Bildschirm Sie können die Quelle ebenfalls durch Drücken der Funktion Taste in der rechten oberen Ecke der Fernbedienung wechseln. 1 . Legen Sie eine kommerzielle Audio Disk mit dem Aufdruck nach oben zeigend in die DiskLade ein und schließen Sie die Disk-Lade. Der AllShare Play Musik Bildschirm wird angezeigt, in dem die Titel aufgelistet sind. Die Wiedergabe wird automatisch mit dem ersten Titel gestartet.
Media Play Wiedergabe von selbst aufgenommenen Disks Sie können Multimedia Dateien wiedergeben, die Sie auf DVDs oder CDs aufgenommen haben. 1 . Legen Sie eine vom Benutzer aufgezeichnete Disk mit dem Aufdruck nach oben zeigend in die Disk-Lade ein und schließen Sie die Disk-Lade. Das Gerät angeschlossen PopupFenster erscheint. 2 . Mit Hilfe der ▲▼ Tasten die Art des Inhalts auswählen, den Sie wiedergeben möchten Videos, Fotos oder Musik - und drücken Sie dann die E Taste.
Inhalte auf Ihrem PC oder DLNA-Gerät mit diesem Gerät wiedergeben Produkt AllShare Verbindung PC Produkt Wiedergabe der PCDateien Wiedergabe der PC-Dateien AllShare Verbindung 1 . Verbinden Sie das Gerät, Ihren PC und/oder Ihr DLNA kompatibles Mobiltelefon mit dem gleichen Netzwerk. 2 . Folgen Sie den Anweisungen aus Installations- und Bedienungsanleitung der AllShare Software, um die Geräte und Dateien für die Wiedergabe einzurichten. 3 .
Media Play Steuern der Videowiedergabe Sie können die Wiedergabe von Videodateien auf Blu-ray-Disks, DVDs, CDs oder USB-Geräten steuern. Je nach Disk können einige in dieser Anleitung beschriebenen Funktionen nicht zur Verfügung stehen. Tasten auf der Fernbedienung für die Videowiedergabe DISC MENU TITLE MENU 0 POPUP Bedienen des Disk Menüs, Titel Menüs, Popup Menüs und der Titelliste DISC MENU Während der Wiedergabe diese Taste drücken, um das Disk Menü aufzurufen.
Das Menü wird nur angezeigt, wenn eine Drücken Sie während der Wiedergabe die TOOLS Taste. BD/DVD wiedergegeben wird. Vom Anfang wiedergeben Wählen Sie diese Option, um den Film vom Anfang wiederzugeben. Kapitelsuche Wählen Sie diese Option, um zu dem Kapitel zu springen, dass Sie sich ansehen möchten. Audio-Opt. Wählen Sie diese Option, um die gewünschte Audiosprache einzustellen. - Sie können diese Funktion auch durch Drücken der AUDIO Taste auf der Fernbedienung auswählen.
Media Play Wiedergabe der Titel auf einer Audio CD in zufälliger Reihenfolge Steuern der Musikwiedergabe Sie können die Wiedergabe von Musikinhalten auf DVDs, CDs oder USB-Geräten steuern. Tasten auf der Fernbedienung für die Wiedergabe RDS DISPLAY 6 TA 1 2 3 PTY- PTY SEARCH PTY+ 4 5 6 7 8 DISC MENU 9 TITLE MENU 0 POPUP 5 MUTE 4 1 1 2 3 Schnelle Wiedergabe (nur bei Audio CDs (CD-DA)) Drücken Sie während der Wiedergabe die 3 oder Taste.
Sie können Musiktitel von einer Musik CD auf ein an den USB-Anschluss angeschlossenes USB-Gerät rippen. 1 . Schließen Sie ein USB-Gerät an den USBAnschluss auf der Vorderseite des Geräts an und drücken Sie die RETURN (') Taste auf der Fernbedienung. 2 . Legen Sie die Disk ein, die Sie rippen möchten, und schließen Sie die Disk-Lade. 3 . Rufen Sie den Wiedergabebildschirm auf und drücken Sie die TOOLS Taste. Das Extras Menü wird angezeigt. 4 . Mit Hilfe der ▲▼ Tasten Ripp.
Media Play Anschließen eines Bluetooth-Geräts an das Heimkino Verbinden - Wenn in der Umgebung des Heimkinos eine starke elektromagnetische Wellen ausgesendet werden. - Wenn mit mehreren Bluetooth-Geräten gleichzeitig eine Verbindung zum Heimkino hergestellt wurde. - Wenn das Bluetooth-Gerät ausgeschaltet oder nicht angeschlossen ist oder nicht richtig funktioniert.
Anzeigen von Fotos Drücken Sie während der Wiedergabe die TOOLS Taste. Zur Fotoliste Wählen Sie diese Option, um zu der Liste der Fotos auf dem eingelegten Medium zu wechseln. Diashow starten Startet die Diashow. DiashowGeschw. Wählen Sie diese Option, um die Geschwindigkeit der Diashow einzustellen. Wählen Sie diese Option, um Diashow-Effekt die Spezialeffekte der Diashow einzustellen.
Media Play Frühestes Dat. Erscheint im Bildschirm der Ansicht Funktion. Nach Auswahl dieser Option werden alle Fotos oder Videos auf einem Speichergerät vom jüngsten bis zum spätesten Datum sortiert angezeigt. Monatlich Erscheint im Bildschirm der Ansicht Funktion. Wählen Sie diese Option, um alle Fotos oder Videos auf dem Speichergerät nach Erstellungsmonat sortiert anzuzeigen. Mit derAusw. wiederg. Funktion können Sie bestimmte Musik-, Videound Fotodateien für die Wiedergabe auswählen.
Wählen Sie Wdg.-L. bearb. um Dateien oder Titel aus einer bestehenden Wiedergabeliste zu löschen. Das Speichermedium mit der Wiedergabeliste muss in das Gerät eingelegt oder an diesen angeschlossen sein. 1. Wählen Sie mit Hilfe der ▲▼◄►Tasten eine Datei aus und drücken Sie anschließend die E Taste. Wdg.-L. bearb. 2. Wiederholen Sie diese Schritte für jede Datei, die Sie löschen möchten.
Media Play Sender voreinstellen Beispiel : Speichern des Senders FM 89.10. 1 . Wählen Sie mit der Taste FUNCTION die Option FM aus. 2 . Drücken Sie die TUNING/CH (,.) Taste, um <89.10> auszuwählen. 3 . Drücken Sie die TUNER MEMORY Taste. • Auf dem Display leuchte NUMBER auf. 4 . Drücken Sie die TUNER MEMORY Taste erneut. • Drücken Sie die TUNER MEMORY Taste bevor NUMBER auf der Anzeige ausgeblendet wird.
PTY (Program-Typ) Anzeige und PTY-SUCH-Funktion Bevor Sie beginnen! • Die PTY-Suche steht nur für gespeicherte Stationen zur Verfügung. • Um den Suchvorgang vorzeitig abzubrechen, während der Suche die 5 Taste drücken. • Es existiert eine Zeitbegrenzung für die folgenden Schritte. Wenn die Einstellung vor ihrer Beendigung abgebrochen wird, starten Sie nochmals mit Schritt 1.
Netzwerkdienste SOUND SOUND EFFECT Funktion EFFECT Mit dieser Funktion können Sie Modus für die Klangoptimierung auswählen. 1. Drücken Sie die SOUND EFFECT Taste. 2. Wählen Sie mit den ▲▼ Tasten den gewünschten Modus: DSP, Dolby Pro Logic II oder KFE-Modus. 3. Wählen Sie mit den Tasten ◄► den gewünschten Klangeffekt aus. • Philh.-Halle Bratislava (Halle2) : Bietet eine helle Klangstimme wie in einer Konzerthalle aber nicht so stark wie HALL 1. • Jazz-Club in Seoul B : Empfohlene Einstellung für Jazz.
Netzwerkdienste Smart Hub Übersicht 1 1 . Schließen Sie das Gerät an ein Netzwerk an. (Siehe Seite 22) 2 . Die Netzwerkeinstellungen konfigurieren. (Siehe Seiten 32 - 36) Search 0 9 Smart Hub verwendenb Mit Hilfe von Smart Hub können Sie Filme, Videos und Musik direkt aus dem Internet herunterladen, auf verschiedene gebührenpflichtige oder gebührenfreie Anwendungen zugreifen und diese auf Ihrem Fernsehgerät ansehen.
Netzwerkdienste 9 Meine Anwendungen : Zeigt Ihre persönliche Sammlung von Anwendungen an, die Sie ergänzen, bearbeiten oder löschen können. 0 Samsung Apps : Ermöglicht das Herunterladen von verschiedenen gebührenpflichtigen oder Freeware Diensten. Der Webbrowser im Überblick 1 http://www.google.com/ Verwenden des Webbrowsers Sie können mit Hilfe des im Smart Hub Bildschirm integrierten Webbrowsers auf das Internet zugreifen. Google Search 1 .
06 Netzwerkdienste 2 Navigationshilfe : Zeigt die Tasten auf der Fernbedienung an, die für die Navigieren im Webbrowser verwendet werden können. • GRÜN (B) : Zeigt die Systemsteuerung an. • GELBE (C) : Einen Link suchen. • Tools : Ruft das Extras Fenster auf. • Exit : Kehrt zum vorherigen Menü zurück. BD-LIVE™ Sobald das Gerät mit dem Netzwerk verbunden ist, können sie verschiedene filmbezogene Serviceinhalte, unter Benutzung einer BD-Live konformen Disk, genießen. 1 .
Anhang Zusätzliche Informationen Hinweis HDMI-AUSGANG Anschlüsse • Je nach Fernsehgerät stehen für den HDMI-Ausgang bestimmte Auflösungen möglicherweise nicht zur Verfügung. • Sie müssen eine HDMI-Verbindung verwenden, um Videos mit 3D-Technik zu genießen. • Ein langes HDMI-Kabel kann Bildrauschen verursachen. Wenn dieser Fall eintritt, HDMI-Deep Color im Menü auf Aus stellen. 3D-Einstell. • Bei einigen 3D Disks muss zum Anhalten des Films währen einer 3D Wiedergabe die 5 Taste einmal gedrückt werden.
Anynet+ (HDMI-CEC) 07 Anhang • Je nach Fernsehgerät stehen für den HDMI-Ausgang bestimmte Auflösungen möglicherweise nicht zur Verfügung. Informationen dazu finden Sie in der Bedienungsanleitung Ihres Fernsehgeräts. • Diese Funktion steht nicht zur Verfügung wenn CEC vom HDMI-Kabel nicht unterstützt wird. • Wenn sich ein Anynet+ Logo auf Ihrem Samsung-Fernsehgerät befindet, wird die Anynet+Funktion unterstützt.
Anhang Wiedergabe einer Videodatei • Videodateien mit hohen Bitraten von 20Mbps oder mehr beanspruchen das Gerät stark und können zu einer Unterbrechung der Wiedergabe führen. Audiosprache wählen • Die ◄► Anzeige wird nicht auf dem Bildschirm angezeigt, wenn der BONUSVIEW Bereich keine Einstellungen für BONUSVIEW-Audio enthält. • Die über die Audiosprache Funktion zur Verfügung stehenden Sprachen hängen von den auf der Disk kodierten Sprachen ab.
Musikwiedergabe AllShare Play Anhang Einen Film schauen 07 • Stellen Sie vor dem Anschließen Ihres iPods an das Gerät die Lautstärke auf einen moderaten Wert ein. • Wenn das Gerät eingeschaltet ist und Sie einen iPod anschließen, wird der Akku des iPod über das Gerät aufgeladen. • Sie müssen den VIDEO-Ausgang (Composite) mit ihrem Fernsehgerät verbunden haben, um Videos vom iPod zu anzusehen (Siehe Seite 20).
Anhang Auflösung nach Wiedergabemodus Bei der Wiedergabe von Blu-ray Disk/E-content/Digital Content HDMI / nicht angeschlossen HDMI / angeschlossen Ausgang HDMI-Modus Einstellung Blu-ray Disc E-contents/Digital contents VIDEO Modus VIDEO Modus BD Wise Auflösung der Bluray-Disk 1080p@60F 576i/480i - Automatisch Max. Auflösung des TV-Eingangs Max.
Auswahl des Digitalausgangs PCM HDMI-fähiger AV Receiver Bis zu PCM 7.1ch PCM DTS re-encoded Dolby D. Re-encoded * Dolby Digital Bis zu PCM 7.1ch Dolby Digital DTS re-encoded Dolby D. Re-encoded * Dolby Digital Plus Bis zu PCM 7.1ch Dolby Digital Plus DTS re-encoded Dolby D. Re-encoded * Bis zu PCM 7.1ch Dolby TrueHD DTS re-encoded Dolby D. Re-encoded * Bis zu PCM 6.1ch DTS DTS re-encoded Dolby D. Re-encoded * Bis zu PCM 7.1ch DTS-HD (Hochauflösender Audio) DTS re-encoded Dolby D.
Anhang Fehlerbehebung Schlagen Sie in der nachfolgenden Liste nach, wenn das Gerät nicht ordnungsgemäß funktioniert. Falls ihr Problem unten nicht aufgelistet oder die Problemlösung nicht hilfreich ist, das Gerät abschalten, den Netzstecker ziehen und setzen Sie sich mit dem nächstgelegenen autorisierten Händler oder dem Samsung Electronics-Servicecenter in Verbindung. Symptom Überprüfen/Beheben Die Disk wird nicht ausgeworfen.
Symptom Überprüfen/Beheben • Verwenden Sie eine Disk, die keine Menüs enthält? Das Bildformat kann nicht geändert werden. • Sie können 16:9 Blu-ray/DVD Disks im 16:9 Voll, 4:3 Letter Box Modus oder 4:3 Passend Modus wiedergeben, 4:3 Blu-ray/DVD Disks werden nur im 4:3 Bildformat wiedergegeben. Greifen Sie auf die Informationen an der Blu-ray Diskhülle zurück und wählen Sie die entsprechende Funktion. • Das Gerät funktioniert nicht.
Anhang Symptom Überprüfen/Beheben AllShare Play Funktion Ich kann durch AllShare Play veröffentlichte Ordner sehen, nicht aber die Dateien. • AllShare Play zeigt nur Dateien an, die den Foto, Musik und Film Kategorien entsprechen. Dateien, die diesen Kategorien nicht entsprechen können nicht angezeigt werden. Unterbrechungen bei Videowiedergabe. • Überprüfen Sie die Stabilität des Netzwerks. • Anschluss des Netzwerkkabels überprüfen und ob das Netzwerk überlastet ist.
Technische Daten UKW-Tuner Disk 430 (B) x 65 (H) x 353.5 (T) mm Abmessungen +5°C bis +35°C Betriebstemperaturbereich 10 % bis 75 % Signal/Rauschabstand 55 dB Verwendbare Empfindlichkeit 12 dB Klirrfaktor (Total Harmonic Distortion) 0,5 % BD (Blu-ray Disk) Lesegeschwindigkeit: 9,834 m/Sek. DVD (Digital Versatile Disc (digitale vielseitige Scheibe)) Lesegeschwindigkeit: 6,98 bis 7,68 m/Sek.
Anhang Lautsprecher 7.
Wenden Sie sich an SAMSUNG WORLD WIDE Wenn Sie Fragen oder Anmerkungen zu Produkten von Samsung haben, wenden Sie sich an den Kundendienst von SAMSUNG. Area ` Europe Albania Austria Contact Centre 42 27 5755 0810 - SAMSUNG (7267864, € 0.07/min) 02-201-24-18 Bosnia Bulgaria Croatia 05 133 1999 07001 33 11 062 SAMSUNG (062 726 7864) 800-SAMSUNG (800-726786) Samsung Zrt.
HT-E6750W Sistema Home Entertainment Blu-ray™ 7.1 canali manuale utente immagina le possibilità Grazie per avere acquistato questo prodotto Samsung. Per ricevere un servizio più completo, registrare il prodotto all'indirizzo www.samsung.com/register HT-E6750W_XU_ITA_0223.
Informazioni Sulla sicurezza Avvertenza PER RIDURRE IL RISCHIO DI SCOSSE ELETTRICHE, NON RIMUOVERE IL COPERCHIO (O LA PARTE POSTERIORE). ALL'INTERNO NON VI SONO PARTI RIPARABILI DALL'UTENTE. PER LA MANUTENZIONE RIVOLGERSI AL PERSONALE DI ASSISTENZA QUALIFICATO. ATTENZIONE RISCHIO DI SCOSSE ELETTRICHE NON APRIRE Questo simbolo indica la presenza di "tensione pericolosa" all'interno del prodotto, che comporta il rischio di scosse elettriche o lesioni.
Conservazione e gestione dei dischi Conservare in una custodia di protezione pulita e archiviare in posizione verticale. Precauzioni per la manipolazione • Non schizzare o sgocciolare liquidi sull'apparecchio. Non sistemare oggetti pieni di liquidi, come dei vasi, sull'apparecchio. • Per spegnere completamente l'apparecchio, estrarre la spina di alimentazione dalla presa di rete. Di conseguenza, la spina di alimentazione deve essere facilmente e prontamente accessibile in qualsiasi momento.
Informazioni Sulla sicurezza • Non utilizzare la funzione 3D o gli occhiali 3D quando si è in movimento o ci si sposta. Se si utilizza la funzione 3D o gli occhiali 3D mentre ci si sposta si può urtare contro oggetti, inciampare e/o cadere, provocando lesioni. • Per vedere un contenuto 3D, collegare un dispositivo 3D (ricevitore AV 3D o televisore 3D) alla porta HDMI OUT del prodotto con un cavo HDMI ad alta velocità. Indossare gli occhiali per la visione in 3D prima di riprodurre il contenuto 3D.
Informazioni sulla Sicurezza • Oracle e Java sono marchi registrati di Oracle e/o delle sue filiali. Altri nomi possono essere marchi dei rispettivi proprietari. • Avviso di licenza open source - In caso di utilizzo di software open source, sono disponibili licenze open source nel menu del prodotto. 01 • The terms HDMI and HDMI High-Definition Multimedia Interface, and the HDMI Logo are trademarks or registered trademarks of HDMI Licensing LLC in the United States and other countries.
Indice INFORMAZIONI SULLA SICUREZZA 2 3 3 3 4 4 Avvertenza Conservazione e gestione dei dischi Precauzioni per la manipolazione Utilizzo della funzione 3D Copyright Licenza 7 8 11 12 12 13 Compatibilità dei dischi e dei formati Loghi dei dischi riproducibili Accessori Pannello anteriore Pannello posteriore Telecomando GUIDA INTRODUTTIVA CONNESSIONI 15 15 16 16 17 18 19 19 19 20 20 20 21 21 21 21 22 22 22 Collegamento del nucleo toroidale in ferrite al cavo di alimentazione dell'unità principale Col
Guida Introduttiva Compatibilità dei dischi e dei formati 02 Tipi di dischi e contenuti riproducibili VIDEO Tipo di disco Dettagli Disco Blu-ray Disco Blu-ray 3D Disco BD-ROM o BD-RE/-R registrato in formato BD-RE. DVD-VIDEO, DVD-RW, DVD-R, DVD+RW, DVD+R DVD-VIDEO, DVD+RW/DVD-RW(V)/DVD-R/+R registrati e finalizzati, o supporti di memorizzazione USB contenenti file DivX, MKV, MP4.
Guida Introduttiva Codice regionale Loghi dei dischi riproducibili I prodotti e i dischi sono codificati in base alla regione. Per poter riprodurre un disco, i codici regionali devono corrispondere. Se i codici non corrispondono, il disco non viene riprodotto. Il codice regionale di questo prodotto è indicato sul pannello posteriore del prodotto.
File video supportati Bit rate (Mbps) Codec audio *.avi DivX 3.11/4.x /5.1/6.0 H.264 BP/MP/HP MPEG4 SP/ASP DivX 3.11/4.x /5.1/6.0 MKV H.264 BP/MP/HP MPEG4 SP/ASP DivX 3.11/4.x /5.1/6.0 ASF H.264 BP/MP/HP MPEG4 SP/ASP Media WMV (wmv9) Window Video v9 H.264 BP/MP/HP MP4 MPEG4 SP/ASP 1920x1080 6 ~ 30 8 1920x1080 1920x1080 6 ~ 30 6 ~ 30 25 8 MP3 AC3 LPCM DTS Core *.mkv 1920x1080 6 ~ 30 8 1920x1080 1920x1080 6 ~ 30 6 ~ 30 25 8 *.
Guida Introduttiva Decoder video - Supporta fino a H.264 livello 4.1 - Non supporta H.264 FMO/ASO/RS, VC1 SP/ MP/AP L4 e AVCHD - MPEG4 SP, ASP : Al di sotto di 1280 x 720: Max. 60 fotogrammi Al di sopra di 1280 x 720: Max. 30 fotogrammi - Non supporta GMC 2 o superiore Decoder audio - Supporta WMA 7, 8, 9 e Standard - Non supporta i file multicanale WMA 9 PRO se il numero di canali è superiore a 2 o se i file richiedono la decodifica audio lossless.
Accessori 02 Controllare di seguito gli accessori forniti.
Guida Introduttiva Pannello anteriore AMPLIFICATORE A VALVOLE REGOLAZIONE DEL VOLUME APERTURA/CHIUSURA INVIO RIPRODUZIONE/PAUSA ARRESTO VANO DEL DISCO FUNZIONE ACCENSIONE ASC IN 5V 500mA DISPLAY INGRESSO PORTA USB ASC SENSORE TELECOMANDO | NOTA | Se il telefono cellulare o il dispositivo mobile si trovano accanto a un amplificatore a valvole o se si posizionano altri dispositivi elettronici sul prodotto, l'audio verrà disturbato.
Telecomando 02 Descrizione del telecomando FUNCTION TV SOURCE Per passare al modo TV, premere il tasto TV. Per passare all'home cinema, premere il tasto BD. Premere i tasti numerici per attivare le opzioni. RECEIVER SLEEP BD TV RDS DISPLAY TA 1 2 3 PTY- PTY SEARCH PTY+ 4 5 6 7 8 TITLE MENU 0 POPUP Per arrestare/riprodurre un disco. Per mettere in pausa un disco. VOL S/W LEVEL TUNING / CH FULL SCREEN HOME REPEAT Per visualizzare l'immagine a schermo intero sul televisore.
Guida Introduttiva Inserimento delle batterie nel telecomando Tipo batterie: AAA 1 Codici di comando del televisore Codice Marca Codice Admiral (M.Wards) 56, 57, 58 Mitsubishi/MGA 18, 40, 59, 60, 75 A Mark 01, 15 Anam 01, 02, 03, 04, 05, 06, 07, 08, 09, 10, 11, 12, 13, 14 AOC 01, 18, 40, 48 Marca 2 | NOTA | Assicurarsi che la batteria venga posta con i poli positivo e negativo in corrispondenza dei simboli "+" e "-" riportati nell'apposito vano.
Connessioni Questa sezione descrive vari metodi per collegare il prodotto ad altri componenti esterni. Prima di spostare o installare il prodotto, spegnere l'apparecchio e staccare il cavo di alimentazione. Connessioni Se si collega un nucleo toroidale in ferrite al cavo di alimentazione dell’unità principale, si può contribuire ad evitare le interferenze RF provenienti dai segnali radio. SPEAKERS OUT CENTER 1. Per aprire il nucleo toroidale in ferrite, tirare la linguetta di fissaggio. 2.
Connessioni Componenti degli altoparlanti SWA-5000 VITI (5X15): 4X VITI (5X20): 12X DIFFUSORI ANTERIORI/ ANTERIORI SUPERIORI SUPPORTO (S) (D) (S) (D) SURROUND BASE DEL SUPPORTO Modulo ricevitore wireless CAVI DIFFUSORI Cavo del diffusore (2X) DIFFUSORI ANTERIORI/ ANTERIORI SUPERIORI SURROUND CENTRALE Scheda TX SUBWOOFER Installazione dei diffusori sul supporto a colonna 1. Tendere il cavo del diffusore e farlo passare nel foro della base di supporto. 2.
Collegamento dei diffusori Rosso Connessioni LAN 03 1. Abbinare ciascun fascio di cavi al rispettivo diffusore facendo corrispondere i colori delle spine dei cavi agli adesivi in basso sui connettori dei diffusori. 2. Per collegare ciascun filo al relativo diffusore: a. Premere verso il basso la linguetta rossa dietro il diffusore, inserire il filo Nero rosso, quindi rilasciare la linguetta. b.
Connessioni | ATTENZIONE | Se si desidera installare il prodotto su una parete, fissare in modo stabile le viti o i chiodi nella parete e utilizzare i fori sul retro del diffusore per montarlo contro la parete. Gli accessori (chiodi o viti) necessari per il montaggio non sono forniti in dotazione di fabbrica. Non lasciar giocare i bambini con i diffusori o nelle loro vicinanze. La caduta di un diffusore potrebbe provocare lesioni. Per collegare i cavi agli altoparlanti, rispettare la polarità (+/ –).
Collegamento di un iPod/iPhone 03 Mediante un cavo USB Connessioni Collegare un iPod/iPhone alla porta USB anteriore utilizzando il cavo USB. ASC IN 5V 500mA 5V 500mA Mediante una basetta dock Per riprodurre un video deve essere coIlegato un cavo Composito.
Connessioni Collegamento a un televisore Selezionare il metodo 1 o il metodo 2. • Se il telecomando del prodotto è stato impostato per il funzionamento con il televisore, premere il tasto TV SOURCE sul telecomando e selezionare la corretta sorgente esterna dall'elenco di sorgenti TV (HDMI, ingresso video, ecc.) per visualizzare il video dal sistema home cinema.
Collegamento a dispositivi esterni W Rosso AUX IN Bianco Connessioni R 03 Per selezionare il modo corretto per un dispositivo esterno, premere il tasto FUNCTION. Ogni volta che si preme il tasto, il modo cambia in questo ordine : BD/DVD D. IN AUX R.
Connessioni Collegamento a un router di rete Rete wireless È possibile collegare il prodotto al router di rete utilizzando uno dei metodi di seguito illustrati.
Impostazioni Procedura di impostazione iniziale 5 . Il prodotto cerca e visualizza tutte le connessioni di rete di router wireless disponibili. Impostazione iniziale > Impostazioni di rete (2/5) Selezionare dall'elenco il router wireless in uso. KIMING_VTOWER Initial Settings > On-Screen Language TIAS Select a language for the on-screen displays. si-ap ▲ Dansk Nederlands English Eesti keel Suomi Français Deutsch Impostazioni 1 .
Impostazioni Impostazione iniziale > Impostazioni di rete (4/5) Immettere chiave di sicurezza. 0 imm. a b c d e 1 2 3 Precedente Succ. g h i j k l 4 5 6 m n o p q r 7 8 9 s t u v w x y z 0 A/a Spazio WPS PIN f Salta 11 . Se è disponibile un aggiornamento software, il prodotto scarica e installa l'aggiornamento. Questo può richiedere del tempo.
La schermata iniziale Impostazione iniziale > Calib audio automatica 04 AllShare Play Precedente Posizionare il mic. di calibrazione qui Utente Consente di riprodurre video, foto o musica da dischi o dispositivi connessi. Successivo Salta 2 3 4 1 Smart Hub 13 . Viene visualizzata la schermata Calibrazione audio automatica. Collegare il microfono ASC al connettore ASC IN sul prodotto. 14 . Premere il tasto E per selezionare il tasto Successivo button.
Impostazioni Accesso alla schermata di impostazione 1 . Selezionare Impostazioni nella schermata iniziale, quindi premere E. Viene visualizzata la schermata Impostazioni. 3 Tasto E (Invio) / DIREZIONE: ~ Premere ▲▼◄► per spostare il cursore o selezionare una voce. ~ Premere il tasto E per attivare la voce correntemente selezionata o confermare un'impostazione. 4 Tasto EXIT: Premere per uscire dal menu corrente.
Funzioni del menu Impostazioni Consente di regolare l'uscita del prodotto in base alla dimensione dello schermo del televisore. Vedere il passo 12 a pagina 24 per una descrizione delle possibili dimensioni dello schermo. Dimensioni schermo Smart Hub Consente di selezionare le dimensioni ottimali dello schermo Smart Hub. BD Wise Risoluzione Fotogramma Video(24Fs) Formato colore HDMI HDMI Profondità colori Modo progressivo BD Wise è la funzione di interconnettività Samsung di ultima generazione.
Impostazioni Audio Imposta altoparlanti È possibile impostare le opzioni del diffusore. Calib audio automatica Il prodotto riconoscere automaticamente il campo sonoro ottimizzato per l'ambiente. Equalizzatore Permette di configurare manualmente le impostazioni di equalizzazione. Volume Smart Permette di impostare il prodotto in modo che il volume resti stabile quando si verifica un cambio di scena o quando si cambia il canale. Selez.
Rete Impostazioni di rete Per ulteriori informazioni sulle impostazioni di rete e le funzioni di rete, vedere "Le reti e Internet " a partire da pagina 32. 04 Permette di controllare se è stata stabilita una connessione alla rete e a Internet. Wi-Fi Direct Consente di collegare un dispositivo Wi-Fi Direct al prodotto attraverso una rete peer-to-peer, senza utilizzare un router wireless. È possibile utilizzare il dispositivo per controllare il prodotto.
Impostazioni Sistema Impostazione iniziale Consente di eseguire nuovamente la procedura di impostazione iniziale. Vedere a pagina 23 per i dettagli. È possibile collegare una tastiera o un mouse USB wireless alla porta USB sulla parte anteriore del prodotto. Impostaz. tastiera: Consente di configurare una tastiera USB wireless collegata al prodotto. | NOTA | La tastiera può essere utilizzata solo se nel browser Web appare una schermata o una finestra con una tastiera QWERTY.
Grado Blocco Can. BD: Se non viene inserito il PIN, impedisce la riproduzione di dischi Blu-ray con classificazione uguale o superiore a quella di un'età specifica inserita. Grado Blocco Can. DVD: Se non viene inserito il PIN, impedisce la riproduzione di DVD con classificazione superiore ad una specifica classificazione numerica selezionata. Cambia PIN: Modificare il PIN a quattro cifre utilizzato per accedere alle funzioni di sicurezza. Impostazioni Sicurezza 04 Il PIN predefinito è 0000.
Impostazioni Calib audio automatica Impostando la funzione di calibrazione audio automatica (ASC) solo una volta mentre si riposiziona o si installa il prodotto, è possibile fare in modo che il prodotto riconosca automaticamente la distanza tra i diffusori, i livelli tra i canali e le caratteristiche di frequenza per creare un campo sonoro a 7.1 canali ottimizzato per il proprio ambiente.
Via cavo - Manuale 1 . Selezionare Avvio nelle impostazioni di rete, quindi premere il tasto E. Viene visualizzata la schermata Network Status (Stato rete). Il prodotto tenta di verificare la connessione di rete senza riuscirvi. Connessione alla rete cablata non riuscita. Impossibile connettersi alla rete. Verificare che l'indirizzo IP sia impostato correttamente in Impostazioni IP. Per maggiori informazioni, contattare l'ISP. 3 . Nella finestra di dialogo che appare, fare clic sulla scheda Supporto.
Impostazioni Wireless (Generale) - Automatico Dopo aver seguito i passi da 1 a 3 del capitolo "Come ottenere i valori delle impostazioni di rete" a pagina 32. 1 . Selezionare Avvio nelle impostazioni di rete, quindi premere il tasto E. Il prodotto cerca e visualizza un elenco delle reti disponibili. Impostazioni di rete Selezionare dall'elenco il router wireless in uso. 1/10 iptime23 Aggiorna ELT WPS(PBC) JSY Precedente KT_WLAN_C361 Mirhenge_edu Succ. Annulla SO070VOIP 2 .
5 . La connessione Wi-Fi può essere stabilita in tre modi: WPS(PBC) 2 . Premere il tasto BLU (D) sul telecomando. 3 . Premere il tasto WPS(PBC) sul router entro due minuti. Il prodotto acquisisce automaticamente tutti i valori delle impostazioni di rete necessari, quindi si collega alla rete. Viene visualizzata la schermata Stato rete. Il prodotto si collega alla rete dopo aver verificato la connessione di rete.
Impostazioni 4 . Viene visualizzato il popup di collegamento in corso, seguito dal popup di dispositivo collegato. Quando si chiude, il dispositivo viene visualizzato come collegato nell'elenco della schermata Wi-Fi Direct. | NOTA | La connessione di rete via cavo o wireless viene scollegata quando si utilizza la funzione Wi-Fi Direct. Soft AP Soft AP permette di collegare altri dispositivi WiFi alla rete attraverso il prodotto e di consentirne l'accesso a Internet.
Aggiornamento del software 1 . Nel menu principale, selezionare Impostazioni, quindi premere il tasto E. 2 . Selezionare Supporto, quindi premere il tasto E. 3 . Selezionare Aggiornamento software, quindi premere il tasto E. 4 . Selezionare uno dei seguenti metodi : • In linea • Tramite USB • Tramite disco • Con file scaric • Aggiornamento mod Standby 5 . Premere il tasto E. Di seguito sono riportate le informazioni relative a ciascun metodo.
Impostazioni Tramite disco 4 . Al termine dell'aggiornamento, il prodotto si spegne e riaccende da solo. 1 . Accedere al sito www.samsung.com. 2 . Fare clic su SUPPORT in alto a destra nella pagina. 3 . Inserire il codice del modello del prodotto nel campo di ricerca, quindi fare clic su Find Product. 4 . Fare clic su Get downloads al centro della pagina sotto l'intestazione Download. 5 . Fare clic su Firmware al centro della pagina. 6 .
Riproduzione Multimediale Per accedere alla schermata AllShare Play, selezionare l'icona AllShare Play nella schermata principale, quindi premere il tasto E. Utilizzo della schermata AllShare Play AllShare Play / El. pers. / Ultime riproduz. El. pers. Video Qui verranno visualiz. i file riprod. di recente. Novità Aggiorn. di rec. 09.Gen.2012 Visualiz altro Foto SAM_0001 SAM_0002 SAM_0003 SAM_0004 SAM_0005 Elenco Musica Nessuna playlist creata. Creare playlist per accedere ai conten.
Riproduzione Multimediale Riproduzione di file su un dispositivo di memorizzazione USB o su iPod/iPhone È possibile riprodurre i file multimediali memorizzati su un dispositivo USB collegato. 1 . Quando il prodotto è spento collegare un dispositivo di memorizzazione USB o un iPod/iPhone. 2 . Accendere il prodotto. Quando viene visualizzata la schermata principale, selezionare AllShare Play > Video, Foto o Musica > Dispositivo connesso, quindi premere il tasto E. 3 .
La schermata Funzione È inoltre possibile cambiare la sorgente premendo il tasto FUNCTION in alto a destra sul telecomando. AllShare Play / Musica / Per accedere alla schermata Funzione, selezionare l'icona Funzione nella schermata principale, quindi premere il tasto E. Opzioni nella schermata Funzione Per selezionare un'opzione, evidenziarla utilizzando i tasti ▲▼, quindi premere il tasto E.
Riproduzione Multimediale Riproduzione di un disco con contenuti registrati dall'utente È possibile riprodurre i file multimediali registrati su dischi DVD o CD. 1 . Inserire un disco registrato dall'utente nell'apposito vano con l'etichetta rivolta verso l'alto, quindi chiudere il vano. Viene visualizzato il popup di dispositivo collegato. 2 . Utilizzare i tasti ▲▼ per selezionare il tipo di contenuto da visualizzare o riprodurre (Video, Foto o Musica), quindi premere il tasto E.
PC Prodotto Prodotto Connessione AllShare Riproduzione dei file memorizzati sul PC Connessione AllShare Smartphone 1 . Collegare il prodotto, il PC e/o il telefono cellulare compatibile con DLNA alla stessa rete wireless. 2 . Seguire le istruzioni riportate nel manuale di installazione/istruzioni del software AllShare per impostare i dispositivi e i file da riprodurre o visualizzare.
Riproduzione Multimediale Controllo della riproduzione video È possibile controllare la riproduzione dei file video memorizzati su dischi Blu-ray, DVD e CD e su dispositivi di memorizzazione USB. A seconda del disco, alcune funzioni descritte in questo manuale potrebbero non essere disponibili.
Menu visualizzati solo durante la Durante la riproduzione, premere il tasto TOOLS. riproduzione di dischi BD/DVD Selezionarlo per ripetere un titolo, un capitolo (solo dischi BD/DVD) o una Modalità Ripeti sezione contrassegnata specifici.Funziona allo stesso modo del tasto REPEAT. Vedere a pagina 44. Full Screen Selezionarlo per impostare il formato schermo intero desiderato. È possibile selezionare Originale, Modalità1 (più grande) o Modalità2 (grandezza massima).
Riproduzione Multimediale Controllo della riproduzione musicale È possibile controllare la riproduzione dei contenuti musicali memorizzati su DVD, CD o dispositivi di memorizzazione USB. Tasti del telecomando utilizzati per la riproduzione musicale RDS DISPLAY 6 TA 1 2 3 PTY- PTY SEARCH PTY+ 4 5 6 7 8 DISC MENU 9 0 5 MUTE 4 1 1 1 . Durante la riproduzione, utilizzare il tasto ► per selezionare nell'angolo in basso a destra della schermata, quindi premere il tasto E. 2 .
• Annulla annulla eventuali modifiche effettuate nella schermata Selezione ripr.. Quando si torna alla schermata di riproduzione, la playlist rimane immutata. Ripping È possibile trasferire la musica da un CD musicale a un dispositivo USB inserito nella porta USB. 1 . Inserire un dispositivo USB nel connettore USB sul pannello anteriore del prodotto, quindi premere il tasto RETURN (') sul telecomando. 2 .
Riproduzione Multimediale Come collegare il sistema Home Cinema a un dispositivo Bluetooth Collegamento Dispositivo Bluetooth Verificare che il dispositivo Bluetooth supporti la funzione di cuffie stereo compatibile con Bluetooth. 1 . Premere il tasto FUNCTION sul telecomando del prodotto per visualizzare il messaggio BT. • Sul display anteriore del sistema Home Cinema viene visualizzato il messaggio WAIT per 2 secondi, quindi viene visualizzato il messaggio READY . 2 .
Riproduzione di contenuti fotografici Durante la riproduzione, premere il tasto TOOLS. Vai a Elenco foto Selezionarlo per andare all'elenco delle foto sull'attuale supporto. Avvia proiezione diapositive Selezionarlo per avviare la presentazione. Slide Show Speed Selezionarlo per impostare la velocità della presentazione. Velocità slide show Selezionarlo per impostare gli effetti speciali della presentazione.
Riproduzione Multimediale Viene visualizzato sulla schermata della funzione Visualizza. Selezionarlo per ordinare e visualizzare tutti i Prima data psb file foto o video su un dispositivo di memorizzazione dalla data più recente a quella più vecchia. Mensile Rip. selezione Selezionare Invia per caricare i file selezionati su Picasa, Facebook, Cloud Storage, NDrive e Family Story. Per utilizzare Invia, è necessario creare un account sul sito online, quindi accedervi utilizzando la funzione Accedi.
Selezionare Mod. playlist per rimuovere i file o le tracce da una playlist. Il dispositivo di memorizzazione che contiene la playlist deve essere inserito o collegato al prodotto. Mod. playlist 1. Utilizzare i tasti ▲▼◄► per selezionare un file, quindi premere il tasto E. 2. Ripetere l'operazione per ogni traccia o file da rimuovere. | NOTA | È anche possibile spostarsi su Select All (Seleziona tutto) a destra, quindi premere il tasto E per selezionare tutte le tracce o tutti i file. 3.
Riproduzione Multimediale Memorizzazione delle stazioni Esempio: memorizzazione della stazione FM 89.10. 1 . Premere il tasto FUNCTION per selezionare FM. 2 . Premere il tasto TUNING/CH (,.) per selezionare <89.10>. 3 . Premere il tasto TUNER MEMORY. • Il numero lampeggia sul display. 4 . Premere di nuovo il tasto TUNER MEMORY. • Premere il tasto TUNER MEMORY prima che il numero scompaia dal display.
Indicazione PTY (Tipo programma) e 05 funzione PTY-SEARCH Utilizzo dei tasti degli effetti speciali sul telecomando Per ricercare un programma usando i Audio 3D codici PTY È possibile godere di un audio surround più naturale e nitido con toni ricchi regolando l'intensità del suono attraverso le relative opzioni. Off Alto Medio Basso Prima di cominciare • La funzione di ricerca PTY è applicabile soltanto alle stazioni memorizzate.
Riproduzione Multimediale SOUND Funzione EFFETTO AUDIO EFFECT Permette di selezionare un modo per ottimizzare l'audio. 1. Premere il tasto SOUND EFFECT. 2. Premere il tasto ▲▼ per selezionare il modo desiderato: DSP, Dolby Pro Logic II o Mod. SFE. 3. Premere i tasti ◄► per selezionare l'effetto audio desiderato. DSP • Sala fil. Bratislava (Sala 2) : Riproduce anch’essa l’effetto di trovarsi in una sala concerti, ma con potenza inferiore rispetto a SALA 1.
Servizi di Rete Panoramica di Smart Hub 1 34 Search 1 . Collegare il prodotto alla rete. (Vedere a pagina 22) 2 . Configurare le impostazioni di rete. (Vedere alle pagine 32~36) 2 Servizi di Rete Per utilizzare i servizi di rete, è necessario innanzitutto: 06 È possibile usufruire di diversi servizi di rete come Smart Hub o BD-LIVE collegando il prodotto alla rete.
Servizi di Rete 9 Applicazioni personali : Visualizza la galleria personale delle applicazioni in cui è possibile aggiungere, modificare ed eliminare applicazioni. 0 Samsung Apps : Aprire Samsung Apps per scaricare vari servizi applicativi a pagamento o gratuiti. Panoramica del browser Web 1 http://www.google.com/ Utilizzo del browser Web È possibile accedere a Internet utilizzando per impostazione predefinita il browser Web installato nella schermata di Smart Hub. Google Search 1 .
06 Servizi di Rete 2 Guida di navigazione : Visualizza i tasti del telecomando che è possibile utilizzare per navigare nel browser Web. • VERDE (B) : Per visualizzare il pannello di controllo. • GIALLO (C) : Per cercare un link. • Tools : Per visualizzare la finestra Strumenti. • Exit : Per tornare al menu precedente. BD-LIVE™ Quando il prodotto è collegato alla rete, è possibile fruire di diversi contenuti di servizi relativi ai film disponibili su dischi compatibili con BD-LIVE. 1 .
Appendice Informazioni aggiuntive Nota HDMI OUT Connessioni • A seconda del televisore, alcune risoluzioni di uscita HDMI potrebbero non essere utilizzabili. • Per poter vedere video in 3D, è necessaria una connessione HDMI. • In questo caso, impostare HDMI Profondità colori su Off nel menu. Impostazioni 3D • Per alcuni dischi 3D, per arrestare un film durante la riproduzione in 3D, premere una volta il tasto 5. Il film si arresta e l'opzione modo 3D si disattiva.
Anynet+ (HDMI-CEC) • Nel modo memoria esterna, la riproduzione del disco può essere interrotta se si scollega il dispositivo USB durante la riproduzione. • Sono supportati solo i dispositivi USB formattati nel file system FAT (etichetta di volume DOS 8.3). Si consiglia di usare dispositivi USB che supportano il protocollo USB 2.0, con velocità di lettura/ scrittura di 4 MB/sec o superiore. • La funzione Riprendi Riproduzione potrebbe non funzionare dopo aver formattato il dispositivo di memorizzazione.
Appendice Riproduzione di file video • I file video con frequenze di bit elevate, pari o superiori a 20 Mbps, forzano le capacità del prodotto e potrebbero arrestarsi durante la riproduzione. Selezione della lingua dell'audio • L'indicatore ◄► non viene visualizzato sulla schermata se la sezione BONUSVIEW non contiene impostazioni audio BONUSVIEW. • Le lingue disponibili attraverso la funzione Lingua audio dipendono dalle lingue codificate sul disco.
Riproduzione dei file musicali 07 • Regolare il volume a un livello moderato prima di collegare l'iPod al prodotto. • Quando il prodotto è alimentato e si collega un iPod, il prodotto carica la batteria dell'iPod. AllShare Play • Per poter visualizzare i video sull'iPod, l'uscita VIDEO (Composito) deve essere collegata al televisore (vedere a pagina 20). • Se si desidera riprodurre i video sull'iPod attraverso l'uscita VIDEO, impostare Anynet+ (HDMICEC) su Off.
Appendice Risoluzione in base al modo di uscita Riproduzione di dischi Blu-ray/e-Content/contenuti digitali HDMI/collegata Uscita Conf. HDMI/non collegata Modo HDMI Disco Blu-ray E-Content/Contenuti digitali Modo VIDEO Modo VIDEO BD Wise Risoluzione del disco Blu-ray 1080p@60F 576i/480i - Auto Risoluzione max. dell'ingresso TV Risoluzione max.
Selezione dell'uscita digitale PCM Bitstream (DTS ricodificato) Bitstream (Dolby D ricodificato) Ricevitore AV con supporto HDMI PCM Fino a PCM 7,1 can. PCM DTS ricodificato Dolby Digital ricodificato * Dolby Digital Fino a PCM 7,1 can. Dolby Digital DTS ricodificato Dolby Digital ricodificato * Dolby Digital Plus Fino a PCM 7,1 can. Dolby Digital Plus DTS ricodificato Dolby Digital ricodificato * Streaming Dolby TrueHD audio su disco Blu-ray DTS Fino a PCM 7,1 can.
Appendice Risoluzione dei problemi Se il prodotto non funziona correttamente, consultare la tabella che segue. Se il problema non è elencato nella tabella o se le istruzioni fornite non portano a una soluzione, spegnere il prodotto, scollegare il cavo di alimentazione e contattare il rivenditore autorizzato più vicino o il Centro di assistenza di Samsung Electronics. Sintomo Controlli/Rimedi Non si riesce ad estrarre il disco.
Sintomo • Il prodotto non funziona (esempio: l'apparecchio si spegne o si sentono strani rumori). • È possibile riprodurre i dischi Blu-ray/DVD 16:9 in modo 16:9 Pieno, 4:3 Letter Box o 4:3 Pan-Scan, ma i dischi Blu-ray/DVD 4:3 possono essere visti soltanto in formato 4:3. Selezionare la funzione appropriata in base alla copertina del disco Blu-ray. Appendice Il formato non può essere cambiato.
Appendice Sintomo Controlli/Rimedi Funzione AllShare Play Si vedono le cartelle condivise in AllShare Play, ma non i file. • AllShare Play mostra solo i file corrispondenti alle categorie Video, Foto e Musica. I file che non corrispondono a queste categorie potrebbero non essere visualizzati. Il video viene riprodotto in modo intermittente. • Verificare che la rete sia stabile. • Verificare che il cavo di rete sia collegato correttamente e che la rete non sia sovraccarica.
Specifiche Sintonizzatore FM 3,9 kg Dimensioni 430 (L) x 65 (A) x 353,5 (P) mm Temperatura di esercizio da +5°C a +35°C Umidità di esercizio da 10 % a 75 % Rapporto segnale/rumore 55 dB Sensibilità utile 12 dB Distorsione armonica totale 0,5 % BD (disco Blu-ray) Velocità di lettura: 9,834 m/sec Appendice Generale 07 Peso Velocità di lettura: 6,98 ~ 7,68 m/sec.
Appendice Altoparlante Sistema di altoparlanti a 7.
Contatta SAMSUNG WORLD WIDE Se avete commenti o domande sui prodotti Samsung, contattate il Servizio Clienti Samsung. Area ` Europe Albania Austria Contact Centre 42 27 5755 0810 - SAMSUNG (7267864, € 0.07/min) 02-201-24-18 Bosnia Bulgaria Croatia 05 133 1999 07001 33 11 062 SAMSUNG (062 726 7864) 800-SAMSUNG (800-726786) Samsung Zrt.