HT-H5500 HT-H5500W HT-H5530 HT-H5550 HT-H5550W 5.1CH Blu-ray™ Home Entertainment System user manual imagine the possibilities Thank you for purchasing this Samsung product. To receive more complete service, please register your product at www.samsung.com/register HT-H5500_00W_30_50_50W-ENG_0206.
Safety Information This symbol indicates that high voltage is present inside. It is dangerous to make any kind of contact with any internal part of this product. CAUTION RISK OF ELECTRIC SHOCK DO NOT OPEN CAUTION: TO REDUCE THE RISK OF ELECTRIC SHOCK, DO NOT REMOVE THE COVER (OR BACK). THERE ARE NO USER SERVICEABLE PARTS INSIDE. REFER ALL SERVICING TO QUALIFIED PERSONNEL. • The slots and openings in the cabinet and in the back or bottom are provided for necessary ventilation.
WARNING : • TO PREVENT THE SPREAD OF FIRE, KEEP CANDLES AND OTHER ITEMS WITH OPEN FLAMES AWAY FROM THIS PRODUCT AT ALL TIMES. CLASS 1 LASER PRODUCT This product is classified as a CLASS 1 LASER product. Use of controls, adjustments or performance of procedures other than those specified herein may result in hazardous radiation exposure. CAUTION : • INVISIBLE LASER RADIATION WHEN OPEN AND INTERLOCKS DEFEATED, AVOID EXPOSURE TO BEAM.
Contents GETTING STARTED PLAYING CONTENT 5 Accessories 26 Switching the Source Device 5 Speaker Components 26 Playing Commercial Discs 7 Front Panel 26 Playing a Disc with User Recorded Content 7 Rear Panel 27 Playing Files on a USB Device 8 Remote Control 28 Controlling Video Playback 29 Playing a Pre-Recorded Commercial Audio Disc CONNECTIONS 9 30 Controlling Music Playback Connecting the Speakers 12 Attaching the Toroidal Ferrite Core to the Power Cord of the Wireless Receiver Module
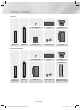
Getting Started Check the box for the accessories and speaker components listed or shown below. Accessories • Remote Control • User Manual Getting Started Figures and illustrations in this User Manual are provided for reference only and may differ from actual product appearance. An administration fee may be charged if either a. an engineer is called out at your request and there is no defect in the product (i.e. where you have failed to read this user manual) b.
Getting Started HT-H5530 Front x 2 Stand x 2 Screw (5x20) x 8 Centre Stand Base x 2 Surround x 2 Speaker Cable x 6 Subwoofer Screw (5x20) x 16 Centre Stand Base x 4 HT-H5550/HT-H5550W HT-H5550W only Front x 2 Surround x 2 Stand x 4 Subwoofer Speaker Cable x 6 Wireless Receiver Module (SWA-6000) 6 - English HT-H5500_00W_30_50_50W-ENG_0206.
Front Panel DISPLAY ICONS NFC FUNCTION STOP PLAY/PAUSE OPEN/ CLOSE VOLUME CONTROL POWER Getting Started DISPLAY 5V 0.5A DISC TRAY ✎ ✎ ✎ ✎ ✎ REMOTE CONTROL SENSOR USB When the product is on, do not let children touch the product's surface. It will be hot. To upgrade the product's software through the USB jack, you must use a USB flash drive. When the product displays the Blu-ray Disc menu, you cannot start the movie by pressing the /6 button on the product or the remote.
Getting Started Remote Control Tour of the Remote Control Turn the product on and off. FUNCTION VOLUME Adjust the volume. - MUTE TA 1 2 3 PTY - PTY SEARCH PTY + 4 5 6 7 8 9 TITLE MENU DISC MENU Press to view the disc menu. 0 POPUP Press to skip backwards or forwards. Press to play a disc or files. Press to stop a disc or files. SUBTITLE HOME TOOLS INFO EXIT RETURN TUNER MEMORY MO/ST These buttons are used both for menus on the product and also several Blu-ray Disc functions.
Connections This section describes various methods of connecting the product to other external components. Before moving or installing the product, be sure to turn off the power and disconnect the power cord.
Connections Installing the Speakers on the Tallboy Stand * HT-H5530/HT-H5550/HT-H5550W only 1 1. Turn the Stand Base upside-down and connect it to the Stand. 2. Use the driver to combine the screws on the 3 marked holes. Stand Base 2 Stand 3. 4. Straighten a supplied speaker wire to the gravity direction and put in the hole on the centre of Stand Base. 3 4 Speaker Connect the upper Speaker to the assembled Stand. Stand 5. 6.
In case of HT-H5500 Centre Speaker Front Speaker (L) SURROUND Surround Speaker (L) Connections SURROUND Subwoofer Front Speaker (R) Surround Speaker (R) SURROUND SURROUND * Refer to page 6 for the speakers of HT-H5530/HT-H5550. In case of HT-H5500W Front Speaker (L) Centre Speaker Subwoofer Front Speaker (R) Surround Speaker (L) Surround Speaker (R) Wireless Receiver Module * HT-H5500W/HT-H5550W should be connected with the SWA-6000 only. * Refer to page 6 for the speakers of HT-H5550W.
Connections ✎ ✎ The maximum transmission distance from the product to the wireless receiver module is about 10m, but may vary depending on your operating environment. If a steel-concrete wall or metallic wall is between the product and the wireless receiver module, the system may not operate at all, because the radio waves cannot penetrate metal. If the product doesn't make a wireless connection, you need to run an ID Set between the product and wireless receiver module.
Connecting to a TV and External Devices Red W White Method 1 External Devices Connections R Method 2 AUDIO OUT OPTICAL OUT HDMI IN Connecting to a TV Connect an HDMI cable (not supplied) from the HDMI OUT jack on the back of the product to the HDMI IN jack on your TV. If the TV supports ARC, you can hear the audio from your TV through the home cinema with only this cable connected. See page 18 in this manual and the section on ARC in your TV's user's manual for details.
Connections Connecting to a Network Router Wireless Network You can connect your product to your network router using one of the methods illustrated below. Wired Network Wireless IP sharer Broadband modem (with integrated router) Broadband service Broadband service Or ✎ Router Broadband service ✎ ✎ Broadband modem ✎ ✎ ✎ ✎ Your router or your Internet Service Provider's policies may prevent the product from accessing Samsung's software update server.
Settings 4:3 Pan-Scan - For older, standard screen, analogue TVs. Displays 4:3 pictures in full screen and 16:9 pictures in Pan-Scan format that fills the screen, but cuts off the left and right sides of the picture and enlarges the middle vertically. The Initial Settings Procedure • The Home menu will not appear if you do not configure the initial settings. • The OSD (On Screen Display) may change in this product after you upgrade the software version.
Settings The Home Screen at a Glance 1 8 Function 2 Play disc Photos Videos Music Use for switching to an external device, and for radio and mode switching for a Bluetooth connection. You can use the remote control’s FUNCTION button and the main unit’s button for mode switching. 9 Settings Set various functions to suit your personal preferences.
Buttons on the Remote Control Used for the Settings Menu SUBTITLE 1 HOME Display REPEAT 3D Settings TOOLS INFO 3 2 Settings Menu Functions EXIT RETURN 4 TUNER HOME Button : Press to move to the Home screen. 2 RETURN Button : Press to return to the previous menu. 3 E (ENTER) / DIRECTION Button : • Press ▲▼◄► to move the cursor or select an item. • Press the E button to activate the currently selected item or confirm a setting.
Settings HDMI Colour Format Digital Output Lets you set the colour space format for the HDMI output to match the capabilities of the connected device (TV, monitor, etc). Lets you set the Digital Output to match the capabilities of the AV receiver you’ve connected to the product. For more details, please refer to the digital output selection table. (See page 45) HDMI Deep Colour Lets you set the product to output video from the HDMI OUT jack with Deep Colour.
Wi-Fi Direct BD Data Management Lets you connect a Wi-Fi Direct device to the product using a peer-to-peer network, without the need for a wireless router. Note that if the product is connected to a wireless network, it may be disconnected when you use Wi-Fi Direct. (See page 22) Lets you manage the contents you downloaded through a Blu-ray disc that supports the BD-Live service. You can view the information about the USB device you are using for BD Live data storage including the storage space.
Settings 2. Support Software Upgrade When it is done, highlight OK, and then press E button. For more information about this function see page 23. Contact Samsung Provides contact information for assistance with your product. Wired - Manual If you have a static IP address or the automatic procedure does not work, you'll need to set the Network Settings values manually. After following Steps 1 to 3 above: 1. In the Network Settings screen, change Network Type to Wired.
6. ✎ 7. Repeat Steps 4 and 5 until you have filled in all parameters. You can get the network parameter values from your Internet provider. When finished entering all the parameter values, select Return ('), and then press the E button. The home cinema verifies the network connection and then connects to the network. Wireless Network You should be able to find the security code or pass phrase on one of the set up screens you used to set up your router or modem.
Settings When finished, select Done, and then press the E button. The product searches for the network. 6. The Network connection fail screen appears. Use ◄► buttons to select IP Settings, and then press the E button. 7. Select the IP setting field, and then set it to Enter manually. 8. Select a network parameter to enter (IP Address, for example), and then press E button. Use the number keypad on your remote control to enter the numbers for the parameter.
4. Select Wi-Fi Direct, and then press the E button. The Wi-Fi Direct devices that you can connect to appear. 2. Settings Through the Product Using a PIN Display Wi-Fi Direct The Connecting pop-up appears, followed by the Connected pop-up. When it closes, you should see the device listed on the Wi-Fi Direct screen as connected. Select the Wi-Fi Direct device you want to connect to this product, and then press the E button. 2. The PIN pop-up appears. 3.
Settings 4. 5. ✎ Select one of the following methods: • By Online • By USB • Auto Upgrade Notification 10. Copy the folder to a USB flash drive. Press the E button. Directions for each method begin below. 12. In the product’s menu, go to Settings > Support > Software Upgrade. 11. Make sure no disc is inserted in the product, and then insert the USB flash drive into the USB port of the product. If you want to cancel the upgrade while the upgrade software is downloading, press the E button.
Setting Up DLNA DLNA enables you to play music, video, and photo files located in your PC using this product. To use DLNA, you must connect the product to your PC via the network (See page 14) and install the SAMSUNG PC Share Manager on the PC. To Download the DLNA Software To use DLNA with your PC, you must install DLNA software on your PC. You can download the PC software and get detailed instructions for using DLNA from the Samsung.com website. Go to www.samsung.com. 2.
Playing Content Your home cinema can play content located on Blu-ray/DVD/CD discs, USB devices, PCs, smart phones, tablets, and in Apps. To play content located on your PC or a mobile device, you must connect the PC or mobile device and the product to your network. To play content on your PC, you must also download and install DLNA network software or already have DLNA network software on your PC. ✎ PCs running Windows 7 and Windows 8 have DLNA software (Play To) built in.
3. A screen appears listing the contents of the disc. Depending on how the contents are arranged, you will see either folders, individual files, or both. 3. 4. If necessary, use the ▲▼◄► buttons to select a folder, and then press the E button. 5. 5. Use the ▲▼◄► buttons to select a file to view or play, and then press the E button. 6. 6. Press the RETURN button one or more times to exit a current screen, exit a folder, or to return to the Home screen.
Playing Content Controlling Video Playback 2 Using the disc menu, title menu, popup menu, and title list You can control the playback of video content located on a Blu-ray/DVD disc, USB device, mobile device, or PC. Depending on the disc or contents, some of the functions described in this manual may not be available. Buttons on the Remote Control used for Video Playback TITLE MENU DISC MENU 0 POPUP 2 1 DISC MENU During playback, press this button to display the Disc menu.
Using the TOOLS Menu Subtitle During playback, press the TOOLS button. Lets you set the desired subtitle language. Title Angle If there is more than one title on a disk or device, lets you move to or select a desired title. To view a scene from another angle. The Angle option displays the number of angles available to view (1/1, 1/2, 1/3, etc.). Playing Time Lets you go to a specific playback point. Use the numeric buttons to input the playback point.
Playing Content Pl li Playlist Repeat Mode 4 Fast Play (Audio CD [CD-DA] only) : During playback, press the 3 or button. Each time you press the 3 or button, the playback speed will change. 5 7 button : Pauses a track. 6 6 button : Plays the currently selected track. 0/16 Tools TRACK 001 Track Rip > Move < Adjust ' Return TRACK 003 04:41 TRACK 004 04:02 TRACK 005 03:43 TRACK 006 03:40 00:00/00:00 Repeating Tracks " Pause CD 2.
4. To remove a file from the Playlist, move to the file, and then press the YELLOW (C) button. ✎ 5. Press the E button to play the selected files. The Playlist screen appears. ✎ 6. To go to the Music List, press the 5 or RETURN button. 7. ✎ ✎ To go back to the Playlist, press the E button. You can create a playlist with up to 99 tracks on Audio CDs (CD-DA). If you go to the Music List from the Playlist, and then return to the Playlist, the Playlist will start playing again from the beginning.
Playing Content ✎ ✎ Depending on the disc or storage device, the Tools menu may differ. All options may not be displayed. To enable the background music function, the photo file must be in the same storage media as the music file. However, the sound quality can be affected by the bit rate of the MP3 file, the size of the photo, and the encoding method. Presetting Stations Example : Presetting FM 89.10 into memory. 1. Press the FUNCTION button to select FM. 2.
- When pressing the buttons on the primary remote control, make sure that you have selected the FM station using the primary remote control. To show the RDS signals You can see the RDS signals the station sends on the display. Press the RDS DISPLAY button while listening to an FM station.
Playing Content • The further the distance is between the Home Cinema and the Bluetooth device, the worse the quality is. If the distance exceeds the Bluetooth operational range, the connection is lost. • In poor reception-sensitivity areas, the Bluetooth connection may not work properly. • The Home Cinema has an effective reception range of up to 10 meters in all directions if there are no obstacles. The connection will be automatically cut off if the device is out of this range.
To Disconnect the Home Cinema from the Using NFC (Near Field Communication) Bluetooth Device Connect your NFC compatible device via Bluetooth to the Home Cinema using this simple set-up procedure. You can play music from the smart phone through the Home Cinema. Press the ( ) button on the front panel of the Home Cinema to switch from BT to another mode or turn off the Home Cinema.
Playing Content ✎ ✎ ✎ ✎ NFC connection works even when the Home Cinema is turned off, if Quick start is set to On. However, NFC connection will work only after the Home Cinema is turned on if the power cord had been disconnected and reconnected. The is a trademark or registered trademark of NFC Note2 Forum, Inc. in the United States and in other countries. S3/S4 NFC tagging for Bluetooth Note3 connection cannot be established while powering on and off.
Network Services Using BD-LIVE™ 3. On your home cinema, select Change Device. 4. Use the ▲% button to select your PC in the Device List. Connect the product to the network. (See page 14) 5. Select the kind of file you want to view or play, Photos, Videos, or Music and then press E. 2. Configure the network settings. (See pages 20~22) 6. Once the product is connected to your network, you can enjoy various movie-related service contents available on BD-LIVE compliant discs.
Network Services Using Apps Using Opera TV Store The first time you access any one of the apps, the home cinema displays two agreements. You must accept both agreements to download and use any apps. By default, the home cinema displays four popular apps on the Home screen. You can view more apps and change the apps the home cinema displays on the Home screen by selecting the More button. To start an app, highlight the app, double click it, and then follow the directions displayed on the screen.
4. Repeat this process to delete additional apps. 5. When finished, select DONE, and then press the E button. 6. Press the RETURN button to go back to the Main screen. • Bluetooth transmissions can interfere with the Screen Mirroring signal. Before using the Screen Mirroring function, we strongly recommend that you turn off the Bluetooth function on your smart phone or smart device. Searching for Apps 1. Select SEARCH at the top of the screen, and then press the E button. 2.
Appendix Additional Information Digital Output Notes Connections HDMI OUT • Certain HDMI output resolutions may not work, depending on your TV. • You must have an HDMI connection to enjoy videos with 3D technology. • A long HDMI cable may cause screen noise. If this occurs, set HDMI Deep Colour to Off in the menu. Settings 3D Settings • For some 3D discs, to stop a movie during 3D playback, press the 5 button once. The movie stops and the 3D mode option is de-activated.
Speaker Settings Playing JPEG files • When Speaker Selection is set to TV Speaker, audio is produced by the TV speakers. • You can’t enlarge the subtitle and PG graphics in the full screen mode. HDMI audio Playing Content • When HDMI audio is output to the TV speakers, it is automatically down-mixed to 2 channels. Audio Return Channel • When Anynet+ (HDMI-CEC) is Off, the Audio Return Channel function is not available.
Appendix ✎ ✎ ✎ ✎ ✎ If a DVD-RW/-R disc has not been recorded properly in DVD video format, it will not be playable. Your product will not play content that has been recorded on a DVD-R at a bit rate that exceeds 10 Mbps. Your product will not play content that has been recorded on a BD-R or USB device at a bit rate that exceeds 30 Mbps. Playback may not work for some types of discs, or when you use specific operations, such as angle change and aspect ratio adjustment.
1 The U.S., U.S. territories and Canada 2 Europe, Japan, the Middle East, Egypt, Africa, Greenland 3 Taiwan, Korea, the Philippines, Indonesia, Hong Kong 4 Mexico, South America, Central America, Australia, New Zealand, Pacific Islands, Caribbean 5 Russia, Eastern Europe, India, North Korea, Mongolia 6 China DVDVIDEO If the Region number of a Blu-ray Disc/DVD does not correspond to the Region number of this product, the product cannot play the disc.
Appendix Video File Support File Extension Container Video Codec Audio Codec *.avi AVI DivX 3.11/4/5/6 MP4v3 H.264 BP/MP/HP Resolution MP3, Dolby Digital, DTS, WMA, PCM *.mkv MKV VC-1 AP, DivX 5/6 H.264 BP/MP/HP MP3, Dolby Digital, DTS *.wmv WMV (wmv9) VC-1 AP, VC-1 SM WMA *.mp4 MP4 MP4 (mp4v) H.264 BP/MP/HP AAC *.mpg / *.mpeg PS MPEG1 MPEG2 H.
Digital Output Selections Setup Bitstream (Unprocessed) PCM Connection Audio Stream on Blu-ray Disc Definition for Blu-ray Disc HDMI supported AV receiver PCM Up to PCM 7.1ch PCM Dolby Digital Up to PCM 5.1ch Dolby Digital Dolby Digital Plus Up to PCM 5.1ch Dolby Digital Plus Dolby TrueHD Up to PCM 5.1ch Dolby TrueHD DTS Up to PCM 5.1ch DTS DTS-HD High Resolution Audio Up to PCM 5.1ch DTS-HD High Resolution Audio DTS-HD Master Audio Up to PCM 5.
Appendix Resolution according to the output mode Blu-ray Disc/E-contents/Digital Contents playback DVD playback HDMI Mode Output E-contents/ Digital contents HDMI Mode Blu-ray Disc Resolution of Blu-ray Disc 1080p@60F 480i Setup BD Wise Auto Max. Resolution of TV input 1080p@60F 1080p@60F Max.
Symptom Check/Remedy Dolby Digital 5.1 CH Surround Sound is not produced. • Is there "Dolby Digital 5.1 CH" mark on the disc? Dolby Digital 5.1 CH Surround Sound is produced only if the disc is recorded with 5.1 channel sound. • Is the audio language correctly set to Dolby Digital 5.1-CH in the information display? The remote control does not work.
Appendix Symptom Check/Remedy If the HDMI output is set to a resolution your TV cannot support (for example, 1080p), you may not see a picture on your TV. • Press and hold the 5 button on front panel for more than 5 seconds with no disc in the product. All settings will revert to their factory settings. No HDMI output. • Check the connection between the TV and the HDMI jack of the product. • Check if your TV supports 576p/480p/720p/1080i/1080p HDMI input resolution.
HT-H5500W/HT-H5550W Hereby, Samsung Electronics, declares that this Home Cinema System is in compliance with the essential requirements and other relevant provisions of Directive 1999/5/EC. The official Declaration of Conformity may be found at http://www.samsung.com, go to Support > Search Product Support and enter the model name. This equipment may be operated in all EU countries. This equipment may only be used indoors. Specifications General 1.90 kg Dimensions 430.0 (W) x 55.0 (H) x 224.
Appendix HT-H5500/HT-H5500W 95.0 x 146.0 x 74.0 95.0 x 116.0 x 74.0 227.0 x 95.0 x 74.0 170.0 x 350.4 x 287.0 HT-H5530 Dimensions (W x H x D) (Unit : mm) 95.0 x 1113.0 x 74.0 (Stand base: 95.0 x 116.0 x 276.0 x 23.0 x 74.0 189.0) 227.0 x 95.0 x 74.0 170.0 x 350.4 x 287.0 HT-H5550/HT-H5550W 95.0 x 1113.0 x 74.0 (Stand base: 276.0 x 23.0 x 189.0) Speaker 95.0 x 1113.0 x 74.0 (Stand base: 227.0 x 95.0 x 276.0 x 23.0 x 74.0 189.0) 170.0 x 350.4 x 287.0 HT-H5500/HT-H5500W 0.44 0.40 0.56 3.
Licences Manufactured under license from Dolby Laboratories. Dolby and the double-D symbol are trademarks of Dolby Laboratories. For DTS patents, see http://patents.dts.com. Manufactured under license from DTS Licensing Limited. DTS, DTSHD, the Symbol, & DTS and the Symbol together are registered trademarks, and DTS-HD Master Audio | Essential is a trademark of DTS, Inc. © DTS, Inc. All Rights Reserved.
Contact SAMSUNG WORLD WIDE If you have any questions or comments relating to Samsung products, please contact the SAMSUNG customer care centre. Area ` Europe AUSTRIA Contact Centre 0800 - SAMSUNG (0800 - 7267864) Web Site www.samsung.com/at/support www.samsung.com/be/support (Dutch) BELGIUM 02-201-24-18 www.samsung.com/be_fr/support (French) BOSNIA 051 331 999 www.samsung.com/support BULGARIA 07001 33 11 , sharing cost www.samsung.com/bg/support CROATIA 062 726 786 www.samsung.