FULL MANUAL HW-S50B Imagine the possibilities Thank you for purchasing this Samsung product. To receive more complete service, please register your product at www.samsung.com/register Para evitar cualquier avería o daños, lea detalladamente este manual de instrucciones antes de conectar y utilizar este aparato. Conserve el manual para referencia futura.
SAFETY INFORMATION SAFETY WARNINGS WARNING •• To reduce the risk of fire or electric shock, do TO REDUCE THE RISK OF ELECTRIC SHOCK, DO not expose this appliance to rain or moisture. NOT REMOVE THE COVER (OR BACK). CAUTION NO USER-SERVICEABLE PARTS ARE INSIDE. REFER SERVICING TO QUALIFIED SERVICE PERSONNEL. Refer to the table below for an explanation of symbols which may be on your Samsung product. CAUTION RISK OF ELECTRIC SHOCK. DO NOT OPEN. This symbol indicates that high voltage is present inside.
PRECAUTIONS 5. The battery used with this product contains chemicals that are harmful to the environment. Do not dispose of the battery 1. Ensure that the AC power supply in your in the general household trash. Do not house complies with the power expose the battery to excess heat, direct requirements listed on the identification sunlight, or fire. Do not short circuit, sticker located on the bottom of your product.
CONTENTS 01 Checking the Components 6 02 Product Overview 7 03 04 05 06 Front Panel / Top Panel of the Soundbar -------------------------- 7 Bottom Panel of the Soundbar -------------------------- 8 Using the Remote Control 9 Inserting Batteries before using the Remote Control (AAA batteries X 2) -------------------------- 9 How to Use the Remote Control -------------------------- 9 Using the Hidden Buttons (Buttons with more than one function) -------------------------- 14 Output s
07 Connecting an External Device Connecting using an Optical Cable 23 -------------------------- 23 08 Connecting a USB Storage Device 24 09 Connecting a Mobile Device 26 10 Connecting via Bluetooth -------------------------- 26 Using Tap Sound -------------------------- 31 Installing the Wall Mount 32 Installation Precautions -------------------------- 32 Wallmount Components -------------------------- 32 11 Installing the Soundbar in front of TV 34 12 Software Update 35 Reset --
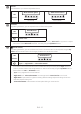
01 CHECKING THE COMPONENTS SOUND MODE WOOFER CH LEVEL TONE CONTROL Soundbar Main Unit Remote Control / Batteries (Not available in some locations or models) HDMI Cable AC/DC Adapter (Soundbar) Micro USB to USB adapter Cable Power Cord (Soundbar) x2 Wall Mount Guide Holder-Screw x2 x2 (M4 x L10) Screw Bracket-Wall Mount •• For more information about the power supply and power consumption, refer to the label attached to the product.
02 PRODUCT OVERVIEW Front Panel / Top Panel of the Soundbar Top Panel The LED Indicator flashes, glows, or changes color depending on the Soundbar's current mode or status. The color of the LED indicator and the number of lights indicate the active mode as described below. LED indicator W W M W W White LED White LED Multicolor LED White LED White LED •• The Multicolor LED changes to White, Cyan, Green, Red, Yellow, Orange, Purple and Blue depending on the mode or status.
•• When you plug in the AC cord, the power button will begin working in 4 to 6 seconds. •• When you turn on this unit, there will be a 4 to 5 second delay before it produces sound. •• If you hear sounds from both the TV and Soundbar, go to the Settings menu for the TV audio and change the TV speaker to External Speaker. Bottom Panel of the Soundbar DC 19V DC 19V USB (5V 0.5A) USB (5V 0.
03 USING THE REMOTE CONTROL Inserting Batteries before using the Remote Control (AAA batteries X 2) Slide the back cover in the direction of the arrow until it is completely removed. Insert 2 AAA batteries (1.5V) oriented so that their polarity is correct. Slide the back cover back into position. How to Use the Remote Control LED Power Turns the Soundbar on and off.
Volume Push the button up or down to adjust the volume. White moves to right X1 White moves to left X1 Volume Up Volume Down LED Indicator CH LEVEL By pressing the button, you can adjust the volume of the each speaker. LED White Blinks X1 Indicator “Center Level” –– If the Rear Speakers (sold separately) are connected, the setting “Rear Level” is supported. To adjust the volume of the “Rear Level” between -6 to +6 by using the Up/Down buttons.
7 Band EQ Press and hold the (Sound Control) button for about 5 seconds to adjust the sound for each frequency band. 150Hz, 300Hz, 600Hz, 1.2kHz, 2.5kHz, 5kHz, and 10kHz are selectable using the Left/Right buttons and each can be adjusted to a setting between -6 to +6 using the Up/Down buttons. (Make sure the Sound mode is set to "Standard".) 7 Band EQ 5 Sec Press and hold the (Sound Control) button for about 5 seconds. Using the Left/Right buttos and each can be adjusted to setting between -6 to+6.
SOUND MODE By pressing the button, you can select the desired audio mode. Each time the mode changes, the Multicolor LED blinks in white. (The sound mode may differ with the TV model.) White Blinks X1 LED Indicator “DTS Virtual:X” “Standard” “Music” “Game” “Adaptive Sound” –– DTS Virtual:X Immersive 3D sound from any content. –– Standard Outputs the original sound. –– Music Provides more natural and room filling sound for music content.
FE R W OO CH LE VE L CO TO NT NE RO L FE R CO TO NT NE RO L W OO CH LE VE L CO TO NT NE RO L CH LE VE L W OO FE R DE SO M UN OD D E WOOFER (BASS) LEVEL SO M UN OD D E When subwoofer is connected, push the button up or down to adjust the woofer level to -12 or between -6 to +6. When subwoofer is disconnected, push the button up or down to adjust the bass level between -6 to +6. To set the woofer (bass) volume level to 0 (Default), press the button.
Using the Hidden Buttons (Buttons with more than one function) Hidden Button Reference page Remote Control Button Function WOOFER (Up) TV remote control On/Off page 15 Left TV Auto connect On/Off page 22 Up ID SET page 11 7 Band EQ page 11 DRC On/Off page 12 (Sound Control) SOUND MODE PAIR Bluetooth Power On/Off page 12 Bluetooth Multi connection On/Off page 29 Output specifications for the different sound effect modes Output Effect DTS Virtual:X Standard Music Game Adaptive Sound In
Adjusting the Soundbar volume with a TV remote control Adjust the Soundbar volume using the TV’s remote control. •• This function can be used with IR remote controls only. Bluetooth remote controls (remote controls that require pairing) are not supported. •• Set the TV speaker to External Speaker to use this function. •• Manufacturers supporting this function: Samsung, VIZIO, LG, Sony, Sharp, PHILIPS, PANASONIC, TOSHIBA, Hisense, RCA TV remote control On/Off 1. Turn Off the Soundbar. 2.
04 CONNECTING THE SOUNDBAR Connecting Electrical Power Use the power components to connect the Soundbar to an electrical outlet in the following order: •• For more information about the required electrical power and power consumption, refer to the label attached to the product. (Label: Bottom of the Soundbar Main Unit) 1. First connect the power cable to the AC/DC adapter. Connect the AC/DC adapter (with the power cable) to the Soundbar. 2. Connect the power cord to a wall socket.
05 USING A WIRED CONNECTION TO THE TV Method 1. Connecting with HDMI CAUTION •• When both the HDMI cable and optical cable are connected, the HDMI signal is received first. •• To connect the HDMI cable between the TV and Soundbar, be sure to connect the terminals marked ARC. Otherwise, the TV sound may not be output. •• The recommended cable is High Speed HDMI Cable with Ethernet. Connecting the TV that supports HDMI ARC (Audio Return Channel) Connect to the HDMI IN (ARC) or (eARC) port of your TV.
•• When the TV sound is not output, press the top panel of the Soundbar or the (Source) button on the remote control to select the “Digital Audio In” mode. •• When the sound is not output, check the HDMI Cable connection again. •• Use the volume buttons on the TV’s remote control to change the volume on the Soundbar.
Method 2. Connecting using an Optical Cable Pre-connection Checklist •• When both the HDMI cable and optical cable are connected, the HDMI signal is received first. •• When you use an optical cable and the terminals have covers, be sure to remove the covers. Optical Cable (not supplied) DIGITAL AUDIO IN (OPTICAL) OPTICAL OUT Top of the Soundbar HDMI Bottom of the (ARC) Soundbar LED White On -> Off Indicator “Digital Audio In” 1.
Using the Q-Symphony Function For Q-Symphony, the Soundbar syncs with a Samsung TV to output sound through two devices for optimum surround effect. When the Soundbar is connected, the menu, “TV+Soundbar” appears under the Sound Output menu of the TV. Select the corresponding menu. TV Menu HDMI Cable OR Optical Cable (not supplied) LED White On -> Off Indicator “Digital Audio In” •• TV menu example: TV + [AV] Soundbar series name (HDMI) NOTES •• It can operate according to the Codec supported by TV.
06 USING A WIRELESS CONNECTION TO THE TV Connecting via Bluetooth When a Samsung TV is connected using Bluetooth, you can hear stereo sound without the hassle of cables. •• Only one Samsung TV can be connected at a time. •• Samsung TV that supports Bluetooth can be connected. Check the specifications of your TV. The initial connection 1. Press the PAIR button on the Soundbar remote control or press (Source) button on the Soundbar top panel to enter the "Bluetooth" mode.
If the device fails to connect •• If you have an existing Soundbar (e.g., [AV] Soundbar S5B-Series) on the list of speakers on the Samsung TV, delete it. •• Then repeat steps 1 through 3. Disconnecting the Soundbar from the Samsung TV Press the (Source) button on the top panel or on the remote control to select the mode other than “Bluetooth”. •• Disconnecting takes time because the Samsung TV must receive a response from the Soundbar. (The time required may differ, depending on the Samsung TV model.
07 CONNECTING AN EXTERNAL DEVICE Connecting using an Optical Cable Bottom of the Soundbar Optical Cable BD / DVD player / Set-top (not supplied) box / Game console DIGITAL AUDIO IN (OPTICAL) HDMI Top of the Soundbar (ARC) OPTICAL OUT R - AUDIO - L LED White On -> Off Indicator “Digital Audio In” 1.
08 CONNECTING A USB STORAGE DEVICE You can play music files located on USB storage devices through the Soundbar. DC 19V USB (5V 0.5A) DIGITAL AUDIO IN (OPTICAL) DC 19V HDMI (ARC) USB (5V 0.5A) Micro USB to USB adapter Cable DIGITAL AUDIO IN (OPTICAL) HDMI (ARC) LED White On -> Off Indicator “USB” 1. Connect the Soundbar with the USB stick by the USB adapter cable above. 2. Press the (Source) button on the top panel or remote control, and then select the “USB” mode. 3.
File Format Type Compatibility list Extension Codec Sampling Rate Bit Rate *.mp3 MPEG1 Layer2 32kHz ~ 48kHz 32kbps ~ 320kbps MPEG1 Layer3 32kHz ~ 48kHz 32kbps ~ 320kbps MPEG2 Layer3 16kHz ~ 24kHz 8kbps ~ 160kbps MPEG2.5 Layer3 8kHz ~ 12kHz 8kbps ~ 160kbps *.wma WMA7/8/9 32kHz ~ 48kHz 32kbps ~ 320kbps *.ogg Vorbis 32kHz ~ 48kHz 45kbps ~ 500kbps *.aac *.m4a AAC-LC (MPEG2/MPEG4 Audio Only) 32kHz ~ 48kHz 32kbps ~ 320kbps *.wav LPCM 32kHz ~ 192kHz 1,024kbps ~ 9,216kbps *.
09 CONNECTING A MOBILE DEVICE Connecting via Bluetooth When a mobile device is connected using Bluetooth, you can hear stereo sound without the hassle of cables. •• When you connect a paired Bluetooth device with the Soundbar off, the Soundbar automatically turns on. mobile device The initial connection •• When connecting to a new Bluetooth device, make sure the device is within 1 m distance. 1.
Notes on Bluetooth connection •• Locate a new device within 1 m to connect via Bluetooth communication. •• If asked for a PIN code when connecting a Bluetooth device, enter <0000>. •• The Soundbar automatically turns off after 20 minutes in the Ready state. •• The Soundbar may not perform Bluetooth search or connection correctly under the following circumstances: –– If there is a strong electrical field around the Soundbar. –– If several Bluetooth devices are simultaneously paired with the Soundbar.
Bluetooth Power On/Off If a previously paired Bluetooth device tries to pair with the Soundbar when the Bluetooth Power On function is on and the Soundbar is turned off, the Soundbar turns on automatically. 1. Press and hold the SOUND MODE button for more than 5 seconds on the remote while the Soundbar is turned on. 2. Multicolor LED indicator on the Soundbar blinks "Cyan”.
Bluetooth Multi connection The Soundbar can be connected to 2 Bluetooth devices at the same time. Bluetooth device A Bluetooth device B TV Auto connect On/Off 1. Press and hold the PAIR button for more than 5 seconds on the remote while the Soundbar is turned off. 2. Multicolor LED indicator on the Soundbar blinks "Cyan”. Bluetooth Pairing button LED Indicator When in standby mode Cyan Blinks X1 Red Blinks X1 Multi connection On (Default) Multi connection Off 5 Sec PAIR ND SOUODE M 3.
NOTES •• Connect the Soundbar to up to two Bluetooth devices. •• Play music from one of the connected Bluetooth devices while two devices are connected. •• If music is played from the Bluetooth device “B” while playing from the device “A”, the music is started playing on the device “B” and automatically being stopped/paused playback on the device A”. •• In versions prior to AVRCP V1.4, the switching time of the device playing music may be delayed.
Using Tap Sound Tap the Soundbar with your mobile device to play audio from the mobile device through the Soundbar. •• This function may not be supported, depending on the mobile device. •• This function is only compatible on Samsung mobile devices with Android 8.1 or later. SmartThings App Top of the Soundbar Mobile device 1. Turn on the Tap Sound function on your mobile device. •• For details on how to turn on the function, refer to “Enable the Tap Sound function” below. 2.
10 INSTALLING THE WALL MOUNT Wallmount Components Installation Precautions Wall Mount Guide •• Install on a vertical wall only. •• Do not install in a place with high x2 x2 (M4 x L10) temperature or humidity. •• Verify whether the wall is strong enough to Holder-Screw support the product’s weight. If not, reinforce the wall or choose another installation point.
2. Align the Wall Mount Guide’s Center Line 5. Push a screw (not supplied) through each with the center of your TV (if you are Holder-Screw, and then screw each screw mounting the Soundbar below your TV), and firmly into a support screw hole. then fix the Wall Mount Guide to the wall using tape. (Not supplied) •• If you are not mounting below a TV, place the Center Line in the center of the installation area. 6.
7. Install the Soundbar with the attached Bracket-Wall Mounts by hanging the Bracket-Wall Mounts on the Holder-Screws on the wall. 11 INSTALLING THE SOUNDBAR IN FRONT OF TV 8. Slide the Soundbar down as shown below so that the Bracket-Wall Mounts rest securely on the Holder-Screws. •• Insert the Holder-Screws into the wide (bottom) part of the Bracket-Wall 3cm or m ore Mounts, and then slide the Bracket-Wall Mounts down so that the Bracket-Wall Mounts rest securely on the Holder-Screws.
12 SOFTWARE UPDATE 5. Plug USB into Soudbar and switch to USB source, the software will update automatically and will complete update within 2 minutes. During the update process, the 5 LEDs will start flashing in a loop, and Important: After upgrading, keep the original then the 5 LEDs will all be bright white, and Settings. then the 5 LEDs will flash in a loop again. When the update is complete, the cyan DC 19V USB (5V 0.
•• This product has a DUAL BOOT function. If the firmware fails to update, you can Reset update the firmware again. 5 Sec If LED sequence flashing is not displayed 1. Turn off the Soundbar, disconnect and then reconnect the USB storage device that contains the update files to the Soundbar’s USB port. With the Soundbar on, press the (Volume) buttons on the body at the same time for at least 5 seconds. The LED display changes as shown 2.
13 TROUBLESHOOTING Before seeking assistance, check the following. Soundbar does not turn on. If the TV is not connected via HDMI (ARC). ;; Check whether the power cord of the Soundbar is correctly inserted into the outlet. ;; After removing the power cord, insert it again. ;; Power cycle the external device and try again. ;; If there is no signal, the Soundbar automatically turns off after a certain period of time. Turn on the power. (See page 9.
14 LICENSE Sound drops out when connected via Bluetooth. ;; If your device that is connected via Bluetooth moves too far away from the Soundbar, it may cause the sound to drop Manufactured under license from Dolby out. Move the device closer to the Laboratories. Dolby, Dolby Audio and the Soundbar. ;; If a part of your body is in contact with the double-D symbol are trademarks of Dolby Bluetooth transceiver or the product is Laboratories Licensing Corporation.
15 OPEN SOURCE LICENSE NOTICE [ENERGY STAR] ENERGY STAR qualified model only –– Your Samsung product is ENERGY STAR qualified in its factory default setting. Change to certain features, settings and functionality in this product can change the power consumption, possibly beyond the limits required for ENERGY STAR qualification. –– Environmental Protection Agency and Department of Energy. ENERGY STAR is a joint program of the Government agencies, designed to promote energy efficient products and practices.
17 SPECIFICATIONS AND GUIDE Specifications Model Name HW-S50B USB 5V/0.5A Weight 2.4 kg Dimensions (W x H x D) 670.0 x 62.3 x 105.0 mm Operating Temperature Range +5°C to +35°C Operating Humidity Range 10 % ~ 75 % AMPLIFIER (30W x 2) + (30W x 2) + 20W Rated Output power Supported play formats DTS, Dolby® Digital (DTS Virtual Surround is LPCM 2ch, Dolby Audio™ (supporting Dolby® Digital), DTS, DTS Virtual:X played in DTS format.
INFORMACIÓN DE SEGURIDAD ADVERTENCIAS DE SEGURIDAD PARA REDUCIR EL PELIGRO DE DESCARGA ELÉCTRICA, NO RETIRE LA TAPA (NI LA PARTE TRASERA). NO CONTIENE ELEMENTOS QUE DEBA REEMPLAZAR EL USUARIO. EN CASO DE AVERÍA, SOLICITE LA AYUDA DE PERSONAL ESPECIALIZADO. Consulte la tabla a continuación para obtener una explicación de los símbolos que podrían aparecer en su producto Samsung. ADVERTENCIA •• Para reducir el riesgo de incendio o de descarga eléctrica, no exponga este aparato a la lluvia ni a lahumedad.
PRECAUCIONES 1. Asegúrese de que la fuente de alimentación de CA de su hogar cumpla con los requisitos mencionados en la etiqueta de identificación ubicada en la parte inferior del producto. Instale el producto horizontalmente, sobre una base adecuada (mueble), con espacio suficiente a su alrededor para ventilación 7~10 cm. Asegúrese de que los orificios de ventilación no queden tapados. No coloque la unidad sobre amplificadores o cualquier otro equipo que pueda generar calor.
ÍNDICE 01 Verificación de los componentes 6 02 Información general del producto 7 03 Panel frontal/panel superior de la Soundbar -------------------------- 7 Panel inferior de la Soundbar -------------------------- 8 Uso del control remoto 9 Colocación de las pilas antes de utilizar el control remoto (2 pilas AAA) -------------------------- 9 Cómo usar el control remoto -------------------------- 9 Uso de los botones ocultos (botones con más de una función) -------------------------- 1
07 Conexión a un dispositivo externo Conexión con un cable óptico 23 -------------------------- 23 08 Conectar un dispositivo de almacenamiento USB 24 09 Conexión a un dispositivo móvil 26 10 Conexión a través de Bluetooth -------------------------- 26 Uso de Tap Sound -------------------------- 31 Instalación del soporte de montaje en la pared 32 Precauciones durante la instalación -------------------------- 32 Componentes para montaje en la pared -------------------------- 32 11 Insta
01 VERIFICACIÓN DE LOS COMPONENTES SOUND MODE WOOFER CH LEVEL Unidad principal de la Soundbar Adaptador de CA/CC (Soundbar) Control remoto / Pilas (No disponible en algunos lugares o para algunos modelos) Cable adaptador de USB a micro USB Cable HDMI Cable de alimentación (Soundbar) x2 Guía de montaje en la pared TONE CONTROL Tornillo de sujeción x2 x2 (M4 x L10) Tornillo Soporte de montaje en la pared •• Para obtener más información acerca del suministro eléctrico y el consumo de energía, con
02 INFORMACIÓN GENERAL DEL PRODUCTO Panel frontal/panel superior de la Soundbar Panel superior El indicador LED destella, brilla o cambia de color según el modo o estado actual de la Soundbar. El color del indicador LED y la cantidad de luces indican el modo activo como se describe a continuación.
•• Cuando conecte el cable de CA, el botón de encendido comenzará a funcionar luego de 4 a 6 segundos. •• Cuando encienda esta unidad, habrá un retraso de 4 a 5 segundos antes de que emita sonido. •• Si escucha sonidos tanto del televisor como de la Soundbar, vaya al menú Ajustes, busque la opción de audio del televisor y cambie el parlante del televisor a Altavoz externo. Panel inferior de la Soundbar DC 19V DC 19V USB (5V 0.5A) USB (5V 0.
03 USO DEL CONTROL REMOTO Colocación de las pilas antes de utilizar el control remoto (2 pilas AAA) Deslice la contratapa en dirección de la flecha hasta retirarla completamente. Coloque 2 pilas AAA (1.5V) tal como se indica para que la polaridad sea correcta. Vuelva a deslizar la contratapa hasta su posición. Cómo usar el control remoto Encendido Enciende y apaga la Soundbar.
Volumen Mueva el botón hacia arriba o hacia abajo para ajustar el volumen. Indicador El color blanco se mueve hacia la derecha X1 El color blanco se mueve hacia la izquierda X1 Sube el volumen Baja el volumen LED CH LEVEL Puede presionar este botón para ajustar el volumen de cada altavoz. Indicador Parpadeos blancos X1 LED “Center Level” –– Cuando se conectan los altavoces traseros (que se venden por separado), se admite la configuración “Rear Level”.
EQ 7 bandas Mantenga presionado el botón (Control de sonido) durante aproximadamente 5 segundos para ajustar el sonido de cada banda de frecuencia. Puede elegir 150 Hz, 300 Hz, 600 Hz, 1,2 kHz, 2,5 kHz, 5 kHz y 10 kHz usando los botones Izquierda/Derecha y puede configurar cada uno entre -6 y +6 con los botones Arriba/Abajo. (Asegúrese de que el modo de sonido se establezca como “Standard”.
SOUND MODE Puede seleccionar el modo de audio que desea presionando el botón. Cada vez que cambia el modo, el LED multicolor parpadea en blanco. (El modo de sonido puede ser diferente según el modelo de TV). Parpadeos blancos X1 Indicador LED “DTS Virtual:X” “Standard” “Music” “Game” “Adaptive Sound” –– DTS Virtual:X Sonido 3D envolvente desde cualquier contenido. –– Standard Emite el sonido original. –– Music Proporciona un sonido más natural y envolvente para el contenido musical.
W OO CH LE VE L CO TO NT NE RO L FE R SO M UN OD D E W OO CO TO NT NE RO L CH LE VE L CO TO NT NE RO L CH LE VE L W OO FE R SO M UN OD D E NIVEL de WOOFER (BAJOS) FE R OD D E Cuando el altavoz de graves esté conectado, pulse este botón para subir o bajar el nivel de los graves a -12 o entre -6 y +6. Cuando el altavoz de graves esté desconectado, pulse este botón para subir o bajar el nivel de los bajos a entre -6 y +6.
Uso de los botones ocultos (botones con más de una función) Botón oculto Página de referencia Botón del mando a distancia Función WOOFER (Arriba) Encendido/Apagado del control remoto del TV Encendido/Apagado de la conexión Izquierda automática del TV Arriba (Control de sonido) SOUND MODE Página 22 ID SET Página 11 EQ 7 bandas Página 11 Encendido/Apagado de DRC Página 12 Encendido/Apagado de Bluetooth Power Página 12 Encendido/Apagado de la conexión PAIR Página 15 múltiple de Bluetooth
Ajuste del volumen de la Soundbar con un control remoto de televisor Ajuste el volumen de la Soundbar con el control remoto del televisor. •• Esta función solo se puede usar con controles remotos IR. Los controles remotos Bluetooth (controles remotos que requieren emparejamiento) no son compatibles. •• Configure el parlante del televisor en Altavoz externo para usar esta función.
04 CONEXIÓN DE LA SOUNDBAR Conexión de la corriente eléctrica Use los componentes de suministro eléctrico en el siguiente orden para conectar la Soundbar a una toma de corriente eléctrica: •• Para obtener más información acerca del suministro eléctrico necesario y el consumo de energía, consulte la etiqueta del producto. (Etiqueta: parte inferior de la unidad principal de la Soundbar) 1. Primero conecte el cable de alimentación al adaptador de CA/CC.
05 USO DE UNA CONEXIÓN CON CABLE AL TV Método 1. Conexión con HDMI PRECAUCIÓN •• Cuando el cable HDMI y el cable óptico estén conectados al mismo tiempo, la señal HDMI se recibe primero. •• Para conectar el cable HDMI entre el TV y la Soundbar, asegúrese de conectar las terminales marcadas como ARC. De lo contrario, es posible que el sonido del TV no se escuche. •• El cable recomendado es High-Speed HDMI Cable with Ethernet.
•• Si no sale el sonido del TV, presione el panel superior de la Soundbar o el botón (Fuente) del control remoto para seleccionar el modo “Digital Audio In”. •• Si el sonido no sale, revise la conexión del cable HDMI nuevamente. •• Use los botones de volumen en el control remoto del TV para cambiar el volumen de la Soundbar.
Método 2. Conexión con un cable óptico Lista de verificación previa a la conexión •• Cuando el cable HDMI y el cable óptico estén conectados al mismo tiempo, la señal HDMI se recibe primero. •• Cuando use un cable óptico y las terminales tengan cubiertas, asegúrese de quitarlas. Cable óptico (no suministrado) DIGITAL AUDIO IN (OPTICAL) OPTICAL OUT Parte superior de la Soundbar HDMI Parte inferior de la (ARC) Soundbar Indicador LED Blanco Encendido -> Apagado “Digital Audio In” 1.
Cómo utilizar la función Q-Symphony Para Q-Symphony, la Soundbar se sincroniza con un televisor Samsung para emitir el sonido a través de dos dispositivos para brindar un efecto envolvente óptimo. Cuando la Soundbar está conectada, aparece el menú “TV+Soundbar” debajo del menú Salida del sonido del TV. Seleccione el menú correspondiente.
06 USO DE UNA CONEXIÓN INALÁMBRICA AL TV Conexión a través de Bluetooth Cuando se conecta un TV Samsung a través de Bluetooth, puede escuchar sonido en estéreo sin cables de por medio. •• Solo se puede conectar un TV Samsung por vez. •• Se puede conectar un TV Samsung que sea compatible con Bluetooth. Compruebe las especificaciones de su TV. La conexión inicial 1.
Si el dispositivo no se puede conectar •• Si tiene una Soundbar existente (p. ej., [AV] Soundbar S5B-Series) en la lista de parlantes del TV Samsung, elimínela. •• Luego, repita los pasos 1 a 3. Desconexión de la Soundbar del TV Samsung Presione el botón (Fuente) en el panel superior o en el control remoto para seleccionar el modo que no sea “Bluetooth”. •• La desconexión toma tiempo porque el TV Samsung debe recibir la respuesta de la Soundbar.
07 CONEXIÓN A UN DISPOSITIVO EXTERNO Conexión con un cable óptico BD / Reproductor de DVD / Decodificador / Cable óptico Parte inferior de la Soundbar (no suministrado) Consola de juegos DIGITAL AUDIO IN (OPTICAL) HDMI (ARC) Parte superior de la Soundbar OPTICAL OUT R - AUDIO - L Indicador LED Blanco Encendido -> Apagado “Digital Audio In” 1.
08 CONECTAR UN DISPOSITIVO DE ALMACENAMIENTO USB Puede reproducir archivos de música que se encuentran en dispositivos de almacenamiento a través de la Soundbar. DIGITAL AUDIO IN (OPTICAL) DC 19V DC 19V HDMI (ARC) USB (5V 0.5A) USB (5V 0.5A) Cable adaptador de USB a micro USB DIGITAL AUDIO IN (OPTICAL) HDMI (ARC) Indicador LED Blanco Encendido -> Apagado “USB” 1. Conecte la Soundbar con la unidad USB mediante el cable adaptador USB indicado arriba. 2.
Lista de compatibilidad Extensión Códec Velocidad de muestreo Velocidad en bits *.mp3 MPEG1 Layer2 32kHz ~ 48kHz 32 ~ 320 kbps MPEG1 Layer3 32kHz ~ 48kHz 32 ~ 320 kbps MPEG2 Layer3 16kHz ~ 24kHz 8 ~ 160 kbps MPEG2.5 Layer3 8kHz ~ 12kHz 8 ~ 160 kbps *.wma WMA7/8/9 32kHz ~ 48kHz 32 ~ 320 kbps *.ogg Vorbis 32kHz ~ 48kHz 45 ~ 500 kbps *.aac *.m4a AAC-LC (MPEG2/MPEG4 audio únicamente) 32kHz ~ 48kHz 32 ~ 320 kbps *.wav LPCM 32kHz ~ 192kHz 1024 ~ 9216 kbps *.
09 CONEXIÓN A UN DISPOSITIVO MÓVIL Conexión a través de Bluetooth Cuando se conecta un dispositivo móvil a través de Bluetooth, puede escuchar sonido en estéreo sin cables de por medio. •• Cuando conecta un dispositivo Bluetooth emparejado y la Soundbar está apagada, la Soundbar se enciende automáticamente. Dispositivo móvil La conexión inicial •• Cuando conecte un dispositivo Bluetooth nuevo, asegúrese de que el dispositivo esté en un radio de 1 m de distancia. 1.
Notas sobre la conexión a través de Bluetooth •• Ubique un dispositivo nuevo en un radio de 1 m para conectarlo a través de Bluetooth. •• Si le pide un código PIN cuando conecta un dispositivo Bluetooth, ingrese <0000>. •• La Soundbar se apaga automáticamente después de estar 20 minutos en estado Listo. •• Es posible que la Soundbar no realice la conexión o la búsqueda de Bluetooth correctamente en los siguientes casos: –– Si hay un campo eléctrico fuerte cerca de la Soundbar.
Encendido/Apagado de Bluetooth Power Si otro dispositivo con Bluetooth previamente emparejado intenta emparejarse con la Soundbar cuando la función Bluetooth Power Está encendida y la Soundbar está apagada, la Soundbar se enciende automáticamente. 1. Mantenga presionado el botón SOUND MODE durante más de 5 segundos en el control remoto mientras la Soundbar está encendida. 2. El indicador LED multicolor en la Soundbar parpadea en color “Cian”.
Conexión Bluetooth múltiple La Soundbar se puede conectar a 2 dispositivos Bluetooth al mismo tiempo. Dispositivo Bluetooth A Dispositivo Bluetooth B Encendido/Apagado de la conexión automática del TV 1. Mantenga presionado el botón PAIR durante más de 5 segundos en el control remoto mientras la Soundbar está apagada. 2. El indicador LED multicolor en la Soundbar parpadea en color "Cyan”.
NOTAS •• Puede conectar la Soundbar hasta a dos dispositivos Bluetooth. •• Puede reproducir música de uno de los dispositivos Bluetooth conectados mientras hay dos dispositivos conectados. •• Si se reproduce música desde el dispositivo Bluetooth "B" mientras se está reproduciendo música desde el dispositivo "A", esta comienza a reproducirse en el dispositivo "B" y, automáticamente, se detiene o se pausa la reproducción en el dispositivo "A". •• En versiones anteriores a AVRCP V1.
Uso de Tap Sound Toque la Soundbar con su dispositivo móvil para reproducir el sonido del dispositivo móvil a través de la Soundbar. •• Es posible que esta función no sea compatible, según el dispositivo móvil. •• Esta función solo es compatible con dispositivos móviles Samsung con Android 8.1 o una versión posterior. Aplicación SmartThings Parte superior de la Soundbar Dispositivo móvil 1. Active la función Tap Sound en su dispositivo móvil.
10 INSTALACIÓN DEL SOPORTE DE MONTAJE EN LA PARED Componentes para montaje en la pared Guía de montaje en la pared x2 x2 Precauciones durante la instalación (M4 x L10) Tornillo de sujeción Tornillo •• Instálelo en la pared solo de forma vertical. x2 •• No lo instale en un lugar con altas temperaturas o humedad. •• Verifique si la pared es lo suficientemente Soporte de montaje en la pared resistente como para soportar el peso del producto.
2. Haga coincidir la Línea central de la guía 5. Pase un tornillo (no suministrado) por cada para montaje en la pared con el centro de su Tornillo de sujeción y luego ajuste cada televisor (si va a montar la Soundbar debajo tornillo con firmeza en un orificio de soporte de su televisor) y luego fije la Guía de del tornillo. montaje en la pared a la pared con cinta adhesiva.
7. Para instalar la Soundbar con el Soporte de montaje en la pared ya colocado, cuelgue el soporte de montaje en la pared de los Tornillos de sujeción que están en la pared. 11 INSTALACIÓN DE LA SOUNDBAR FRENTE AL TELEVISOR 8. Deslice la Soundbar hacia abajo, como se muestra a continuación, de manera que los Soportes de montaje para pared se apoyen firmemente en los Tornillos de sujeción.
12 ACTUALIZACIÓN DEL SOFTWARE 5. Enchufe la unidad USB en la Soundbar y cambie a fuente USB. La actualización de software comenzará a ejecutarse automáticamente y finalizará dentro de los 2 minutos siguientes. Durante el proceso de actualización, los 5 indicadores LED parpadearán en bucle; luego, los 5 se iluminarán todos de color blanco brillante y, luego, los 5 iniciarán nuevamente una secuencia de parpadeo en bucle. Cuando la actualización haya finalizado, el indicador color cian parpadeará 3 veces.
Restablecer •• Este producto tiene una función DUAL BOOT. Si falla la actualización del firmware, puede actualizarlo nuevamente. 5 Sec Si no se muestra la secuencia de LED parpadeando 1. Apague la Soundbar, desconecte y vuelva a conectar el dispositivo de almacenamiento que contiene los archivos actualizados al puerto USB de la Soundbar. 2. Desconecte el cable de alimentación de la Soundbar, vuelva a conectarlo y luego encienda la Soundbar.
13 SOLUCIÓN DE PROBLEMAS Antes de buscar ayuda, controle lo siguiente. La Soundbar no se enciende. Si el TV no está conectado a través de HDMI (ARC). ;; Compruebe si el cable de alimentación de la Soundbar se insertó correctamente en el enchufe. ;; Compruebe si el cable HDMI se conectó correctamente a la terminal ARC La Soundbar funciona de forma errática. (Consulte la página 17.) ;; Después de quitar el cable de alimentación, ;; Si hay un dispositivo externo conectado vuelva a insertarlo.
14 LICENCIA No hay sonido cuando se conecta mediante Bluetooth. ;; Si el dispositivo que está conectado mediante Bluetooth se aleja demasiado de la Soundbar, eso puede hacer que no haya Manufactured under license from Dolby sonido. Acerque el dispositivo a la Laboratories. Dolby, Dolby Audio and the Soundbar. ;; Si parte de su cuerpo está en contacto con double-D symbol are trademarks of Dolby el transceptor Bluetooth o si el producto Laboratories Licensing Corporation.
[ENERGY STAR] ENERGY STAR qualified model only –– Your Samsung product is ENERGY STAR qualified in its factory default setting. Change to certain features, settings and functionality in this product can change the power consumption, possibly beyond the limits required for ENERGY STAR qualification. –– Environmental Protection Agency and Department of Energy. ENERGY STAR is a joint program of the Government agencies, designed to promote energy efficient products and practices. Refer to www.energystar.
17 ESPECIFICACIONES Y GUÍA Especificaciones Nombre del modelo HW-S50B USB 5V/0,5A Requisitos de electricidad (solo México) 19V Consumo de energía (solo México) (méxico sólo) 25W (méxico sólo) Peso 2,4 kg Dimensiones (An x Al x Pr) 670,0 x 62,3 x 105,0 mm Rango de temperatura de servicio +5 °C a +35 °C Rango de humedad de servicio 10 % a 75 % AMPLIFICADOR (30W x 2) + (30W x 2) + 20W Potencia nominal de salida Formatos de reproducción compatibles DTS, Dolby® Digital (DTS Virtual Surround se
© 2022 Samsung Electronics Co., Ltd. All rights reserved. Contact SAMSUNG WORLD WIDE If you have any questions or comments relating to Samsung products, please contact the SAMSUNG customer care Center. Country Samsung Service Center Web Site ` Latin America MEXICO 800-SAMSUNG www.samsung.com/mx/support BRAZIL 0800 555 0000 (Demais cidades e regiões) 4004-0000 (Capitais e grandes centros) www.samsung.