IMPRESSORA LASER SAMSUNG Manual do utilizador
Este manual é fornecido para fins meramente informativos. Todas as informações aqui incluídas estão sujeitas a alterações sem pré-aviso. A Samsung Electronics não se responsabiliza por quaisquer danos, directos ou indirectos, decorrentes da utilização deste manual ou com ele relacionados. © 2003 Samsung Electronics Co., Ltd. Todos os direitos reservados. • ML-1750 e o logótipo Samsung são marcas comerciais da Samsung Electronics Co., Ltd. • PCL e PCL 6 são marcas comerciais da Hewlett-Packard Company.
ÍNDICE Capítulo 1: INTRODUÇÃO Recursos especiais ............................................... Componentes da impressora ................................. Vista de frente ............................................... Vista do interior .............................................. Vista de trás .................................................. 1.2 1.4 1.4 1.5 1.5 Pormenores do painel de controlo .......................... 1.6 LEDs On Line/Error e Toner Save ...................... 1.6 Botão Cancel .
Capítulo 3: UTILIZAR MATERIAIS DE IMPRESSÃO Seleccionar o papel e outros materiais .................... 3.2 Tamanhos e capacidades ................................. 3.3 Directrizes para papel e materiais especiais ........ 3.4 Seleccionar a localização de saída .......................... 3.5 Imprimir no tabuleiro de saída superior (voltado para baixo) ........................................ 3.5 Imprimir no tabuleiro de saída posterior (voltado para cima) ........................................ 3.
Imprimir sobreposições ....................................... O que é uma sobreposição? ............................ Criar uma nova sobreposição de página ............ Utilizar sobreposições de página ...................... Eliminar uma sobreposição de página ............... 4.22 4.22 4.22 4.24 4.25 Utilizar o Monitor de estado .................................. 4.26 Abrir o Monitor de estado ................................ 4.26 Definir a impressora partilhada localmente ............. 4.
Capítulo 7: APÊNDICE Utilizar a impressora com o sistema operativo Linux . 7.2 Instalar o controlador da impressora ................. 7.2 Alterar o método de ligação da impressora ......... 7.6 Utilizar a ferramenta de configuração ................ 7.8 Alterar as propriedades do LLPR ...................... 7.10 Imprimir a partir de aplicações DOS ...................... Acerca do painel de comandos remoto .............. Instalar o painel de comandos remoto ..............
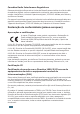
Considerações ambientais e de segurança Declaração de segurança sobre equipamentos laser A impressora está certificada nos E.U.A. como equipamento em conformidade com os requisitos da norma DHHS 21 CFR, capítulo 1, subcapítulo J relativamente a produtos laser classe I (1) e, noutros países, como produto laser Classe I em conformidade com os requisitos da norma IEC 825. Os produtos laser classe I não são considerados perigosos.
Segurança do ozono Durante o funcionamento normal, esta máquina produz ozono. O ozono produzido não representa perigo para o operador. No entanto, é aconselhável utilizar a máquina numa área com boa ventilação. Se necessitar de mais informações acerca do ozono, contacte o seu agente Samsung mais próximo. Economia de energia Esta impressora apresenta tecnologia avançada de economia de energia que reduz o consumo de força quando não se encontra em utilização.
Canadian Radio Interference Regulations Este aparelho digital não excede os limites da Classe B para emissões de ruído de rádio de aparelhos digitais conforme estabelecido na directriz sobre equipamentos que causam interferência, intitulada “Aparelhos digitais”, ICES-003 editada pela Industry and Science Canada.
ix
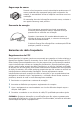
AVISO • Não desmonte a impressora. Se o fizer ficará sujeito a um choque eléctrico. • Se imprimir continuamente muitas páginas, a superfície do tabuleiro de saída poderá ficar quente. Não toque na superfície, especialmente crianças.
1 INTRODUÇÃO Parabéns pela aquisição da sua impressora! Este capítulo inclui: • Recursos especiais • Componentes da impressora • Pormenores do painel de controlo
Recursos especiais A sua nova impressora é dotada de recursos especiais que melhoram a qualidade de impressão, proporcionando uma vantagem concorrencial. É possível: Imprimir com uma qualidade excelente e alta velocidade • Você pode imprimir até 1200 x 1200 ppi (saída eficaz). Consulte a secção na página 4.16. • Imprime 17 páginas por minuto (no formato Carta), 16 páginas por minuto (no formato A4).
Imprimir em vários ambientes • Pode imprimir nos ambientes Windows 95/98/Me/NT 4.0/ 2000/XP. • A impressora é compatível com os sistemas Linux. • Esta máquina possui tanto a interface paralela como a USB. INTRODUÇÃO 1.
Componentes da impressora Vista de frente Suporte de saída de papel Tabuleiro de saída superior (voltado para baixo) Painel de controlo Tampa frontal Guia do alimentador manual Tabuleiro Interruptor de alimentação Alimentador manual Indicador de nível do papel 1.
Vista do interior 1 Cartucho de toner Tampa frontal Vista de trás Tabuleiro de saída posterior (voltado para cima) Conector de alimentação Porta paralela Porta USB INTRODUÇÃO 1.
Pormenores do painel de controlo LEDs On Line/Error e Toner Save LED Descrição Se On Line/Error estiver verde, a impressora está pronta para imprimir. Se On Line/Error estiver vermelho, há um erro na impressora, tal como papel encravado, tampa aberta ou cartucho de toner vazio. Consulte a secção “Mensagens de erro da resolução de problemas” na página 6.18. Se premir o botão Cancel enquanto a impressora recebe dados, o LED On Line/Error pisca em vermelho para que se cancele a impressão.
LED Descrição 1 Se os LEDs On Line/Error e Toner Save piscarem, é sinal de problemas no sistema. Para resolver o problema, consulte a secção “Mensagens de erro da resolução de problemas” na página 6.18. Botão Cancel Função Descrição Imprimir uma página de demonstração No modo Ready, prima este botão sem soltar durante cerca de 2 segundos até que todos os LEDs pisquem lentamente e, em seguida, solte-o.
NOTA 1.
2 INSTALAÇÃO DA IMPRESSORA Este capítulo apresenta instruções pormenorizadas de instalação e configuração da impressora.
Desembalar 1 Retire a impressora e todos os acessórios da respectiva embalagem. Certifique-se de que a embalagem da impressora contém os seguintes elementos: Cartucho de toner Cabo de alimentação CD-ROM Manual de instalação Notas: • Se um destes elementos estiver em falta ou estiver danificado, contacte imediatamente o vendedor. • Os componentes podem variar de uns países para os outros. • O CD-ROM contém o controlador da impressora, o Manual do Utilizador e o programa Adobe Acrobat Reader.
Seleccionar uma localização Seleccione um local nivelado e estável, com espaço adequado para a circulação de ar. Deixe espaço adicional suficiente para abrir as tampas e o tabuleiro. A área deve ser bem ventilada e estar afastada da luz directa do sol ou de fontes de calor, frio e humidade. Examine a imagem abaixo para determinar o espaço que deve deixar em torno da máquina. Não instale a impressora demasiado próximo da extremidade de uma secretária ou mesa! 100 mm Espaço em torno da máquina 100 mm 482.
Instalar o cartucho de toner 1 Agarre a tampa frontal e puxe-a para si, para a abrir. Nota: Como é muito leve, a impreesora pode mmovimentarse, por exemplo, ao abrir/fechar o tabuleiro ou ao instalar/remover o cartucho de toner. Execute todas as operações com o maior cuidado possível. 2 Retire o cartucho de toner da respectiva embalagem e remova o papel que cobre o cartucho. 3 Agite ligeiramente o cartucho de um lado para o outro, para distribuir o toner uniformemente no interior do cartucho.
4 Localize as ranhuras do cartucho no interior da impressora, uma de cada lado. 2 5 Agarre no manípulo e insira o cartucho na impressora, até encaixar no lugar. 6 Feche a tampa frontal. Certifique-se de que a tampa está bem fechada. Se não estiver fechada firmemente, podem ocorrer erros ao imprimir. Nota: Se imprimir texto com cobertura de 5%, pode esperar do toner uma autonomia de cerca de 3.000 páginas (1.000 páginas com o cartucho de toner fornecido com a impressora). INSTALAÇÃO DA IMPRESSORA 2.
Colocar o papel Pode colocar aproximadamente 250 folhas de papel no tabuleiro. 1 Puxe o tabuleiro para fora da impressora. Nota: Como é muito leve, a impreesora pode mmovimentarse, por exemplo, ao abrir/fechar o tabuleiro ou ao instalar/remover o cartucho de toner. Execute todas as operações com o maior cuidado possível. 2 Carregue na placa de pressão, para a prender no lugar. 3 Prepare um maço de folhas para colocar na impressora, vergando-o ou folheando-o para a frente e para trás.
4 Coloque o papel com o lado a imprimir voltado para baixo. 2 Certifique-se de que os quatro cantos do papel estão bem assentes no tabuleiro. 5 Tome atenção à marca de limite do papel, na parede interior esquerda do tabuleiro. Se colocar demasiado papel, este pode encravar. Nota: Se pretender mudar o formato de papel no tabuleiro, consulte a secção “Alterar o formato do papel no tabuleiro” na página 2.8. 6 Volte a introduzir o tabuleiro na impressora. INSTALAÇÃO DA IMPRESSORA 2.
Alterar o formato do papel no tabuleiro 1 Aperte a guia posterior conforme ilustrado abaixo, para ajustar o comprimento do papel. 2 Aperte a guia lateral conforme ilustrado e encoste-a ao lado esquerdo do papel. Notas: • Não empurre a guia da largura ao ponto de o papel ficar ondulado. • Se não ajustar a guia da largura, o papel pode encravar. 2.
Ligar o cabo de impressora Para imprimir do computador, é necessário ligar a impressora ao computador por meio de um cabo de interface paralela ou um cabo Universal Serial Bus (USB). Utilizar os cabos paralelos Nota: Para ligar a impressora à porta paralela do computador, é necessário um cabo paralelo certificado. Adquira um cabo que respeite a norma IEEE1284. 1 Certifique-se de que a impressora e o computador estão desligados. 2 Ligue o cabo paralelo ao conector situado na parte posterior da impressora.
Utilizar os cabos USB Nota: Para ligar a impressora à porta USB do computador, é necessário um cabo USB certificado. Adquira um cabo compatível com USB 2.0 que possua até 3m de comprimento. 1 Certifique-se de que a impressora e o computador estão desligados. 2 Ligue o cabo USB ao conector situado na parte posterior da impressora. À porta USB do computador 3 Ligue a outra extremidade do cabo à porta USB do computador. Se necessitar de ajuda, consulte o Manual do Utilizador do computador.
Ligar a impressora 1 Ligue o cabo de alimentação ao conector de energia, na parte posterior da impressora. 2 Ligue a outra extremidade a uma tomada de corrente eléctrica com ligação de terra e ligue a impressora utilizando o interruptor de alimentação. À tomada de corrente eléctrica CUIDADO: • A área de fusão na parte traseira interna fica quente quando a impressora está ligada. Tome cuidado para não se queimar quando mexer nessa área. • Não desmonte a impressora quando estiver ligada.
Imprimir uma página de demonstração Imprima uma página de demonstração ou uma folha de configuração para se certificar de que a impressora está a funcionar correctamente. 1 Mantenha o botão Cancel premido durante cerca de 2 segundos para imprimir uma página de demonstração. OU Segure o botão Cancel durante cerca de 6 segundos para imprimir uma folha de configuração. 2 A página de demonstração ou a folha de configuração mostra a configuração actual da impressora.
Instalar o software da impressora O CD-ROM fornecido contém software de impressão para os sistemas Windows e Linux, o Manual do Utilizador on-line e o programa Acrobat Reader para visualizar o manual. Se imprimir a partir do Windows Pode instalar o seguinte software de impressão utilizando o CDROM. • Controlador de impressora para o Windows. Utilize este controlador para tirar o máximo partido das funções da impressora. Consulte a secção na página 2.15.
Funções do controlador de impressora Os controladores da sua impressora suportam as seguintes funções padrão: • Selecção da origem do papel • Formato de papel, orientação e tipo de suporte • número de cópias A tabela seguinte apresenta uma descrição geral das funções suportadas pelos controladores da impressora. Controlador de impressora Função Win9x/Me Win2000/XP NT4.
Instalar o software da impressora no Windows Requisitos de sistema Verifique o seguinte: • Estão instalados 32 MB (Windows 9x/Me), 64 MB (Windows 2000/NT), 128 MB (Windows XP) ou mais de RAM no computador. • Existem pelo menos 300 MB de espaço livre no disco do computador. • Todas as aplicações do computador estão fechadas, antes de começar a instalação. • Windows 95, Windows 98, Windows Me, Windows NT 4.0, Windows 2000 ou Windows XP. • Pelo menos, Internet Explorer 5.0.
3 Faça clique em Instalar o software da Samsung em seu PC. Se pretender utilizar o Monitor de estado, clique em Instalar o software-II da Samsung em seu PC (Status Monitor). 4 É apresentada a janela Welcome. Faça clique em Seguinte. 5 Siga as instruções apresentadas na janela para concluir a instalação. Reinstalar o software da impressora Se a instalação falhar, é necessário reinstalar o software. 1 No menu Iniciar, seleccione Programas.
Remover o software da impressora 1 No menu Iniciar, seleccione Programas. 2 Seleccione Samsung ML-1750 Series e, em seguida, Manutenção do controlador ML-1750 Series da Samsung. 3 É apresentada a janela Manutenção do controlador ML-1750 Series da Samsung. Marque Remover e, em seguida, faça clique em Seguinte. 4 Quando lhe for pedido para confirmar a selecção, faça clique em OK. O controlador da impressora Samsung ML-1750 Series e os respectivos componentes são eliminados do computador.
Instalar o controlador USB no Windows 98/Me 1 Ligue a impressora ao computador utilizando o cabo USB e ligue os equipamentos. Para obter informações pormenorizadas, consulte a página 2.10. 2 Aparece a janela Assistente Adicionar Novo Hardware. Faça clique em Seguinte. 3 Coloque o CD-ROM na respectiva unidade, marque Procurar o melhor controlador para o dispositivo e faça clique em Seguinte. 4 Marque Unidade de CD-ROM e faça clique em Procurar. A seguir, seleccione x:\USB (x corresponde à letra da unidade
8 Siga as instruções apresentadas na janela para concluir a instalação do software da impressora. Para obter mais pormenores, consulte a página 2.15. Notas: • Se pretender utilizar a impressora com o cabo paralelo, desligue o cabo USB e ligue o paralelo. Em seguida, reinstale o controlador da impressora. • Se a impressora não funcionar correctamente, reinstale o controlador. INSTALAÇÃO DA IMPRESSORA 2.
NOTA 2.
3 Utilizar materiais de impressão Este capítulo pretende explicar os tipos de papel que pode utilizar com a impressora e como colocá-los adequadamente no tabuleiro para obter a melhor qualidade de impressão.
Seleccionar o papel e outros materiais É possível imprimir em vários suportes diferentes, tais como papel normal, envelopes, etiquetas, acetato e assim por diante. Consulte a secção “Especificações de papel” na página 7.22. Para obter a melhor qualidade de impressão possível, utilize somente papel de impressão de alta qualidade. Quando escolher materiais de impressão, considere o que se segue: • Resultado pretendido: O papel escolhido deve ser apropriado para o projecto.
Tamanhos e capacidades Origem de entrada/ capacidadea Tamanho Tabuleiro Alimentador manual Carta (216 x 279 mm) 250 1 Ofício (216 x 356 mm) 250 1 Executive (184 x 254 mm) 250 1 Folio (216 x 329 mm) 250 1 A4 (210 x 297 mm) 250 1 B5 (182 x 257 mm) 250 1 A5 (148 x 210 mm) 250 1 A6 (105 x 148 mm) 250 1 - 1 1 1 1 1 1 - 1 1 Carta (216 x 279 mm) A4 (210 x 297 mm) - 1 1 Card stocksb - 1 Papel normal 3 Envelopesb No.
Directrizes para papel e materiais especiais Quando seleccionar ou colocar papel, envelopes ou outros materiais especiais, lembre-se destas directrizes: • A tentativa de imprimir em papel húmido, dobrado, engelhado ou rasgado pode causar encravamento e baixa qualidade de impressão. • Utilize somente papel no formato correcto. Não pode utilizar papel em várias partes. • Utilize somente papel de impressão de alta qualidade para obter os melhores resultados.
Seleccionar a localização de saída A impressora possui duas localizações de saída: o tabuleiro de saída posterior e o tabuleiro de saída superior. Tabuleiro de saída superior Tabuleiro de saída posterior 3 Para utilizar o tabuleiro de saída superior, certifique-se de que o tabuleiro de saída posterior esteja fechado. Para utilizar o tabuleiro de saída posterior, abra-o.
Imprimir no tabuleiro de saída posterior (voltado para cima) A impressora sempre envia as impressões para o tabuleiro de saída posterior, se este estiver aberto. O papel sai da impressora voltado para cima e, toda vez que uma folha de papel sai, ela cai da impressora. A impressão a partir do alimentador manual para o tabuleiro de saída posterior corresponde ao caminho de papel direito.
2 Se não pretender empilhar as páginas impressas no tabuleiro de saída posterior, feche o tabuleiro. As páginas empilharão no tabuleiro de saída superior. 3 Colocar o papel A colocação correcta do papel ajuda a evitar encravamentos e garante impressões sem erros. Não remova o tabuleiro enquanto o trabalho estiver a imprimir, o que pode causar encravamento do papel. Consulte a secção “Tamanhos e capacidades” na página 3.
Utilizar o alimentador manual Se seleccionar Manual na opção Origem, pode colocar o papel manualmente no alimentador. A alimentação manual do papel pode ser útil se pretender verificar a qualidade da impressão assim que cada página é impressa. Se ocorrer encravamento do papel no tabuleiro, coloque uma folha por vez no alimentador manual. 1 Coloque o material de impressão no alimentador manual com o lado a imprimir voltado para cima. Ajuste a guia do papel contra o material de impressão sem dobrar o papel.
No modo de alimentação manual, não é possível cancelar o trabalho de impressão premindo-se o botão Cancel. Para cancelar um trabalho de impressão no modo de alimentação manual: 1 Desligue a impressora. 2 Faça duplo clique no ícone na parte inferior direita da janela. 3 Faça duplo clique neste ícone para visualizar a fila de trabalhos de impressão. 3 Seleccione um trabalho a cancelar. 4 No Windows 9x/Me, seleccione Cancelar impressão no menu Documento.
Imprimir envelopes Directrizes • Somente utilize envelopes recomendados para impressoras laser. Antes de colocar os envelopes no alimentador manual, certifique-se de que não estejam danificados nem colados uns aos outros. • Não utilize envelopes com selos. • Nunca utilize envelopes com ganchos, fechos, aberturas, revestimentos ou adesivos auto-colantes. Esses envelopes podem danificar a impressora seriamente. 1 Abra o tabuleiro de saída posterior.
3 Quando imprimir em envelopes, seleccione Manual em Origem na aplicação de software e, em seguida, seleccione o tamanho e o tipo correctos de papel. Para obter pormenores, consulte a página 4.6. 4 Prima o botão Cancel para começar a alimentar a impressora. Nota: Cuidado ao abrir a tampa posterior. A parte interna da impressora ainda está quente. 5 A impressão é iniciada. Feche o tabuleiro de saída posterior. UTILIZAR MATERIAIS DE IMPRESSÃO 3.
Imprimir etiquetas Directrizes • Somente utilize etiquetas recomendadas para impressoras laser. • Verifique se o material adesivo das etiquetas pode tolerar a temperatura de fusão de 200 ºC durante 0,1 segundo. • Certifique-se de que não exista material adesivo exposto entre as etiquetas. As áreas expostas podem causar o descolamento das etiquetas durante a impressão, o que pode acarretar o encravamento do papel. Os adesivos expostos também podem causar danos aos componentes da impressora.
3 Quando imprimir em etiquetas, tem de seleccionar Manual em Origem a partir da aplicação de software e, em seguida, seleccionar o tamanho e o tipo correctos de papel. Para obter pormenores, consulte a página 4.6. Nota: Cuidado ao abrir a tampa posterior. A parte interna da impressora ainda está quente. 4 Prima o botão Cancel para começar a alimentar a impressora. A impressão é iniciada. Feche o tabuleiro de saída posterior.
2 Ajuste a guia à largura das transparências. 3 Quando imprimir em transparências, seleccione Manual em Origem na aplicação de software e, em seguida, seleccione o tamanho e o tipo correctos de papel. Para obter pormenores, consulte a página 4.6. Nota: Cuidado ao abrir a tampa posterior. A parte interna da impressora ainda está quente. 4 Prima o botão Cancel para começar a alimentar a impressora. A impressão inicia. Feche o tabuleiro de saída posterior.
Imprimir em card stock ou em materiais com tamanho personalizado Os postais, os cartões com 88 x 147 mm (índice) e outros materiais com tamanho personalizado podem ser impressos nesta impressora. O tamanho mínimo é de 76 por 127 mm e o tamanho máximo é de 216 por 356 mm. Directrizes • Sempre insira a margem curta no alimentador manual primeiro. Se pretender imprimir em modo horizontal, faça a selecção no software. A introdução da extremidade longa do papel primeiro pode causar encravamento.
3 Quando imprimir em card stocks ou em papel com tamanho personalizado, seleccione Manual em Origem a partir da aplicação de software e, em seguida, seleccionar o tamanho e o tipo correctos de papel. Para obter pormenores, consulte a página 4.6. Nota: Se o tamanho do material de impressão não estiver listado na caixa Tamanho no separador Papel das propriedades do controlador da impressora, faça clique no botão Adicionar personalizado e defina o tamanho manualmente. Consulte a secção na página 4.6.
1 Coloque os papéis timbrados no tabuleiro que pretende utilizar, conforme ilustrado nas figuras abaixo. Ajuste as guias à largura da pilha de folhas. Coloque a folha com o desenho voltado para baixo e a extremidade inferior em direcção à impressora. 3 Coloque a folha com o desenho voltado para cima e a extremidade superior em direcção à impressora. 2 o imprimir, configure adequadamente o tipo, a origem e o tamanho do papel. Para tal, utilize a aplicação de software.
NOTA 3.
4 Tarefas de impressão Este capítulo explica as opções de impressão e as tarefas de impressão comuns.
Imprimir documentos O procedimento a seguir descreve os passos gerais necessários para imprimir a partir de várias aplicações do sistema Windows. Os passos exactos para imprimir um documento podem variar consoante o programa que estiver a utilizar. Consulte o Manual do Utilizador de sua aplicação de software para obter o procedimento de impressão exacto. 1 Abra o documento que pretende imprimir. 2 Seleccione Imprimir no menu Ficheiro.
4 Agora é possível visualizar a janela Propriedades de Samsung ML-1750 Series, que permite aceder a todas as informações que serão necessárias ao utilizar a impressora. O separador Esquema é o primeiro a aparecer. A imagem de prévisualização mostra a página exemplo com as definições especificadas actualmente. 4 Se necessário, seleccione a opção Orientação. A opção Orientação permite seleccionar a direcção na qual as informações são impressas na página.
7 Quando completar a definição das propriedades, faça clique em OK até que a janela Imprimir apareça. 8 Faça clique em OK para iniciar a impressão. Notas: • A maioria das aplicações do sistema Windows sobrepõem as definições especificadas no controlador da impressora. Altere todas as definições de impressão disponíveis na aplicação do software primeiro e altere as definições restantes utilizando o controlador da impressora.
A impressora terminará de imprimir a página em curso e eliminará o restante do trabalho de impressão. Premir o botão Cancel cancela somente o trabalho actual na impressora. Se existir mais de um trabalho na memória da impressora, prima o botão Cancel uma vez para cada tarefa. Para interromper um trabalho de impressão a partir da pasta Impressoras 1 No menu Iniciar do Windows, seleccione Definições.
Definir as propriedades do papel Utilize as seguintes opções para definir as necessidades básicas para o tratamento do papel quando aceder às propriedades da impressora. Consulte a página 4.2 para obter mais informações acerca do acesso às propriedades da impressora. Faça clique no separador Papel para aceder às várias propriedades. ➀ ➁ ➂ ➃ Propriedade ➀ ➁ Descrição A opção Cópias permite escolher o número de cópias a imprimir. Pode introduzir até 999.
Propriedade ➂ Descrição Certifique-se de que Origem esteja definida para o tabuleiro correspondente. A origem Manual é utilizada quando se usa o alimentador manual para a impressão de materiais especiais. Tem de colocar uma folha por vez na impressora. Consulte a página 3.8. Se a origem do papel for definida em Selecção automática, a impressora automaticamente selecciona o papel do alimentador manual primeiro e, em seguida, do tabuleiro.
Utilizar o modo de economia de toner O modo de economia de toner permite que a impressora utilize menos toner em cada página. A selecção dessa opção prolongará a vida do cartucho de toner e reduzirá o custo por página, mas reduzirá também a qualidade da impressão. Existem duas maneiras de activar o modo de economia de toner: A partir do painel de controlo Prima o botão Cancel no painel de controlo. A impressora tem de estar no modo Ready (com o LED On Line/Error verde aceso).
A partir da aplicação de software 1 Quando alterar as definições de impressão a partir da aplicação de software, aceda às propriedades da impressora. Consulte a secção na página 4.2. 2 Faça clique no separador Gráficos e seleccione a opção Economia de toner. Pode seleccionar as opções: • Definição da impressora: Se seleccionar essa opção, esta função é determinada pela definição feita no painel de controlo da impressora.
Imprimir várias páginas em uma única folha de papel (impressão de n páginas) Pode seleccionar o número de páginas a imprimir em uma única folha de papel. Para imprimir mais de uma página por folha, as páginas aparecerão em tamanho reduzido e em ordem. Pode imprimir até 16 páginas em uma folha. 1 Para alterar as definições de impressão a partir da aplicação de software, aceda às propriedades da impressora. Consulte a secção na página 4.2.
4 Seleccione a ordem das páginas, se necessário. 1 2 1 3 2 1 3 1 3 4 2 4 4 3 4 2 Direita, depois para baixo Para baixo, depois direita Esquerda, depois Para baixo, para baixo depois esquerda 5 Faça clique no separador Papel, seleccione a origem, o tamanho e o tipo de papel. 6 Faça clique em OK e imprima o documento. 4 TAREFAS DE IMPRESSÃO 4.
Definir escalas para o documento É possível definir a escala do trabalho de impressão na página. 1 Quando alterar as definições de impressão a partir da aplicação de software, aceda às propriedades da impressora. Consulte a secção na página 4.2. 2 No separador Esquema, seleccione Redução/ampliação na lista pendente Tipo. 3 Informe a taxa para a escala pretendida na caixa de introdução Percentagem. Também é possível fazer clique no botão ou .
Ajustar o documento ao tamanho de papel seleccionado A Essa função da impressora permite escolher a escala do trabalho de impressão em qualquer tamanho de papel seleccionado sem olhar o tamanho do documento digital. Isso pode ser útil quando pretende verificar detalhes em documentos pequenos. 1 Quando alterar as definições de impressão a partir da aplicação de software, aceda às propriedades da impressora. Consulte a secção na página 4.2.
Imprimir cartazes Esta função permite imprimir documentos com uma única página em 4, 9 ou 16 folhas de papel, com o objectivo de colar as folhas juntas e formar um documento do tamanho de um cartaz. 1 Quando alterar as definições de impressão a partir da aplicação de software, aceda às propriedades da impressora. Consulte a secção na página 4.2. 2 Faça clique no separador Esquema e seleccione Cartaz na lista pendente Tipo. 3 Configure a opção cartaz: O esquema da página pode ser 2x2, 3x3 ou 4x4.
Especifique uma sobreposição em milímetros ou polegadas para facilitar a reconstrução do cartaz resultante. 4 Faça clique no separador Papel, seleccione a origem, o tamanho e o tipo de papel. 5 Faça clique em OK e imprima o documento. Pode completar o cartaz reconstruindo os resultados. TAREFAS DE IMPRESSÃO 4.
Definir as propriedades gráficas Utilize as opções gráficas a seguir para ajustar a qualidade da impressão às suas necessidades específicas. Consulte a página 4.2 para obter mais informações acerca do acesso às propriedades da impressora. Faça clique no separador Gráficos para apresentar as propriedades mostradas abaixo. ➀ ➁ ➂ ➃ Propriedade ➀ Resolução ➁ Economia de toner 4.
Propriedade ➂ Modo Imagem ➃ Descrição Alguns caracteres ou imagens impressos parecem possuir margens chanfradas ou desiguais. Defina a opção Modo Imagem para melhorar a qualidade da impressão do seu texto e imagem e fazer com que os caracteres e as imagens pareçam mais suaves. A opção Modo Imagem está disponível somente quando selecciona 1200 ppp Classe (Melhor) na opção Resolução.
Propriedade ➃ Opções avançadas (continuação) Descrição Opções TrueType Esta opção determina o que o controlador informa à impressora acerca da representação do texto no documento. Seleccione a definição apropriada consoante o estado do documento. • Descarregar como imagem de bits: Quando essa opção é seleccionada, o controlador descarrega os dados do tipo de letra como imagens de mapas de bits.
Imprimir marcas de água A opção Marca de água permite imprimir texto sobre um documento existente. Por exemplo, talvez pretenda incluir grandes letras na cor cinza a formar as palavras “RASCUNHO” ou “CONFIDENCIAL” no sentido diagonal na primeira página ou todas as páginas de um documento. Existem várias marcas de água predefinas que acompanham a impressora e podem ser alteradas. Além disso, pode adicionar novas marcas de água à lista.
Criar uma marca de água 1 Quando alterar as definições de impressão a partir da aplicação de software, aceda às propriedades da impressora. Consulte a secção na página 4.2. 2 Faça clique no separador Extras e, em seguida, clique no botão Editar na secção Marca de água. A janela Marcas de água aparece no ecrã. 3 Pode escrever a mensagem de texto pretendida na caixa Mensagem de marca de água. Essa mensagem aparecerá na janela de pré-visualização.
Editar uma marca de água 1 Quando alterar as definições de impressão a partir da aplicação de software, aceda às propriedades da impressora. Consulte a secção na página 4.2. 2 Faça clique no separador Extras e, em seguida, faça clique no botão Editar na secção Marca de água. A janela Marcas de água aparece no ecrã. 3 Seleccione a marca de água que pretende editar na lista Marcas de água actuais. Altere a mensagem da marca de água e as suas opções. Consulte a secção “Criar uma marca de água” na página 4.
Imprimir sobreposições O que é uma sobreposição? Dear ABC Regards WORLD BEST Sobreposições são textos e/ou imagens armazenadas na unidade de disco rígido do computador (HDD) como formato de ficheiro especial que pode ser impresso em qualquer documento. As sobreposições são frequentemente utilizadas para substituir formulários pré-impressos e papéis timbrados. Em vez de utilizar papéis timbrados pré-impressos, pode criar uma sobreposição contendo exactamente as mesmas informações actualizadas do timbre.
4 Na janela Editar sobreposições, faça clique em Criar sobreposição. 5 Na janela Criar sobreposição, introduza um nome com até oito caracteres na caixa Nome do ficheiro. Seleccione o caminho de destino, se necessário (o caminho predefinido é C:\Formover). 6 Faça clique em Guardar. Verá o nome em Lista de sobreposição. 7 Faça clique em OK ou Sim até completar a criação. O ficheiro não é impresso. Em vez disso, será guardado no disco rígido do computador.
Utilizar sobreposições de página Uma vez criada a sobreposição, ela estará pronta para ser impressa com o documento. Para imprimir uma sobreposição com um documento: 1 Crie ou abra o documento que pretende imprimir. 2 Quando alterar as definições de impressão a partir da aplicação de software, aceda às propriedades da impressora. Consulte a secção na página 4.2. 3 Faça clique no separador Extras. 4 Seleccione a sobreposição pretendida na caixa de listagem pendente Sobreposição.
6 Se necessário, faça clique em Confirmar sobreposição de página ao imprimir. Se essa caixa for marcada, aparece uma janela de mensagem cada vez que enviar um documento para imprimir, pedindo a confirmação de que deseja imprimir uma sobreposição no documento. A resposta Sim à janela significa que a sobreposição seleccionada será impressa com o documento. A resposta Não à janela cancela a impressão da sobreposição.
Utilizar o Monitor de estado Se instalou o software Monitor de estado, poderá verificar o estado actual da impressora sempre que desejar. Se ocorrer um erro na impressora, a janela do Monitor de estado aparece no ecrã e indica o problema. Nota: O programa Monitor de estado somente pode ser utilizado se ligar a impressora ao computador com o cabo USB. Abrir o Monitor de estado 1 Faça duplo clique no ícone Monitor de estado na barra de tarefas do Windows. Faça duplo clique neste ícone.
Alterar a definição do programa Monitor de estado Se fizer clique no ícone de configuração na janela do Monitor de estado , verá a janela a seguir. • Sempre em primeiro plano a janela do Monitor de estado está sempre visível independentemente de abrir outros programas. • Activar ecrã do Monitor de estado nos erros de impressão apresenta a janela do Monitor de estado quando ocorre um erro na impressora.
Definir a impressora partilhada localmente Pode ligar a impressora directamente ao computador seleccionado, que é chamado “computador anfitrião”, na rede. A impressora pode ser partilhada pelos outros utilizadores na rede por meio de uma ligação de impressora de rede no Windows 9x, Me, 2000, XP ou NT 4.0. Windows 9x/Me Definir o computador anfitrião 1 Inicie o Windows. 2 No menu Iniciar, seleccione Painel de controlo e faça duplo clique no ícone Rede.
Windows NT/2000/XP Definir o computador anfitrião 1 Inicie o Windows. 2 No menu Iniciar, seleccione Definições e Impressoras. (Windows NT/2000) No menu Iniciar, seleccione Impressoras e Faxes. (Windows XP) 3 Faça duplo clique no ícone da impressora. 4 No menu Impressora, seleccione Partilhar. 5 Marque a caixa Partilhado. (Windows NT) Marque a caixa Partilhada como. (Windows 2000) Marque a caixa Partilhar esta impressora. (Windows XP) Preencha o campo Partilhar nome e, em seguida, faça clique em OK.
9 Preencha o campo Introduza um nome de porta e escreva o nome partilhado. 10 Faça clique em OK e em Fechar. 11 Faça clique em OK. (Windows NT) Faça clique em Aplicar e faça clique em OK. (Windows 2000/XP) 4.
5 Manutenção da impressora Este capítulo fornece sugestões para a manutenção do cartucho de toner e da impressora.
Manutenção do cartucho de toner Armazenar o cartucho de toner Para obter os melhores resultados do cartucho de toner, lembrese das directrizes a seguir. • Não remova o cartucho de toner de sua embalagem até que esteja pronto para usá-lo. • Não reaproveite o cartucho de toner. A garantia da impressora não cobre os danos causados pela utilização de cartuchos reabastecidos. • Armazene o cartucho de toner no mesmo ambiente da impressora.
Redistribuir o toner Quando o toner está baixo, podem aparecer áreas claras ou desbotadas na página impressa. É possível melhorar temporariamente a qualidade da impressão redistribuindo o toner. Os procedimentos a seguir permitem terminar o trabalho de impressão actual antes de substituir o cartucho de toner. 1 Agarre a tampa frontal e puxe-a para si, para a abrir. 5 2 Empurre o cartucho de toner para baixo e remova-o da impressora. CUIDADO: • Evite introduzir a mão muito fundo na impressora.
3 Agite ligeiramente o cartucho de toner um lado para o outro cinco ou seis vezes para distribuir o toner. Nota: Se manchar a roupa com toner, limpe-a com um pano seco e lave a roupa em água fria. A água quente fixa o toner no tecido. 4 Recoloque o cartucho de toner na impressora. Certifique-se de que o cartucho de toner encaixe no lugar. 5 Feche a tampa frontal. Certifique-se de que a tampa está bem fechada. Se não estiver fechada firmemente, podem ocorrer erros ao imprimir.
Limpar a impressora Para manter a qualidade da impressão, siga os procedimentos de limpeza abaixo cada vez que o cartucho de toner for substituído ou se ocorrerem problemas com a qualidade da impressão. Nota: Ao limpar a parte interna da impressora, cuidado para não tocar o rolo de transferência (localizado abaixo do cartucho de toner). A gordura dos dedos pode causar problemas à qualidade da impressão.
3 Com um pano seco e sem fiapos, limpe a poeira e o toner espirrado da área do cartucho de toner e da cavidade do cartucho. Nota: Para evitar danos ao cartucho de toner, não o exponha à luz por mais de alguns minutos. Cubra-o com uma folha de papel, se necessário. Da mesma forma, não toque no rolo de transferência preto dentro da impressora. 4 Recoloque o cartucho de toner e feche a tampa. Certifiquese de que a tampa está bem fechada. Se não estiver fechada firmemente, podem ocorrer erros ao imprimir.
Imprimir uma folha de limpeza Se estiver a experimentar impressões manchadas, desbotadas ou sujas, a impressão de uma folha de limpeza limpa o tambor dentro do cartucho de toner. Esse processo produz uma página com os detritos de toner, que devem ser descartados. 1 Certifique-se de que a impressora está ligada e no modo Ready com papel colocado no tabuleiro. 2 Prima sem soltar o botão Cancel no painel de controlo por cerca de 10 segundos.
Peças de consumo e de substituição De tempos em tempos, será necessário substituir o rolo e a unidade de fusão para manter um desempenho superior, evitar problemas quanto à qualidade da impressão e à alimentação do papel resultantes de peças desgastadas. Os itens a seguir devem ser substituídos após a impressão de um número específico de páginas. Veja a tabela abaixo. Itens Quantidade produzida (em média) Rolo de alimentação de papel 60.000 Rolo de transferência 60.000 Rolo captador 60.
6 Resolução de problemas Este capítulo fornece informações úteis a respeito do que fazer se ocorrer um erro durante a utilização da impressora.
Lista de verificação de problemas Se a impressora não estiver a funcionar correctamente, consulte a lista de verificação a seguir. Se a impressora falhar em algum passo, siga as sugestões correspondentes para resolver o problema. Verificação Solução Verifique o cabo e o interruptor de alimentação. Verifique a fonte de alimentação ligando o cabo em outra tomada. Certifique-se de que o LED On Line/Error esteja aceso. No modo Ready, a luz do LED On Line/Error é verde.
Resolver problemas gerais de impressão Nos problemas de operação da impressora, consulte a tabela de soluções sugeridas. Problema A impressora não imprime Causa possível A impressora não está a receber alimentação. Solução Verifique as ligações do cabo de alimentação. Verifique o interruptor e a fonte de alimentação. A impressora não está Seleccione Samsung ML-1750 Series na seleccionada como pasta Impressora no Windows como a impressora predefinida. impressora predefinida.
Problema Causa possível Solução O controlador da impressora pode estar instalado incorrectamente. Reinstale o controlador da impressora; consulte a página 2.16. Tente imprimir uma página de demonstração. A impressora funciona mal. Verifique se os LEDs no painel de controlo indicam erro de sistema com a impressora. A impressora selecciona o material a partir da origem de papel incorrecta. A selecção da origem de papel nas propriedades da impressora pode estar incorrecta.
Problema O papel encrava com frequência. A impressora imprime, mas o texto está errado, ininteligível ou incompleto. Causa possível Solução Existe papel em demasia no tabuleiro. Remova o excesso de papel do tabuleiro. Se imprimir em materiais especiais, utilize o alimentador manual. Está a utilizar um tipo incorrecto de papel. Utilize somente papel que obedeça às especificações exigidas pela impressora. Está a utilizar um método de saída incorrecto.
Problema As páginas são impressas, mas estão em branco. A impressora não imprime correctamente as ilustrações do Adobe Illustrator. Causa possível O cartucho de toner apresenta avarias ou está sem toner. Solução Redistribua o toner, se necessário. Consulte a página 5.3. Se necessário, substitua o cartucho de toner. O ficheiro pode conter páginas em branco. Verifique o ficheiro para garantir que não contenha páginas vazias. Algumas peças, tais como o controlador ou a placa, podem apresentar avarias.
Eliminar encravamentos de papel Ocasionalmente, o papel pode encravar durante um trabalho de impressão. Algumas possíveis causas são: • O tabuleiro foi colocado incorrectamente ou está sobrecarregado. • O tabuleiro foi puxado para fora durante um trabalho de impressão. • A tampa frontal foi aberta durante um trabalho de impressão. • O papel utilizado não obedece às especificações. Consulte a secção “Especificações de papel” na página 7.22. • O papel utilizado está fora do intervalo de tamanho suportado.
2 Abra o tabuleiro de saída posterior. 3 Solte o papel se estiver preso nos rolos de alimentação. Em seguida, puxe o papel para fora delicadamente. Nota: Cuidado ao abrir a tampa posterior. A parte interna da impressora ainda está quente. 4 Feche o tabuleiro de saída posterior. 5 Abra e feche a tampa frontal. A impressão pode ser reiniciada. 6.
Na área de alimentação do papel 1 Retire o tabuleiro para expor o papel encravado. 2 Remova o papel posicionado incorrectamente puxando-o para fora pela margem visível do tabuleiro. Certifique-se de que todo o papel esteja alinhado correctamente no tabuleiro. 6 3 Volte a inserir o tabuleiro na impressora. 4 Abra e feche a tampa frontal. A impressão pode ser reiniciada. RESOLUÇÃO DE PROBLEMAS 6.
Em torno do cartucho de toner 1 Abra a tampa frontal. 2 Empurre o cartucho de toner para baixo e remova-o da impressora. 3 Puxe o papel delicadamente para si. 4 Verifique se não há mais papel na impressora. 5 Reinstale o cartucho de toner e feche a tampa. A impressão pode ser reiniciada. 6.
Sugestões para evitar o encravamento de papel ao imprimir em papéis com tamanho A5 Caso ocorra encravamentos de papel frequentemente ao imprimir em papéis com tamanho A5: 1 Abra o tabuleiro de entrada e coloque o papel conforme ilustrado abaixo. 2 Abra a janela Propriedades de Samsung ML-1750 Series e defina o tamanho do papel para A5 (148x210 mm) no separador Papel. 3 Na opção Orientação do separador Esquema, defina a opção Rodar em 90º. Seleccione 90 graus. Faça clique.
Sugestões para evitar o encravamento de papel A maioria dos encravamentos de papel pode ser evitada mediante a selecção dos tipos correctos de papel. Se ocorrer encravamento, siga os passos descritos na secção “Eliminar encravamentos de papel” na página 6.7. • Siga os procedimentos expostos na secção “Colocar o papel” na página 2.6. Certifique-se de que as guias ajustáveis estejam correctamente posicionadas. • Não sobrecarregue o tabuleiro.
Resolver problemas da qualidade de impressão Problema Solução Impressão clara ou desbotada Se aparecer uma risca vertical branca ou área desbotada na página: • A quantidade de toner está baixa. É possível prolongar temporariamente o tempo de vida útil do cartucho de toner. Consulte a secção “Redistribuir o toner” na página 5.3. Se isso não melhorar a qualidade de impressão, instale um novo cartucho de toner.
Problema Solução Perdas de informação Se a página apresentar áreas desbotadas, geralmente redondas, distribuídas aleatoriamente: • Uma única folha de papel pode apresentar defeito. Tente imprimir o trabalho mais uma vez. • O teor de humidade do papel é desigual ou o papel possui pontos húmidos na superfície. Tente uma marca diferente de papel. Consulte a secção “Especificações de papel” na página 7.22. • O lote de papel apresenta problemas.
Problema Solução Defeitos verticais repetitivos Se aparecerem marcas repetidas no lado impresso da página a intervalos regulares: • O cartucho de toner pode estar danificado. Se a página apresentar marcas repetitivas, imprima uma folha de limpeza várias vezes para limpar o cartucho (consulte a página 5.5). Após a impressão, se os problemas persistirem, instale um novo cartucho de toner. Consulte a secção “Instalar o cartucho de toner” na página 2.4. • Algumas peças da impressora podem conter toner.
Problema Solução Desalinhamento de página • Verifique o tipo e a qualidade do papel. Consulte a secção “Especificações de papel” na página 7.22. • Certifique-se de que o papel ou outro material esteja colocado correctamente e as guias não estejam muito apertadas ou muito frouxas contra a pilha de papel. Dobras ou ondas • Verifique o tipo e a qualidade do papel. Tanto a temperatura como a humidade altas podem causar dobras no papel. Consulte a secção “Especificações de papel” na página 7.22.
Problema Solução Perda de toner Limpe o interior da impressora • Verifique o tipo e a qualidade do papel. Consulte a secção “Especificações de papel” na página 7.22. • Instale um novo cartucho de toner. • Se o problema persistir, a impressora pode precisar de reparos. Contacte o representante de suporte.
Mensagens de erro da resolução de problemas Quando a impressora encontra um erro, o painel de controlo emite uma mensagem de erro com as luzes indicadoras. Consulte o padrão de luzes abaixo que coincide com o padrão de luzes da impressora e siga as sugestões para corrigir o erro. Legenda do estado do LED símbolo de “luz apagada” símbolo de “luz acesa” símbolo de “luz a piscar” Padrão do LED Problemas possíveis e soluções O sistema apresenta algum problema.
Problemas comuns do Windows Problema Causa possível e solução A mensagem “Ficheiro em uso” aparece durante a instalação. Feche todas as aplicações de software. Remova todo o software do Grupo de arranque e, em seguida, reinicie o Windows. Reinstale o software da impressora. A mensagem “Erro ao escrever em LPTx” aparece. • Certifique-se de que os cabos e a impressora estejam ligados correctamente. • Se a comunicação bi-direccional não estiver activada no controlador, essa mensagem também aparecerá.
Problemas comuns do Linux Problema Causa possível e solução Não é possível alterar as definições na ferramenta de configuração. Tem de possuir privilégios de administrador para poder alterar as definições globais. Estou a utilizar o ambiente de trabalho KDE, mas a ferramenta de configuração e o LLPR não inicializam. Talvez as bibliotecas GTK não estejam instaladas. Elas geralmente acompanham a maioria dos produtos Linux, mas talvez tenha de as instalar manualmente.
Problema Causa possível e solução A definição “n páginas” não funciona correctamente em alguns documentos. A função “n páginas” é obtida por meio do pósprocessamento dos dados PostScript que são enviados para o sistema de impressão. No entanto, o pós-processamento só pode ser obtido adequadamente se os dados PostScript obedecerem às convenções de estrutura de documentos da Adobe (Adobe Document Structing Conventions).
Problema Causa possível e solução Como especifico o endereço IP de meu servidor SMB? Pode ser especificado na caixa de diálogo “Add Printer” da ferramenta de configuração, se não utilizar o sistema de impressão CUPS. Infelizmente, o CUPS actualmente não permite a especificação do endereço IP de impressoras SMB, portanto, procure a função com o Samba para poder imprimir. Alguns documentos saem em branco durante a impressão.
7 Apêndice Este capítulo inclui: • Utilizar a impressora com o sistema operativo Linux • Imprimir a partir de aplicações DOS • Especificações da impressora • Especificações de papel
Utilizar a impressora com o sistema operativo Linux Instalar o controlador da impressora Requisitos de sistema Sistema operativo suportado • Redhat 6.2/7.0/7.1 e superior • Linux Mandrake 7.1/8.0 e superior • SuSE 6.4/7.0/7.1 e superior • Debian 2.2 e superior • Caldera OpenLinux 2.3/2.4 e superior • Turbo Linux 6.0 e superior • Slackware 7.0/7.1 e superior Requisitos recomendados • Pentium IV 1GHz • 256 MB de memória RAM ou mais • Disco rígido de 1 GB ou mais Software • Glibc 2.1 ou superior • GTK+ 1.
Nota: Se o CD-ROM não se iniciar automaticamente, faça clique no ícone na parte inferior da janela. No ecrã Terminal que aparece, escreva: [root@local /root]# cd /mnt/cdrom (o directório do CD-ROM) [root@local cdrom]# ./setup.sh 4 Seleccione o tipo de instalação, Recommended ou Expert e faça clique em Continue. A opção Recommended é totalmente automatizada e não requer nenhuma interacção. A instalação Expert permite seleccionar o caminho de instalação ou sistema de impressão.
6 Inicia-se a instalação do controlador da impressora. Quando a instalação estiver concluída, faça clique em Start. 7 A janela Linux Printer Configuration aparece. Faça clique no ícone Add Printer na barra de ferramentas no topo da janela. Nota: Consoante o sistema de impressão em uso, a janela Administrator Login pode aparecer. Escreva “root” no campo Login e informe a palavra-passe do sistema. 8 Aparecem as impressoras actualmente acrescentadas ao sistema. Seleccione a impressora a utilizar.
9 Faça clique no separador Connection e verifique se a porta da impressora foi definida adequadamente. Se não estiver correcta, altere a definição do dispositivo. 10 Pode utilizar o separador Settings e o separador Queue para visualizar a definição actual da impressora. Se necessário, pode alterar as definições. Nota: As opções podem diferir consoante a impressora em uso. É possível que os campos Description e Location não apareçam no ecrã Queue devido ao sistema de impressão em uso.
Alterar o método de ligação da impressora Se alterar o método de ligação da impressora de USB para paralelo ou vice-versa enquanto ela estiver em uso, reconfigure a impressora Linux acrescentando-a ao sistema. Siga os passos seguintes: 1 Certifique-se de ligar a impressora ao computador. Ligue a impressora e o computador. 2 Quando aparecer a janela Administrator Login, escreva "root" no campo Login e informe a palavra-passe do sistema.
Desinstalar o controlador da impressora 1 No ícone Startup Menu disponível na parte inferior do ambiente de trabalho, seleccione Linux Printer e, em seguida, Configuration Tool. Também pode aceder à janela Linux Printer Configuration escrevendo “linux-config” no ecrã Terminal. 2 Na janela Linux Printer Configuration, seleccione o comando Uninstall no menu File. 3 A janela Administrator Login aparece. Escreva "root" no campo Login e informe a palavra-passe do sistema. Faça clique em Proceed.
6 Faça clique em OK para iniciar a desinstalação. 7 Quando a desinstalação estiver completa, faça clique em Finished. Utilizar a ferramenta de configuração A ferramenta de configuração possibilita a realização das tarefas administrativas, incluindo acrescentar e remover novas impressoras e alterar as definições globais. Os utilizadores regulares podem também executá-las para inspeccionar as filas de trabalhos, examinar as propriedades da impressora e alterar a preferência local mais facilmente.
3 O separador Info apresenta as informações gerais acerca da impressora. Se for utilizador da Internet, pode fazer clique na página Go to the Web page for this printer para aceder à página da Samsung na web. Faça clique no separador Job para inspeccionar e administrar a fila de trabalhos da impressora seleccionada. Pode suspender, retomar ou eliminar trabalhos específicos que estejam na fila. Se arrastar um trabalho específico, pode largá-lo na fila de outra impressora.
Alterar as propriedades do LLPR É possível ajustar as propriedades da impressora abrindo-se a janela LLPR Properties. Para abrir a janela LLPR Properties: 1 A partir da aplicação que está a utilizar, seleccione o comando Print. 2 Quando a janela Linux LPR abrir, faça clique em Properties. Também pode abrir a janela LLPR utilizando o seguinte: • Faça clique no ícone Startup Menu na parte inferior do ecrã, seleccione Linux Printer e, em seguida, Linux LPR.
3 É apresentada a janela LLPR Properties. No topo da janela, aparecerão os seis separadores a seguir: • General - permite alterar o tamanho, o tipo e a origem do papel e a orientação dos documentos; activa a função dúplex; acrescenta faixas iniciais e finais e altera o número de páginas por folha. • Margins - permite especificar as margens da página. O gráfico à direita apresenta as definições actuais. Essas margens não se aplicam a impressões de dados PostScript regulares.
Imprimir a partir de aplicações DOS Sendo a impressora principalmente um equipamento Windows, pode também imprimir a partir de programas DOS utilizando o utilitário Painel de comandos remoto que acompanha o CD-ROM do software. Acerca do painel de comandos remoto Os utilizadores DOS têm acesso a muitas funções da impressora por meio de controladores DOS específicos; entretanto, muitos fabricantes de software não desenvolvem controladores de impressora para seus programas.
3 Faça clique em Instalar o software-III da Samsung em seu PC (WinRCP). 4 Faça clique em Seguinte. Os ficheiros são copiados no directório apropriado. 5 Assim que a instalação estiver concluída, faça clique em Concluir. Desinstalar o painel de comandos remoto O ícone Uninstall do grupo de programas Samsung ML-1750 permite seleccionar e eliminar alguns ou todos os componentes do sistema de impressão Windows ML-1750. 1 No menu Iniciar, seleccione Programas.
Seleccionar as definições de impressão Pode utilizar o Painel de comandos remoto para seleccionar as definições de impressão que podem não estar disponíveis em alguns programas DOS. Normalmente, as definições de impressão duplicadas seleccionadas a partir de programas DOS sobrepõem as definições seleccionadas no Painel de comandos remoto. Iniciar o Painel de comandos remoto 1 No menu Iniciar, seleccione Programas. 2 Seleccione Samsung ML-1750 Series e, em seguida, Painel de comandos remoto.
O Painel de comandos remoto permite aceder às seguintes funções: IMPRESSÃO Neste separador, pode configurar as definições gerais de impressão. • Tamanho do papel define o tamanho do papel. • Orientação determina a direcção em que a página é impressa. • Tabuleiro de papel define a origem predefinida do papel. • RC automático define como a impressora executa o retorno do carro. • Cópias determina o número de cópias impressas de cada página. • Qualidade especifica a qualidade da impressão.
CONFIGURAÇÃO É possível configurar várias funções da impressora. • Emulação selecciona a emulação para imprimir um documento. A configuração de fábrica é Auto. • Economia de energia determina o tempo que a impressora aguarda após a impressão de um trabalho, antes de entrar num estado de consumo reduzido. Se a impressora é utilizada com frequência, seleccione Desactivada, o que mantém a impressora pronta para imprimir com tempo de preparo mínimo.
• Altitude: ajuda a impressora a optimizar o resultado em áreas de baixa pressão, tais como regiões montanhosas altas. • Texto escuro: permite que todo o texto no documento seja impresso mais escuro do que o normal. TAREFA É possível definir opções para melhorar a qualidade do trabalho de impressão. • Densidade do toner determina a densidade do toner na página. O valor predefinido é Média. • Tipo de papel fornece à impressora informações acerca do tipo de papel a ser utilizado para imprimir o trabalho.
TESTE Esse separador permite imprimir uma página residente para testar o desempenho da impressora. • Auto teste imprime uma folha de configuração. São impressas uma lista das predefinições do utilizador e a quantidade disponível de memória da impressora. • Página de demonstração imprime uma página de demonstração. A página apresenta as funções e especificações da impressora. 7.
PCL Neste separador, pode configurar várias definições para a emulação PCL. • Tipo de letra permite seleccionar o tipo de caractere pretendido. Esta definição é ignorada quando a aplicação de software especifica um tipo de letra. • Conjunto de símbolos determina o conjunto de símbolos. Um conjunto de símbolos é um conjunto de caracteres alfabéticos e numéricos, de pontuação e de símbolos especiais utilizado ao imprimir com um tipo de letra seleccionado.
EPSON/IBM Pode configurar várias definições para emulação EPSON. • Tipo de letra permite seleccionar o tipo de letra pretendido. • Conjunto internacional de caracteres permite seleccionar um conjunto de caracteres do idioma pretendido. • Tabela de caracteres selecciona os conjuntos de caracteres. • Espaçamento define a densidade do tipo de letra. "Pitch" refere-se ao número de caracteres de espaço fixo por polegada horizontal. • lpp define o número de linhas impressas por polegada vertical.
Especificações da impressora Item Especificações e descrição Velocidade de impressão* Até 16 PPM em papel A4 (17 PPM em papel Carta) Resolução 1200 x 600 ppp Tempo da primeira impressão 12 segundos Tempo de aquecimento 30 segundos Potência nominal 110 ~ 127 V AC (EUA, Canadá) / 220 ~ 240 V (outros países), 50 / 60 Hz Consumo de energia 330 W em média durante o funcionamento / menos de 10 W em modo de hibernação Ruído acústico** Em modo de espera: Menos de 35 dB; Impressão: Menos de 52 dB Modo
Especificações de papel Descrição geral A impressora aceita diversos materiais de impressão, tais como folhas de papel no formato predefinido (incluindo papel com conteúdo de até 100 % de fibras recicladas), envelopes, etiquetas, transparências e papel de tamanho personalizado. Propriedades como peso, composição, granulação e teor de humidade são factores importantes que afectam o desempenho da impressora e a qualidade do trabalho.
Tipos de papel suportados Papel Carta A4 Dimensões* (216 X 279 mm) 210 X 297 mm Executive (191 X 267 mm) Ofício (216 X 356 mm) B5 (JIS) 182 X 257 mm Folio 216 X 330 mm Tamanho mínimo (personalizado) 76 x 127 mm Tamanho máximo (personalizado) 216 x 356mm Transparência Etiquetas Envelopes Peso Os mesmos tamanhos mínimo e máximo listados acima.
Directrizes para a utilização do papel Para obter os melhores resultados, utilize papel convencional de 75 g/m2. Certifique-se de que o papel é de boa qualidade e não possui cortes, entalhes, rasgos, manchas, partículas soltas, poeira, engelhas, espaços vazios e margens dobradas ou torcidas. Se não tiver a certeza do tipo de papel que está a colocar (por exemplo, não calandrado ou reciclado), verifique a etiqueta na embalagem.
Especificações de papel Categoria Especificações Acidez 5,5 a 8,0 pH Espessura 0,094 a 0,18 mm (3,0 a 7,0 mil) Ondulação da resma Uniforme até 5 mm Condições de corte das bordas Corte com lâminas afiadas sem desfiados visíveis. Compatibilidade da fusão Não deve queimar, derreter, aderir ou libertar emissões perigosas quando aquecido a 200 °C (392 °F) durante 0,1 segundo.
Ambiente de armazenamento da impressora e do papel As condições ambientais de armazenamento do papel afectam directamente a sua alimentação. O ideal é que o ambiente de armazenamento da impressora e do papel esteja em temperatura ambiente ou próximo dela, em condições não muito secas nem muito húmidas. Lembre-se de que o papel é higroscópico; absorve e perde humidade rapidamente. O calor age com a humidade e danifica o papel.
INDEX C I cabo de impressora, ligar 2.9 cancelar, imprimir 4.4 colocar papel 3.7 no alimentador manual 3.8 no tabuleiro 2.6, 3.7 idioma, alterar 2.17 impressora, limpar 5.5 impressora, partilha 4.28 imprimir ajuste à página 4.13 cartaz 4.14 documento 4.2 escala 4.12 folha de limpeza 5.7 marca de água 4.19 n páginas 4.10 página de demonstração 2.12 sobreposição 4.22 instalar controlador USB 2.18 software 2.15 toner 2.4 D definição economia de toner 4.16 favorita 4.5 luminosidade 4.16 modo de imagem 4.
P T página de demonstração, imprimir 2.12 painel de controlo, usar 1.6 papel, capacidade 3.3 papel, directrizes 3.4 problema DOS 6.22 Linux 6.20 windows 6.19 tabuleiro de saída, seleccionar 3.5 tamanho do papel 3.3 toner duração 5.2 instalar 2.4 reciclar 5.2 redistribuir 5.3 substituir 5.4 S sobreposição criar 4.22 eliminar 4.25 imprimir 4.24 software descrição geral 2.13 desinstalar 2.17 DOS 7.12 instalar 2.15 Linux 7.2 reinstalar 2.16 requisitos de sistema 2.
Home Visite a Samsung em: www.samsungprinter.com Rev.2.