MX-JS8000 PREMIUM HI-FI Component System user manual imagine the possibilities Thank you for purchasing this Samsung product. To receive more complete service, please register your product at www.samsung.com/register [MX-JS8000-TK]AH68-02771W-00ENG.
Safety Information Warning TO REDUCE THE RISK OF ELECTRIC SHOCK, DO NOT REMOVE THE COVER (OR BACK). NO USER-SERVICEABLE PARTS ARE INSIDE. REFER SERVICING TO QUALIFIED SERVICE PERSONNEL. CAUTION This symbol indicates "dangerous voltage" inside the product that presents a risk of electric shock or personal injury. RISK OF ELECTRIC SHOCK DO NOT OPEN CAUTION: TO PREVENT ELECTRIC SHOCK, MATCH WIDE BLADE OF PLUG TO WIDE SLOT, FULLY INSERT.
Precautions [MX-JS8000-TK]AH68-02771W-00ENG.indd 3 Safety Information 3 01 • Ensure that the AC power supply in your house complies with the identification sticker located on the back of your product. • Install your product horizontally, on a suitable base (furniture), with enough space around it for ventilation (3 - 4 inches/7.5 - 10 cm). • Do not place the product on amplifiers or other equipment which may become hot. Make sure the ventilation slots are not covered.
Contents Safety Information 2 Warning 3 Disc Storage & Management 3 12 12 12 13 13 13 13 Precautions Getting Started 6 Front Panel 8 Remote Control 7 9 9 9 14 14 Rear Panel 14 14 15 15 15 Accessories Connecting the Speakers Cautions on Moving the Speakers 15 16 Functions 10 10 10 10 10 10 11 11 11 11 12 12 17 Using Samsung Audio Remote App 17 Install Samsung Audio Remote App Accessing the Samsung Audio Remote App The Display function 17 18 18 Changing Display mode The DEMO functi
20 Timer Function 22 24 24 Basic Recording Recording Speed Special Sound Effects 24 25 25 25 25 26 26 26 27 27 27 28 28 Setting the Clock Setting the Timer Cancelling the Timer Setting the Sleep The Recording Function Contents 20 20 22 22 22 Selecting PRESET EQ Mode Selecting USER EQ Mode FOOTBALL MODE function GIGA PARTY Function BEAT WAVING Function DJ BEAT Function +PANNING Function NON-STOP MUSIC RELAY Function TEMPO Function BOOTING SOUND Function Software Update Disc and Format Compatibility S
Getting Started Front Panel 1 2 8 3 7 4 5 6 1 CD Source button Display Panel OPEN/CLOSE button for Disc Remote control sensor DISC tray GIGA PARTY button 2 PRESET EQ button 5 BACKWARD SEARCH/SKIP button USER EQ button PLAY/PAUSE button FOOTBALL MODE button FORWARD SEARCH/SKIP button AUTO CHANGE button 3 DISPLAY/DEMO button 6 DJ BEAT button for DJ sound effect 7 MIC 1/2 jacks MIC VOL JOG USB 1/2 Source buttons USB 2 jack for Playing and USB Recording ENTER button TEMPO button 8
Rear Panel 345 6 7 8 02 Getting Started 12 FM Antenna Terminals 1 1. Connect the FM antenna to the FM antenna connector terminal. 2. Slowly move the antenna wire until you find a location where reception is good, then fasten it to a wall or other rigid surface. 4 5 2 6 7 AUX IN 1 Terminals 3 1. Use to connect an external device such as an MP3 player. • Connect AUX IN 1 on the rear panel of the main unit to the Audio Out of an external device/MP3 player. • Press the AUX 1/2 button to select AUX1.
Getting Started Remote Control MUTE (Turn off the sound temporarily. Press again to turn the sound back on.) Power BEAT WAVING Bluetooth CD TV SoundConnect USB REC REC SPEED USB TUNING MODE TUNER/AUX MO/ST, TEMPO DJ BEAT +PANNING USER EQ NON-STOP MUSIC RELAY PRESET EQ MEMORY FORWARD, BACKWARD SEARCH SKIP/TUNING PLAY/PAUSE STOP REPEAT GIGA PARTY AUTO CHANGE FOOTBALL VOLUME - VOLUME + FOLDER (-, +), EFFECT (-, +) ,,.
Accessories 02 Check for the supplied accessories below. Getting Started User Manual Remote Control / Batteries Power Cable FM Antenna • Figures and illustrations in this user's manual are provided for reference only and may differ from actual product appearance. Connecting the Speakers Recommended speaker setup. ||IMPORTANT | ✎✎ The product may not operate properly if it is subject to shaking or external shocks or if the speakers are not installed as recommended.
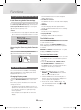
Functions Using Samsung Audio Remote App Install Samsung Audio Remote App To control the product with your Smart Device and the Samsung Audio Remote app, download the Samsung Audio Remote App by accessing the app through Google Play store. ||NOTE | ✎✎ The APP function only supports Android mobile phone devices running Android OS 3.0 or later.
Playing a CD 1. Press the OPEN/CLOSE button, Place a disc gently into the tray with the disc's label facing up. After putting in the disc, press the OPEN/ CLOSE button to start playing the disc. • You can load or unload compact discs when the radio, USB, or auxiliary source function is selected. When you press the OPEN/CLOSE button, all the other functions will change to the CD mode. • If no buttons are pressed on the main unit.
Functions To play the current track from the beginning • DIR (DIRECTORY) : Repeatedly plays all tracks in the selected folder. • ALL : Repeatedly plays the entire disc. Press the 1 button, 3 seconds after the current track started playing. To play the previous track Press the 1 button twice, 3 seconds or more after the previous track starts playing. To play the next track Press the 2 button. • RANDOM : Plays tracks in random order.
To repeat OFF ; TRACK ; DIR ; ALL ; RANDOM hen you want to stop the repeat function, W press the REPEAT button until "OFF" is displayed. • OFF : Cancels repeat playback. • TRACK : Repeatedly plays the selected file. • DIR (DIRECTORY) : Repeatedly plays all files in the selected folder. • ALL : Repeatedly plays all files. • RANDOM : Plays files in random order. ||NOTE | ✎✎ If the file selected to be played is located in a folder all the files within that folder are played in random order.
Functions To safely remove a USB device 1. 2. Press the 5 button twice while the USB is playing or press the 5 button once when play has stopped. When the "REMOVE" message appears on the display, remove the USB device. Read Before Connecting USB Storage Devices • Some USB devices may not work properly with this product. • This product only supports external HDD`s that are formatted in the FAT file system. • USB 2.0 HDDs should be connected to a separate power source. Otherwise, the USB 2.
2. 5. 6. 1. LIST 02--- is displayed. To select another track, follow Steps 2 and 3 above. Press the or MY LIST buttons to play the my list tracks. Press MY LIST button for 5 seconds to display "MY LIST ON/OFF". Use VOLUME/ SEARCH JOG on the main unit or ,/. button on the remote control to select ON or OFF and press ¬ button to set. • Selection will be cancelled automatically if there is no input for 5 seconds. Even when the MY LIST is set to OFF, saved LIST items are maintained.
Functions • A Bluetooth device may cause noise or malfunction, depending on usage, when: -- A part of your body is in contact with the receiving/transmitting system of the Bluetooth device or the Hi-Fi Component. -- It is subject to electrical variation from obstructions caused by a wall, corner, or office partitioning. -- It is exposed to electrical interference from same frequency-band devices including medical equipment, microwave ovens, and wireless LANs.
You can disconnect the Bluetooth device from the Hi-Fi Component. For instructions, see the Bluetooth device's user manual. • The Hi-Fi Component will be disconnected. • When the Hi-Fi Component is disconnected from the Bluetooth device, the Hi-Fi Component displays DISCONNECTED ; READY on its display. To disconnect the Hi-Fi Component from the Bluetooth device Press another mode button on the front panel of the Hi-Fi Component to switch from Bluetooth mode to another mode or turn off the Hi-Fi Component.
Functions TV SoundConnect To disconnect the TV from the Hi-Fi Component You can listen to the sound from your SoundConnect Compatible Samsung TV through the Hi-Fi Component by using the TV SoundConnect function. To connect the Hi-Fi Component to a SoundConnect Compatible Samsung TV Before activating this function, be sure to set the Samsung TV's SoundConnect or SoundShare function to On. 1. 2. 3. 4. Press the TV SoundConnect button of the Hi-Fi Component to display the TV SOUNDCONNECT message.
Press the MY KARAOKE button on the remote control to suppress the vocal if you need to. Each time you press the button, the selection changes as follows: MY KARAOKE ON ; MY KARAOKE OFF • When USB is playing, if you disconnected the USB, the AUTO CHANGE function automatically switches to "OFF" mode. • If you hear strange noises (squealing or howling) while using the Karaoke feature, move the microphone away from the speakers. Turning down the microphone's volume or the speaker volume is also effective.
Functions 3. 4. 5. Press the MO/ST button to switch between stereo and mono. • In a poor reception area, select MONO for a clear, interference-free broadcast. • This applies only when listening to an FM station. Find a station by: • Pressing and holding the TUNING 1/2 or ,/. button on the remote control to automatically search for broadcasting stations. If you do not want to store the radio station found, go back to Step 3 and search for another station. Otherwise: a. Press the MEMORY button. b.
Example: You want to wake up to music every morning. 3. Press the ¬ button. Result: ON TIME is displayed for a few seconds. You can set the timer switch-on time. Set the timer switch-on time. USB1/USB2 a. Press the ,/. button on the remote control to set the hours. 7. b. Press the ¬ button. Result: The minutes flash. c. Press the ,/. button to on the remote control set the minutes. 4. CD (compact disc) 8. d. Press the ¬ button. Result: OFF TIME is displayed for a few seconds.
Functions ✎✎ When you use the auto timer, you may need an additional step to use a CD or USB device with it, depending on the disc (or device). Consequently, it is easier to use the tuner instead. 2. CD • Press the CD button on the main unit to select the CD function. ✎✎ If you select CD or USB mode when there is no disc or no USB in the main unit, it will automatically change to TUNER. • Insert a CD gently into the disc tray. • Use the CD selection (1 or 2) buttons to select the desired song.
RADIO 5. • "FILE COPY" is displayed and COPY starts. • You can also copy a folder containing MP3/ WMA files to a device on USB 2. Press and hold the USB REC button while the system plays an MP3 or WMA file located in a folder. Your system displays "FOLDER COPY", and will record all the files in that folder. • When the recording is done, "STOP" is displayed. • If there is a file with the same name on the USB 2 device, "FILE ALRADY EXISTS" is displayed, and the function is canceled.
Functions ✎✎ You can not record audio from the radio when searching for a station or if there are no frequencies available when the product is set to Tuner mode. ✎✎ Note that setting the input level too loud when recording music from an external device through the AUX or USB channel may introduce noise into the recording. If this occurs, lower the external device’s volume level.
1. 1. USER EQ mode shows up to 5 equalizer bands according to the user’s setup. 2. To configure the EQ manually, press USER EQ button. You can adjust levels manually. The football mode brings greater realism to sports broadcasts. To configure the EQ in detail, adjust the 80Hz, 200Hz, 800Hz, 2kHz and 8kHz levels by using the following method. 1) Select the desired mode, then press the ¬ button to enter the edit mode.
Functions 2. If you select the GIGA PARTY ON at GIGA PARTY mode 1) If the BEAT WAVING is not set to STARDUST, EMERALD MOON, SOLAR BOMB, SHOOTING STAR or STAR modes, it will automatically switch to one of those, at random. 2) If selected BEAT WAVING is one of the 5 listed modes, it is maintained. 3) You can select another general mode by pressing the BEAT WAVING button. +PANNING Function Increases the left and right speaker's output in turn and makes it seem as if the sound is moving from side to side.
TEMPO Function 2. During playback (CD-DA/MP3/WMA), press the TEMPO button on the remote control or on the main unit. Select the desired TEMPO by using the EFFECT-, + button on the remote control or VOLUME/SEARCH JOG on the main unit. ||NOTEs | ✎✎ You can set each of the TEMPO functions from -10 to +10. The initial setting for all functions is 0. ✎✎ TEMPO Function does not operate in the Bluetooth, TV SoundConnect, TUNER and AUX mode. ✎✎ When you turn TEMPO off, all TEMPO settings are lost.
Functions Disc and Format Compatibility Supported Audio Formats This product does not support Secure (DRM) Media files. File Extension CD-R Discs • Some CD-R discs may not be playable depending on the disc recording device (CDRecorder or PC) and the condition of the disc. • Use 650MB/74 minute CD-R discs. Do not use CD-R discs over 700MB/80 minutes as they may not be played back. • Some CD-RW (Rewritable) media may not be playable. • Only CD-Rs that are properly "closed" can be fully played.
Appendix Troubleshooting Check/Remedy I cannot eject the disc. • Is the power cord plugged securely into the outlet? • Turn off the power and then turn it back on. Playback does not start immediately when the Play/Pause button is pressed. • Are you using a deformed disc or a disc with scratches on the surface? • Wipe the disc clean. Sound is not produced. • No sound is heard during fast playback, slow playback, and step motion playback.
Appendix Specifications Weight General Dimensions Main unit 5.4 Kg Main unit 460 (W) x 209 (H) x 382.5 (D) mm Speaker 29.5 Kg X 2 Speaker 561 (W) x 752 (H) x 503 (D) mm Operating Temperature Range FM Tuner CD Disc 5°C~35°C Operating Humidity Range 10 % to 75 % Usable sensitivity 10 dB Signal/Noise ratio 55 dB Total harmonic distortion 1% CD : 12 cm (COMPACT DISC) Reading Speed : 4.8 ~ 5.6 m/sec. Front speaker output 600W/CH (4Ω) Maximum Play Time : 74 min.
Contact SAMSUNG WORLD WIDE If you have any questions or comments relating to Samsung products, please contact the SAMSUNG customer care centre. TURKEY Country 444 77 11 Contact Centre Web Site www.samsung.com/tr/support Correct disposal of batteries in this product (Applicable in the European Union and other European countries with separate battery return systems.
MX-JS8000 PREMIUM HI-FI Bileşen Sistemi kullanıcı kılavuzu olasılıkları hayal edin Bu Samsung ürününü aldığınız için teşekkürler. Daha ayrıntılı hizmet için, lütfen aşağıdaki web adresinden ürün kaydınızı yapın www.samsung.com/register [MX-JS8000-TK]AH68-02771W-00TUR.
Güvenlik Bilgileri Uyarı ELEKTRİK ÇARPMASI RİSKİNİ AZALTMAK İÇİN, KAPAĞI (VEYA CİHAZIN ARKASINI) AÇMAYIN. KULLANICI TARAFINDAN ONARILABİLECEK PARÇA İÇERMEZ. SERVİS İÇİN YETKİLİ SERVİS PERSONELİNE BAŞVURUN. DİKKAT ELEKTRİK ÇARPMASI RİSKİ AÇMAYIN Bu sembol, ürünün içinde elektrik çarpması veya yaralanma riski teşkil eden "tehlikeli voltaj" bulunduğunu ifade eder. DİKKAT: ELEKTRİK ÇARPMASINI ÖNLEMEK İÇİN, FİŞİN GENİŞ UCUNU GENİŞ YUVAYLA EŞLEŞTİRİN VE TAMAMEN TAKIN.
Önlemler [MX-JS8000-TK]AH68-02771W-00TUR.indd 3 Güvenlik Bilgileri 3 01 • Evinizdeki AC güç kaynağının, ürününüzün arkasında yer alan tanımlama etiketiyle uyumlu olduğundan emin olun. • Ürününüzü, etrafında havalandırma için yeterli boşluk (3 - 4 inç/7,5 - 10 cm) olacak şekilde, uygun bir taban (mobilya) üzerine yatay biçimde yerleştirin. • Ürünü amplifikatörlerin veya ısınabilen diğer ekipmanların üzerine koymayın. Havalandırma deliklerinin kapatılmadığından emin olun.
İçindekiler Güvenlik Bilgileri 2 Uyarı 3 Disklerin Saklanması ve Yönetimi 3 12 12 12 13 13 13 13 Önlemler Başlarken 6 Ön Panel 8 Uzaktan Kumanda 7 9 9 9 14 14 Arka Panel 14 14 15 Aksesuarlar Hoparlörleri Bağlama Hoparlörlerin Taşınmasında Dikkat Edilecek Noktalar 15 15 16 17 İşlevler 10 10 10 10 10 10 11 11 11 11 12 12 Samsung Audio Remote Uygulamasının Kullanılması Samsung Audio Remote Uygulamasını Kurulumu Samsung Audio Remote Uygulamasına Erişim Görüntü işlevi 17 18 18 Görüntü mod
20 Zamanlayıcı İşlevi 22 24 24 Temel Kayıt Kayıt Hızı Özel Ses Efektleri 24 25 25 25 25 26 26 26 27 27 27 28 28 Saati Ayarlama Zamanlayıcıyı Ayarlama Zamanlayıcıyı İptal Etme Uykunun Ayarlanması Kayıt İşlevi İçindekiler 20 20 22 22 22 PRESET EQ Modu Seçimi USER EQ Modu Secimi FUTBOL MODU işlevi GIGA PARTY İşlevi RİTM DALGALANDIRMA İşlevi DJ RİTMİ İşlevi +PANNING İşlevi KESİNTİSİZ MÜZİK ÇALMA İşlevi TEMPO İşlevi BOOTING SOUND İşlevi Yazılım Güncellemesi Disk ve Format Uyumluluğu Desteklenen Ses Biçim
Başlarken Ön Panel 1 2 8 3 7 4 5 6 1 2 Ekran Paneli CD Kaynak düğmesi GIGA PARTY düğmesi DİSK tepsisi Disk için AÇ/KAPAT düğmesi Uzaktan kumanda sensörü PRESET EQ düğmesi 5 USER EQ düğmesi FOOTBALL MODE düğmesi İLERİ DOĞRU ARAMA/ATLAMA düğmesi DISPLAY/DEMO düğmesi MIC 1/2 jakları MIC VOL JOG TEKERLEĞİ 6 DJ ses efekti için +PANNING düğmesi 7 USB 1/2 Kaynak düğmeleri Oynatma ve USB Kaydı için USB 2 jakı ENTER düğmesi TEMPO düğmesi 8 AUX 1/2 Kaynak düğmeleri TUNER Kaynak düğmesi 6
Arka Panel 345 6 7 8 02 Başlarken 12 1 2 FM Anteni Terminalleri 1. FM antenini FM anteni konnektör terminaline bağlayın. 2. Sinyal alımının iyi olduğu bir yer bulana kadar anten kablosunu yavaşça hareket ettirin, daha sonra bir duvara veya başka bir sert yüzeye sabitleyin. AUX IN 2 Terminalleri 1. Ürün üzerindeki AUX IN 2 terminalini harici bir analog çıkış cihazındaki Ses Çıkışına bağlamak için bir Ses Kablosu (ürünle birlikte verilmez) kullanın. • Konnektör renklerinin eşleştiğinden emin olun.
Başlarken Uzaktan Kumanda SESSİZ (sesi geçici olarak kapatır. Sesi yeniden açmak için tekrar basın.) Güç BEAT WAVING Bluetooth CD TV SoundConnect USB REC REC SPEED USB TUNING MODE TUNER/AUX MO/ST, TEMPO DJ BEAT +PANNING USER EQ NON-STOP MUSIC RELAY PRESET EQ MEMORY İLERİ DOĞRU ARAMA/ATLAMA SKIP/TUNING OYNATMA/DURAKLATMA DURDURMA REPEAT GIGA PARTY AUTO CHANGE FOOTBALL VOLUME - VOLUME + FOLDER (-, +), EFFECT (-, +) ,,.
Aksesuarlar 02 Aşağıdaki aksesuarların sağlanıp sağlanmadığını kontrol edin. Başlarken Kullanım Kılavuzu Uzaktan Kumanda / Piller Güç Kablosu FM Anteni • Bu kullanma kılavuzundaki şekiller ve çizimler yalnızca referans amaçlı olarak verilmiştir ve gerçek ürün görünümünden farklı olabilir. Hoparlörleri Bağlama Önerilen hoparlör ayarı. ||ÖNEMLİ | ✎✎ Ürün titremeye veya harici sarsıntılara maruz kalırsa veya hoparlörler önerilen şekilde kurulmazsa ürün düzgün şekilde çalışmayabilir.
İşlevler Samsung Audio Remote Uygulamasının Kullanılması Samsung Audio Remote Uygulamasını Kurulumu Ürünü Samsung Audio Remote uygulaması aracılığıyla Akıllı Cihazınızla kontrol etmek için Google Play mağazasından Samsung Audio Remote Uygulamasını indirin. ||NOT | ✎✎ Uygulama işlevi yalnızca Android OS 3.0 veya üstü işletim sistemine sahip Android cihazları desteklemektedir. Mağaza arama: Samsung Audio Remote -- Ekranı kapalı tutmak için Karartma işlevini AÇIK olarak ayarlayın.
CD oynatma 1. OPEN/CLOSE düğmesine basın ve tepsiye etiketi yukarı bakacak şekilde nazikçe bir disk yerleştirin. Diski yerleştirdikten sonra diski oynatmaya başlamak için OPEN/CLOSE düğmesine basın. • Radyo, USB veya yardımcı kaynak işlevi seçildiğinde kompakt diskleri yükleyebilir veya boşaltabilirsiniz. OPEN/CLOSE düğmesine bastığınızda, diğer tüm işlevler CD moduna geçer.
İşlevler Geçerli parçayı baştan çalmak için • DIR (DIRECTORY) : Seçilen klasördeki tüm parçaları tekrar çalar. Geçerli parça çalınmaya başladıktan 3 saniye sonra 1 düğmesine basın. • ALL : Diskin tamamını tekrar çalar. • RANDOM : Parçaları rasgele sırayla çalar. Bir önceki parçayı çalmak için Geçerli parça çalınmaya başladıktan 3 saniye veya daha sonra 1 düğmesine iki kez basın. Bir sonraki parçayı çalmak için 2 düğmesine basın.
Tekrarlama OFF ; TRACK ; DIR ; ALL ; RANDOM Tekrarlama işlevini durdurmak istediğinizde REPEAT düğmesine "OFF" görüntülenene kadar basın. • OFF : Tekrar oynatmayı iptal eder. • TRACK : Seçilen dosyayı tekrar çalar. • DIR (DIRECTORY) : Seçilen klasördeki tüm dosyaları tekrar çalar. • ALL : Tüm dosyları tekrar çalar. • RANDOM : Dosyaları rasgele sırayla çalar. ||NOT | ✎✎ Oynatmak için seçtiğiniz dosya bir klasör içindeyse, o klasördeki tüm dosyalar rasgele sırayla oynatılır.
İşlevler USB cihazını güvenle kaldırma 1. 2. USB çalınırken 5 düğmesine iki kez basın veya çalma işlemi durduğunda 5 düğmesine bir kez basın. Ekranda "REMOVE" mesajı göründüğünde USB cihazını çıkarın. USB Depolama Cihazlarını Bağlamadan Önce Okuyun • Bazı USB cihazları bu ürünle düzgün çalışmayabilir. • Bu ürün yalnızca FAT dosya sisteminde biçimlendirilmiş harici HDD'leri destekler. • USB 2.0 HDD'ler ayrı bir güç kaynağına bağlanmalıdır. Aksi halde USB 2.0 HDD'ler çalışmaz.
2. 5. 6. Programlanan parçaların listesini görüntüleyebilir veya düzenleyebilirsiniz. 1. LIST 02--- görüntülenir. Başka bir parça seçmek için yukarıdaki 2. ve 3. adımları uygulayın. My List parçalarını oynatmak için LIST düğmesine basın. veya MY "MY LIST ON/OFF" öğesini görüntülemek için MY LIST düğmesini 5 saniye boyunca basılı tutun. Ana ünitedeki VOLUME/ SEARCH JOG TEKERLEĞİNİ veya uzaktan kumandadaki ,/. düğmesini kullanarak ON veya OFF öğesini seçin ve ayarlamak için ¬ düğmesine basın.
İşlevler • Aşağıdaki durumlarda, kullanıma bağlı olarak Bluetooth cihazı parazite veya arızaya neden olabilir: -- Vücudunuz Bluetooth cihazının ya da Hi-Fi Bileşeninin alıcı/verici sistemiyle temas halinde olduğunda. -- Duvar, köşe veya ofis bölmeleri gibi engellerden kaynaklanan elektrik dalgalanmalarına maruz kaldığında. -- Tıbbi ekipman, mikrodalga fırın ve kablosuz LAN dahil olmak üzere aynı frekans bandını kullanan cihazların neden olduğu elektrik girişimine maruz kaldığında.
Bluetooth cihazının Hi-Fi Bileşeniyle bağlantısını kesebilirsiniz. Talimatlar için Bluetooth cihazının kullanım kılavuzuna bakın. • Hi-Fi Bileşeniyle bağlantısı kesilecektir. • Hi-Fi Bileşeninin Bluetooth cihazı ile bağlantısı kesildiğinde Hi-Fi Bileşeni ekranında DISCONNECTED ; READY mesajı görüntülenir. Hi-Fi Bileşeninin Bluetooth cihazı ile bağlantısını kesme Bluetooth modundan başka bir moda geçmek için Hi-Fi Bileşeninin ön panelindeki başka bir mod düğmesine basın veya Hi-Fi Bileşeni kapatın.
İşlevler TV SoundConnect TV SoundConnect işlevini kullanarak, sesi HiFi Bileşeni ile SoundConnect Uyumlu Samsung TV'nizden dinleyebilirsiniz. Hi-Fi Bileşenini SoundConnect Uyumlu Bir Samsung TV'ye bağlama Bu işlevi etkinleştirmeden önce, Samsung TV'nin SoundConnect veya SoundShare işlevini On konumuna getirdiğinizden emin olun. 1. TV SoundConnect mesajını görüntülemek için Hi-Fi Bileşeninin TV SoundConnect düğmesine basın. 2.
Gerekirse vokalin sesini bastırmak için, uzaktan kumandadaki MY KARAOKE düğmesine basın. Düğmeye her basıldığında, seçim aşağıdaki şekilde değişir: MY KARAOKE ON ; MY KARAOKE OFF • USB'deki parçalar çalınırken USB'yi çıkarırsanız, AUTO CHANGE işlevi otomatik olarak "OFF" moda geçer. • Karaoke özelliğini kullanırken garip sesler duyarsanız (uğultu veya cızırtı) mikrofonu hoparlörden uzağa götürün. Mikrofonun veya hoparlörün ses seviyesini azaltmak da bu sorunu gidermede etkili olur.
İşlevler 3. 4. 5. Stereo ile mono arasında geçiş yapmak için MO/ST düğmesine basın. • Sinyal alımının zayıf olduğu bir alanda, net, parazitsiz bir yayın almak için MONO seçeneğini seçin. • Bu yalnızca bir FM istasyonunu dinlerken geçerlidir. Bir istasyon seçmek için: • Aktif yayın yapan istasyonları otomatik olarak aramak için, uzaktan kumandadaki TUNING 1/2 veya ,/. düğmesini basılı tutun. Bulunan radyo istasyonunu kaydetmek istemiyorsanız, 3. Adıma geri gidin ve başka bir istasyon arayın. Ya da: a.
Örnek: Her sabah müzikle uyanmak istiyorsunuz. 3. FM (radyo) ¬ düğmesine basın. Sonuç: Birkaç saniyeliğine ON TIME görüntülenir. Zamanlayıcının açılma saatini ayarlayabilirsiniz. b. ¬ düğmesine basın. Sonuç: Dakika kısmı yanıp söner. USB1/USB2 7. 8. c. Dakikayı ayarlamak için uzaktan kumandadaki ,/. düğmesine basın. 4. CD (kompakt disk) Bir kompakt disk yükleyin. Zamanlayıcının açılma saatinin ayarlanması. a. Saati ayarlamak için uzaktan kumandadaki ,/. düğmesine basın. d. ¬ düğmesine basın.
İşlevler ✎✎ Otomatik zamanlayıcıyı kullandığınızda, CD veya USB cihazını birlikte kullanmak için diske (veya cihaza) bağlı olarak ilave adım gerekebilir. Sonuç olarak, onun yerine ayarlayıcıyı kullanmak daha kolaydır. 2. CD ✎✎ Üründe disk veya USB olmadığında CD veya USB modunu seçerseniz, otomatik olarak TUNER'a geçer. • CD işlevini seçmek için ürünün üzerindeki CD düğmesine basın. • Disk yuvasına bir CD yerleştirin.
RADYO • "FILE COPY" görüntülenir ve kayıt başlar. • Ayrıca, MP3/WMA dosyaları içeren bir klasörü USB 2'ye takılı bir cihaza kopyalayabilirsiniz. Sistem bir klasörde bulunan bir MP3 veya WMA dosyasını oynatırken USB REC düğmesini basılı tutun. Sisteminizin ekranında "FOLDER COPY" mesajı görüntülenir ve bu klasördeki tüm dosyalar kaydedilir. • Kayıt bittiğinde, ekranda "STOP" görüntülenir. • USB 2 cihazında aynı adlı bir dosya varsa, ekranda "FILE ALRADY EXISTS" görüntülenir ve işlev iptal edilir.
İşlevler Özel Ses Efektleri ✎✎ İstasyon ararken veya ürün Ayarlayıcı modundayken geçerli frekans olmadığında, radyodan ses kaydı yapamazsınız. PRESET EQ Modu Seçimi ✎✎ Bir harici cihazdan AUX veya USB kanalı üzerinden müzik kaydı yapılırken giriş seviyesinin çok yüksek olarak ayarlanması, kayıtta parazite neden olabilir. Bu durumda, harici cihazın ses seviyesini düşürün. Hi-Fi Bileşeni sisteminiz, belli müzik türleri için optimize edilmiş, önceden tanımlı ekolayzer ayarları sunar.
1. 1. USER EQ modu kullanıcı kurulumuna göre 5 ekolayzer bandını gösterir. 2. Futbol modu, spor yayınlarına daha fazla gerçeklik katar. EQ'yu manuel olarak yapılandırmak için USER EQ düğmesine basın. Seviyeleri manuel olarak ayarlayabilirsiniz. EQ'yu ayrıntılı olarak yapılandırmak için, aşağıdaki yöntemi kullanarak 80Hz, 200Hz, 800Hz, 2kHz ve 8kHz seviyelerini ayarlayın. 1) İstediğiniz modu seçin ve ardından düzenleme moduna girmek için ¬ düğmesine basın.
İşlevler 2. GIGA PARTY modunda GIGA PARTY ON'u seçerseniz 1) BEAT WAVING modu STARDUST, EMERALD MOON, SOLAR BOMB, SHOOTING STAR veya STAR modlarına ayarlanmadığında otomatik olarak rastgele bu modlardan birine geçecektir. 2) Seçilen BEAT WAVING listelenen 5 moddan biriyse, mod bu şekilde sürdürülür. 3) BEAT WAVING düğmesine basarak başka bir genel modu seçebilirsiniz. ||NOT | ✎✎ BEAT WAVING OFF öğesini seçerseniz, tüm hoparlör LED ekranları kapanır.
TEMPO İşlevi 2. Oynatma sırasında (CD-DA/MP3/WMA), uzaktan kumandanın ya da ana ünitenin TEMPO düğmesine basın. Uzaktan kumandadaki EFFECT-, + düğmesini veya ana ünitedeki VOLUME/SEARCH JOG TEKERLEĞİNİ kullanarak istediğiniz TEMPO'yu seçin. ||NOTLAR | ✎✎ -10 ila +10 TEMPO fonksiyonlarının her birini ayarlayabilirsiniz. Tüm fonksiyonların başlangıç ayarı 0'dır. ✎✎ TEMPO fonksiyonu Bluetooth, TV SoundConnect, TUNER ve AUX modunda çalışmaz.
İşlevler Disk ve Format Uyumluluğu Desteklenen Ses Biçimleri Bu ürün Güvenli (DRM) Ortam dosyalarını desteklemez. CD-R Diskler • Disk kayıt cihazına (CD Kaydedicisi veya Bilgisayar) ve diskin durumuna bağlı olarak bazı CD-R diskler oynatılamayabilir. • 650MB/74 dakikalık CD-R diskler kullanın. 700MB/80 dakikanın üzerindeki CD-R diskleri kullanmayın, çünkü bu diskler oynatılmayabilirler. • Bazı CD-RW (tekrar yazılabilir) ortamlar oynatılamayabilir.
Ek Sorun Giderme Kontrol/Çözüm Diski çıkaramıyorum. • Güç kablosu prize sıkıca takılı mı? • Gücü kapatıp tekrar açın. Oynat/Duraklat düğmesine basıldığında oynatma hemen başlamıyor. • Şekli bozulmuş veya yüzeyinde çizikler olan bir disk mi kullanıyorsunuz? • Diski silerek temizleyin. Ses duyulmuyor. • Hızlı oynatma, yavaş oynatma ve adım adım oynatma sırasında hiçbir ses duyulmuyor.
Ek Özellikler Ağırlık Genel Boyutlar Ana ünite 5,4 Kg Ana ünite 460 (G) x 209 (Y) x 382,5 (D) mm Hoparlör 29,5 Kg x 2 Hoparlör 561 (G) x 752 (Y) x 503 (D) mm Çalışma Sıcaklığı Aralığı 5°C~35°C Çalışma Nem Aralığı % 10 ila % 75 Sinyal/Gürültü oranı 55 dB FM Ayarı Kullanılabilir hassaslık 10 dB CD Disk CD : 12 cm (KOMPAKT DİSK) Toplam harmonik bozulma %1 Ön hoparlör çıkışı Maksimum Oynatma Süresi : 74 dak. 600W/CH (4Ω) Subwoofer çıkışı Amplifikatör Okuma Hızı : 4,8 ~ 5,6 m/sn.
İthalatçı Firma SAMSUNG Electronics İstanbul Pazarlama ve Ticaret LTD.ŞTİ. Flatofis İstanbul İş Merkezi,Otakçılar Cad. Bina No: 78, Kat:3, No: B3, 34050, Eyüp, İstanbul /Türkiye Tel : (0212) 467 06 00 Bu ürünün ortalama yaşam süresi 10 yıldır İ m a l a t ç ı : (Maetan dong) 129, Samsung-ro, Yeongtong-Gu, Suwon Si.