Contact SAMSUNG WORLD-WIDE If you have any questions or comments relating to Samsung products, please contact the SAMSUNG customer care center. Comment contacter Samsung dans le monde Si vous avez des suggestions ou des questions concernant les produits Samsung, veuillez contacter le Service Consommateurs Samsung. Country U.S.A CANADA Customer Care Center Web Site 1-800-SAMSUNG(726-7864) www.samsung.com/us 1-800-SAMSUNG(726-7864) www.samsung.com/ca Address Samsung Electronics America, Inc.
Important Warranty Information Regarding Television Format Viewing Wide screen format PDP Displays (16:9, the aspect ratio of the screen width to height) are primarily designed to view wide screen format full-motion video. The images displayed on them should primarily be in the wide screen 16:9 ratio format, or expanded to fill the screen if your model offers this feature and the images are constantly moving.
User Instructions Screen Image retention Do not display a still image (such as on a video game) on the plasma display panel for more than several minutes as it can cause screen image retention. This image retention is also known as “screen burn”. To avoid such image retention, refer to page 24 of this manual to reduce the degree of brightness and contrast of the screen when displaying a still image. Altitude The PDP can only operate normally at heights under 6500ft.
English Contents Connecting and Preparing Your TV Picture Control ■ ■ ■ ■ ■ ■ ■ Changing the Picture Settings.................................................. 22 List of Features........................................................................... 5 Checking Parts........................................................................... 5 Using the Stand-Base................................................................ 5 Viewing the Control Panel..............................................
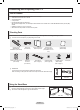
Connecting and Preparing Your TV List of Features Adjustable picture settings that can be stored in the TV’s memory. Automatic timer to turn the TV on and off. A special sleep timer. V-Chip function. Excellent Digital Interface & Networking : With a built-in HD digital tuner, non-subscription HD broadcasts can be viewed with no Cable Box/Satellite receiver (Set-Top Box) needed. • HDMI/DVI connection of your PC to this TV. • SRS TruSurround HD provides a virtual surround system.
Viewing the Control Panel The buttons on the lower-right panel control your TV’s basic features, including the on-screen menu. To use the more advanced features, you must use the remote control. N The product color and shape may vary depending on the model. N If you touch the front panel button, the each button will be operated. 1 SOURCE E Toggles between all the available input sources (TV, AV, Component1, Conponent2, HDMI1, HDMI2/DVI).
Viewing the Connection Panel Use the connection panel jacks to connect A/V components that will be connected continuously, such as Blu-Ray DVD Players or a VCR. N The product color and shape may vary depending on the model. TV Rear Panel 7 ANT IN Uses a 75Ω Coaxial connector for an Air/Cable Network. 1 POWER IN Connects the supplied power cord. 2 SERVICE Used for service only. 8 DIGITAL AUDIO OUT (OPTICAL) Connects to a Digital Audio component. 3 AUDIO OUT Connect to a Digital Audio component.
Remote Control You can use the remote control up to a distance of about 23 feet from the TV. N The product color and shape may vary depending on the model. N The performance of the remote control may be affected by bright light. 1 POWER Turns the TV on and off. 2 NUMERIC BUTTONS Press to change the channel. 3 4 5 6 7 8 9 0 ! $ Use these buttons in the DMA, Anynet+ modes. ( : This remote can be used to control recording on Samsung recorders with the Anynet+ feature) % TV Selects the TV mode directly.
Connections Connecting VHF and UHF Antennas If your antenna has a set of leads that look like this, see “Antennas with 300 Ω Flat Twin Leads” below. If your antenna has one lead that looks like this, see “Antennas with 75 Ω Round Leads.” If you have two antennas, see “Separate VHF and UHF Antennas.” ❑ Antennas with 300 Ω Flat Twin Leads If you are using an off-air antenna (such as a roof antenna or rabbit ears) that has 300 Ω twin flat leads, follow the directions below. 1.
❑ Connecting to a Cable Box that Descrambles Some Channels If your cable box descrambles only some channels (such as premium channels), follow the instructions below. You will need a two-way splitter, an RF (A/B) switch, and four lengths of Antenna cable. (These items are available at most electronics stores.) 1. Find and disconnect the cable that is connected to the ANT IN terminal on your cable box. N This terminal might be labeled “ANT IN”, “VHF IN” or simply, “IN”. ANT IN 2.
Connecting a DVD / Blu-Ray Player or Cable Box / Satellite receiver (Set-Top Box) via HDMI This connection can only be made if there is an HDMI Output jack on the external device. This connection will provide the highest quality picture. 1. Connect an HDMI Cable between the HDMI IN 1 or 2(DVI) jack on the TV and the HDMI jack on the DVD / Blu-Ray Player or Cable Box / Satellite receiver (Set-Top Box).
Connecting a DVD / Blu-Ray Player or Cable Box / Satellite receiver (Set-Top Box) via Component cables The rear panel jacks on your TV make it easy to connect a DVD/Blu-Ray Player or Cable Box / Satellite receiver (Set-Top Box) to your TV. 1. 2. Connect Component Cable between the COMPONENT IN (1 or 2) [Y, PB, PR] jacks on the TV and the COMPONENT [Y, PB, PR] jacks on the DVD / Blu-Ray Player or Cable Box / Satellite receiver(Set-Top Box).
Connecting a VCR ❑ Video Connection These instructions assume that you have already connected your TV to an antenna or a cable TV system (according to the instructions on pages 9~10). Skip step 1 if you have not yet connected to an antenna or a cable system. 1. Unplug the cable or antenna from the back of the TV. 2. Connect the cable or antenna to the ANT IN terminal on the back of the VCR. 3. Connect an Antenna Cable between the ANT OUT terminal on the VCR and the ANT IN terminal on the TV. 4.
Connecting a Digital Audio System The rear panel jacks on your TV make it easy to connect a Digital Audio System(Home theater/Receiver) to your TV. 1. Connect an Optical Cable between the DIGITAL AUDIO OUT (OPTICAL) jacks on the TV and the Digital Audio Input (OPTICAL) jacks on the Digital Audio System. When a Digital Audio System is connected to the DIGITAL AUDIO OUT (OPTICAL) jack : Decrease the volume of the TV, and adjust the volume level with the system’s volume control.
Connecting a PC ❑ Using an HDMI Cable 1. 2. Connect an HDMI/DVI cable between the HDMI IN 2(DVI) jack on the TV and the PC output jack on your computer. Connect a 3.5 mm Stereo plug to 2RCA cable between the DVI AUDIO IN [R-AUDIO-L] jack on the TV and the Audio Out jack of the sound card on your computer. TV Rear Panel PC 2 3.5 mm Stereo plug to 2 RCA Cable (Not supplied) 1 HDMI/DVI Cable (Not supplied) N Each PC has a different back panel configuration.
Operation Turning the TV On and Off Press the POWER button on the remote control. You can also use the POWER button on the TV. N It may take a while for your TV to power on. Changing Channels ❑ Using the Channel Buttons Press the CH or CH button to change channels. or CH button, the TV changes channels in sequence. You will see all the channels that the TV has memorized. (The TV must have memorized at least three channels). You will not see channels that were either erased or not memorized.
VOL Using the TOOLS Button CH You can use the TOOLS button to select your frequently used functions quickly and easily. The Tools menu changes CHLIST MENU FAV.CH depending on which external input mode you are viewing. 1. 2. Press the TOOLS button. The Tools menu will appear. Press the ▲/▼ button to select a menu, then press the ENTERE button. 3. Press the ▲/▼/◄/►/ ENTERE buttons to display, change, or use the selected items.
Viewing the Menus Before using the TV, follow the steps below to learn how to navigate the menu in order to select and adjust different functions. 1. 2. 3. 4. 5. Press the MENU button. The main menu is displayed on the screen. Its left side has the following icons: Picture, Sound, Channel , Setup, Input, Application, Support. Press the ▲ or ▼ button to select one of the icons. Press the ◄ or ► button to access the icon’s sub-menu. Press the ▲ or ▼ button to move to items in the menu.
Plug & Play Feature When the TV is initially powered on, basic settings proceed automatically and subsequently. N The Screen Saver is activated if there is no remote control key input for longer than 1 minute while Plug & Play is running. N The Screen Saver is activated if there is no operating signal for longer than 15 minutes. 1. 2. 3. Press the POWER button on the remote control. The message Menu Language, Store Demo, Channels, and Time will be set. is displayed.
Channel Control Storing Channels ❑ Antenna → Air / Cable T Press the TOOLS button to display Tools menu. You can also switch the antenna by selecting Tools → Switch to Cable (or Air) Channel Before your television can begin memorizing the available channels, you must specify the type of signal source that is connected to the TV (i.e. an Air or a Cable system). Antenna : Air ► Auto Program Clear Scrambled Channel ❑ Auto Program Channel List • Air: Air antenna signal. • Cable: Cable antenna signal.
❑ Channel List Tools Menu (in All Channels / Added Channels / Favorite) N Press the TOOLS button to use the option menu. N Option menu items may differ depending on the channel status. T Press the TOOLS button to display Tools menu. Air 7-1 9 9-1 10 10-1 11-1 19 Air Delete Add to Favorite Timer Viewing Channel Name Edit Select All Auto Program ♥ TV #7 Air ♥ TV #9 Air ♥ TV #10 ♥ TV #11 Air Zoom Select 6 N The “♥” symbol will be displayed and the channel will be set as a favorite.
VOL Picture Control CH MENU CHLIST Changing the Picture Settings FAV.CH ❑ Mode Picture You can select the type of picture which best corresponds to your viewing requirements. • Dynamic: Select a high-definition picture for bright environments. • Standard: Selects the optimal picture display for normal environments. This setting is convenient for most situations. • Movie: Selects a comfortable picture display for dark environments. O You can select these options simply by pressing the P.
White Balance You can adjust the color temperature for more natural picture colors. • R-Offset: Adjust the low level red intensity. • G-Offset: Adjust the low level green intensity. • B-Offset: Adjust the low level blue intensity. • R-Gain: Adjusts the high level red intensity. • G-Gain: Adjusts the high level green intensity. • B-Gain: Adjusts the high level blue intensity. • Reset: Resets the default white balance. N Changing the adjustment value will refresh the adjusted screen.
N Temporary image retention may occur when viewing a static image on the set for more than two hours. N After selecting Zoom1, Zoom2 or Wide Fit: Press the ◄ or ► button to select Position, then press the ENTERE button. Press the ▲ or ▼ button to move the picture up and down. Reset: Press the ◄ or ► button to select Reset, then press the ENTERE button. You can initialize the setting.
• Side Gray: When you watch TV with the screen ratio of 4:3, the screen is prevented from any damage by adjusting the white balance on both extreme left and right sides. To prevent the screen burn from happening, select Dark or Light. - Dark: When you set the screen ratio to 4:3, it darkens the left and right sides. - Light: When you set the screen ratio to 4:3, it brightens the left and right sides.
Sound Control VOL Changing the Sound Settings ❑ Mode CHLIST Sound You can select the sound mode to best suit the programming you’re watching. • Standard: This sound mode is for general purposes. • Music: Music mode enables you to listen to music as if you are sitting in a concert hall. • Movie: Movie mode enables you to experience live and full movie sound as if you are sitting in a movie theater. • Clear Voice: Emphasizes voice over other sounds.
❑ Speaker Select Multi-Track Sound Sound When you watch TV with it connecting to a Home theater, turn the TV speakers off so you can listen to sound from the Home theater’s (external) speakers. • External Speaker: Uses the external speakers(Home Theater) to output sound. • TV Speaker: Uses the TV speakers to output sound. N If you select External Speaker in the Speaker Select menu, the sound settings will be limited.
❑ V-Chip The V-Chip feature automatically locks out programs that are deemed inappropriate for children. The user must enter a PIN (personal ID number) before any of the V-Chip restrictions are set up or changed. N V-Chip function is not available in HDMI or Component mode. N The default PIN number of a new TV set is ‘0-0-0-0’. N If you forget the PIN, press the remote-control buttons in the following sequence, which resets the pin to ‘0-0-0-0’ : Power Off. → MMUTE → 8 → 2 → 4 → Power On.
Downloadable U.S. Rating Rating title Parental restriction information can be used while watching DTV channels Downloadable U.S. Rating N If information is not downloaded from the broadcasting station, the Downloadable U.S. ► 1/2 Humor Level Rating menu is deactivated. Allow All DH N Parental restriction information is automatically downloaded while watching DTV channels. MH Block All It may take several seconds. H N The Downloadable U.S.
❑ Melody V-Chip Caption Setup A melody sound can be set to come on when the TV is powered On or Off. • Off: Turns off the melody function. • Low: Sets the melody volume to low. • Medium: Sets the melody volume to medium. • High: Sets the melody volume to high. N The Melody does not play. - When no sound is output from the TV because the MUTE button has been pressed, - When no sound is output from the TV because the volume has been reduced to minimum with the VOL button.
Setting the Time Setting the clock is necessary in order to use the various timer features of the TV. Also, you can check the time while watching the TV. (Just press the INFO button.) ❑ Time Plug & Play Language Setup 1. Press the MENU button to display the menu. 2. Press the ▲ or ▼ button to select Setup, then press the ENTERE button. 3. Press the ▲ or ▼ button to select Time, then press the ENTERE button.
Source List / Edit Name ❑ Source List Input Use to select TV or other external input sources such as DVD / Blu-Ray players / Cable Boxes / Satellite / receivers (Set-Top Box) connected to the TV. Use to select the input source of your choice. Source List Edit Name TV, AV, Component1, Component2, HDMI1, HDMI2/DVI. N You can choose only those external devices that are connected to the TV. In the Source List, connected inputs will be highlighted and sorted to the top.
Display Modes If the signal from the system equals the standard signal mode, the screen is adjusted automatically. If the signal from the system doesn’t equal the standard signal mode, adjust the mode by referring to your videocard user guide; otherwise there may be no video. For the display modes listed below, the screen image has been optimized during manufacturing.
Signal Strength (Digital) Unlike analog channels, which can vary in reception quality from snowy to clear, digital (HDTV) channels have either perfect reception quality or you will not receive them at all. So, unlike analog channels, you cannot fine tune a digital channel. You can, however, adjust your antenna to improve the reception of available digital channels. N If the signal strength meter indicates that the signal is weak, physically adjust your antenna to increase the signal strength.
Anynet+ Connecting Anynet+ Devices Anynet+ is a function that enables you to control all connected Samsung devices that support Anynet+ with your Samsung TV’s remote. The Anynet+ system can be used only with Samsung devices that have the Anynet+ feature. To be sure your Samsung device has this feature, check if there is an Anynet+ logo on it. To connect to a TV 1. Connect the HDMI IN 1 or 2(DVI) jack on the TV and the HDMI OUT jack of the corresponding Anynet+ device using an HDMI cable.
❑ Setting Up Anynet+ The following settings help set the Anynet+ functions. You can also set the Anynet+ by selecting Tools → Anynet+ (HDMI-CEC) To use the Anynet+ Function, Anynet+ (HDMI-CEC) must be set to On 1. Press the MENU button. Press the ▲ or ▼ button to select Application, then press the ENTERE button. 2. Press the ▲ or ▼ button to select Anynet+ (HDMI-CEC), then press the ENTERE button. 3. Press the ▲ or ▼ to select Setup, then press the ENTERE button. 4.
N The Anynet+ function only works when the active source on the TV remote control is set to TV. N The button works only while in the recordable state. N You cannot control Anynet+ devices using the buttons on the TV. You can control Anynet+ devices only using the TV remote control. N The TV remote control may not work under certain conditions. In this case, reselect the Anynet+ device. N The Anynet+ functions do not operate with other manufacturers’ products.
Troubleshooting for Anynet+ Symptom Solution Anynet+ does not work. • Check if the device is an Anynet+ device. The Anynet+ system supports Anynet+ devices only. • Connect only one receiver (home theater). • Check if the Anynet+ device power cord is properly connected. • Check the Anynet+ device’s Video/Audio/HDMI 1.3 cable connections. • Check whether Anynet+ (HDMI-CEC) is set to On in the Anynet+ setup menu. • Check whether the TV remote control is in TV mode.
Appendix Troubleshooting If the TV seems to have a problem, first try this list of possible problems and solutions. If none of these troubleshooting tips apply, call Samsung customer service at 1-800-SAMSUNG. Problem Possible Solution Poor picture quality. Try another channel. Adjust the antenna. Check all wire connections. Poor sound quality. Try another channel. Adjust the antenna. No picture or sound. Try another channel. Press the SOURCE button. Make sure the TV is plugged in.
Preparation before installing the Wall-Mount Case A. Installing the SAMSUNG Wall-Mount Case B. Installing another company’s Wall-Mount 1. Install the Wall Mount with a torque range of 15kgf·cm or less. Use care as the parts can be damaged if the torque is out of the specified range. 2. Accessory Kit contains Holder–Ring [②] for installing other company’s Wall-Mount on Samsung TV. (Case B) N Screw down the hole [①] when installing wall-mount on the wall.
경고 주의 Securing the TV to the Wall Pulling, pushing, or climbing on the TV may cause the TV to fall. In particular, ensure your children do not hang 경고 Caution over or destabilize the TV; doing so may cause the TV to tip over, causing serious injuries or death. Follow all safety 주의 precautions provided on the included Safety Flyer. For added stability, install the anti-fall device for safety purposes, as follows.
Wall Mount Kit Specifications (VESA) Install your wall mount on a solid wall perpendicular to the floor. When attaching to other building materials, please contact your nearest dealer. If installed on a ceiling or slanted wall, it may fall and result in severe personal injury. Product Family inch VESA Spec.
Specifications Model Name PN42B430P2D PN50B430P2D 42 inch (42.3 inches measured diagonally) 50 inch (49.9 inches measured diagonally) PC Resolution 1024x768 @ 60 Hz 1360x768 @ 60 Hz Sound (Output) 10W x 2 10W x 2 41.5 x 26.6 x 2.8 inches (1055.0 x 667.4 x 73 mm) 41.5 x 28.6 x 12.4 inches (1055.5 x 728.7 x 316 mm) 48.4 x 29.7 x 2.8 inches (1230.2 x 755.7 x 73 mm) 48.4 x 32.1 x 12.4 inches (1230.2 x 816.8 x 316 mm) 53.5 lbs (24.3 kg) 61.7 lbs (28.0 kg) 70.1 lbs (31.8 kg) 78.2 lbs (35.
Dimensions (PN42B430P2D) TOP VIEW FRONT VIEW JACK PANEL DETAIL 7.2 x 3.7 inches SIDE VIEW REAR VIEW NOTE: All drawings not necessarily to scale. Some dimensions are subject to change without prior notice. Refer to dimensions on each unit prior to performing any carpentry. Not responsible for typographical or printed errors. © 2009 Samsung Electronics America, Inc. English - 44 BN68-02025B_Eng.
Dimensions (PN50B430P2D) TOP VIEW FRONT VIEW JACK PANEL DETAIL 7.2 x 3.7 inches SIDE VIEW REAR VIEW NOTE: All drawings not necessarily to scale. Some dimensions are subject to change without prior notice. Refer to dimensions on each unit prior to performing any carpentry. Not responsible for typographical or printed errors. © 2009 Samsung Electronics America, Inc. English - 45 BN68-02025B_Eng.
Téléviseur à écran à plasma Guide de l’utilisateur Imaginez les possibilités Merci d’avoir acheté ce produit Samsung. Pour obtenir un service complet, veuillez enregistrer votre produit à : www.samsung.com/register Modèle : BN68-02025B_CF.
Information importante sur la garantie relative au format de l’image du téléviseur Le format écran large des écrans à plasma (16:9, soit le rapport hauteur/largeur de l’image) est conçu principalement pour le visionnement de vidéos plein écran. Les images affichées sur ces écrans devraient être principalement au format d’écran large de rapport 16:9, ou élargies pour remplir l’écran, si votre modèle offre cette fonction et si les images sont continuellement en mouvement.
Mode d’emploi Rémanence à l’écran N’affichez pas d’images fixes (comme celle des jeux vidéos) sur un écran à plasma pendant plus que quelques minutes. Cela pourrait causer une rémanence à l’écran. Cette rémanence est également connue sous le nom de “brûlure à l’écran”. Pour éviter une telle rémanence, reportez-vous à la page 23 pour réduire le niveau de luminosité et de contraste de l’écran pendant l’affichage d’une image fixe.
Français Table des matières Branchement et préparation de votre téléviseur Commande de l’image ■ ■ ■ ■ ■ ■ ■ Modification des paramètres de l’image................................... 22 Liste des caractéristiques........................................................... 5 Vérification des pièces............................................................... 5 Utilisation du support.................................................................. 5 Présentation du panneau de commande..................
Branchement et préparation de votre téléviseur Liste des caractéristiques Paramètres d’image réglables pouvant être enregistrés dans la mémoire du téléviseur. Minuterie automatique pour mettre le téléviseur sous tension et hors tension. Minuterie de mise en veille spéciale. Fonction de contrôle parental V-Chip.
Présentation du panneau de commande Les touches du panneau inférieur droit permettent de commander les principales fonctions du téléviseur, y compris le menu à l’écran. N Pour accéder aux fonctions plus avancées, utilisez la télécommande.La couleur et la forme du produit peuvent varier selon le modèle. N Si vous appuyez sur la touche du panneau frontal, chaque touche devient active.
Présentation du panneau de branchement Les prises du panneau de branchement vous permettent de brancher des composantes AV qui doivent l’être en permanence, comme des lecteurs Blu-Ray/DVD ou un magnétoscope. N La couleur et la forme du produit peuvent varier selon le modèle. Panneau arrière du téléviseur Panneau latéral du téléviseur 1 POWER IN À brancher au cordon d’alimentation fourni avec le téléviseur. 2 SERVICE Connecteur pour entretien seulement..
Télécommande La distance maximale à laquelle vous pouvez utiliser la télécommande est d’environ 7 m (23 pieds). N La couleur et la forme du produit peuvent varier selon le modèle. N Une lumière intense peut nuire au bon fonctionnement de la télécommande. 1 POWER Appuyez sur cette touche pour mettre le téléviseur sous tension et hors tension. 2 TOUCHES NUMÉRIQUES Appuyez sur ces touches pour changer de canal.
Branchements Branchement des antennes VHF et UHF Si votre antenne est dotée de pattes de branchement semblables à celles-ci, reportez-vous à la rubrique “Antenne 300 Ω à deux pattes de branchement plates” ci-dessous. Si votre antenne est dotée d’une patte de branchement semblable à celle-ci, reportez-vous à la rubrique “Antenne 75 Ω à patte de branchement ronde”. Si le téléviseur est pourvu de deux antennes, reportez-vous à la rubrique “Antennes VHF et UHF distinctes”.
❑ Branchement à un câblosélecteur de débrouillage de certains canaux Si votre câblosélecteur débrouille seulement certains canaux (comme les canaux spécialisés), suivez les directives ci-dessous. Un répartiteur à deux voies, un commutateur RF (A/B) et quatre câbles d’antenne sont nécessaires. (Ces articles sont vendus dans la plupart des magasins d’électronique.) 1. Repérez et débranchez le câble branché à la borne ANT IN du câblosélecteur.
Branchement d’un lecteur DVD/Blu-Ray, d’un câblosélecteur ou d’un récepteur satellite (boîtier décodeur) par HDMI Ce branchement n’est possible que si l’appareil externe est pourvu d’une prise de sortie HDMI. Il offre la meilleure qualité d’ image. 1. Branchez un Câble HDMI entre la prise HDMI IN 1 ou 2(DVI) du téléviseur et la prise HDMI du lecteur DVD/ Blu-Ray, du câblosélecteur ou du récepteur satellite (boîtier décodeur).
Branchement d’un lecteur DVD/Blu-Ray, d’un câblosélecteur ou d’un récepteur satellite (boîtier décodeur) par les câbles de composante Les prises du panneau arrière du téléviseur sont conçues pour faciliter le branchement d’un lecteur DVD/Blu-Ray, d’un câblosélecteur ou d’un récepteur satellite (boîtier décodeur). 1. 2.
Branchement d’un magnétoscope ❑ Branchement vidéo Ces instructions supposent que le téléviseur est déjà branché à une antenne ou à un système de câblodiffusion (conformément aux instructions des pages 9 et 10). Ignorez l’étape 1 si le téléviseur n’est pas branché à une antenne ou un système de câblodiffusion. 1. Débranchez le câble ou l’antenne de l’arrière du téléviseur. 2. Branchez le câble ou l’antenne à la borne ANT IN située à l’arrière du magnétoscope. 3.
Branchement d’un système audionumérique Les prises du panneau arrière du téléviseur facilitent le branchement d’un système audionumérique (cinéma maison/ récepteur). 1. Branchez un câble optique entre les prises DIGITAL AUDIO OUT (OPTICAL) du téléviseur et les prises DIGITAL AUDIO INPUT (OPTICAL) du système audionumérique. Lorsqu’un système audionumérique est branché à la prise DIGITAL AUDIO OUT (OPTICAL) : baissez le volume du téléviseur, puis réglez-le à l’aide de la commande de volume du système.
Branchement d’un ordinateur ❑ À l’aide d’un câble HDMI/DVI 1. Branchez un câble HDMI/DVI entre la prise HDMI IN 2(DVI) du téléviseur et la prise de sortie PC de l’ordinateur. 2. Branchez un câble stéréo à fiche de 3,5 mm/2RCA entre les prises droite et gauche DVI IN (HDMI2) [R-AUDIO-L] du téléviseur et la prise Audio Out de la carte son de votre ordinateur.
Fonction Mise sous tension et hors tension du téléviseur Appuyez sur la touche POWER de la télécommande. Vous pouvez également appuyer sur la touche POWER du téléviseur. N Votre téléviseur peut prendre un certain temps avant de se mettre sous tension. Changement de canal ❑ À l’aide des touches de canal Appuyez sur la touche CH ou CH pour changer de canal. ou CH , le téléviseur change de canal en séquence. Tous les canaux mémorisés par le téléviseur défilent à l’écran.
VOL La touche TOOLS CH La touche TOOLS facilite la sélection rapide des fonctions courantes. Le menu Outils varie selon le mode d’entrée externe CH LIST MENU FAV.CH visionné. 1. 2. Appuyez sur la touche TOOLS. Le menu Outils s’affiche. Appuyez sur les touches ▲/▼ pour sélectionner un menu, puis sur la touche ENTERE. 3. Appuyez sur les touches ▲/▼/◄/►/ENTERE pour afficher, modifier ou utiliser les éléments sélectionnés.
Visualisation des menus Avant d’utiliser votre téléviseur, suivez ces étapes pour comprendre la navigation dans le menu, pour sélectionner et régler différentes fonctions. 1. 2. 3. 4. 5. Appuyez sur la touche MENU. Le menu principal s’affiche. Ces icônes figurent sur le côté gauche du menu : Image, Son, Chaîne, Configuration, Entrée, Application, Support technique. Appuyez sur la touche ▲ ou ▼ pour sélectionner une icônes. Appuyez sur la touche ◄ ou ► pour accéder au sous-menu de l’icône.
Fonction Prêt à l’emploi À la mise sous tension initiale du téléviseur, les paramètres de base sont automatiquement réglés. D’autres paramètres sont réglés en cours d’utilisation. N L’écran de veille est activé si le téléviseur ne reçoit aucune commande de la télécommande pendant plus d’une minute alors que la fonction Prêt à l’emploi est activée. N L’écran de veille est activé s’il n’y a pas de signal de fonctionnement pendant plus de Prêt à l’emploi 15 minutes. 1. 2. 3. 4. 5.
Commande des canaux Enregistrement des canaux ❑ Antenne → Air / Câble Chaîne Avant que votre téléviseur ne puisse mémoriser les canaux accessibles, vous devez préciser le type de la source de signal branchée au téléviseur (c’est-à-dire une antenne ou un système de câblodiffusion). Antenne : Air ► Prog. auto T Appuyez sur la touche TOOLS pour afficher le menu Outils.
❑ Option du menu de la liste des canaux (dans Tous les canaux/Canaux ajoutés/Favori) N Appuyez sur la touche TOOLS pour utiliser le menu. N Les options du menu peuvent varier selon l’état du canal. Ajouter ou Supprimer Il est possible d’ajouter ou de supprimer un canal afin d’afficher seulement les canaux désirés. N Tous les canaux supprimés sont affichés dans le menu Tous les canaux. N Un canal affiché en gris indique qu’il a été supprimé. N Le menu Ajouter ne s’affiche que pour les canaux supprimés.
VOL Commande de l’image CH MENU CH LIST Modification des paramètres de l’image FAV.CH ❑ Mode Image Vous pouvez choisir le type d’image qui correspond le mieux à vos exigences. • Dynamique: Choisir une image de haute définition pour les endroits très éclairés. • Standard: Choisir la qualité d’image optimale pour un environnement normal. Ce réglage convient à la plupart des situations. • Cinéma: Choisir la qualité d’image optimale pour un environnement sombre.
Équilibrage du blanc Vous pouvez régler la température de la couleur pour obtenir des couleurs d’image plus naturelles. • Décal.-R : Régler le niveau inférieur d’intensité du rouge. • Décal.-V : Régler le niveau inférieur d’intensité du vert. • Décal.-B : Régler le niveau inférieur d’intensité du bleu. • Gain-R : Régler le niveau supérieur d’intensité du rouge. • Gain-V : Régler le niveau supérieur de l’intensité du vert. • Gain-B : Régler le niveau supérieur de l’intensité du bleu.
N Une rémanence temporaire peut se produire si une image fixe est affichée à l’écran pendant plus de deux heures. N Après avoir sélectionné Zoom1, Zoom2 ou Format large : Appuyez sur la touche◄ ou ► pour sélectionner Position, puis sur la touche ENTERE. Appuyez sur la touche ▲ ou ▼ pour déplacer l’image de haut en bas.Après avoir sélectionné Régler : Appuyez sur la touche ◄ ou ► pour sélectionner Régler, puis sur ENTERE.
• Bords gris : Le visionnement du téléviseur en format 4:3, l’équilibrage du blanc de l’extrême gauche et de l’extrême droite permet d’éviter d’endommager l’écran. Pour éviter la brûlure d’écran, sélectionner Foncé ou Clair. - Foncé : Lorsque le format de l’image est réglé à 4:3, les côtés gauche et droit sont plus foncés. - Clair : Lorsque le format de l’image est réglé à 4:3, les côtés gauche et droit sont plus clairs.
Commande du son VOL Modification des paramètres du son ❑ Mode CH LIST Son Vous pouvez choisir le mode sonore qui correspond le mieux à l’émission visionnée. • Standard : Ce mode sonore convient à l’usage général. • Musique : Le mode Musique vous permet d’écouter de la musique, comme si vous étiez au concert. • Cinéma : Le mode Cinéma vous permet de vivre une expérience sonore intégrale, comme si vous étiez au cinéma. • Voix claire : Accentuer les dialogues par rapport aux autres sons.
❑ Sélect. le haut-parleur Son Lorsque vous visionnez une émission sur un téléviseur branché à un cinéma maison, coupez le son des haut-parleurs du téléviseur afin d’entendre celui des haut-parleurs (externes) du cinéma maison. • Haut-p. externe : Utiliser les haut-parleurs externes (cinéma maison) pour la sortie du son. • Haut-parleur TV : Utiliser les haut-parleurs du téléviseur pour la sortie du son. N Si vous choisissez Haut-p. externe dans le menu Sélect.
❑ V-Chip La fonction V-Chip bloque automatiquement la diffusion d’émissions pouvant ne pas convenir aux enfants. L’utilisateur doit entrer un NIP (numéro d’identification personnel) avant de configurer ou modifier les restrictions de la fonction V-Chip. N La fonction V-Chip n’est pas accessible dans les modes HDMI, ou Composante. N Le NIP par défaut d’un nouveau téléviseur est “0-0-0-0”.
Catég. américaine téléchargeable Classification Il est possible d’utiliser l’information du contrôle parental en visionnant des canaux Catég. américaine téléchargeable numériques. ► 1/2 Humor Level N Si l’information n’est pas téléchargée à partir de la station de télédiffusion, le menu Catég. Perm. tout DH américaine téléchargeable est désactivé. MH Bloq. tout N L’information du contrôle parental est téléchargée automatiquement pendant le H visionnement de canaux numériques.
❑ Mélodie V-Chip Sous-titres Configuration Vous pouvez choisir et configurer une mélodie qui se déclenchera à la mise sous tension et hors tension du téléviseur. • Off : Désactiver la fonction Mélodie. • Basse : Régler le volume de la mélodie au niveau inférieur. • Moyen : Régler le volume de la mélodie au niveau moyen. • Haute : Régler le volume de la mélodie au niveau supérieur. N La mélodie ne joue pas.
Réglage de l’horloge ❑ Heure Prêt à l’emploi Langue Configuration Le réglage de l’horloge est nécessaire pour utiliser les diverses fonctions de minuterie du téléviseur. Cette fonction permet également de vérifier l’heure pendant le visionnement. (Il vous suffit d’appuyer sur la touche INFO). ► Mode Jeu : Off V-Chip Sous-titres 1. Appuyez sur la touche MENU pour afficher le menu. 2. Appuyez sur la touche ▲ ou ▼ pour sélectionner Configuration, puis sur la touche ENTERE. 3.
Liste source / Entrer le nom ❑ Liste source Entrée Cette fonction permet de sélectionner le téléviseur ou une autre source d’entrée externe branchée au téléviseur, comme un lecteur DVD/Blu-Ray, un magnétoscope, un câblodistributeur, ou un récepteur satellite (boîtier décodeur). Cette fonction permet de choisir la source d’entrée désirée. Liste source Entrer le nom TV, AV, Composante1, Composante2, HDMI1, HDMI2/DVI. N Seuls les appareils externes branchés au téléviseur peuvent être sélectionnés.
Modes d’affichage Si le signal en provenance du système équivaut au mode de signal standard, l’écran est réglé automatiquement. Si le signal du système ne correspond pas au signal standard, réglez le mode en vous reportant au mode d’emploi votre la carte vidéo; sinon, l’image pourrait ne pas apparaître. L’image à l’écran a été optimisée en usine pour les modes d’affichage ci-dessous.
Puissance du signal (canaux numériques) Contrairement aux canaux analogiques, dont la qualité de réception peut varier, de “enneigée” à claire, les canaux numériques (HDTV) offrent soit une réception parfaite, soit aucune réception. Ainsi, contrairement aux canaux analogiques, vous ne pouvez pas procéder à une syntonisation de précision pour les canaux numériques. Cependant, vous pouvez régler votre antenne pour améliorer la réception des canaux numériques accessibles.
Anynet+ Branchement de dispositifs Anynet+ Anynet+ est une fonction qui permet de commander, à l’aide de la télécommande de votre téléviseur Samsung, tous vos appareils Samsung prenant en charge Anynet+. Pour vérifier si votre appareil Samsung est doté de cette fonction, vérifiez la présence d’un logo Anynet+ sur l’appareil. Branchement au téléviseur 1. Branchez un câble HDMI entre la prise HDMI IN 1 or 2(DVI) du téléviseur et la prise HDMI OUT de l’appareil Anynet+ correspondant.
❑ Configuration d’Anynet+ Application Les réglages suivants permettent de configurer les fonctions Anynet+. T Appuyez sur la touche TOOLS pour afficher le menu Outils. Vous pouvez également choisir Anynet+ en choisissant Outils→ Anynet+ (HDMI-CEC). Pour utiliser la fonction Anynet+, Anynet+ (HDMI-CEC) doit être activé. 1 Appuyez sur la touche MENU. Appuyez sur la touche ▲ ou ▼ pour sélectionner Application, puis sur la touche ENTERE. 2.
N La fonction Anynet+ ne fonctionne que lorsque la source active de la télécommande du téléviseur est réglée à TV. N La touche ne fonctionne qu’en mode d’enregistrement. N Il est impossible de commander des appareils Anynet+ à l’aide des touches du téléviseur. Seule la télécommande du téléviseur permet de commander les appareils Anynet+. N Il est possible que la télécommande du téléviseur ne fonctionne pas dans certaines conditions. Le cas échéant, sélectionnez à nouveau l’appareil Anynet+.
Dépannage de la fonction Anynet+ Symptôme Solution Anynet+ ne fonctionne pas. • Vérifier si l’appareil est bien un appareil Anynet+. Le système Anynet+ ne prend en charge que les appareils Anynet+. • Branchez un seul récepteur (cinéma maison). • Vérifiez si le cordon d’alimentation de l’appareil Anynet+ est bien branché. • Vérifiez les branchements des câbles vidéo/audio/HDMI 1.3 de l’appareil Anynet+. • Vérifiez si l’option Anynet+ (HDMI-CEC) est réglée sur On dans le menu de configuration d’Anynet+.
Annexe Dépannage Le tableau ci-dessous dresse la liste des problèmes courants et suggère des solutions. Si aucun de ces conseils de dépannage ne permet de corriger le problème, communiquez avec le service à la clientèle de Samsung en composant le 1-800-SAMSUNG. Problème Solution possible Image de mauvaise qualité. Essayez un autre canal. Réglez l’antenne. Vérifiez tous les branchements de câble. Essayez un autre canal. Réglez l’antenne. Essayez un autre canal. Appuyez sur la touche SOURCE.
Préparation avant l’installation du support mural Cas A. Installation du support mural Samsung Cas B. Installation du support mural d’une autre marque 1 Installez le support mural à l’aide d’une plage de couple maximale de 15 kgf/cm. Soyez prudent : les pièces pourraient être endommagées par un couple situé à l’extérieur de la plage indiquée. 2. La trousse d’accessoires contient un anneau de support [②] pour l’installation d’un support mural de marque autre.
경고 주의 Fixation du téléviseur au mur Le fait de tirer, de pousser ou de monter sur le téléviseur peut en provoquer la chute. Plus particulièrement, veillez 경고 à ce que vos enfants ne grimpent pas sur le téléviseur et qu’ils ne le déstabilisent pas : il pourrait se renverser et 주의 causer des blessures grave, voire la mort. Respectez toutes les mesures de sécurité indiquées dans le dépliant sur Avertissement la sécurit inclus.
Spécifications pour la trousse de fixation murale (VESA) Installez votre support mural sur un mur massif perpendiculaire au plancher. Pour le fixer à d’autres matériaux, veuillez communiquer avec votre détaillant. Si vous l’installez au plafond ou sur un mur incliné, il risque de tomber et de causer des blessures. Type de produits TV ACL Téléviseur à écran à plasma pouces Spéc.
Spécifications Modèle Taille de l’écran (en diagonal) Résolution de l’ordinateur Son (Sortie) PN42B430P2D PN50B430P2D 42 pouces (42.3 pouces en diagonale) 50 pouces (49.9 pouces en diagonale) 1024x768 à 60 Hz 1360x768 à 60 Hz 10W x 2 10W x 2 41.5 x 26.6 x 2.8 pouces (1055.0 x 667.4 x 73 mm) 41.5 x 28.6 x 12.4 pouces (1055.5 x 728.7 x 316 mm) 48.4 x 29.7 x 2.8 pouces (1230.2 x 755.7 x 73 mm) 48.4 x 32.1 x 12.4 pouces (1230.2 x 816.8 x 316 mm) 53.5 lb (24.3 kg) 61.7 lb (28.0 kg) 70.1 lb (31.
Dimensions (PN42B430P2D) VUE EN PLONGÉE VUE AVANT DÉTAILS DU PANNEAU DES PRISES 7,2 x 3,7 POUCES VUE LATÉRALE VUE ARRIÈRE REMARQUE : Tous les dessins ne sont pas nécessairement des représentations à l’échelle. Certaines dimensions sont susceptibles de changer sans préavis. Vérifiez les dimensions de chaque unité avant de procéder. à des travaux de menuiserie. Nous ne sommes pas responsables des erreurs de typographie ou d’impression. © 2009 Samsung Electronics America, Inc.
Dimensions (PN50B430P2D)) VUE EN PLONGÉE VUE AVANT DÉTAILS DU PANNEAU DES PRISES 7,2 x 3,7 POUCES VUE LATÉRALE VUE ARRIÈRER REMARQUE : Tous les dessins ne sont pas nécessairement des représentations à l’échelle. Certaines dimensions sont susceptibles de changer sans préavis. Vérifiez les dimensions de chaque unité avant de procéder. à des travaux de menuiserie. Nous ne sommes pas responsables des erreurs de typographie ou d’impression. © 2009 Samsung Electronics America, Inc.
Cette page est laissée intentionnellement en blanc. Français - 46 BN68-02025B_CF.