BN68-00528A-01_ENG 2003.11.20 4:13 PM Page 1 PDP-MONITOR (PLASMA DISPLAY PANEL) PS42P3ST Owner’s Instructions Before operating the unit, please read this manual thoroughly, and retain it for future reference.
BN68-00528A-01_ENG 2003.11.20 4:13 PM Page 2 Warning! Important Safety Instructions ENG CAUTION RISK OF ELECTRIC SHOCK DO NOT OPEN CAUTION: TO PREVENT ELECTRICAL SHOCK, DO NOT REMOVE REAR COVER, NO USER SERVICEABLE PARTS INSIDE. REFER SERVICING TO QUALIFIED SERVICE PERSONNEL. The lightning flash and arrow head within the triangle is a warning sign alerting you of “dangerous voltage” inside the product.
BN68-00528A-01_ENG 2003.11.20 4:13 PM Page 3 Important Warranty Information Regarding PDP Format Viewing ENG Wide screen format PDP Displays (16:9,the aspect ratio of the screen width to height) are primarily designed to view wide screen format full-motion video. The images displayed on them should primarily be in the wide screen 16:9 ratio format, or expanded to fill the screen if your model offers this feature and constantly moving.
BN68-00528A-01_ENG 2003.11.20 4:13 PM Page 4 User Instructions ENG ◆ Screen Image retention Do not display a still image (such as on a video game or when hooking up a PC to this PDP) on the plasma display panel for more than 2 hours as it can cause screen image retention. This image retention is also known as “screen burn”. To avoid such image retention, reduce the degree of brightness and contrast of this screen when displaying a still image.
BN68-00528A-01_ENG 2003.11.20 4:13 PM Page 5 User Instructions ENG Checking Parts A Separated Sales Owner’s Instructions Remote Control/ AAA Batteries Ferrite Cores for Speaker Wire (2EA) A/V Cable (1EA) A/V Cable (1EA) Speaker Wires (2EA) Power Cord Install CD - MDC Software (RS232C) MDC Cable (RS232C) PC Cable DNIeTM (Digital Natural Image engine) This feature bring you more detailed image with 3D noise reduction, detail enhancement, contrast enhancement and white enhancement.
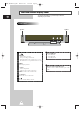
BN68-00528A-01_ENG 2003.11.20 4:13 PM Page 6 ENG Contents ◆ FOREWORD ■ ■ ■ Warning! Important Safety Instructions ......................................................... Important Warranty Information Regarding PDP Format Viewing................. User Instructions............................................................................................ 2 3 4 ◆ CONNECTING AND PREPARING YOUR DISPLAY ■ ■ ■ ■ ■ ■ ■ ■ Your New Plasma Display Panel.....................................................
BN68-00528A-01_ENG 2003.11.20 4:13 PM Page 7 ENG Contents (continued) ◆ USING YOUR DISPLAY (CONTINUED) ■ ■ ■ ■ ■ ■ ■ ■ ■ ■ ■ Locking the Control buttons........................................................................... Setting the MDC (Multiple Display Control) ................................................... Protecting the Screen Burning....................................................................... Displaying the PC Information ....................................................
BN68-00528A-01_ENG 2003.11.20 4:13 PM Page 8 Your New Plasma Display Panel ➢ ENG The actual configuration on your PDP may be different, depending on your model. Front Panel Speaker Speaker a b c b a Power Indicator - Power Off; Red - Power On; Off - Timer On; Green SOURCE - External input selection. - Store your settings in the menu. - When the Main menu is displayed on screen, the Main menu is not operated with source key. MENU Menu display and exit. - VOL + - Volume adjustment.
BN68-00528A-01_ENG 2003.11.20 4:13 PM Page 9 Your New Plasma Display Panel ➢ The actual configuration on your PDP may be different, depending on your model. ENG Rear Panel ➢ For further details about connection, refer to pages 34~36. a b c d a) RS232C - IN : Used for the MDC function when connecting PC or RS232C output of another PDP. - OUT : Used for the MDC function when connecting with RS232C input of another PDP.
BN68-00528A-01_ENG 2003.11.20 4:13 PM Page 10 Becoming Familiar with the Remote Control ENG The remote control is used mainly to: ◆ Change sources and adjust the volume ◆ Set up the PDP using the on-screen menu system PDP ON PDP OFF SOUND MODE SELECTION PICTURE MODE SELECTION CURRENT TIME DISPLAY NUMERIC BUTTONS PICTURE STILL VOLUME INCREASE TEMPORARY SOUND SWITCH-OFF ➣ Press it again , or - /+ button to turn the sound back on.
BN68-00528A-01_ENG 2003.11.20 4:13 PM Page 11 Inserting the Batteries in the Remote Control ENG You must insert or replace the batteries in the remote control when you: ◆ Purchase the PDP ◆ Find that the remote control is no longer operating correctly 1 Remove the cover on the rear of the remote control by pressing the symbol downwards and then pulling firmly to remove it. 2 Insert two R03, UM4, “AAA” 1.
BN68-00528A-01_ENG 2003.11.20 4:14 PM Page 12 Installing the Display on the Wall Attachment Panel ENG ☛ This wall mount bracket installation guide is for the following models: WMN4230 This installation guide may be different from the PDP User’s manual. Please refer to the proper installation guide for your product. Installation Notes ◆ Do not install the PDP on any place other than vertical walls.
BN68-00528A-01_ENG 2003.11.20 4:14 PM Page 13 Installing the Display on the Wall Attachment Panel ➢ The exterior of the PDP may be different than the picture. (Assembly and installation of the plastic hanger is the same.) 1 Remove the screws from the back of the PDP. 2 Use the screws and assemble the plastic hanger. ☛ ENG ◆ Please ask the installers to install the wall mount bracket.
BN68-00528A-01_ENG 2003.11.20 4:14 PM Page 14 Connecting Speakers ENG 1 Remove the screws on the rear of the PDP. 2 Hang the two “T” shaped hangers on the square holes on the rear of the PDP. 3 Tighten the PDP and the speaker bracket using the screws removed from the PDP. ➢ When moving your PDP, do NOT hold the speaker connected to your PDP. It may damage the bracket clamping the speaker and your PDP together and result in a drop of your PDP and a risk of personal damage and injury.
BN68-00528A-01_ENG 2003.11.20 4:14 PM Page 15 Connecting Speakers (continued) ENG Connect the speaker audio cable to the external speaker output jack on the rear of the PDP matching the “+” and “-” ends of the cable with the diagram on the PDP. ➢ ◆ The speakers MUST have to a power handling capability of 10 watts minimum (impedance 8Ω). ◆ When you connect the speaker wire to the external speaker out connector, first bind the speaker wire round the ferrite core to secure it.
BN68-00528A-01_ENG 2003.11.20 4:14 PM Page 16 Switching On and Off ENG The mains lead is attached to the rear of your PDP. 1 Front of the PDP Plug the mains lead into an appropriate socket. Result: ➢ The Standby indicator on the front of the PDP lights up. The main voltage is indicated on the rear of the PDP and the frequency is 50 or 60Hz. 2 Press the “ I / ” button on the front of the PDP (or ON ( button on the remote control) to switch the PDP on.
BN68-00528A-01_ENG 2003.11.20 4:14 PM Page 17 Selecting the Color System (Video or S-Video Mode) ENG ➢ Preset to the Video or S-Video mode by using the SOURCE button. Picture If necessary, select the broadcasting standard which best corresponds to your viewing requirements. 1 Press the MENU button. Result: 2 œ AUTO √ Mode œ Dynamic √ Adjust √ Color Tone œ Normal √ Size Wide Digital NR œ Off √ Move Sel. Return Press the √ button.
BN68-00528A-01_ENG 2003.11.20 4:14 PM Page 18 Adjusting the Picture Settings ENG Your PDP has several settings which allow you to control picture quality. Picture Color System œ AUTO √ Mode œ Dynamic √ Adjust √ Color Tone œ Normal √ Size Wide Digital NR œ Off √ Move Enter 1 2 Press the √ button. 3 Press the ▲ or ▼ button to select Adjust. Press the √ button.
BN68-00528A-01_ENG 2003.11.20 4:14 PM Page 19 Adjusting the Picture Settings (PC or DVI Mode) ➢ 1 Preset to the PC or DVI mode by using the SOURCE button. ENG Press the MENU button. Result: 2 3 The options available in the Picture group are displayed. Press the √ button. Press the ▲ or ▼ button to select Adjust. Press the √ button. Result: Picture Mode œ Custom √ Adjust √ Color Tone œ Custom √ Color Adjust √ Size Wide The Adjust menu is displayed.
BN68-00528A-01_ENG 2003.11.20 4:14 PM Page 20 Selecting the Picture Size ENG You can select the picture size which best corresponds to your viewing requirements. Picture Color System œ AUTO √ Mode œ Dynamic √ Adjust √ Color Tone œ Normal √ Size Wide Digital NR œ Off √ Move Sel. 1 Press the MENU button. Result: The options available in the Picture group are displayed. 2 Press the √ button. 3 Press the ▲ or ▼ button to select Size. Press the √ button.
BN68-00528A-01_ENG 2003.11.20 4:14 PM Page 21 Freezing the Current Picture ENG You can freeze the picture when watching a moving picture simply by pressing the “STILL” button. To return to normal viewing, press it again. ➣ In the PIP mode, the main and sub pictures are stilled at the same time. Changing the Sound Mode You can select the type of special sound effect to be used when watching a given broadcast. 1 2 Mode œ Custom √ Press the MENU button.
BN68-00528A-01_ENG 2003.11.20 4:14 PM Page 22 Adjusting the Sound Settings ENG The sound settings can be adjusted to suit your personal preferences. Sound Mode œ Custom √ Equalizer √ Auto Volume œ Off √ Melody œ Off √ Pseudo Stereo œ Off √ Virtual Surround œ Off √ Move 1 Enter 2 Return Equalizer (Custom) 4 L 100 300 œ √ Move Adjust 1K 3K Press the ▲ or ▼ button to select Equalizer. Press the √ button. The Equalizer menu is displayed with the current option.
BN68-00528A-01_ENG 2003.11.20 4:14 PM Page 23 Extra Sound Settings ENG ◆ Auto Volume Each broadcasting station has its own signal conditions, and so it is not easy for you to adjust the volume every time the channel is changed. This feature lets you automatically adjust the volume of the desired channel by lowering the sound output when the modulation signal is high or by raising the sound output when the modulation signal is low.
BN68-00528A-01_ENG 2003.11.20 4:14 PM Page 24 Adjusting the Image Preferences (PC Mode) ENG Setup Image Lock √ Key Lock œ Off √ Multi Control √ Burning Protection √ Information √ Move Enter 1 Press the MENU button. The main menu is displayed. Result: 2 Press the ▲ or ▼ button to select Setup. The options available in the Setup group are displayed. Result: 3 Press the √ button. The Image Lock is selected. Result: 4 Press the √ button again.
BN68-00528A-01_ENG 2003.11.20 4:14 PM Page 25 Locking the Control buttons ENG This feature allows you to lock the PDP so that it cannot be switched on via the front panel. It can, however, still be switched on via the remote control. Thus, by keeping the remote control away from unauthorised users. 1 Press the MENU button. Result: 2 Setup Screen Adjust √ Key Lock œ Off √ Multi Control √ Burning Protection √ The main menu is displayed. Press the ▲ or ▼ button to select Setup.
BN68-00528A-01_ENG 2003.11.20 4:14 PM Page 26 Protecting the Screen Burning ENG You can prevent the residual image of the PDP. Setup Key Lock œ Off √ Multi Control √ Burning Protection √ 1 Press the MENU button. Result: Press the ▲ or ▼ button to select Setup. 2 Result: Move Enter Return The main menu is displayed. The options available in the Setup group are displayed. 3 Press the √ button. 4 Press the ▲ or ▼ button to select Burning Protection. 5 Press the √ button.
BN68-00528A-01_ENG 2003.11.20 4:14 PM Page 27 Displaying the PC Information ENG 1 Press the MENU button. Result: 2 The main menu is displayed. Press the ▲ or ▼ button to select Setup. Result: The options available in the Setup group are displayed. 3 Press the √ button. 4 Press the ▲ or ▼ button to select Information. 5 Press the √ button. Result: The resolution, vertical frequency and horizontal frequency are displayed.
BN68-00528A-01_ENG 2003.11.20 4:14 PM Page 28 Setting and Displaying the Current Time ENG You can set the clock so that the current time is displayed. You must also set the time if you wish to use the automatic on or off timers. Function Language English Time √ Film Mode œ Off √ 1 2 Move Enter Press the MENU button. Result: Press the ▲ or ▼ button to select Function. Result: Return The main menu is displayed. The options available in the Function group are displayed.
BN68-00528A-01_ENG 2003.11.20 4:14 PM Page 29 Switching On and Off Automatically ENG You can set the on or off time so that the PDP will: ◆ Switch on automatically and tune to the volume of your choice at the time you select ◆ Switch off automatically at the time you select Time 11:35 Clock Clock Display œ Off √ Timer œ Off √ On Time Volume 1 Press the MENU button. Result: 2 The main menu is displayed. --:-- Off Time --:-- Move œ √ Sel.
BN68-00528A-01_ENG 2003.11.20 4:14 PM Page 30 Setting the Film Mode ENG When a video input source is from a film such as movies, this feature identifies the source and changes to the corresponding screen. Function Language English Time √ Film Mode œ Off √ 1 2 Move Sel. Press the MENU button. Result: Press the ▲ or ▼ button to select Function. Result: Return The main menu is displayed. The options available in the Function group are displayed. 3 Press the √ button.
BN68-00528A-01_ENG 2003.11.20 4:14 PM Page 31 Viewing the Picture In Picture (PIP) ENG You can display a sub picture within the main picture. In this way you can monitor the video input from any connected devices while monitoring other video input. 1 Press the MENU button. Result: The main menu is displayed. 2 Press the ▲ or ▼ button to select PIP. 3 Press the √ button. PIP PIP œ On √ Sel. œ Video √ Swap √ Size œ Large √ Position œ Sound Sel.
BN68-00528A-01_ENG 2003.11.20 4:14 PM Page 32 Viewing the Picture In Picture (PIP) (continued) ENG Easy functions of remote control. Buttons Feature PIP ON Used to activate or deactivate the PIP feature directly. SIZE Used to select a size of sub picture (Large, Small, Double1, Double2). LOCATE Used to move the sub picture counterclockwise. SOURCE Used to assign a source of sub picture. SWAP Used to interchange the main picture and the sub picture. S.
BN68-00528A-01_ENG 2003.11.20 4:14 PM Page 33 Listening to the Sound of the Sub Picture ENG During the PIP feature is activating, you can listen to the sound of the sub picture. 1 2 PIP PIP œ On √ Press the MENU button. Sel. œ Video √ Result: Swap √ Size œ Large √ Position œ Sound Sel. œ Sub √ The main menu is displayed. Press the ▲ or ▼ button to select PIP. Result: The options available in the PIP group are displayed. 3 Press the √ button.
BN68-00528A-01_ENG 2003.11.20 4:14 PM Page 34 Connecting to the Audio/Video Input ENG The "VIDEO IN" connectors are used for the equipment with an Composite Video output, such as video game devices or video disc players. Rear of the PDP VCR (Input) ① DVD Decoder / Video game device Video disc player The "VIDEO OUT" connectors are used for the equipment with an Composite Video input, such as a camcorder or VCR.
BN68-00528A-01_ENG 2003.11.20 4:14 PM Page 35 Connecting to the S-Video Input ENG The S-VIDEO and RCA (AUDIO-L/R) connectors are used for equipment with an S-Video output, such as a camcorder or VCR. Rear of the PDP Camcorder ① and VCR ① To play picture and sound, both the S-VIDEO and RCA connectors must be used. Connecting to the DVD/DTV RECEIVER Input The “COMPONENT IN” (and “AUDIO”) connectors are used for equipment with a DVD/ DTV RECEIVER output.
BN68-00528A-01_ENG 2003.11.20 4:14 PM Page 36 Connecting to the DVI Input ENG The “DVI IN” (video) and “AUDIO” connectors are used for equipment with a DVI output. Rear of the PDP Personal Computer and Connecting to the RGB(PC) Input The “RGB(PC) IN” and “AUDIO” connectors are used for interfacing with your PC.
BN68-00528A-01_ENG 2003.11.20 4:14 PM Page 37 Setting up Your PC Software (Windows only) ENG The Windows display-settings for a typical computer are shown below. But the actual screens on your PC will probably be different, depending upon your particular version of Windows and your particular video card. But even if your actual screens look different, the same, basic set-up information will apply in almost all cases. (If not, contact your computer manufacturer or Samsung Dealer.
BN68-00528A-01_ENG 2003.11.20 4:14 PM Page 38 Pin Configurations ENG RGB(PC) Input Connector (15Pin) Pin RGB(PC) IN 1 2 3 4 5 6 7 8 9 10 11 12 13 14 15 Red (R) Green (G) Blue (B) Grounding Grounding (DDC) Red (R) Grounding Green (G) Grounding Blue (B) Grounding Reserved Sync Grounding Grounding Data (DDC) Horizontal sync. Vertical sync.
BN68-00528A-01_ENG 2003.11.20 4:14 PM Page 39 Input Mode (PC/DVI) ENG Both screen position and size will vary depending on the type of PC monitor and its resolution.
BN68-00528A-01_ENG 2003.11.20 4:14 PM Page 40 Power Saver (PC mode only) ENG This monitor has a built-in power management system called Power Saver. This power management system saves energy by switching your monitor into a low-power mode when it has not been used for a certain amount of time. This power management system operates with a VESA DPMS compliant video card installed in your computer. You use a software utility installed on your computer to set up this feature.
BN68-00528A-01_ENG 2003.11.20 4:14 PM Page 41 Troubleshooting: Before Contacting Service Personnel ENG Before contacting Samsung after-sales service, perform the following simple checks. If you cannot solve the problem using the instructions below, note the model and serial number of the PDP and contact your local dealer. No sound or picture ◆ ◆ ◆ ◆ Normal picture but no sound ◆ Check the volume. ◆ Check whether the volume MUTE button on the remote control has been pressed.
BN68-00528A-01_ENG 2003.11.
BN68-00528A-01_ENG 2003.11.
BN68-00528A-01_ENG 2003.11.20 4:14 PM Page 44 - AFTER SALES SERVICE - Do not hesitate to contact your retailer or service agent if a change in the performance of your product indicates that a faulty condition may be present.