Driver Installation Program Installation SyncMaster 710V/910V/510M/710M/910M/712V
Failure to follow directions noted by this symbol could result in bodily harm or damage to equipment.
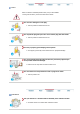
Power When not used for extended periods of time, set your PC to DPMS. If using a screen saver, set it to the active screen mode. Do not use a damaged or loose plug. z This may cause an electric shock or fire. Do not pull the plug out by the wire nor touch the plug with wet hands. z This may cause an electric shock or fire. Use only a properly grounded plug and receptacle. z An improper ground may cause electric shock or equipment damage.
Do not drop the monitor when moving it. z This may cause damage to the product or human body. Place the monitor on a flat and stable surface. z The monitor can cause injury by falling. Set down the monitor carefully. z It could be damaged or broken. Do not place the monitor face down. z The CDT surface may be damaged. Installing a wall bracket must be done by a qualified professional. z Installation by unqualified personnel may result in injury.
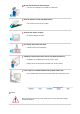
Do not spray water or detergent directly on the monitor. z This may cause damage, electric shock or a fire. Use the recommended detergent with a smooth cloth. If the connector between the plug and the pin is dusty or dirty, clean it properly with a dry cloth. z A dirty connector can cause an electric shock or fire. Contact a Service Center or Customer Center for interior cleaning once a year. z Keep the product's interior clean.
If the monitor is dropped or the casing is damaged, turn the monitor off and unplug the power cord. z The monitor may malfunction, causing an electric shock or a fire. z Then contact the Service Center . Keep the power off when there is thunder and lightening outside, or let the monitor remain unused for an extended period of time. z The monitor may malfunction, causing an electric shock or a fire. Do not try to move the monitor by pulling on the wire or the signal cable.
Do not insert metal objects such as utensils, wire or drill bits, or things that catch fire easily, such as pieces of paper or matches, into the vents or the headphone or A/V ports on the monitor. z z This may cause malfunction, an electric shock or a fire. Always contact the Service Center if foreign substances/objects enter into the monitor. If you view a fixed screen for an extended period of time, residual image or blurriness may appear.
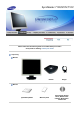
SyncMaster 710V/910V/712V Please make sure the following items are included with your monitor. If any items are missing, contact your dealer.
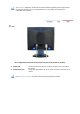
Cable D-Sub Cable Power Cord Front 1. Menu button [ ] Use this button to open the on-screen menu and exits from the menu screen or closes screen adjustment menu. 2. MagicBright™ button [ ] MagicBright™ is a new feature providing optimum viewing environment depending on the contents of the image you are watching. Currently four different modes are available: Custom, Text, Internet, and Entertain. Each mode has its own pre-configured brightness value.
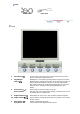
See PowerSaver described in the manual for further information regarding power saving functions. For energy conservation, turn your monitor OFF when it is not needed, or when leaving it unattended for long periods. Rear (The configuration at the back of the monitor may vary from product to product.) 1. Power port 2. D-sub 15-pin port Connect the power cord for your monitor to the power port on the back of the monitor.
SyncMaster 510M/710M/910M Please make sure the following items are included with your monitor. If any items are missing, contact your dealer.
Cable D-Sub Cable Power Cord Audio Cable Front 1. Menu button [ ] Use this button for open the on-screen menu and exits from the menu screen or closes screen adjustment menu. 2. MagicBright™ button [ ] MagicBright™ is a new feature providing optimum viewing environment depending on the contents of the image you are watching. Currently four different modes are available: Custom, Text, Internet, and Entertain. Each mode has its own pre-configured brightness value.
If this is the case, adjust the Brightness and Contrast by using the OSD menu. 3. Power button [ ] / Power indicator Use this button for turn the monitor on and off./ This light glows green during normal operation, and blinks green once as the monitor saves your adjustments. 4. Volume button [ ] When OSD is not on the screen, push the button to adjust volume. 2,4. Adjust buttons [ 5.
1. Headphone connection terminal [ ] 2. PC sound connection terminal Connect the audio cable for your monitor to the audio port on the back of your computer. See Connecting Your Monitor for further information regarding cable connections.
1. Connect the power cord for your monitor to the power port on the back of the monitor. Plug the power cord for the monitor into a nearby outlet. 2-1. Using the D-sub (Analog) connector on the video card. Connect the signal cable to the 15-pin, D-sub connector on the back of your monitor. 2-2. Connected to a Macintosh. Connect the monitor to the Macintosh computer using the D-SUB connection cable. 2-3.
Monitor Assembly 1. Monitor and Bottom 2. Monitor and Hanger Attaching a base This monitor accepts a 100 mm x 100 mm VESA-compliant mounting interface pad. A.Monitor B.Mounting interface pad 1. 2. 3. 4. Turn off your monitor and unplug its power cord. Lay the LCD monitor face-down on a flat surface with a cushion beneath it to protect the screen. Remove the four screws and then remove the Stand from the LCD monitor.
When prompted by the operating system for the monitor driver, insert the CD-ROM included with this monitor. Driver installation is slightly different from one operating system to another. Follow the directions as appropriate for the operating system you have. Prepare a blank disk and download the driver program file at the Internet web site shown here. Internet web site : z http://www.samsung-monitor.com/ (Worldwide) http://www.samsungusa.com/monitor (USA) http://www.sec.co.kr/monitor (Korea) http://www.
4. If you can see following "Message" window, then click the "Continue Anyway" button. Then click "OK" button. This monitor driver is under certifying MS logo,and this installation don't damage your system.The certified driver will be posted on Samsung Monitor Homepage http://www.samsung-monitor.com/. 5. Monitor driver installation is completed.
3. Click "Display" icon and choose the "Settings" tab then click "Advanced..". 4. Click the "Properties" button on the "Monitor" tab and select "Driver" tab. 5. Click "Update Driver.." and select "Install from a list or.." then click "Next" button. 6. Select "Don't search ,I will.." then click "Next" and then click "Have disk".
7. Click the "Browse" button then choose A:(D:\Driver) and choose your monitor model in the model list and click the "Next" button. 8. If you can see following "Message" window, then click the "Continue Anyway" button. Then click "OK" button. This monitor driver is under certifying MS logo,and this installation don't damage your system.The certified driver will be posted on Samsung Monitor Homepage http://www.samsung-monitor.com/ 9. Click the "Close" button then click "OK" button continually.
10. Monitor driver installation is completed. Microsoft® Windows® 2000 Operating System When you can see "Digital Signature Not Found" on your monitor, follow these steps. 1. Choose "OK" button on the "Insert disk" window. 2. Click the "Browse" button on the "File Needed" window. 3. Choose A:(D:\Driver) then click the "Open" button and then click "OK" button. How to install 1. 2. 3. 4. 5. 6. 7. 8. 9. 10. Click "Start" , "Setting" , "Control Panel". Double click the "Display" Icon.
1. Click Start, Settings, Control Panel, and then double-click Display icon. 2. In Display Registration Information window, click Settings Tab and then click All Display Modes. 3. Select a mode that you wish to use (Resolution, Number of colors and Vertical frequency) and then click OK. 4. Click Apply button if you see the screen working normally after clicking Test. If the screen is not normal, change to a different mode (lower mode of resolution, colors or frequency).
SyncMaster 710V/910V/712V 1. Opens the OSD menu. Also used to exit the OSD menu or return to the previous menu. 2. These buttons allow you to adjust items in the menu. 3. These buttons allow you to adjust items in the menu. 4. Activate a highlighted menu item.
AUTO Menu AUTO Description When the 'AUTO' button is pressed, the Auto Adjustment screen appears as shown in the animated screen on the center. Auto adjustment allows the monitor to self-adjust to the incoming video signal. The values of fine, coarse and position are adjusted automatically. To make the automatic adjustment function sharper, execute the 'AUTO' function while the AUTO PATTERN is on.
Brightness Menu Brightness Description Adjust Brightness.
Picture Menu Description Brightness Adjust the Brightness. Direct Access Feature : When OSD is not on the screen, Push the button to adjust brightness. Contrast Play/Stop Adjust the Contrast. Color Menu Color Tone Color Control Gamma Description The tone of the color can be changed and one of four modes can be selected - Cool, normal, Warm and Custom. Follow these steps to adjust individual R,G,B color control. Select one of three pre-defined gammas.
Image Menu Description Coarse Image is used to fine tune and get the best image by removing noises that creates unstable images with jitters and shimmers. If satisfactory results are not obtained using the Fine adjustment, use the Coarse adjustment and then use Fine again. Fine Image is used to fine tune and get the best image by removing noises that creates unstable images with jitters and shimmers.
OSD Menu Description Language Follow these steps to change the language used in the menu. You can choose one of seven languages. (English, German, Spanish, French, Italian, Swedish, Russian) Note:The language chosen affects only the language of the OSD. It has no effect on any software running on the computer. H-Position You can change the horizontal position where the OSD menu appears on your monitor. V-Positon You can change the vertical position where the OSD menu appears on your monitor.
Setup Menu Description Image Reset Image parameters are replaced with the factory default values. Color Reset Color parameters are replaced with the factory default values. Information Menu Information Description Shows a video source, display mode on the OSD screen.
SyncMaster 510M/710M/910M 1. Opens the OSD menu. Also used to exit the OSD menu or return to the previous menu. 2. These buttons allow you to adjust items in the menu. 3. These buttons allow you to adjust items in the menu. 4. Activate a highlighted menu item. MagicTune™2.
AUTO Menu AUTO Description When the 'AUTO' button is pressed, the Auto Adjustment screen appears as shown in the animated screen on the center. Auto adjustment allows the monitor to self-adjust to the incoming video signal. The values of fine, coarse and position are adjusted automatically. To make the automatic adjustment function sharper, execute the 'AUTO' function while the AUTO PATTERN is on.
- four different mode (Custom/Text/Internet/Entertain) Brightness Menu Brightness Description Adjust Brightness.
Picture Menu Description Brightness Adjust the Brightness. Direct Access Feature : When OSD is not on the screen, Push the button to adjust brightness. Contrast Play/Stop Adjust the Contrast. Color Menu Color Tone Description The tone of the color can be changed and one of four modes can be selected - Cool, normal, Warm and Custom.
Color Control Gamma Follow these steps to adjust individual R,G,B color balance. Select one of three pre-defined gammas. Image Menu Description Coarse Removes noise such as vertical stripes. Coarse adjustment may move the screen image area. You may relocate it to the center using the Horizontal Control menu. Fine Removes noise such as horizontal stripes. If the noise persists even after Fine tuning, repeat it after adjusting the frequency (clock speed).
OSD Menu Description Language Follow these steps to change the language used in the menu. You can choose one of seven languages. (English, German, Spanish, French, Italian, Swedish, Russian) Note:The language chosen affects only the language of the OSD. It has no effect on any software running on the computer. H-Position You can change the horizontal position where the OSD menu appears on your monitor. V-Positon You can change the vertical position where the OSD menu appears on your monitor.
Setup Menu Description Image Reset Image parameters are replaced with the factory default values. Color Reset Color parameters are replaced with the factory default values. Information Menu Information Description Shows a video source, display mode on the OSD screen.
Before calling for service, check the information in this section to see if you can remedy any problems yourself. If you do need assistance, please call the phone number on the warranty card, the phone number on the Information section or contact your dealer. Symptom No images on the screen. I cannot turn on the monitor. Check List Solutions Is the power cord connected properly? Check the signal cable connection. Can you see "Check Signal Cable" on the screen? Check the signal cable connection.
one minute and then disappears. Please change to the recommended mode during this one-minute period. (The message is displayed again if the system is rebooted.) The screen shows strange colors or just black and white. The screen suddenly has become unbalanced. There is no image on the screen. Is the power indicator on the monitor blinking at 1 second intervals? The monitor is in PowerSaver mode.
driver and the monitor driver. 4. Check if the scanning ratio of the video screen is set at 75Hz. (Do not exceed 60Hz when using the maximum resolution.) 5. If you have problems in installing the adapter (video) driver, boot the computer in Safe Mode, remove the Display Adapter at the "Control Panel→System→Device Administrator" and then reboot the computer to reinstall the adapter (video) driver. If problems repeatedly occur, contact an authorized service center.
Failure of any of the boxes to appear indicates a problem with your monitor. This box also appears during normal operation if the video cable becomes disconnected or damaged. 4. Turn off your monitor and reconnect the video cable; then turn on both your computer and the monitor. If your monitor screen remains blank after using the previous procedure, check your video controller and computer system; your monitor is functioning properly.
General General Model Name SyncMaster 710V LCD Panel Size 17" Diagonal Display area 337.92 (H) x 270.336 (V) Pixel Pitch 0.264mm (H) x 0.264mm (V) Type a-si TFT active matrix Synchronization Horizontal 30 ~ 81 kHz Vertical 56 ~ 75 Hz Display Color 16,194,277 Colors Resolution Optimum resolution 1280 x 1024@60 Hz Maximum resolution 1280 x 1024@75 Hz Input Signal, Terminated RGB Analog, 0.7 Vpp positive at 75 ohms Separate H/V sync, TTL level positive or negative.
Signal Cable 15pin-to-15pin D-sub cable, attatch Power Consumption(maximum) Less than 34W Dimensions (WxDxH)/ Weight 382.0 x 62.0 x 320.5 mm (Without Stand) 382.0 x 175.0 x 383.7 mm (with Basic Stand)/4.55kg VESA Mounting Interface 100mm x 100mm (for use with Specialty(Arm) Mounting hardware.
Preset Timing Modes If the signal transferred from the computer is the same as the following Preset Timing Modes, the screen will be adjusted automatically. However, if the signal differs, the screen may go blank while the power LED is on. Refer to the video card manual and adjust the screen as follows. Table 1. Preset Timing Modes Display Mode Horizontal Frequency (kHz) Vertical Frequency (Hz) Pixel Clock (MHz) Sync Polarity (H/V) IBM, 640 x 350 31.469 70.086 25.175 +/- IBM, 640 x 480 31.
General General Model Name SyncMaster 910V LCD Panel Size 19" Diagonal Display area 376.32 (H) x 301.056 (V) Pixel Pitch 0.294mm (H) x 0.294mm (V) Type a-si TFT active matrix Synchronization Horizontal 31 ~ 81 kHz Vertical 56 ~ 75 Hz Display Color 16,194,277 Colors Resolution Optimum resolution 1280 x 1024@60 Hz Maximum resolution 1280 x 1024@75 Hz Input Signal, Terminated RGB Analog, 0.7 Vpp positive at 75 ohms Separate H/V sync, TTL level positive or negative.
Signal Cable 15pin-to-15pin D-sub cable, attatch Power Consumption(maximum) Less than 38W Dimensions (WxDxH)/ Weight 428.0 X 61.8 X 356.0 mm (Without Stand) 428.0 X 195.7 X 430.0 mm (with Basic Stand)/4.8kg VESA Mounting Interface 100mm x 100mm (for use with Specialty(Arm) Mounting hardware.
Preset Timing Modes If the signal transferred from the computer is the same as the following Preset Timing Modes, the screen will be adjusted automatically. However, if the signal differs, the screen may go blank while the power LED is on. Refer to the video card manual and adjust the screen as follows. Table 1. Preset Timing Modes Display Mode Horizontal Frequency (kHz) Vertical Frequency (Hz) Pixel Clock (MHz) Sync Polarity (H/V) IBM, 640 x 350 31.469 70.086 25.175 +/- IBM, 640 x 480 31.
General General Model Name SyncMaster 510M LCD Panel Size 15" Diagonal Display area 304.1 (H) x 228.1 (V) Pixel Pitch 0.297mm (H) x 0.297mm (V) Type a-si TFT active matrix Synchronization Horizontal 31 ~ 61 kHz Vertical 56 ~ 75 Hz Display Color 16,194,277 Colors Resolution Optimum resolution 1024 x 768@60 Hz Maximum resolution 1024 x 768@75 Hz Input Signal, Terminated RGB Analog, 0.7 Vpp positive at 75 ohms Separate H/V sync, TTL level positive or negative.
Signal Cable 15pin-to-15pin D-sub cable, attatch Power Consumption(maximum) Less than 34W Dimensions (WxDxH)/ Weight 353.9 X 57.0 X 304.7 mm (Without Stand) 353.9 X 175.0 X 344.7 mm (with Basic Stand)/4.8kg VESA Mounting Interface 100mm x 100mm (for use with Specialty(Arm) Mounting hardware.
meets the ENERGY STAR® guidelines for energy efficiency. Preset Timing Modes If the signal transferred from the computer is the same as the following Preset Timing Modes, the screen will be adjusted automatically. However, if the signal differs, the screen may go blank while the power LED is on. Refer to the video card manual and adjust the screen as follows. Table 1.
Select Model Name General General Model Name SyncMaster 710M LCD Panel Size 17" Diagonal Display area 337.92 (H) x 270.336 (V) Pixel Pitch 0.264mm (H) x 0.264mm (V) Type a-si TFT active matrix Synchronization Horizontal 30 ~ 81 kHz Vertical 56 ~ 75 Hz Display Color 16,194,277 Colors Resolution Optimum resolution 1280 x 1024@60 Hz Maximum resolution 1280 x 1024@75 Hz Input Signal, Terminated RGB Analog, 0.7 Vpp positive at 75 ohms Separate H/V sync, TTL level positive or negative.
Signal Cable 15pin-to-15pin D-sub cable, attatch Power Consumption(maximum) Less than 34W Dimensions (WxDxH)/ Weight 381.9 X 62.0 X 342.9 mm (Without Stand) 381.9 X 175.0 X 383.9 mm (with Basic Stand)/4.8kg VESA Mounting Interface 100mm x 100mm (for use with Specialty(Arm) Mounting hardware.
Preset Timing Modes If the signal transferred from the computer is the same as the following Preset Timing Modes, the screen will be adjusted automatically. However, if the signal differs, the screen may go blank while the power LED is on. Refer to the video card manual and adjust the screen as follows. Table 1. Preset Timing Modes Display Mode Horizontal Frequency (kHz) Vertical Frequency (Hz) Pixel Clock (MHz) Sync Polarity (H/V) IBM, 640 x 350 31.469 70.086 25.175 +/- IBM, 640 x 480 31.
General General Model Name SyncMaster 910M LCD Panel Size 19" Diagonal Display area 376.32 (H) x 301.056 (V) Pixel Pitch 0.294mm (H) x 0.294mm (V) Type a-si TFT active matrix Synchronization Horizontal 30 ~ 81 kHz Vertical 56 ~ 75 Hz Display Color 16,194,277 Colors Resolution Optimum resolution 1280 x 1024@60 Hz Maximum resolution 1280 x 1024@75 Hz Input Signal, Terminated RGB Analog, 0.7 Vpp positive at 75 ohms Separate H/V sync, TTL level positive or negative.
Signal Cable 15pin-to-15pin D-sub cable, attatch Power Consumption(maximum) Less than 38W Dimensions (WxDxH)/ Weight 428.0 X 61.8 X 380.5 mm (Without Stand) 428.0 X 195.7 X 430.0 mm (with Basic Stand)/5.75kg VESA Mounting Interface 100mm x 100mm (for use with Specialty(Arm) Mounting hardware.
Preset Timing Modes If the signal transferred from the computer is the same as the following Preset Timing Modes, the screen will be adjusted automatically. However, if the signal differs, the screen may go blank while the power LED is on. Refer to the video card manual and adjust the screen as follows. Table 1. Preset Timing Modes Display Mode Horizontal Frequency (kHz) Vertical Frequency (Hz) Pixel Clock (MHz) Sync Polarity (H/V) IBM, 640 x 350 31.469 70.086 25.175 +/- IBM, 640 x 480 31.
General General Model Name SyncMaster 712V LCD Panel Size 17" Diagonal Display area 337.92 (H) x 270.336 (V) Pixel Pitch 0.264mm (H) x 0.264mm (V) Type a-si TFT active matrix Synchronization Horizontal 30 ~ 81 kHz Vertical 56 ~ 75 Hz Display Color 16,194,277 Colors Resolution Optimum resolution 1280 x 1024@60 Hz Maximum resolution 1280 x 1024@75 Hz Input Signal, Terminated RGB Analog, 0.7 Vpp positive at 75 ohms Separate H/V sync, TTL level positive or negative.
Signal Cable 15pin-to-15pin D-sub cable, attatch Power Consumption(maximum) Less than 34W Dimensions (WxDxH)/ Weight 382.0 x 62.0 x 320.5 mm (Without Stand) 382.0 x 175.0 x 383.7 mm (with Basic Stand)/4.55kg VESA Mounting Interface 100mm x 100mm (for use with Specialty(Arm) Mounting hardware.
meets the ENERGY STAR® guidelines for energy efficiency. Preset Timing Modes If the signal transferred from the computer is the same as the following Preset Timing Modes, the screen will be adjusted automatically. However, if the signal differs, the screen may go blank while the power LED is on. Refer to the video card manual and adjust the screen as follows. Table 1.
Service AUSTRALIA : Samsung Electronics Australia Pty Ltd. Customer Response Centre 7 Parkview Drive, Homebush Bay NSW 2127 Tel : 1300 362 603 http://www.samsung.com.au/ BRAZIL : Samsung Eletronica da Amazonia Ltda. R. Prof. Manoelito de Ornellas, 303, Terro B Chacara Sto. Antonio, CEP : 04719-040 Sao Paulo, SP SAC : 0800 124 421 http://www.samsung.com.br/ CANADA : Samsung Electronics Canada Inc.
ESPAÑA : Samsung Electronics Comercial Iberica, S.A. Ciencies, 55-65 (Poligono Pedrosa) 08908 Hospitalet de Llobregat (Barcelona) Tel. : (93) 261 67 00 Fax. : (93) 261 67 50 http://samsung.es/ FRANCE : SAMSUNG ELECTRONICS FRANCE Service Paris Nord 2 66 rue des Vanesses BP 50116 Villepinte 95950 Roissy CDG Cedex Tel : 08 25 08 65 65 Fax : 01 48 63 06 38 http://www.samsungservices.com/ GERMANY : TELEPLAN Rhein-Main GmbH Feldstr. 16 64331 Weiterstadt T. 06151/957-1306 F. 06151/957-1732 * EURO 0.
NETHERLANDS/BELGIUM/LUXEMBOURG : Samsung Electronics Benelux B. V. Fleminglaan 12 2289 CP Rijiswijk, NEDERLANDS Service and informatielijn ; Belgium :0800-95214, http://www.samsung.be/ Netherlands : 0800-2295214, http://www.samsung.nl/ PANAMA : Samsung Electronics Latinoamerica( Z.L.) S.A. Calle 50 Edificio Plaza Credicorp, Planta Baja Panama Tel. : (507) 210-1122, 210-1133 Tel : 800-3278(FAST) http://www.samsung-latin.com/ PERU : Servicio Integral Samsung Av.Argentina 1790 Lima1.
UKRAINE : SAMSUNG ELECTRONICS REPRESENTATIVE OFFICE IN UKRAINE 4 Glybochitska str. Kiev, Ukraine Tel. 8-044-4906878 Fax 8-044-4906887 Toll-free 8-800-502-0000 http://www.samsung.com.ua/ United Kingdom : Samsung Electronics (UK) Ltd. Samsung House, 225 Hook Rise South Surbiton, Surrey KT6 7LD Tel. : (0208) 391 0168 Fax. : (0208) 397 9949 < European Service Center & National Service > Stafford Park 12 Telford, Shropshire, TF3 3BJ Tel. : (0870) 242 0303 Fax. : (01952) 292 033 http://samsungservice.co.uk/ U.S.
This is a function that provides the best quality screen for the user by allowing the computer and the monitor to exchange information automatically. This monitor follows the international standard VESA DDC for the Plug & Play function. Resolution The number of horizontal and vertical dots used to compose the screen image is called 'resolution'. This number shows the accuracy of the display. High resolution is good for performing multiple tasks as more image information can be shown on the screen.
Video Electronics Standard Association; the ENERGY STAR name and logo are registered trademarks of the U.S. Environmental Protection Agency (EPA). As an ENERGY STAR Partner, Samsung Electronics Co., Ltd. has determined that this product meets the ENERGY STAR guidelines for energy efficiency. All other product names mentioned herein may be the trademarks or registered trademarks of their respective owners.