SAFETY CONCERNS The purpose of the Safety Concerns section is to ensure the safety of users and prevent property damage. Please read this document carefully for proper use. Conventions Warning Provides information or instructions that you should follow in order to avoid personal injury or fatality. Caution Provides information or instructions that you should follow in order to avoid a service failure or damage to your phone. Note Indicates additional information for referrence.
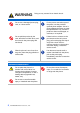
Warning WARNING Doing so may cause a fire or electric shock. Power Do not use a damaged power plug, cord, or a loose outlet. For the power connection port of the phone, use the provided optional power adapter. Use of a power adapter that does not meet the specifications may cause the product to become damaged, to overheat, or to explode. Do not pull the product by the cord, bend the cord with force, and do not touch the power plug with wet hands.
Caution CAUTION Doing so may cause the damage to the product and the product to be out of order. Power Do not power off the phone while upgrading a program. General The LAN cable to the network should be connected to the LAN port of a phone, NOT to the PC connection port. Use a soft and dry cloth when cleaning the phone. Do not spray water directly onto the product; and do not use chemicals such as wax, benzene, alcohol, thinner, mosquito killer, perfume spray, lubricant, detergent, etc.
TABLE OF CONTENTS SAFETY CONCERNS 1 Conventions ...........................................................................1 Symbols ..................................................................................1 Warning...................................................................................2 Caution....................................................................................3 PREPARATIONS 8 Check Package Items ...........................................................
Call Status Information ................................................................20 Text Input Method............................................................... 21 BASIC FUNCTIONS 22 Dialing .................................................................................. 22 Dialing an Extension Number......................................................22 Dialing a Station Line Number ....................................................23 Dialing via Speaker Phone .........................
Phonebook...................................................................................42 Call Log ........................................................................................48 Message.......................................................................................49 Conference...................................................................................53 Directory service ..........................................................................54 UC Menu.....................
TROUBLESHOOTING 79 ANNEX 81 Product Specifications ....................................................... 81 REQUIRED PUBLIC STATEMENT FOR GPL/LGPL LICENSED SOFTWARE USED IN THIS PRODUCT........
PREPARATIONS Check Package Items Check that all the components below are contained in the product package box. Phone Body Handset Phone Cradle Wall-Mount Bracket(Option) Quick Guide User Manual CD Ferrite Core LAN Cable - If any components are damaged or missing, contact the dealer. - The power adapter is optional. If needing the power adaper, contact the dealer. 8_ © SAMSUNG Electronics Co., Ltd.
Phone Installation Connection to Back Ports 1 If a headset is used, connect it to the headset port. 2 Connect a handset to the handset port. 3 Connect one end of the PC connection LAN cable, which was provided with the phone, to the PC connection port of the phone. Connect the other end to the PC network port. 4 Connect the LAN cable connected to the network to the LAN connection port of the phone. - If power is supplied from the LAN port (PoE), the phone is booted up when the LAN is connected.
Assembling the Cradle The installation angle of a phone can be changed depending on the assembly direction of the cradle. 1 Fix one latch of the cradle to the top or bottom groove of the phone. 2 Push the remaining latch into the remaining groove on the opposite side. 3 Place the phone on the installation location and check whether it shakes. 10_ © SAMSUNG Electronics Co., Ltd.
Assembling the Wall-Mount Bracket Assemble the wall-mount bracket where you want to use the phone. The wall-mount bracket is an optional item. If necessary, please contact your dealer. 1 First, choose the location where you want to install the phone, and then determine the positions of the screws by placing the phone at the target location on the wall. 2 Remove the desk cradle of the phone. 3 Insert the wall-mount bracket as shown in the figure.
Detachment from the Wall-Mount Bracket This section describes how to detach the phone from the wall-mount bracket. 1 You can detach the phone from the bracket by pressing the [Push] section at the bottom of the bracket. - Detach the phone more easily by pulling the entire bottom of the bracket instead of only the [Push] section. 2 Pull out the handset rack, change the direction, and then insert it again. 12_ © SAMSUNG Electronics Co., Ltd.
BEFORE USE Key Functions Network Network The SMT-i5243 phone enables voice telecommunication through an already-installed data network, without requiring the installation of a separate telephone line. Therefore, it does not require the additional expense of maintaining telephone numbers, and can save on telephone costs for the businesses, and people, that use international phone calls frequently. Screen The SMT-i5243 phone displays various functions on an LCD screen.
Call Hold When carrying out a complex job, or if another call is received while making a call, that call can be put on ‘hold’ temporarily or transferred to another person by using the call hold or call forward function. Conference If the [Conference] button is used during a conference, up to 5 people including the original caller can participate in the call. Call Forward A call can be forwarded to another number when the call cannot be received.
Parts and Names Front Configuration SMT-i5243 User Guide _15
Names and Functions Button Phone Status Indicator Bottom and right-side , Selection buttons Function A red LED showing the phone’s status (busy, ringing, receiving an internal message, etc.). Used by the user to select their desired function from the menus displayed on the LCD screen. Conference button Used to make a conference call. Transfer button Used to transfer a current call, or enter a function to a button on the AOM screen. Hold button Used to hold a call temporary without hanging up.
Button LCD screen Function The configuration of LCD screen is as follows: - On the top of the screen, the icons representing phone function settings are displayed. - On the main screen, selectable menus, the call processing status, or various messages are displayed. - At the bottom of the screen, menus that the user can select depending on status are displayed. Status display Main screen Menu display Handset Transfers the caller’s voice.
Navigation Button and UC Dial The SMT-i5243 phone has navigation buttons and UC dial to allow users to use its functions easily. UC dial Navigation button Direction key OK button Button UC dial Navigation Function Left The user can set the phone to the unconditional call forward state. If a buddy server is connected, this is set to a busy status. Center The default standby status. Right This is set to ‘Do Not Disturb’ and in buddy rejection status.
Phone Information Display Phone Status Indicator The phone status indicators are turned on or off depending on their usage status. Situation Indicator State When busy Red colored indicator is constant. When an extension rings Red colored indicator flashes. When a station line rings When a message is left LED Indicator [Hold] button, [Speaker] button, [Headset] button, [Mute] button and [AOM] button have an LED which is turned on or off according to their status.
Phone Status Icons They show the phone setting status, being displayed on the left top side. Button Description Server connection status Headset connection status Missed calls Internal messages Locked Call Forward Do Not Disturb Recording during calling Connection to PC program during calling Message Call Status Information Describes the different animation images displayed according to call status. Animation image Description Dial input/system function is being conducted.
Text Input Method Using the dial buttons and navigation buttons on the phone, the user can easily enter or modify the Korean, English, numbers, and special characters. 1 Whenever the user presses the dial button [*] on a text input screen, the input mode is changed in sequence. The input mode is displayed as an icon in the status area of the top-right corner of the LCD.
BASIC FUNCTIONS Dialing Function used to place a call using an extension or station line number. The product is set to its general phone mode which allows the user to make a call directly through dialing. If the phone is changed to its mobile phone mode, a call can be made by pressing the phone number and then pressing the [Send] button. This description is based on a mobile phone mode. Dialing an Extension Number Function used to dial an extension number.
An extension line is the telephone line through which a call can be placed to another internal phone connected to the system of the office. A station line is the telephone line where the user can make or receive a call to/from outside (e.g. home), which is directly connected to the switching system of a central office. Dialing a Station Line Number Function used to dial a station line number. 1 Pick up the handset, and check whether the dial tone is audible.
Dialing via Speaker Phone Function used to make a call via a speaker phone, instead of a handset. 1 Press the [Speaker] button without picking up a handset. 2 Press a phone number, select [Call] at the screen bottom, and then a ring back tone will be heard. 3 When the party receives the call, begin the conversation. - If the handset is picked during a call, the speaker is turned off, and the conversation can be continued through the handset. 4 When a call ends, press the [Speaker] button again.
Quick Search Function Function used to search for a phone number saved in a phonebook or call log, allowing the user to place a call. This is available only when in mobile phone mode. If there are multiple phone numbers that contain the same number sequence, the search results are displayed for each item. 1 On the dial input screen, enter the phone number to call. When the number of digits entered exceeds 3 or more, the search result is displayed at the bottom.
Dialing the Last Call Number Function used to make a call to the last extension or station line number. 1 Selecting the [CallLog] at the bottom of a standby screen displays the last call records. 2 Using a navigation button, move to a desired number and select [Call] to make a call. 26_ © SAMSUNG Electronics Co., Ltd.
Receiving a Call Function used to receive a call from an extension or station line. Receiving a Call via the Handset The phone can be answered via a handset. 1 Pick up a handset when a phone rings. 2 Converse with the party. 3 Hang up the handset when the call ends.
Receiving a Call via Speaker Phone Function used to receive a call via a speaker phone, instead of a handset. 1 When the phone rings, press the [Speaker] button. 2 Converse with the party. 3 When a call ends, press the [Speaker] button again. - If the handset is picked up during a call, the speaker is turned off, and the conversation can be continued via the handset.
Call Pickup Function used to receive a call placed to another extension phone allocated within the same group. 1 The extension phone allocated to the same group is ringing. 2 Select [DIR.PICK UP] from the soft menu. Enter the extension phone number to pick up. - Make a selection using a navigation button, or press the selection button on the right side of the soft menu screen. 3 Converse with the party when connected. Call pickup is allowed only to the subscribers allocated to the same group.
Functions Available during Call The functions below are convenient to use while making a call via an extension or station line. Call Hold A call can be held temporarily, making the caller wait, and then the conversation can be continued when convenient. 1 To hold the current call, press the [Hold] button during call. 2 The message ‘HOLD’ is displayed. 3 Put down the handset. The call can be resumed by pressing the [CALL 1] button. 30_ © SAMSUNG Electronics Co., Ltd.
Call Back This function can be used to make a call to a specific party later in the event of a call being made via an extension line when the called party is busy. 1 When the called party is busy, select [CAMP ON] from the soft menu. 2 If the message ‘0000: BUSY. Camp’ is displayed, put down the handset. - When the handset has been put down, it returns to the initial screen.
MUTE This function is used to silence the user’s voice during a call via an extension line, but the user can still hear the voice of the other party. 1 During a call, select [MUTE] from the soft menu. Now the other party cannot hear the user’s voice. 2 To disable the MUTE function, select the [mute (Off)] from the soft menu. Alternately, pressing the [Mute] button to the left of the dial button provides the same function. 32_ © SAMSUNG Electronics Co., Ltd.
Call Transfer A current call can be transferred to another extension or station line’s subscriber. 1 To transfer a call, press the [Transfer] button. 2 After hearing a dial tone, press the phone number of another subscriber to connect. - If the target number is a station line number, press the line group directory number (e.g. [9]) and then dial a phone number; or if it is an extension number, only dial the extension number.
Conference Function During a call, other subscribers of extension line can be invited to participate in a conference call. 1 During a call, press the [Conference] button, or select the [CONFERENCE] from the soft menu. - When the system does not support a conference call, even if the soft button is pressed, a conference call is not created. 2 After getting a dial tone, dial the phone numbers of the other conference participants.
Details of Counterpart This is the function-during inbound or outbound calls-that receives the details and information on the counterpart from the system, and displays it on a screen. 1 When information on the counterpart is received, the [PremiumCID] menu is activated. - If the counterpart is already registered in the phonebook, the information contained in it is displayed; if not, the information received from the system is displayed on the screen. 2 Select the [PremiumCID] to check the information.
Call Recording If a terminal is working with the OfficeServ Communicator, it is possible to record the conversation using the recording function of the OfficeServ Communicator. 1 During a call, select [VoiceRec] at the bottom of a screen, to start recording. - If the call is being made while working with the active OfficeServ Communicator, the [Record] menu at the bottom is activated. 2 Selecting [StopVoRec] terminates the recording.
Volume Control The user can adjust the volume of a handset, speaker and tone sound. Volume Control of a Handset 1 The user can adjust the volume in the following way while making a call via a handset. 2 To increase the volume, press the upper part (+) of the [Vol] button. 3 To decrease the volume, press the lower part (-) of the [Vol] button.
Volume Control of a Speaker 1 The user can adjust the volume of a speaker in the following way while calling. 2 To increase the speaker volume, press the upper part (+) of the [Vol] button. 3 To decrease the speaker volume, press the lower part (-) of the [Vol] button. 38_ © SAMSUNG Electronics Co., Ltd.
Volume Control of Ringing Sound 1 To increase the volume of the ringing sound, press the upper part (+) of the [Vol] button while the bell is ringing. 2 To decrease the volume of the ringing sound, press the lower part (-) of the [Vol] button while the bell is ringing. By pressing the [Vol] button in standby mode, the user can also adjust the key tone volume.
MAIN MENUS This section describes menu functions. The phone includes Call, UC, Phone and Settings menus. Menu Structure Clicking the [Menu] button when a phone is in standby mode displays menus on a screen. The desired menu can be selected by using the navigation button or the selection button on the right side or at the bottom of a screen. Button Call Sub-menus Function 1. Phonebook Provides the function to save, search and register with the phonebook. 2.
Button UC Phone Settings Sub-menus Function 1. Buddy Setting The status of a user who logged into the presence server can be changed. 2. Buddy List The user can view the buddy list registered by a user, or add the data. 3. VOD The user can view and play the VOD list of the VCS (Video Contents Server). 4. Scheduler The user can register and manage his schedule. 5. XML Browser The user can search and use the information provided from the XML browser server. 1.
Call Menus Settings can be changed for the phonebook, call log, call forward and absent message. Phonebook Using the phonebook, the user can easily manage phone numbers, email ID, fax numbers, photos, etc. In addition, calls can easily be made using the phonebook. By selecting [Menu] Æ [1. Phonebook] or by pressing the [Phonebook] button, the user can access the phonebook. In addition, the group list is displayed on the initial screen. 42_ © SAMSUNG Electronics Co., Ltd.
Viewing a Contact A phone number can be viewed based on its group saved in the phonebook. 1 Select the [Menu] Æ [Call] Æ [1. Phonebook] Æ group. 2 The phone number list of the given group is displayed. - Pressing the [OK] button displays the detailed information. - If the user selects [Send], a call can be made to the given number. Search phonebook The user can search a phone number saved in a phonebook by phone number or name. Select [Menu] Æ [Call] Æ [1. Phonebook] Æ [Search].
Adding a Contact This is the function used to add a phone number to the phonebook. The phone numbers of up to 500 people can be saved. 1 Select [Menu] Æ [Call] Æ [1. Phonebook] Æ [Add]. 2 Enter a name and phone number, and then select [Save]. - Phone numbers (e.g., of mobile phone, home, office, extension), fax, email, notes, group and ringing sound settings and photos can all be saved. Editing a Contact The user can edit the phone numbers registered in the phonebook. 1 Select [Menu] Æ [Call] Æ [1.
Deleting a Contact The phone number registered in the phonebook can be deleted. 1 Select [Menu] Æ [Call] Æ [1. Phonebook] Æ Select Group Æ [Edit Mode]. 2 Select an item to delete and select [Delete]. 3 Selecting [Yes] deletes the number.
Adding a Group This is the function used to add a new group. 1 Select [Menu] Æ [Call] Æ [1. Phonebook] Æ [Edit Mode]. 2 Select [Add Group]. 3 Enter a new group name, and select [Save]. - The ringing sound can also be set. 46_ © SAMSUNG Electronics Co., Ltd.
Deleting a Group This is the function used to delete an existing group. 1 Select [Menu] Æ [Call] Æ [1. Phonebook] Æ [Edit Mode]. 2 Select a group to delete, and select [Delete]. 3 Selecting [Yes] deletes the group. - The members of the deleted group are moved to the unspecified group.
Call Log Displays the entire call Log for the recent inbound and outbound calls and missed calls. Up to 500 call logs can be saved. Select [Menu] Æ [Call] Æ [2. Call Log]. Using a navigation button, the user can move to the list of all inbound and outbound calls, and missed calls. - By selecting [Send], the user can make a call to the specified number. - Selecting [Save] saves the selected item in the phonebook. - By selecting [Edit Mode], the user can delete a call log item, or the entire log.
Message Text messages can be sent and received between users, and can save a created message temporarily. New Message This is the function used to create and save a message to send. 1 Select [Menu] Æ [Call] Æ [3. Message] Æ [New Msg]. - If the phone is registered in the OfficeServ, a Voice Message menu is added. The user can navigate directly to a voice message box by selecting Voice Messages. 2 Create a new message. - By selecting [Save], the user can save a created message temporarily.
Inbox This is the function used to save and check the received message. 1 Select [Menu] Æ [Call] Æ [3. Message] Æ [1.Inbox]. A list of the received messages is displayed. - By selecting the [Edit Mode], the user can delete the selected message or all messages. 2 To view all message information, select the message and then press [OK] button. - By pressing [Reply], a reply message can be sent. - By selecting [Save], the user can save the phone number of the sender of the message.
Outbox This is the function used to save the sent messages. 1 Select [Menu] Æ [Call] Æ [3. Message] Æ [2. Outbox]. A list of sent messages are displayed. - By selecting the [Edit Mode], the user can delete the selected message or all messages. 2 To view all message information, select the message and then press [OK] button. - By selecting [Resend], the user can send the message again. - By selecting [Save], the user can save the phone number of the sender of the message.
Draft Messages This is the function used to save a created message temporarily. 1 Select [Menu] Æ [Call] Æ [3. Message] Æ [3. Draft Messages]. A list of saved messages are displayed. - By selecting the [Edit Mode], the user can delete the selected message or all messages. 2 To view all message information, select the message and then press [OK] button. - By selecting [Send], the user can send the specified message. - By selecting [Edit], the user can edit a message.
Conference A conference group can be selected to make a conference call between the users registered with the group. Group Conference Call 1 Select [Menu] Æ [Call] Æ [4. Conference] Æ Group. 2 If [Connect] is selected, a conference call is connected. - If not connected, a connection fail icon is displayed. - The user can add participants to the conference call. Adding a Group 1 Select [Menu] Æ [Call] Æ [4. Conference] Æ [Add Group].
Directory service With the LDAP (Lightweight Directory Access Protocol), the user can search the registered users to view user information or make a call. (For information on the specific server, contact the server administrator.) Select [Menu] Æ [Call] Æ [5. Directory Service]. - Enter name, phone number or department, and then select [Search]. 54_ © SAMSUNG Electronics Co., Ltd.
UC Menu The user can change the settings for the buddy presence, buddy list, VOD play, scheduler, and XML browser. A buddy list is a list of users that is used to manage the real-time changes in status of the users registered with the presence server. This user is called a buddy. If the status of a user registered with a presence server is changed, this change is delivered in real time to the people to whom the user is registered as a buddy.
Connecting to Presence Server The user must access the presence server to set the buddy status and view a buddy list. Server Login 1 Select [Menu] Æ [UC] Æ [1. Buddy Setting] or [Menu] Æ [UC] Æ [2. Buddy List]. 2 Enter ID and password, and change the automatic log-in settings. 3 Select [Login] to connect to the server. 4 When the login is successful, a presence screen or a group item is displayed. 56_ © SAMSUNG Electronics Co., Ltd.
Server Logout 1 Select [Menu] Æ [UC] Æ [1. Buddy Setting]. 2 For the logout confirmation prompt, select [Yes]. - If login is not successful after setting automatic login, check the account information. If the problem continues, contact the administrator. - After logout, automatic login does not work until next login.
Buddy Setting The user status information shown to the counterpart buddy can be changed. 1 Select [Menu] Æ [UC] Æ [1.Buddy Setting]. 2 Select a desired status, and select [OK]. Icon Description Online Status in which a user is connected to a buddy server Offline Logout status The user can select this to log out from the buddy server. Meeting Status of meeting attendance Lunch Out to lunch. Busy Busy, as a result of another job.
Set/Cancel Home Buddy The user can always check the status information of a selected buddy registered in the phone, on a standby screen. 1 Select [Menu] Æ [UC] Æ [1. Buddy Setting] Æ [Home Buddy]. Select the buddy that is wanted to be set as a home buddy, and select [Change]. 2 Specify the location to display the home buddy, and select [Input]. - By selecting [Disable], the home buddy setting can be cancelled.
Buddy List This displays a buddy list. By selecting a buddy, the user can view his/her details; and can move the information to other groups, save/delete a phonebook, and make a call to the buddy. Search a Buddy A buddy can be searched for by phone number or name. - With icons, the status of a buddy can be checked. Add a Buddy The user can add a new buddy. 1 Select [Menu] Æ [UC] Æ [2. Buddy List] Æ [Add Buddy]. 2 Enter the ID of the buddy to add. Specify a group, and select [OK].
View/Edit/Delete Buddy Information The user can view, edit or delete the information held on a registered buddy. 1 Select [Menu] Æ [UC] Æ [2. Buddy List]. Æ Select Group - By selecting [Call], the user can make a call to the given buddy. - By selecting [Add], the user can add a new buddy. 2 Select [Edit Mode]. - By selecting [HomeBuddy], the user can edit the Home Buddy items. - By selecting [Move], the user can move selected buddy to the other group.
Add/Edit a Group The user can add a buddy group, or modify the name of an existing group. 1 Select [Menu] Æ [UC] Æ [2. Buddy List] Æ [Edit Mode]. 2 By selecting an existing group, the user can edit the group name; or by selecting [Add], the user can enter the name of the group to add. - Select [Save], then new data is added. 62_ © SAMSUNG Electronics Co., Ltd.
Deleting a Group The user can delete a buddy group. 1 Select [Menu] Æ [UC] Æ [2. Buddy List] Æ [Edit Mode] Æ [Delete]. 2 Selecting [Yes] deletes the specified group. Set/Cancel Home Buddy The user can always check the status information of a selected buddy registered in the phone, on a standby screen. 1 Select [Menu] Æ [UC] Æ [2. Buddy List] Æ Select Group Æ Buddy list Æ [Edit Mode], select the one that will be set as a home buddy, and then select [HomeBuddy].
VOD The user can view and play the VOD list in the VCS (Video Contents Server). 1 Select [Menu] Æ [UC] Æ [3. VOD], select the desired item. 2 Selecting [OK] button displays VOD information. - Title, runtime and synopsis information are displayed. 3 Selecting [Play] plays the VOD. - Using the Rewind, Pause, Fast Forward and Stop menu, play can be controlled. - By selecting [Full], the user can expand the screen to the maximum size.
Scheduler This is the function used to register and manage schedules on a daily basis. The user can set location, time, alarm and ringing sound according to schedule. Select [Menu] Æ [UC] Æ [4. Scheduler]. - By selecting the [Go To Date], the user can register schedules for a specified date. - By selecting [New], the user can register the schedule of today. - By selecting [All List], the user can view all the schedules. View Schedule Allows you to view monthly, daily, and full schedules.
XML Browser The user can search and use the information provided from XML browser. Available information and related services may differ per server construction. - When an XML browser server is not constructed, the XML browser service is not available. To find out more about the server construction, contact the server administrator. - The XML browser server differs with each server construction. For information about separate services, contact the server administrator. 1 Select [Menu] Æ [UC] Æ [5.
XML Browser Command Icon On the right side of XML browser screen, icons representing many functions related to the page are displayed. Icon Description Access to the home page Exit browser and switch to UC menu screen Exit browser and switch to a standby screen Move to previous page Move to next page Refresh the current page The user cannot use those functions when the icons are not active. For example, if there is no previous page, the previous page icon is disabled.
Phone Menu Settings can be made for screen, sound, language, and security. Screen Here, the user can make his settings for LCD screen. Idle Screen Decorations The wallpaper of the LCD screen can be set. By pressing the navigation button, the user can change settings for the idle screen and time display. Using the Widget, the user can select digital clock, analog clock, world clock, and calendar. Screen Brightness The user can adjust the brightness of the LCD screen by pressing a navigation button.
LCD Power Saving The user can set the time to turn off the LCD screen and backlight. The options are After 1 min./After 3 min./After 10 min./Always On. Screen Saver This is the function used to set the LCD screen saver. The user can set the activation interval and screen switching interval, and select the picture of the screen saver. Spot News This is the function used to show the news from the Spot News Server on the screen. The speed of news scrolling can be adjusted.
Sound The user can set the type and volume of the ringing sound and key tone. Volume By pressing the navigation button, the user can set the volume of a handset (receiver), speaker, ringing sound, key tone, page, VOC, message alert, and alarm respectively. - The options available may differ depending on the OfficeServ or SCM system. Ringing Sound The user can select the type of ringing sound. Key Tone The user can select the type of key tone.
Language This function is used to change the language displayed onscreen. The user can select of the list. Security The user can set a password which is then used to set the functions of the phone, and the lock function. This prevents other people from using the phone. The password should be 4-digits. If the phone is registered in the OfficeServ, the user can also set a Call Lock function. Phone Information This displays the phone model and software version information.
Settings Menu The user can use such functions as call options, network information view, phone information, and initialization. Application Settings The user can set the optional functions related to call and message. Select [Menu] Æ [Settings] Æ [1. Application Settings]. Call This is the function used to set the optional functions related to calls. The user can change settings for external CID display, phone number, dial mode, answer mode, extension line button (AOM) display, and headset mode.
Station On/Off The user can enable or disable the application settings. Extension Login Another person can access the phone with a different account and the phone also works according to the settings for a new user.
Absent Message The user can select or cancel an automatic response message during absence. 1 Select [Menu] Æ [Settings] Æ [2. Absent Message]. 2 Select the message type. 3 Select [Save] to complete the message setting. - To cancel the absent message, select [Absent Message OFF]. 74_ © SAMSUNG Electronics Co., Ltd.
Call Forward This is the function used to set or cancel a call transfer method. The user can enable call forwarding for all calls, during busy times, or in the event of no answer. 1 Select [Menu] Æ [Settings] Æ [3. Call Forward]. 2 Select the type of call forward, and enter a phone number. 3 Select [Save] to complete the call forward setting.
Network Information Displays IP, MAC information and LAN connection status. User Data Initialization Initializes the phone by entering a password. 76_ © SAMSUNG Electronics Co., Ltd.
SOFT AND AOM MENUS This section describes the user convenience functions - soft menu and AOM. Menus displayed on soft menu and AOM screen may differ per system version. Soft Menu Soft menu is a user convenience function available per phone conditions. It is provided via interworking with the system, and displayed as a menu on the right side of a screen. Using Soft Menu The user can use the functions by pressing the selection button on the right side of a screen.
AOM (Add On Module) For the user’s convenience, AOM allows users to use the various functions registered in the system like hotkeys. AOM becomes available when a system administrator registers the function in the system at the request of a user. The user can register either the functions provided by the system or important phone numbers. Use of AOM The user can use the functions by pressing the selection button on the right side of a screen.
TROUBLESHOOTING The following are examples of frequently occurring problems and solutions. Please check the list of solutions before requesting repair services from the service center. Please call the service center if the problem is not resolved using the following solutions. Installation and Connection Problems The phone is not reset after it is connected to the power supply. Solutions - Check if all of the cables are connected to the phone correctly.
Screen Problems Solutions Nothing is displayed on the LCD screen during the call. Check if the phone cables are properly connected to the ports. (Please refer to the section on ‘Phone Installation’ under ‘Preparations’ in this user manual.) General Problems Solutions The phone does not ring or the sound is too quiet. Press the [Vol] button to increase the sound. (Please refer to the ‘Volume Control’ section under ‘How to Use Basic Functions’ in this manual.
ANNEX Product Specifications The features and specifications of the SMT-i5243 are as follows. Features Model Specifications SMT-i5243 Weight (kg) 1.25 Size (mm) 223 (Width) × 223 (Length) × 133 (Thickness) Adapter Input Power AC 100–240 V/50–60 Hz; 0.3 A Adapter Output Power DC 5 V; 3 A PoE Input Power DC 36–57 V (Standard 48 V) PoE Device 802.
REQUIRED PUBLIC STATEMENT FOR GPL/LGPL LICENSED SOFTWARE USED IN THIS PRODUCT The following GPL and LGPL software are used in this product and are subject to the GPL/LGPL License Agreements included as part of this documentation: GPL SOFTWARE - Linux Kernel - busybox - cramfsck - wget - rp-pppoe LGPL SOFTWARE - ld.so - libc.so - libm.so - libpthread.so - libalsa - libusb - ortp To obtain the source code covered under those Licenses, please visit http://www.samsungnetwork.
To protect your rights, we need to make restrictions that forbid anyone to deny you these rights or to ask you to surrender the rights. These restrictions translate to certain responsibilities for you if you distribute copies of the software, or if you modify it. For example, if you distribute copies of such a program, whether gratis or for a fee, you must give the recipients all the rights that you have. You must make sure that they, too, receive or can get the source code.
separate works. But when you distribute the same sections as part of a whole which is a work based on the Program, the distribution of the whole must be on the terms of this License, whose permissions for other licensees extend to the entire whole, and thus to each and every part regardless of who wrote it.
For example, if a patent license would not permit royalty-free redistribution of the Program by all those who receive copies directly or indirectly through you, then the only way you could satisfy both it and this License would be to refrain entirely from distribution of the Program. If any portion of this section is held invalid or unenforceable under any particular circumstance, the balance of the section is intended to apply and the section as a whole is intended to apply in other circumstances.
END OF TERMS AND CONDITIONS How to Apply These Terms to Your New Programs If you develop a new program, and you want it to be of the greatest possible use to the public, the best way to achieve this is to make it free software which everyone can redistribute and change under these terms. To do so, attach the following notices to the program.
GNU LESSER GENERAL PUBLIC LICENSE Version 2.1, February 1999 Copyright (C) 1991, 1999 Free Software Foundation, Inc. 51 Franklin Street, Fifth Floor, Boston, MA 02110-1301 USA Everyone is permitted to copy and distribute verbatim copies of this license document, but changing it is not allowed. [This is the first released version of the Lesser GPL. It also counts as the successor of the GNU Library Public License, version 2, hence the version number 2.1.
For example, on rare occasions, there may be a special need to encourage the widest possible use of a certain library, so that it becomes a de-facto standard. To achieve this, non-free programs must be allowed to use the library. A more frequent case is that a free library does the same job as widely used non-free libraries. In this case, there is little to gain by limiting the free library to free software only, so we use the Lesser General Public License.
supply such function or table, the facility still operates, and performs whatever part of its purpose remains meaningful. (For example, a function in a library to compute square roots has a purpose that is entirely well-defined independent of the application. Therefore, Subsection 2d requires that any application-supplied function or table used by this function must be optional: if the application does not supply it, the square root function must still compute square roots.
You must give prominent notice with each copy of the work that the Library is used in it and that the Library and its use are covered by this License. You must supply a copy of this License. If the work during execution displays copyright notices, you must include the copyright notice for the Library among them, as well as a reference directing the user to the copy of this License.
11. If, as a consequence of a court judgment or allegation of patent infringement or for any other reason (not limited to patent issues), conditions are imposed on you (whether by court order, agreement or otherwise) that contradict the conditions of this License, they do not excuse you from the conditions of this License.
END OF TERMS AND CONDITIONS How to Apply These Terms to Your New Libraries If you develop a new library, and you want it to be of the greatest possible use to the public, we recommend making it free software that everyone can redistribute and change. You can do so by permitting redistribution under these terms (or, alternatively, under the terms of the ordinary General Public License). To apply these terms, attach the following notices to the library.