J-Chapter 1(US) 4/16/98 8:23 AM Page 1 Operator’s Guide SAMSUNG FACSIMILE 000000000 00 00000000 SF4000/SF4100/SF4200 00000 0000000000000000 Please read this guide before you use this equipment.
J-Chapter 1(US) 4/16/98 8:23 AM Page 3 Thank You for Choosing Samsung Thank you for choosing Samsung! Your new machine represents the very latest technology. It is a full-featured, high-performance machine built to strict quality standards set by Samsung-the highest in the industry. WeÕre proud to offer you a product that will provide convenient, dependable service for years to come. Important Safety Information Always be careful when using the machine.
J-Chapter 1(US) 4/16/98 8:23 AM Page 4 CONTENTS Chapter 1 Your New Machine List of Features .................................................................................................................. 1.1 Parts ..................................................................................................................................... 1.2 Common Parts ................................................................................................................ 1.
J-Chapter 1(US) 4/16/98 8:23 AM Page 5 CONTENTS Chapter 3 Automatic Dialling One-Touch Dialling ........................................................................................................... 3.1 Storing a Number for One-Touch Dialling ................................................................ 3.1 Dialling One-Touch Number ....................................................................................... 3.3 Speed Dialling ..........................................................
J-Chapter 1(US) 4/16/98 8:23 AM Page 6 CONTENTS Chapter 6 Special Features Using REDIAL/PAUSE .................................................................................................... 6.1 Using TONE (Switching from Pulse to Tone) ............................................................... 6.2 Using FLASH (on a PABX system) ................................................................................. 6.3 Chain Dialling a Memory Number ...................................................
J-Chapter 1(US) 4/16/98 8:23 AM Chapter Page 7 One YOUR NEW MACHINE
J-Chapter 1(US) 4/16/98 8:23 AM Page 1.1 Chapter One YOUR NEW MACHINE This chapter will familiarize you with your new MultiJet machine. List of Features SamsungÕs MultiJet machines were designed using the latest technology. The machines are full-featured, high-performance machines that not only meet, but exceed, industry standards.
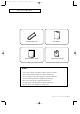
J-Chapter 1(US) 4/16/98 8:23 AM Page 1.2 1 YOUR NEW MACHINE Parts Once you have unpacked your MultiJet machine, check to make sure that you have all the parts shown here. If any piece is missing or broken, call your dealer.
J-Chapter 1(US) 4/16/98 8:23 AM Page 1.
J-Chapter 1(US) 4/16/98 8:23 AM Page 1.4 1 YOUR NEW MACHINE Familiarizing Yourself with Your New Machine Take a moment to familiarize yourself with your new machine by looking at the pictures on the next few pages. Front View Paper Support Document Tray Paper Bin Top Cover Document Guide 000000000 Handset 00 00000000 Control Panel 00000 0000000000000000 Handset Cradle Printer Exit Tray Document Exit Tray 1.
J-Chapter 1(US) 4/16/98 8:23 AM Page 1.5 YOUR NEW MACHINE Rear View Paper Load Lever Print Cartridge Storage Unit Tel. Line Jack (for SF4100, SF4200 only) Dial mode switch AC Power Socket Ringer volume switch Ext. Line Jack Parallel Printer Cable Connector (for SF4100, SF4200 only) Serial Cable Connector (for SF4200 only) Print Cartridge CHAPTER ONE : YOUR NEW MACHINE 1.
I-Control Panel(US) 4/16/98 8:26 AM Page 2 1 YOUR NEW MACHINE Control Panel LCD Display Displays information. BUSY Lamp (for SF4100, SF4200 only) Lights while printing a PC file. PRINTER RESET Button (for SF4100, SF4200 only) Use to reset the machine from paper jam and catastrophic printer error. BUSY CARTRIDGE Button Use when replacing the print cartridge. This button permits you to position the print cartridge carrier so that you may easily remove or replace the print cartridge.
I-Control Panel(US) 4/16/98 8:26 AM Page 3 YOUR NEW MACHINE and ¹ (down/up) Buttons Use to display or the next or last menu item. SEARCH/DELETE Button Use to search for a number in memory. Or use to delete digits in the edit mode. Ã and ¨ (left/right) Buttons Use to move cursor right or left through the display. FAX ANS/FAX TEL/FAX RCV.MODE FINE DARKEN PHOTO S. FINE RESOLUTION LIGHTEN CONTRAST RCV.MODE (Receive Mode) Button Use to choose which receive mode you want to use.
J-Chapter 1(US) 4/16/98 8:24 AM Page 1.8 1 YOUR NEW MACHINE Fax Theory Thank you for your purchase of this SAMSUNG multi-function fax machine. We want you to get maximum use from your new equipment, therefore we would like to explain a little bit about FAX machines and how they work. This will help when reading the rest of this manual and becoming acquainted with FAX machines in general, plus all the features available with your new machine.
J-Chapter 1(US) 4/16/98 8:24 AM Page 1.9 YOUR NEW MACHINE After a few seconds exchanging pleasantries (handshaking), the machines decide to get down to the business of the call: sending and receiving a fax document. A fax document is one or more sheets of paper which have been placed in the transmitting (sending or TX) machine.
G-Chapter 2(US) 4/16/98 8:30 AM Chapter INSTALLATION AND Page 1 Tw o SETUP
G-Chapter 2(US) 4/16/98 8:30 AM Page 2.1 Chapter INSTALLATION Tw o AND SETUP Please review the safety informations at the front of this manual, then follow the directions in this chapter to connect your machine and set it up for use. Choosing a Location To help guarantee trouble-free operation of your machine, place it in a spot where: ¥It is not in direct sunlight or in excessive humidity. ¥It is not too close to heating or air conditioning vents. ¥Its ventilation openings arenÕt blocked.
G-Chapter 2(US) 4/16/98 8:30 AM Page 2.2 2 INSTALLATION AND SETUP Handset and Handset Cradle 1. Plug one end of the coiled cord into the jack on the handset. Then plug the other end into the modular jack on the bottom of the handset cradle. Cradle 000000 0000000 Handset If you have two jacks, be sure to insert ivory-coloured jack into the right hole. 000000000 00 00000000 2. Plug the cradleÕs modular cord(s) into the modular jack(s) on the left side of your machine.
G-Chapter 2(US) 4/16/98 8:30 AM INSTALLATION AND Page 2.3 SETUP Document Tray 1. Hold the document tray with both hands and insert one end of the tray into the corresponding slot as shown. Document tray 2. Gently flex the tray in the middle, until the other end of tray clears the corresponding slot on the machine. 3. Insert the other end of the tray into the corresponding slot as shown. 4. Fold out the extender on the document tray, if necessary.
G-Chapter 2(US) 4/16/98 8:30 AM Page 2.4 2 INSTALLATION AND SETUP Document Exit Tray The document exit tray catches documents fed through the machine from the document feeder. 1. Insert two tabs on the document exit tray into the slots on the front of your machine. Document exit tray 2. Fold out the extender, if necessary. Extender Printer Exit Tray The printer exit tray is built in the bottom cover of the machine and catches paper fed through the machine from the printer automatic sheet feed.
G-Chapter 2(US) 4/16/98 8:30 AM INSTALLATION AND Page 2.5 SETUP Telephone Line Plug one end of the telephone line cord into the TEL LINE jack and the other end into a standard phone wall jack. To select your dialling type, see page 2.28. Extension Phone (Optional) Plug one end of the modular cord into the EXT. LINE jack on the back of your machine. Plug the other end of the cord into a modular jack on a telephone answering device or a regular telephone to use as an extension.
G-Chapter 2(US) 4/16/98 8:30 AM Page 2.6 2 INSTALLATION AND SETUP Loading Paper The LCD displays ÔPAPER OUTÕ when no paper is loaded. You can load approximately 100 sheets of paper. 1. Pull the paper support on the paper bin all the way up. Paper support 2. Push the paper load lever away from you to open the sheet feeder. Paper load lever Warning beeps sound for about 30 seconds and the LCD displays ÔCHECK LOAD LEVERÕ and the paper size selected through user options on page 6.8.
G-Chapter 2(US) 4/16/98 8:30 AM INSTALLATION AND Page 2.7 SETUP Paper Type and Sizes Because all paper varies in physical characteristics, you can receive mixed results from different packages of paper even though the packages contain the same type of paper. If you encounter undesirable results, try the other side of the paper, a different type, or another package of the same kind of paper.
G-Chapter 2(US) 4/16/98 8:30 AM Page 2.8 2 INSTALLATION AND SETUP 3. Remove the print cartridge from its packaging. Hold the print cartridge by the black areas or colored top only. Do not touch the copper area. 4. Carefully remove the tape covering the printhead. Be sure to remove all the tape. Do not touch the copper area. 5. Insert the print cartridge in the carrier. 6. Push the cartridge firmly in the direction of the arrow until it clicks into place. 7.
G-Chapter 2(US) 4/16/98 8:30 AM INSTALLATION AND Page 2.9 SETUP 8. Press the CARTRIDGE or ENTER button. BUSY Use ÔInstall CartridgeÕ tab on your PC for a color cartridge. PRINTER RESET CARTRIDGE FORM FEED The LCD displays ÔCARTRIDGE IS 1:NEW 2:USED.Õ 9. Choose Ô1:NEWÕ by using the or button, or by pressing the 1 button. SEARCH/DELETE MENU 1 STOP FLASH ALARM SPEED /DUAL START/ENTER 10. Press the ENTER or CARTRIDGE button.
G-Chapter 2(US) 4/16/98 8:30 AM Page 2.10 2 INSTALLATION AND SETUP Print Cartridge Storage Unit (SF4100, SF4200) The print cartridge storage unit provides a convenient place to store an extra black or color print cartridge, and prevents an opened cartridge from drying out. Attach the storage unit by inserting its three tabs into the slots on right side of the main body and lowering it until it clicks into place.
G-Chapter 2(US) 4/16/98 8:30 AM INSTALLATION AND Page 2.11 SETUP Running Self-Test Each time you install a new print cartridge, run Self-Test to check if the printer mechanism is functioning properly. 1 ABC MENU 1 Press MENU. STOP FLASH SPEED /DUAL The LCD asks you to press the desired function button. 2 Press 05, SELF-TEST, on the one-touch keypad. 01 02 MEMORY TX. 06 SYSTEM ID 12 TX. CONFIRM 03 DELAY TX.
G-Chapter 2(US) 4/16/98 8:30 AM Page 2.12 2 INSTALLATION AND SETUP The machine prints out a test pattern to show the status of the printer mechanism. P L E A S E WA I T P R I NT I NG . . . 5 STOP FLASH ALARM Prees STOP twice to return to Standby mode. SPEED /DUAL START/ENTER OHD/V.REQ. REDIAL/ PAUSE 6 Examine the test pattern and look for a break in the diagonal line. A broken line shows any clogged nozzles. Run the nozzle test. See page 7.5.
G-Chapter 2(US) 4/16/98 8:30 AM INSTALLATION AND Page 2.13 SETUP Connecting to Your PC (SF4100, SF4200) Connecting SF4200 to Your PC Use the serial cable and the parallel print cable that supports bidirectional communications to connect your machine and the computer. CONNECTING THE PRINTER CABLE Note : Make sure you turn the power off by plugging out the power cord before connecting the machine to your PC. When the connection is completed, turn the power on. 1.
G-Chapter 2(US) 4/16/98 8:30 AM Page 2.14 2 INSTALLATION AND SETUP Connecting SF4100 to Your PC Use the printer cable that supports bidirectional communications to connect your machine and the computer. Note : Make sure you turn the power off by plugging out the power cord before connecting the machine to your PC. When the connection is completed, turn the power on. 1. Connect the parallel printer cable to the 36 pin printer jack on your machine.
G-Chapter 2(US) 4/16/98 8:30 AM INSTALLATION AND Page 2.15 SETUP Setting Up Printer (SF4100, SF4200) Installing the Windows Printer Driver Software If your computer operates with Windows 3.1 or Windows for Workgroups, follow the instructions below to install the printer software. If your computer operates with Windows 95, see page 2.16. WITH WINDOWS 3.1 1. Start Windows. 2. Insert the setup diskette into drive A (or B). 3. In Windows Program Manager, click on ÔFileÕ, then choose ÔRunÕ. 4.
G-Chapter 2(US) 4/16/98 8:30 AM Page 2.16 2 INSTALLATION AND SETUP WITH WINDOWS 95 To install the printer software with Windows 95: 1. Start Windows. 2. Insert the setup diskette into drive A (or B). 3. Click ÔStartÕ on the desktop, and then choose ÔRunÕ. 4. In the Run dialog box, type Ôa:setup (or b:setup)Õ, then click ÔOKÕ. 5. Follow the instructions on the installation screens.
G-Chapter 2(US) 4/16/98 8:30 AM INSTALLATION AND Page 2.17 SETUP Running Windows Printer Software The Samsung MFP 4100/4200 Control program lets you: ¥ Monitor your print jobs. ¥ Watch a print job progress. ¥ Monitor print cartridge ink level. ¥ Install or replace a print cartridge. ¥ Perform print cartridge maintenance. ¥ Access the Windows Printing dialog boxes to change printer settings. ¥ Print from Windows-based applications. ¥ Test your printer. ¥ Change the print queue parameters.
G-Chapter 2(US) 4/16/98 8:30 AM Page 2.18 2 INSTALLATION AND SETUP BEFORE YOU PRINT Make sure Samsung MFP 4100/4200 is listed as your default printer in the Windows Control Panel (the Setup Program does this automatically during installation). Print as you normally would_for example, by choosing Print from your applicationÕs File menu. CHANGING PRINTER SETTINGS Before printing, you may want to change some printer settings.
G-Chapter 2(US) 4/16/98 8:30 AM INSTALLATION AND Page 2.19 SETUP CHOOSING PRINT OPTIONS FROM WINDOWS-BASED APPLICATIONS The following steps are general instructions. Your Windows-based application may require a slight variation from this procedure. For example, in step 3, your application may have a Printer button in the Print Setup dialog box instead of an Options button. 1. Open the applicationÕs File menu. 2. Choose Print (or Printer) Setup. 3.
G-Chapter 2(US) 4/16/98 8:30 AM Page 2.20 2 INSTALLATION AND SETUP Using the DOS Printer Software PRINTING FROM DOS APPLICATIONS When you print from a DOS (not Window based) application, your printer uses PCL 3 emulation. You must install a printer driver for PCL 3 emulation printing in each DOS application. 1. Start your DOS application. 2. Install the HP Deskjet 500C as the current printer in the DOS application from which you are printing.
G-Chapter 2(US) 4/16/98 8:30 AM INSTALLATION AND Page 2.21 SETUP Making a Copy Try copying a document to make sure that the machine is working properly. For information on preparing a document, see page 4.1. 1 Choose a page to copy. 2 Turn the page face down and insert it into the document feeder. 3 Adjust the document guide to match the width of the document. Document guide The LCD displays ÔDOCUMENT LOADINGÕ then ÔDOCUMENT READYÕ when the sheet is gripped by the machine.
G-Chapter 2(US) 4/16/98 8:30 AM Page 2.22 2 INSTALLATION AND SETUP 4 6 15 OPTION Press COPY. 9 START/ENTER COPY JOURNAL 20 The LCD asks you to enter the number of copies from 1 to 99. E N T E R N UM B E R O F C O P I E S [ 1 - 99 ] >1 7 ABC MENU If you need two or more copies, enter the desired number of copies using the dial keypad. DEF 1 2 3 FLASH GHI JKL MNO 4 5 6 SPEED /DUAL PQRS TUV WXYZ 7 8 9 STOP OHD/V.REQ.
G-Chapter 2(US) 4/16/98 8:31 AM INSTALLATION Page 2.23 AND SETUP Setting the Date and Time The current date and time are shown in the LCD when the machine is on and ready for use (Standby Mode). The date and time are printed on all faxes you send. 1 ABC MENU Press MENU. 1 2 FLASH GHI JKL 4 5 SPEED /DUAL PQRS TUV STOP The LCD asks you to press the desired function button. 2 Press 08, DATE & TIME, on the one-touch keypad. PRESS F U NC T I ON B U T T ON MEMORY TX. 06 DELAY TX.
G-Chapter 2(US) 4/16/98 8:31 AM Page 2.24 2 INSTALLATION SETUP AND 4 Adjust the date and time by pressing or to move the blinking cursor under the number you want to change. SEARCH/DELETE MENU STOP FLASH ALARM HH (Hour) MM (Minute) = 01~12 = 01~31 = Last two digits of the year = 01~12 (or 00~23) = 00~59 SPEED /DUAL 5 MENU 1 Enter the correct number by using the number keypad. MM (Month) DD (Day) YY (Year) FLASH SPEED /DUAL Q.
G-Chapter 2(US) 4/16/98 8:31 AM INSTALLATION Page 2.25 AND SETUP Setting the Terminal ID (Your Name and Number) The terminal ID will be printed at the top of each page sent from your machine. 1 ABC MENU 1 2 FLASH GHI JKL 4 5 SPEED /DUAL PQRS TUV Press MENU. STOP The LCD asks you to press a function button. PRE SS F UNC T I ON B U T T ON O 2 O 06 07 G 08 /C C 09 S S 10 SET Press 07, SYSTEM ID, on the one-touch keypad. GROUP DIAL 11 SYSTEM ID 12 TX.
G-Chapter 2(US) 4/16/98 8:31 AM Page 2.26 2 INSTALLATION AND SETUP 4 START/ENTER COPY OHD/V.REQ. Press ENTER when the number in the display is correct. The LCD asks you to enter ID name. T E RM I NAL 5 MENU 1 Enter ID name (up to 40 characters) by using the number keypad. STOP FLASH SPEED /DUAL OHD/V.REQ. ID:_ ABC DEF 2 3 MNO GHI JKL 4 5 6 PQRS TUV WXYZ 7 8 9 For information on using the numeric keypad to enter letters, see page 2.27.
G-Chapter 2(US) 4/16/98 8:31 AM INSTALLATION Page 2.27 AND SETUP Using the Keypad to Enter Letters These instructions assume that the LCD is asking you to enter a name. 1 Press the number button labeled with the letter you want-press the button repeatedly until the letter appears in the display. MENU 1 STOP When the letter you want appears in the display, press another number key labeled with the next letter you want. Select additional letters in the same way.
G-Chapter 2(US) 4/16/98 8:31 AM Page 2.28 2 INSTALLATION AND SETUP Keypad Character Assignments Key Assigned numbers, letters, or characters 1 SPACE 2 A B C 2 3 D E F 3 4 G H I 4 5 J K L 5 6 M N O 6 7 P Q R S 8 T U V 8 9 W X Y Z 0 + - 1 , . 7 9 Ô / & 0 Adjusting Ringer Volume Set the machineÕs ringer volume by using the RINGER VOLUME switch on the back of machine. The fax machine will work normally even if the switch is set to OFF (•).
F-Chapter 3(US) 4/16/98 8:35 AM Chapter Page 1 Three AUTOMATIC DIALLING
F-Chapter 3(US) 4/16/98 8:35 AM Chapter Page 3.1 Three AUTOMATIC DIALLING One-Touch Dialling One-Touch Dialling lets you touch any one of the 20 One-Touch buttons located on the left of the machineÕs control panel to automatically dial a telephone or fax number. Storing a Number for One-Touch Dialling 1 01 MEMORY TX. Press and hold the onetouch button (01 through 20) that you want to assign. 06 Enter the number you want to store by using the number keypad (up to 34 digits).
F-Chapter 3(US) 4/16/98 8:35 AM Page 3.2 3 AUTOMATIC DIALLING 4 If you want to assign a name to the number, enter the name (up to 20 digits). MENU 1 STOP ABC DEF 2 3 MNO FLASH GHI JKL 4 5 6 SPEED /DUAL PQRS TUV WXYZ 7 8 9 OHD/V.REQ. If you assign a name to the number, you can take advantage of the Directory Dialling feature of your machine. For information about Directory Dialling, see page 3.10.
F-Chapter 3(US) 4/16/98 8:35 AM Page 3.3 AUTOMATIC DIALLING Dialling One-Touch Number 1 Press a one-touch button (01 through 20). 01 MEMORY TX. 06 02 03 DELAY TX. 07 04 POLLING 08 05 ADD/CANCEL 09 SELF-TEST A 10 SET GROUP DIAL 11 TX. CONFIRM 16 SYSTEM ID 12 STANDBY 17 DATE & TIME 13 OPTION 14 DIAL LIST 18 OPTION 19 Q.SCAN 15 JOURNAL COPY 20 PRINT HELP LIST The LCD displays the name, then the number stored in the selected one-touch button.
F-Chapter 3(US) 4/16/98 8:35 AM Page 3.4 3 AUTOMATIC DIALLING Speed Dialling You can store up to 50 telephone or fax numbers into 2-digit speed dial locations. Storing a Number for Speed Dialling FLASH 1 4 Press and hold SPEED. SPEED /DUAL OHD/V.REQ. 5 PQRS TUV 7 8 REDIAL/ PAUSE 0 The LCD asks you to enter the location number you wish to assign. 2 Enter a 2-digit location number (01 through 50) to which you want to assign the telephone or fax number. ENTE R REG I STER NO .
F-Chapter 3(US) 4/16/98 8:35 AM Page 3.5 AUTOMATIC DIALLING The LCD asks you to enter a name (up to 20 digits). 5 If you want to assign a name to the number, enter the name. NAM E : MENU 1 STOP ABC DEF 2 3 MNO FLASH GHI JKL 4 5 6 SPEED /DUAL PQRS TUV WXYZ 7 8 9 OHD/V.REQ. If you assign a name to the number, you can take advantage of the Directory Dialling feature of your machine. For information about Directory Dialling, see page 3.10.
F-Chapter 3(US) 4/16/98 8:35 AM Page 3.6 3 AUTOMATIC DIALLING Dialling a Speed Number 4 1 Press SPEED. SPEED /DUAL OHD/V.REQ. 5 PQRS TUV 7 8 REDIAL/ PAUSE 0 The LCD asks you to enter the location number. 2 Enter a 2-digit speed dial number. EN T E R L OC A T I ON NO . [ 01 - 50 ] > MENU 1 STOP ABC DEF 2 3 MNO FLASH GHI JKL 4 5 6 SPEED /DUAL PQRS TUV WXYZ 7 8 9 OHD/V.REQ.
F-Chapter 3(US) 4/16/98 8:35 AM Page 3.7 AUTOMATIC DIALLING Group Dialling You can send a document to multiple parties in a single operation. Before you can use this feature, you must coordinate and store the group numbers desired. Storing One-touch or Speed Dial Numbers for Group Dialling 1 Press MENU. ABC MENU 1 STOP FLASH SPEED /DUAL OHD/V.REQ. 2 Press 06, GROUP DIAL, on the one-touch keypad. MEMORY TX. 06 DELAY TX.
F-Chapter 3(US) 4/16/98 8:35 AM Page 3.8 3 AUTOMATIC DIALLING The LCD asks you to enter a one-touch button or speed dial number you wish to include in the group. EN T E R ON E - TOU C H o r SP E E D D I AL NO 5 01 02 MEMORY TX. Press a one-touch button. 06 03 DELAY TX. 04 POLLING 07 08 05 ADD/CANCEL 09 SELF-TEST ALA 10 SET GROUP DIAL 11 SYSTEM ID DATE & TIME 12 TX. CONFIRM 16 13 STANDBY OPTION 14 DIAL LIST 17 18 Q.
F-Chapter 3(US) 4/16/98 8:35 AM Page 3.9 AUTOMATIC DIALLING The LCD display asks you to enter a group name. 9 If you want to assign a name to the group, enter the name up to 20 digits. If not, skip this step. 10 G R O U P N AM E : MENU 1 STOP ABC DEF 2 3 MNO FLASH GHI JKL 4 5 6 SPEED /DUAL PQRS TUV WXYZ 7 8 9 OHD/V.REQ. For details on how to enter letters using the number keypad, see page 2.27. REDIAL/ PAUSE 0 COPY START/ENTER OHD/V.REQ.
F-Chapter 3(US) 4/16/98 8:35 AM Page 3.10 3 AUTOMATIC DIALLING Searching for a Number in Memory (Directory Dialling) There are two ways to search for a number in memory. You can either scan from A to Z sequentially, or you can search using the first letter of the name associated with the number. Searching Sequentially through Memory 1 SEARCH/DELETE Press SEARCH. STOP ALARM The LCD asks you to press or , or to choose a letter by pressing a number button.
F-Chapter 3(US) 4/16/98 8:35 AM Page 3.11 AUTOMATIC DIALLING Searching for a Particular First Letter 1 SEARCH/DELETE Press SEARCH. STOP ALARM The LCD asks you to press or , or to choose a letter by pressing a number button. 2 Press the button labeled with the letter you want to search for. TO S EARCH , P R E SS , , A-Z MENU 1 STOP FLASH SPEED /DUAL OHD/V.REQ.
E-Chapter 4(US) 4/16/98 8:37 AM Chapter Page 1 Four THE FAX MACHINE
E-Chapter 4(US) 4/16/98 8:37 AM Chapter Page 4.1 Four THE FAX MACHINE In this chapter, you will learn how to send and receive fax documents, and how to use the four fax reception modes and the Voice Request feature. Sending a Fax Acceptable Documents Max Single Sheet 2 or More Sheets 216 mm (W) X 356 mm (L) 216 mm (W) X 297 mm (L) Document Size 148 mm (W) X 148 mm (L) Min Effective Scanning Width 210 mm Automatic Document Feeder capacity Thickness of document 0.07 to 0.
E-Chapter 4(US) 4/16/98 8:37 AM Page 4.2 4 THE FAX MACHINE Setting Document Resolution and Contrast We recommend sending documents printed using a typewriter, felt tip pen, black ink, or laserwriter. The paper should be white or very light, and of normal weight-not cardboard. Blue lines on a ruled pad donÕt fax well. If you send documents with unusual contrast characteristics, including photographs, you can adjust the resolution and contrast to send a high-quality transmission of the documents.
E-Chapter 4(US) 4/16/98 8:37 AM Page 4.3 THE FAX MACHINE Loading Document Be sure that your document is free of staples, paper clips, and other foreign objects. 1 Turn the page face down. You can insert up to 30 sheets at a time. If you insert more than one sheet, make sure the bottom sheet enters first. Stagger the leading edge of the sheets slightly, and insert the sheets with a slight push to ensure smooth feeding. 2 Adjust the document guides to match the width of the document.
E-Chapter 4(US) 4/16/98 8:37 AM Page 4.4 4 THE FAX MACHINE Using Quick Scan You can send a fax using Quick Scan feature. The machine will quickly scan the document. To enable this feature, press MENU and Q.SCAN on the one-touch keypad before dialling the other machine. The LCD displays ÔQUICK SCAN IS ENABLEDÕ for 2 seconds. Notes : ¥ To cancel this feature, press MENU and Q.SCAN again before you send a fax. The LCD displays ÔQUICK SCAN IS DISABLED.
E-Chapter 4(US) 4/16/98 8:37 AM Page 4.5 THE FAX MACHINE Sending a Fax After Talking For hands-off operation, you can press OHD. To adjust speaker volume, press or while you hear tones from the speaker, and select the desired loudness. 1 Pick up the handset. The LCD displays ÔPHONE.Õ 2 Using the number keypad, enter the number of the remote fax machine. JUN - 14 1996 P H ON E MENU 1 STOP FLASH SPEED /DUAL OHD/V.REQ.
E-Chapter 4(US) 4/16/98 8:37 AM Page 4.6 4 THE FAX MACHINE Confirming Transmission When the last page of your document has been sent successfully, the machine beeps and returns to Standby mode. JUN - 14 1996 FR I 1 0 : 3 0 AM 1 0 0% If something went wrong during your fax transmission, an error message appears in the display. For a listing of LCD error messages and their meanings, see page 8.4. If you receive an error message, press STOP to clear the message and try to send the document again.
E-Chapter 4(US) 4/16/98 8:37 AM Page 4.7 THE FAX MACHINE Receiving a Fax Reception Modes Your multi-function machine has four reception modes: ¥ In TEL mode, automatic fax reception is turned off. You can receive a fax only by manually pressing START. ¥ In FAX mode, the machine answers an incoming call and immediately goes into receive mode, waiting for a fax to be sent. ¥ In TEL/FAX mode, the machine answers an incoming call expecting to receive a fax.
E-Chapter 4(US) 4/16/98 8:37 AM Page 4.8 4 THE FAX MACHINE Receiving in FAX Mode 1 Press RCV.MODE repeatedly until the FAX lamp lights. FAX ANS/FAX FINE TEL/FAX S. FINE RCV. MODE MENU 1 RESOLUTION DARKEN PHOTO LIGHTEN CONTRAST ABC DEF 2 3 You can change the number of rings. For more information, see page 6.9. 2 When you get a call, the machine answers the call on the second ring and receives a fax automatically. To adjust ringer volume, see page 2.28.
E-Chapter 4(US) 4/16/98 8:38 AM Page 4.9 THE FAX MACHINE Receiving in ANS/FAX Mode 1 FAX ANS/FAX Press RCV.MODE until both FAX and TEL/FAX lamps light. TEL/FAX RCV. MODE MENU 1 FINE S. FINE RESOLUTION DARKEN PHOTO LIGHTEN To use this mode, you have to attach an answering machine to your fax machine (see page 2.5).
E-Chapter 4(US) 4/16/98 8:38 AM Page 4.10 4 THE FAX MACHINE 4 Replace the handset. The machine begins receiving and returns to standby mode when the reception is complete. Cancelling Reception 1 Press STOP to cancel reception at any time. STOP FLASH ALARM SPEED /DUAL START/ENTER OHD/V.REQ. REDIAL/ PAUSE The machine continues to receive the fax and the LCD displays a message warning you that the machine is in use. 2 Press STOP again before the LCD message disappears.
E-Chapter 4(US) 4/16/98 8:38 AM Page 4.11 THE FAX MACHINE Using an Extension Telephone You can receive a fax from someone you are talking to on the extension telephone without having to go to the fax machine. 1 When you receive a call on the extension phone and hear fax tones, press the buttons Ô 9 Ô (star nine star) on the extension telephone. 7 8 0 The machine receives the document. 9 Press the buttons slowly in sequence.
E-Chapter 4(US) 4/16/98 8:38 AM Page 4.12 4 THE FAX MACHINE Voice Request If youÕre sending or receiving a document and need to speak to the other person during the same phone call, use Voice Request to alert the person at the remote site. You can also respond to a Voice Request made by the person at the remote end. Sending a Voice Request 1 Press V.REQ while a document is being sent or received. Voice Request signal is sent to the remote fax machine after the document has been sent or received.
E-Chapter 4(US) 4/16/98 8:38 AM Page 4.13 THE FAX MACHINE Answering a Voice Request If you donÕt answer the Voice Request within 15 seconds, the machine prints out the number that made the Voice Request, and the time and date the request was made. See ÔCall Back MessageÕ below. 1 When the phone rings, pick up the handset and answer it. If the Voice Request occurred while receiving, you can resume receiving on the same line after talking with the other end by pressing START.
D-Chapter 5(US) 4/16/98 8:39 AM Chapter Page 1 Five ADVANCED OPERATIONS
D-Chapter 5(US) 4/16/98 8:39 AM Chapter Page 5.1 Five ADVANCED OPERATIONS In this chapter, you will learn other ways to send and receive faxes to save transmission costs by sending at preset times, to maintain the privacy of sensitive documents, and to save time by sending the same documents to many different locations. Note : You can store a maximum of 20 different sending or polling jobs in memory.
D-Chapter 5(US) 4/16/98 8:39 AM Page 5.2 5 ADVANCED OPERATIONS 4 Enter the number of the remote machine (up to 34 digits). MENU ABC DEF 2 3 MNO 1 STOP FLASH SPEED /DUAL OHD/V.REQ. GHI JKL 4 5 6 PQRS TUV WXYZ 7 8 9 You can press a one-touch button, a 2-digit Speed Dial number, or a one-touch Group Dial button. The stored number and name appear in the display. REDIAL/ PAUSE 0 5 COPY START/ENTER OHD/V.REQ. Press ENTER when the number appears correctly in the display.
D-Chapter 5(US) 4/16/98 8:39 AM Page 5.3 ADVANCED OPERATIONS Delayed Transmission You can set up your machine to send a fax at a later time when you will not be present. For details on how to load a document, see page 4.3. 1 Load the document. Choose the resolution and contrast, if necessary. FAX ANS/FAX FINE TEL/FAX S. FINE RCV. MODE RESOLUTION MENU 2 DEF 2 3 ABC MENU Press MENU. 1 2 FLASH GHI JKL 4 5 SPEED /DUAL PQRS TUV 7 8 STOP OHD/V.REQ.
D-Chapter 5(US) 4/16/98 8:40 AM Page 5.4 5 ADVANCED OPERATIONS 5 START/ENTER COPY OHD/V.REQ. Press ENTER when the number appears correctly in the display. The LCD asks you if you want to enter another fax number to send the same document to another location. The machine displays the ÔANOTHER FAX NUMBER?Õ message repeatedly up to 10 times each time you enter another fax number using manual dialling, One-Touch, or 2-digit Speed Dialling (you can not use Group number for another fax number).
D-Chapter 5(US) 4/16/98 8:40 AM Page 5.5 ADVANCED OPERATIONS The LCD displays the current time on the upper line and asks you to enter the start time when the fax is to be sent. CU R R EN T S TAR T 9 DEF 2 3 GHI JKL MNO 4 5 6 PQRS TUV WXYZ 7 8 9 1 STOP FLASH SPEED /DUAL OHD/V.REQ. Enter the time in 24-hour format. For example, enter 2230 for 10:30 P.M. ABC MENU Enter the time by using the number keypad.
D-Chapter 5(US) 4/16/98 8:40 AM Page 5.6 5 ADVANCED OPERATIONS Polling Polling is when one fax machine requests another to send a document. This is useful when the person with the original document to be sent is not in the office. The person who wants to receive the document calls the machine holding the original and requests that the document be sent. In other words, it ÒpollsÓ the machine holding the original.
D-Chapter 5(US) 4/16/98 8:40 AM Page 5.7 ADVANCED OPERATIONS The LCD asks if you want to enter a Poll code. 4 If you want to use a Poll code, select Ô1:ONÕ by pressing 1 or by using or button and entering a 4-digit Poll code (except for 0000). or If you do not want to secure the transmission with a Poll code, select Ô2:OFFÕ by pressing 2 or by moving the cursor using or button.
D-Chapter 5(US) 4/16/98 8:40 AM Page 5.8 5 ADVANCED OPERATIONS Polling a Remote Machine 1 Lift the handset or press OHD, and enter the number of the remote machine. ABC MENU 1 2 3 FLASH GHI JKL MNO 4 5 6 SPEED /DUAL PQRS TUV WXYZ 7 8 9 STOP OHD/V.REQ. The remote machine must be ready for your call. DEF REDIAL/ PAUSE 0 2 ABC MENU 1 When you hear a fax tone from the remote machine, press MENU. STOP FLASH SPEED /DUAL OHD/V.REQ.
D-Chapter 5(US) 4/16/98 8:40 AM Page 5.9 ADVANCED OPERATIONS Adding Documents To a Standby Operation You can add documents to a Delayed or Polling Transmission previously reserved in your machineÕs memory. Prior to performing this procedure, make a printout of the Standby Job list and confirm the particular operation to which your document will be added. Confirming the Operation Number 1 ABC MENU 1 Press MENU. STOP FLASH SPEED /DUAL OHD/V.REQ.
D-Chapter 5(US) 4/16/98 8:40 AM Page 5.10 5 ADVANCED OPERATIONS Adding Documents To a Standby Operation in Memory For details on how to load a document, see page 4.3. 1 Load a document. Choose the resolution and contrast, if necessary. FAX ANS/FAX FINE TEL/FAX S. FINE RCV. MODE RESOLUTION MENU 1 2 ABC DEF 2 3 ABC 1 2 FLASH GHI JKL 4 5 SPEED /DUAL PQRS TUV 7 8 STOP OHD/V.REQ. 3 01 MEMORY TX. 06 GROUP DIAL TX. CONFIRM 03 DELAY TX.
D-Chapter 5(US) 4/16/98 8:40 AM Page 5.11 ADVANCED OPERATIONS The LCD asks you to enter a 2-digit operation number. 6 Enter the 2-digit operation number to which you want to add document. 7 ENTE R 2 -D I G I T O P E R A T I ON N O . > ABC MENU DEF 1 2 3 FLASH GHI JKL MNO 4 5 6 SPEED /DUAL PQRS TUV WXYZ 7 8 9 STOP OHD/V.REQ. REDIAL/ PAUSE 0 COPY START/ENTER OHD/V.REQ. Press ENTER. The LCD asks you to confirm the operation number. 8 ADD TO 02 ? COPY START/ENTER OHD/V.
D-Chapter 5(US) 4/16/98 8:40 AM Page 5.12 5 ADVANCED OPERATIONS Cancelling a Standby Operation You can cancel a previously set Delayed or Polling transmission. Prior to performing this procedure, make a printout of the Standby Job list and confirm the operation number you want to cancel. For details on confirming the operation number, see page 5.9. 1 ABC MENU 1 Press MENU. STOP FLASH SPEED /DUAL OHD/V.REQ. 2 Press 04, ADD/CANCEL, on the one-touch keypad. 01 02 MEMORY TX.
D-Chapter 5(US) 4/16/98 8:40 AM Page 5.13 ADVANCED OPERATIONS 5 COPY START/ENTER OHD/V.REQ. Press ENTER. The LCD asks you to confirm the operation number. 6 C AN C E L 02 OP E RAT I ON ? COPY START/ENTER OHD/V.REQ. Press ENTER if the number is correct. The LCD asks you to enter another operation number, if you need. 7 Repeat steps 4-6 to cancel another standby operation. To return to Standby mode, press STOP. ENTE R 2 -D I G I T O P E R A T I ON N O .
C-Chapter 6(US) 4/16/98 8:41 AM Chapter Page 1 Six SPECIAL FEATURES
C-Chapter 6(US) 4/16/98 8:41 AM Page 6.1 Chapter Six SPECIAL FEATURES Using REDIAL/PAUSE The REDIAL/PAUSE button has two functions. It can be used to redial the number you last called or it can be used to insert a pause in a number when you are setting up a One-Touch or Speed Dial number. The redial memory in your machine can hold the last 5 numbers called. If you have dialled the same number as one of the 5 last-dialled numbers, the machine does not count that number as a redial number.
C-Chapter 6(US) 4/16/98 8:42 AM Page 6.2 6 SPECIAL FEATURES 2 Press or to move downward or upward through memory until you find the number you want. 3 Each time you press the button, another one of the 5 last-called numbers appears in the display. SEARCH/DELETE STOP ALARM START/ENTER COPY OHD/V.REQ. When the number you want appears in the LCD display, press START to dial. If a document is loaded in the document tray, the machine automatically begins to SEND. To stop redialling, press STOP.
C-Chapter 6(US) 4/16/98 8:42 AM Page 6.3 SPECIAL FEATURES 2 7 8 9 REDIAL/ PAUSE When the remote phone answers, press . 0 Any numbers you now press will be sent as Touch Tones for the remainder of the call. 3 Dial the remaining numbers required by the service. ABC MENU 2 3 GHI JKL MNO 4 5 6 SPEED /DUAL PQRS TUV WXYZ 7 8 9 OHD/V.REQ. The machine returns to the pulse mode after you finish the call.
C-Chapter 6(US) 4/16/98 8:42 AM Page 6.4 6 SPECIAL FEATURES Chain Dialling a Memory Number When using special computer services, such as alternate long distance carriers, credit card calls, or bank-by-phone, you must dial the telephone number of the service and wait for the computer to answer before continuing. The length of time before the computer answers can vary, so using a pre-programmed pause after a service number is not advised.
C-Chapter 6(US) 4/16/98 8:42 AM Page 6.5 SPECIAL FEATURES Help List You can print a Help list of the machineÕs basic functions and commands to use as a quick reference guide. 1 ABC MENU Press MENU. 1 2 FLASH GHI JKL 4 5 SPEED /DUAL PQRS TUV 7 8 STOP OHD/V.REQ. 2 Press 16, HELP LIST, on the one-touch keypad. TX. CONFIRM 16 STANDBY 17 DIAL LIST 18 OPTION 19 JOURNAL 20 PRINT HELP LIST The machine prints the Help list.
C-Chapter 6(US) 4/16/98 8:42 AM Page 6.6 6 SPECIAL FEATURES User Reports Your fax machine can print reports containing useful information - standby job, option setting, etc. The following reports are available: Selectable Reports ¥Confirmation Report - This report can be printed on command or, by selecting the appropriate user option, automatically after each document you send. ¥Standby Job List - This list shows the currently stored documents for delayed or polling transmission.
C-Chapter 6(US) 4/16/98 8:42 AM Page 6.7 SPECIAL FEATURES 11 2 Press the function button (one-touch button 11 through 16) that corresponds to the list you want to print. TX. CONFIRM 16 PRINT HELP LIST 12 STANDBY 17 13 14 DIAL LIST 18 15 OPTION 19 JOURNAL 20 11 : TX. CONFIRMATION REPORT 12 : STANDBY JOB LIST 13 : DIAL NO. (telephone numbers) LIST 14 : OPTION LIST 15 : TX/RX JOURNAL 16 : HELP LIST The selected list is printed. CHAPTER SIX : SPECIAL FEATURES 6.
C-Chapter 6(US) 4/16/98 8:42 AM Page 6.8 6 SPECIAL FEATURES User Options Your fax machine has various user-selectable features. These options are preset at the factory, but you may need to change them. To find out how the options are currently set, print an Option report. For more information on printing a report, see page 6.6. Setting an Option 1 ABC MENU Press MENU. 1 2 FLASH GHI JKL 4 5 SPEED /DUAL PQRS TUV STOP The LCD asks you to press the desired function buttons.
C-Chapter 6(US) 4/16/98 8:42 AM Page 6.9 SPECIAL FEATURES Selectable Options These instructions assume youÕve followed the steps above under ÔSetting an OptionÕ and the machine is asking if you want to change one of the options listed here. ¥ Contrast Level_Select the expected normal contrast level. DARKEN and LIGHTEN will be based on this normal setting. Enter a number from 1 through 7 on the number keypad. The higher number entered, the darker normal contrast selected.
C-Chapter 6(US) 4/16/98 8:42 AM Page 6.10 6 SPECIAL FEATURES ¥ ECM Communication (ECM COMM.)_This mode compensates for poor line quality and ensures accurate, error-free transmission with any other ECM-equipped facsimile machine. If the line quality is poor, transmission time may be increased when ECM is enabled. Press 1 to turn on the error correction feature. Press 2 to turn off the error correction feature.
C-Chapter 6(US) 4/16/98 8:42 AM Page 6.11 SPECIAL FEATURES Clearing Memory You can selectively clear information registered in your machineÕs memory. 1 ABC MENU Press MENU. 1 STOP FLASH SPEED 2 01 Press 05, SELF-TEST, on the one-touch keypad. MEMORY TX. 06 02 03 DELAY TX. 07 5 PQRS TUV POLLING 05 ADD/CANCEL 09 SELF-TEST 10 SET GROUP DIAL 11 TX. CONFIRM SYSTEM ID 12 DATE & TIME 13 STANDBY 3 Press JKL 4 04 08 2 GHI OPTION Q.
C-Chapter 6(US) 4/16/98 8:42 AM Page 6.12 6 SPECIAL FEATURES 5 SEARCH/DELETE Scroll to the options by pressing or repeatedly until you find the one you want to clear. 6 When memory you want appears in the display, press the number of memory you selected. The LCD asks if you are sure of the number. 7 STOP ALARM MENU 1 STOP ABC DEF 2 3 MNO FLASH GHI JKL 4 5 6 SPEED /DUAL PQRS TUV WXYZ 7 8 9 OHD/V.REQ.
B-Chapter 7(US) 4/16/98 8:43 AM Chapter CARE AND Page 1 Seven MAINTENANCE
B-Chapter 7(US) 4/16/98 8:43 AM Chapter CARE AND Page 7.1 Seven MAINTENANCE Cleaning the Document Scanner To keep your machine working properly, occasionally clean the white roller, ADF rubber, and the scanning glass. If they are dirty, documents sent to another fax machine wonÕt be clear. Note : Do not turn the power off to clean the scanner, as documents stored in memory will be lost. 1. Open the control panel. B 2.
B-Chapter 7(US) 4/16/98 8:43 AM Page 7.2 7 CARE AND MAINTENANCE 4. Clean the ADF rubber piece also. ADF rubber 5. Carefully wipe the scanning glass with a soft, dry cloth. If the glass is very dirty, first wipe it with a slightly dampened cloth, then with a dry cloth. Be very careful not to scratch the glass surface. 6. Replace the roller in reverse order, and then close the control panel firmly until it clicks into place. 7.
B-Chapter 7(US) 4/16/98 8:43 AM CARE AND Page 7.3 MAINTENANCE Printer Cartridge Maintenance To get the maximum benefit from your print cartridges: ¥ Do not remove a print cartridge from its packaging until you are ready to install it. ¥ Do not refill print cartridge. The warranty will not cover damage caused by using refilled cartridges. ¥ Store the print cartridge in the same environment as the printer.
B-Chapter 7(US) 4/16/98 8:43 AM Page 7.4 7 CARE AND MAINTENANCE The LCD asks if you want to run the self-test. SELF TEST ? ( ENTER/ ) 4 SEARCH/DELETE Press , to choose the next menu. STOP ALARM The LCD asks if you want to check ink level. 5 CHECK I NK LEVEL? ( ENTER/ ) COPY START/ENTER OHD/V.REQ. Press ENTER to confirm it. The LCD displays the type of ink cartridge in the upper line and the blocks in the lower line. The number of block indicates the ink level.
B-Chapter 7(US) 4/16/98 8:43 AM CARE AND Page 7.5 MAINTENANCE Run Nozzle Test The print cartridge nozzle test helps you pinpoint any clogged nozzles. The nozzle test also cleans the print cartridge by cleaning (purging) the nozzles. A test line prints so you can see if the cleaning (purging) process was successful. Use the nozzle test : ¥ When you suspect the nozzles are clogged ¥ When characters are not printing completely To run the nozzle test 1 ABC MENU 1 Press MENU.
B-Chapter 7(US) 4/16/98 8:43 AM Page 7.6 7 CARE AND MAINTENANCE The machine prints out the nozzle test pattern. P L E A S E WA I T CL EAN ING . . . 5 Examine the test pattern. This example shows a test pattern of all nozzles functioning correctly on the black print cartridge. This example shows a test pattern of all nozzles functioning correctly on the color print cartridge. 6 Compare the diagonal line at the top and bottom of the test pattern. Look for a break in the diagonal line.
B-Chapter 7(US) 4/16/98 8:44 AM CARE AND Page 7.7 MAINTENANCE Wiping the Print Nozzles and Contacts When the print is not clear or dots are missing, the problem may be caused by dried ink on the: ¥ Print cartridge nozzles ¥ Print cartridge contacts ¥ Print cartridge carrier contacts and deflector 1. Remove the print cartridge. See ÔReplacing the Print CartridgeÕ on page 7.10. 2.
B-Chapter 7(US) 4/16/98 8:44 AM Page 7.8 7 CARE AND MAINTENANCE Cleaning the Cartridge Carrier Contacts and Deflector 1. Press the CARTRIDGE button to move the print cartridge carrier to the load position. BUSY PRINTER RESET CARTRIDGE FORM FEED Warning: All documents stored in memory will be lost when the power is turned off in step 2. 01 02 03 04 05 2. Unplug the power cord from the electrical outlet or the rear of the machine.
B-Chapter 7(US) 4/16/98 8:44 AM CARE AND Page 7.9 MAINTENANCE 5. Use a CLEAN, DRY CLOTH to clean the carrier deflector inside the printer. carrier deflector 6. Plug the power cord in. 7. Press the CARTRIDGE button. BUSY PRINTER RESET 01 02 CARTRIDGE 03 FORM FEED 04 05 8. Install the print cartridge. See ÔReplacing the print cartridgeÕ on page 7.10.
B-Chapter 7(US) 4/16/98 8:44 AM Page 7.10 7 CARE AND MAINTENANCE Replacing the Print Cartridge The print cartridge includes the ink supply and the printhead. Each time you replace the print cartridge, you are replacing the printhead as well. When you notice that the print becomes light or ÔINK OUTÕ appears in the display, replace your cartridge. ¥ Your machine knows which print cartridge is installed and keeps separate ink low counts for the color and black print cartridges.
B-Chapter 7(US) 4/16/98 8:44 AM CARE AND Page 7.11 MAINTENANCE 3. While pushing the cartridge holder away from you, pull the print cartridge handle toward you, until it clicks. Cartridge Cartridge holder 4. Remove the print cartridge. 5. Remove a new print cartridge from its packaging and carefully remove the tape covering the print head. Hold the print cartridge by the colored top or black areas only. Do not touch the copper area. 6.
B-Chapter 7(US) 4/16/98 8:44 AM Page 7.12 7 CARE AND MAINTENANCE 7. Replace the top cover and the control panel. 8. Press the CARTRIDGE button. Use ÔInstall CartridgeÕ tab on your PC for a color cartridge. BUSY PRINTER RESET CARTRIDGE FORM FEED The print cartridge moves to the far right. 01 LCD displays ÔCARTRIDGE IS 1:NEW 2:USED.Õ 9. Select Ô1:NEWÕ by using or , or by pressing the 1 button, then press START.
B-Chapter 7(US) 4/16/98 8:44 AM CARE AND Page 7.13 MAINTENANCE Notes : ¥ If you received fax with the color cartridge installed, you cannot get the fax printed until replacing it with mono cartridge. ¥ When you install a new cartridge, you must select Ô1:NEW.Õ When you install a used cartridge, select Ô2:USEDÕ, which helps you monitor the amount of ink remaining. If you mix up several used cartridges, it will be difficult to check the amount of ink remaining.
A-Chapter 8(US) 4/16/98 8:46 AM Chapter Page 1 Eight TROUBLESHOOTING
A-Chapter 8(US) 4/16/98 8:46 AM Chapter Page 8.1 Eight TROUBLESHOOTING In this chapter you will learn how to clear document jams, what the various error messages mean, how to fix problems. Clearing Jams Document Jams During Transmission If a document jams during transmission, ÔDOCUMENT JAMÕ appears in the LCD display. DO NOT pull the document out of the slot. Doing so could harm your machine. 1. Open the control panel. 2. Carefully remove the jammed document. 3.
A-Chapter 8(US) 4/16/98 8:46 AM Page 8.2 8 TROUBLESHOOTING Paper Jams During Printing If the fax paper jams while you are receiving, ÔPAPER JAMÕ appears in the LCD display. DO NOT pull it out. Doing so could harm the fax machine. IF THE PAPER IS JAMMED IN THE RECEIVED PAPER OUTPUT AREA Remove the jammed paper by hand as shown. IF THE PAPER IS JAMMED IN THE PAPER FEED AREA 1. Push the paper load lever away from you to open the sheet feeder. Paper load lever 2.
A-Chapter 8(US) 4/16/98 8:47 AM Page 8.3 TROUBLESHOOTING 3. After removing the jammed paper, load paper with the print side facing you. Hold the left paper guide and move it to the right to match the width of the paper. 4. Pull the paper load lever toward you to close the sheet feeder. 5. Press the PRINTER RESET button. (if your machine is SF4100 or SF4200) BUSY PRINTER RESET For SF4000, press the STOP button. 01 02 CARTRIDGE 03 04 FORM FEED 05 CHAPTER EIGHT : TROUBLESHOOTING 8.
A-Chapter 8(US) 4/16/98 8:47 AM Page 8.4 8 TROUBLESHOOTING LCD Error Messages Display 8.4 CHAPTER EIGHT Meaning ALREADY SET The number you chose is already set for another fax number you are setting up now. This message also appears when you try to setup another polling transmission when one polling is already setup. ALREADY SET IN GROUP The one-touch button or 2-digit speed number you chose is already set in the group you are storing now.
A-Chapter 8(US) 4/16/98 8:47 AM Page 8.5 TROUBLESHOOTING Display IN USE EXT.PHONE PRESS [START] Meaning The extension phone is in use now. If you press START, you can speak with the other party in the MultiJet machine. IT IS GROUP NO. ITSELF The one-touch button you chose is the group button you are storing now. IT IS USING IN MEMORY JOB The number you tried to delete or change is currently used for the memory job being waited to send or poll at a specified time.
A-Chapter 8(US) 4/16/98 8:47 AM Page 8.6 8 TROUBLESHOOTING Display PAPER OUT Meaning Printer is out of paper. If paper is run out while printing a fax, the machine restarts fax printing when paper is loaded. If paper is run out while printing a PC file, you have to press the FORM FEED button after paper loading according to the instruction on the Window driver.
A-Chapter 8(US) 4/16/98 8:47 AM Page 8.7 TROUBLESHOOTING Fixing Problems Your problem may be listed on page 8.4 in the ÔLCD Error MessagesÕ section. Below are other problems you can solve yourself. If not, call the service company shown on the ÒWarranty Information.Ó Fax Problems Problem The machine is not working, there is no display and the buttons are not working. Solution Unplug the machine and plug it in again. Check your socket is live. Check the phone is connected properly. No dial tone.
A-Chapter 8(US) 4/16/98 8:47 AM Page 8.8 8 TROUBLESHOOTING Problem Solution The machine sending you the fax may be faulty. The fax you receive has got blank bits on it. A noisy phone line can cause line errors. Check your machine by making a copy. Spots on or lines missing from the fax you receive. You are receiving poor quality copies. 8.8 CHAPTER EIGHT Check if your phone line is noisy. Check if the print head is clean by making a copy.
A-Chapter 8(US) 4/16/98 8:47 AM Page 8.9 TROUBLESHOOTING Print Quality Problems Problem Solution Make sure the DRAFT mode is not selected. Check ÔInk LevelÕ to see the amount of ink remaining. See page 7.3. If the print cartridge has completely run out, ÔINK OUTÕ is displayed in the LCD. Install a new print cartridge. See ÔReplacing the Print CartridgeÕ on page 7.10. Light or blurred characters. Make sure you are using the correct type of paper. See ÔPaper Type and SizesÕ on page 2.
A-Chapter 8(US) 4/16/98 8:47 AM Page 8.10 8 TROUBLESHOOTING Printing Problems Problem Printer has missing or damaged parts. Solution Call Samsung Technical Support or contact your point of purchase. Make sure a print cartridge has been installed. Printer seems to be printing, but no characters are printing. Make sure the tape was removed from the print cartridge. Make sure the printer has paper. If ÔINK OUTÕ is displayed, install a new print cartridge. See ÔReplacing the Print CartridgeÕ on page 7.
A-Chapter 8(US) 4/16/98 8:47 AM Page 8.11 TROUBLESHOOTING Paper Feeding Problems Problem Paper is jammed during printing. Solution Clear paper jam. See page 8.2. Make sure there is not too much paper in the automatic sheet feed. The automatic sheet feed can hold up to 100 sheets of paper. Paper sticks together. Make sure you are using the correct type of paper. See ÔPaper Type and SizesÕ on page 2.7. Remove paper from the automatic sheet feed and flex or fan the paper.
A-Chapter 8(US) 4/16/98 8:47 AM Page 8.12 8 TROUBLESHOOTING Problem Solution Make sure the envelope guides have been turned to the envelope load position. Envelopes skew or fail to feed correctly. Make sure envelopes are loaded behind the envelope guides. Make sure the paper guide do not cause envelopes to bow in the automatic sheet feed. Make sure the paper load lever is closed. Transparencies stick together in printer exit tray Use only recommended transparencies.
A-Chapter 8(US) 4/16/98 8:47 AM Page 8.