SGH-t709 P O R T A B L E T r i - B a n d T E L E P H O N E User Guide Please read this manual before operating your phone, and keep it for future reference. UVFE5_1.
Intellectual Property All Intellectual Property, as defined below, owned by or which is otherwise the property of Samsung or its respective suppliers relating to the SAMSUNG Phone, including but not limited to, accessories, parts, or software relating there to (the “Phone System”), is proprietary to Samsung and protected under federal laws, state laws, and international treaty provisions.
Printed in Korea. GH68-08160A Openwave® is a registered Trademark of Openwave, Inc. RSA® is a registered Trademark RSA Security, Inc.
Table of Contents Activating Your Phone . . . . . . . . . . . . . . . . . . . . . . . . . . . . 6 Switching the Phone On or Off . . . . . . . . . . . . . . . . . . . . . 10 Setting Up Your Voice Mail . . . . . . . . . . . . . . . . . . . . . . . 11 Section 2: Understanding Your Phone . . . . . . . 13 Features of Your Phone . . . . . . . . . . . . . . . . . . . . . . . . . . View of Your Phone . . . . . . . . . . . . . . . . . . . . . . . . . . . . . Keys . . . . . . . . . . . . . . . . . . . . . . . . . .
Table of Contents Finding a Phonebook Entry . . . . . . . . . . . . . . . . . . . . . . . .57 Speed Dialing . . . . . . . . . . . . . . . . . . . . . . . . . . . . . . . . . .59 Editing a Caller Group . . . . . . . . . . . . . . . . . . . . . . . . . . . .60 Copying all SIM Phonebook Entries . . . . . . . . . . . . . . . . . .62 Deleting all of the Phonebook Entries . . . . . . . . . . . . . . . .62 My Name Card . . . . . . . . . . . . . . . . . . . . . . . . . . . . . . . . .
Reset Settings . . . . . . . . . . . . . . . . . . . . . . . . . . . . . . . . 110 My Files . . . . . . . . . . . . . . . . . . . . . . . . . . . . . . . . . . . . Audio Player . . . . . . . . . . . . . . . . . . . . . . . . . . . . . . . . . Voice Recognition . . . . . . . . . . . . . . . . . . . . . . . . . . . . . Games . . . . . . . . . . . . . . . . . . . . . . . . . . . . . . . . . . . . . Image Editor . . . . . . . . . . . . . . . . . . . . . . . . . . . . . . . . . Organizer . . . . . . . . . . . .
Table of Contents Potentially Explosive Environments . . . . . . . . . . . . . . . . .217 Emergency Calls . . . . . . . . . . . . . . . . . . . . . . . . . . . . . . .217 FCC Notice and Cautions . . . . . . . . . . . . . . . . . . . . . . . .218 Other Important Safety Information . . . . . . . . . . . . . . . . .219 Product Performance . . . . . . . . . . . . . . . . . . . . . . . . . . .220 Availability of Various Features/Ring Tones . . . . . . . . . . .221 Battery Standby and Talk Time . . . . . . . . .
Section 1: Getting Started Topics Covered • Activating Your Phone • Switching the Phone On or Off • Setting Up Your Voicemail Section 1: Getting Started 5 Section 1 This section describes how to start using your phone by activating your service and setting up your voice mail.
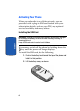
Activating Your Phone When you subscribe to a cellular network, you are provided with a plug-in SIM card loaded with your subscription details, such as your PIN, any optional services available, and many others. Section 1 Installing the SIM Card Important! The plug-in SIM card and its contacts can be easily damaged by scratching or bending, so be careful when handling, inserting, or removing the card. Keep all SIM cards out of reach of small children.
Activating Your Phone 3. Slide the SIM card into the SIM card socket so that the card locks into place. Make sure the gold contacts of the card face into the phone. Section 1 Note: When you need to remove the SIM card, slide it as shown, and take it out of the socket.
Section 1 4. Place the battery so that the tabs on the end align with the slots at the bottom of the phone (1). 5. Press the battery down until it clicks into place (2). Make sure that the battery is properly installed before switching on the phone. Charging a Battery Your phone is powered by a rechargeable Li-ion battery. A travel adapter comes with your phone for charging the battery. Use only approved batteries and chargers. Ask your local Samsung dealer for further details.
Activating Your Phone Note: For connection to an electrical supply not located in the U.S., you must use an adaptor of the proper configuration for the power outlet. Use of the wrong adapter could damage your phone and void your warranty. 3. When charging is finished, unplug the adapter from the power outlet and disconnect it from the phone by pressing the buttons on both sides of the connector (1) and pulling the connector out (2). Section 1: Getting Started 9 Section 1 2.
Note: You must unplug the adapter before you remove the battery from the phone during charging; otherwise, the phone could be damaged. Low Battery Indicator Section 1 When the battery is weak and only a few minutes of talk time remain, a warning tone sounds and the “Battery low” message repeats at regular intervals on the display. When this happens, your phone turns off the backlight to conserve the remaining battery power. When the battery level becomes too low, the phone automatically turns off.
Setting Up Your Voice Mail Setting Up Your Voice Mail For new users, follow the instructions below to set up voicemail: 1. Open your phone to access the keypad. 2. In Idle mode, press and hold the key on the keypad. You may be prompted to enter a password. 3. Follow the tutorial to create a password, a greeting, and your name. Section 1 Note: These steps may be different depending on your network.
Changing the Voice Mail Number Your SIM card gives you the default service number of the voice mail center. However, should you need to change the number, use the following procedures: 1. In Idle mode, press the Menu soft key to access the Menu mode. 2. Highlight Messages and press the Select soft key or the key. Section 1 3. Highlight Voice mail and press the Select soft key or the key. 4. Highlight Voice server number and press the Select soft key or the key.
Section 2: Understanding Your Phone Topics Covered • Features of Your Phone • View of Your Phone • Keys • Display Layout • Get More Help This section outlines some key features of your phone. It also describes the screen and the icons that are displayed when the phone is in use.
Features of Your Phone Your phone is lightweight, easy-to-use and offers many significant features. The following list outlines a few of the features included in your phone. • Wi-Fi® (Wireless Fidelity) capability • Voice Commands • Instant Messaging capability • Multimedia capability • Fun & Apps feature provides My files, audio player, camera, voice recognition, games, image editor, alarms, calendar, calculator, world time, unit conversion, timer, and stopwatch.
Keys Keys The following list correlates to the illustrations. 1. During a call, adjusts the earpiece volume. In Idle mode with the phone open, adjusts the ring volume. With the phone closed, turns on the display when held down. 2. Performs the functions indicated by the screen text on the bottom line of the display. Section 2 3. Makes or answers a call. In Idle mode, displays the Call records menu. 4. In Idle mode, accesses voice mail when held down. 5. Enters special characters.
9. Ends a call. Also switches the phone on and off when held down. In Menu mode, cancels your input and returns the phone to Idle mode. 10. In Idle mode, launches the WAP (Wireless Application Protocol) browser. In Menu mode, selects the highlighted menu options. 11. In Menu mode, scrolls through the menus and Phonebook. In Idle mode: • Down key: allows you to access your Contact list directly. • Up key: allows you to access the Camera or Camcorder feature directly.
Display Layout Display Layout The display has 4 areas: Icons Shows the received signal strength. The greater the number of bars, the stronger the signal. Appears when a new text message or voice mail has been received. Section 2 Appears when a new multimedia message has been received. Appears when you set an alarm to ring at a specified time. For details, see page "Alarm" on page 128. Appears when you are out of your service area. Appears when a call is in progress.
Appears when Silent Mode is active. Appears when Mute is active. Shows the level of your battery. The more bars you see, the more power you have remaining. Backlight A backlight illuminates the display and the keypad. When you press any key or slide the phone open, the backlight comes on. It goes off when no keys are pressed within a given period of time, depending on the setting in the Backlight menu. The display turns off after one minute to conserve battery power.
Get More Help 5. Highlight the On option. Use the Left or Right Navigation key to select the time that the backlight is on. You may choose between 15 seconds, 30 seconds, 1 minute, 3 minutes, or 10 minutes. 6. Press the Down key to take you to the Dim option. Use the Left or Right Navigation key to select the time that Dimming mode is on. You may choose between Off, 5 seconds, 15 seconds, 30 seconds, 1 minute, or 3 minutes. 7. Press the Save soft key to save your settings.
• About: this option offers general information about Get More Help including concept and site design, copyright information, and contact e-mail address. To access the browser options menu: 1. Press the Menu soft key to see the Browser Options. 2. Make a selection and press the Select soft key or the key. Note: The menus may vary, depending on your version of t-zones. Section 2 For more information on browser options, see "Selecting and Using Menu Options" on page 155.
Section 3: Call Functions Topics Covered • Making a Call • Adjusting the Call Volume • Answering a Call • Call Records • Silent Mode • Selecting Functions and Options This section describes how to make or answer a call. It also includes information on the features and functionality associated with making or answering a call.
Making a Call When the idle screen displays, enter the number you wish to dial and press the key. Note: When you activate the Auto redial option in the Extra settings menu, the phone will automatically redial up to 10 times when the person does not answer the call or is already on the phone, provided your call is not sent to voice mail. See page "Extra settings" on page 96 for further details. Making an International Call 1. Press and hold the key. The + character appears. 2.
Making a Call key to return to Idle mode. 2. Press the key to display a list of the most recent numbers used in the order you dialed or received them. 3. Use the Up and Down keys to scroll through the numbers and highlight the number you want. 4. To dial the number, press the key. Before you dial the number, you may press the Options soft key for the following options: • Details: displays details of the number including name, number, and dates and times of calls.
Adjusting the Call Volume During a call, if you want to adjust the earpiece volume, use the Volume keys on the left side of the phone. Press the key to increase the volume level and the key to decrease the level. In Idle mode, you can also adjust the ring volume using these keys while the phone is open. Answering a Call Section 3 When somebody calls you, the phone rings and displays the incoming call image. The caller’s phone number, or name if stored in Phonebook, displays. 1.
Call Records If the Up option in the Slide settings menu is set to Accept call, you can answer the call by simply sliding the phone open. If the Anykey answer option in the Extra Settings menu is activated, you can press any key to answer a call except for the key and the Reject soft key. Note: To reject an incoming call, press the Reject soft key or key. 2. End the call by closing the phone or pressing the key. Note: You can answer a call while using the Phonebook or menu features.
All calls This menu lets you view the 90 most recent calls you received, sent, and missed. The number or name, if already stored in your Phonebook, displays with the number of occurrences of each number. Note: at any time while you are in Call Records, you may use the Left or Right Navigation key to scroll between All calls, Missed calls, Incoming calls, and Outgoing calls. Missed calls This menu lets you view the 30 most recent calls you received, but did not answer.
Call Records 3. To scroll through the missed calls, press the Up or Down Navigation key. 4. To call the number displayed, press the key. 5. Press the Options soft key for the following options: • Details: displays details of the number including name, number, and dates and times of calls. • Call back: places a call back to the number. • Send message: allows you to send a text message, picture message, or voice note to the number. • Store to phonebook: stores the number in your phonebook.
Delete all This menu allows you to delete all of the records in each call record separately, or you can delete all of your call records at one time. 1. Highlight the type of calls you want to delete and press the Select soft key or the key to make a check mark. 2. Press the Delete soft key to delete the calls. 3. When a confirmation message displays, press the Yes soft key or key to confirm. Call time This menu lets you view the time log for calls made and received.
Silent mode Note: The password is preset to “00000000” at the factory. To change this password, see "Change password" on page 108. Silent mode Silent mode is convenient when you wish to stop the phone from making noise, in a theater for example. In Idle mode, press and hold the key until the “Silent Mode On” message and the Silent mode icon ( ) display. In Silent mode, instead of sounds, your phone will vibrate.
Press the left soft key for Menu mode. Press the right soft key to access the t-zones menu. Selecting Options To view the various functions and options available and to select the one you want: • Press the appropriate soft key. • To select the function displayed or the option highlighted, press the Select soft key or the key. • To view the next function or highlight the next option on a list, press the Down Navigation key. • To move back to the previous function or option on a list, press the Up key.
Selecting Functions and Options Options During a Call Your phone provides a number of control functions that you can use during a call. Putting a Call on Hold You can place the current call on hold whenever you want. You can make another call while you have a call in progress if your network supports this service. To place a call on hold, simply press the Options soft key, highlight the Hold option, then press the Select soft key or the key.
When you want to finish, end each call normally by pressing the key. Switching off the Microphone (Mute) You can temporarily switch your phone’s microphone off, so that the other person cannot hear you. Example: You wish to say something to a person in the room but do not want the person on the phone to hear you. To switch the microphone off temporarily: 1. Press the Options soft key and highlight Mute. 2. Press the Select soft key or the key. The other person can no longer hear you.
Selecting Functions and Options the keys, which allows you to press keys without hearing annoying key tones during a call. Note: To communicate with answering machines or computerized telephone systems, the Send DTMF option must be selected. Send DTMF You can use the Send DTMF option to send a key string or number during a phone call. For example, you can send a calling card number by DTMF while on a call. Select the Send DTMF option and enter a number. Press the OK soft key and the number is sent.
6. Highlight the View option and press the Select soft key or the key. The Contact is displayed. For further details about the Phonebook feature, see "Finding a Phonebook Entry" on page 57. Call Waiting You can answer an incoming call while you have a call in progress, if this service is supported by the network and you have set the Call waiting menu to Activate. You are notified of an incoming call by a call waiting tone. To answer a call while you have a call in progress: 1.
Selecting Functions and Options Setting up a Multi-Party Call 1. Call the first participant in the normal way. 2. Call the second participant in the normal way. The first call is automatically put on hold. 3. To join the first participant to the multi-party call, press the Options soft key or the key and select Join. Press the Select soft key or the key. 4. To add a new person to the multi-party call, call the new person in the normal way and then press the Options soft key or the key.
All of the multi-party call participants can now hear each other. Dropping One Participant 1. Press the Options soft key or the key and choose the Split option. Press the Select soft key or the key. The list of call participants appears. 2. Highlight the person you want to keep and press the Select soft key or the key. Press the Options soft key and highlight End held multiparty. Press the Select soft key or the key.
Section 4: Menu Navigation Section 4 Topics Covered • Menu Navigation • Menu Outline This section explains the menu navigation for your phone. It also includes an outline of all the available menus associated with your phone.
Section 4 Menu Navigation You can tailor the phone’s range of functions to your needs using menus and sub-menus. Menus and submenus can be accessed by scrolling using the Navigation keys or by using the shortcuts. Accessing a Menu Function by Scrolling 1. In Idle mode, press the Menu soft key to access Menu mode. 2. Scroll using the Navigation keys to reach a main menu, Settings for example. Press the Select soft key or the key to enter the menu. 3.
Menu Outline Example: Accessing the Security menu. 1. Press the Menu soft key. 2. Press the key for Settings. 3. Press the key for Security. Menu Outline The following list shows the menu structure and indicates the number assigned to each option. 1 Voice notes 2 Call records 2.1 2.2 2.3 2.4 2.5 2.6 All calls Missed calls Incoming calls Outgoing calls Delete all Call time 2.6.1 2.6.2 2.6.3 2.6.4 2.6.5 3 Last call time Total incoming Total outgoing Life time Reset timers t-zones 3.
Section 4 3.2 Favorites 3.3 Go to URL 3.4 Clear cache 4 IM 4.1 AIM 4.1.1 4.1.2 4.1.3 4.1.4 4.1.5 Sign on Saved conversations Offline conversations Settings Help 4.2 ICQ 4.2.1 4.2.2 4.2.3 4.2.4 4.2.5 Connect Saved conversations Offline conversations Settings Help 4.3 Yahoo! 4.3.1 4.3.2 4.3.3 4.3.4 4.3.5 5 Sign in Saved conversations Offline conversations Settings Help Messages 5.1 Create new 5.1.1 5.1.2 5.1.3 5.2 5.3 5.4 5.
Menu Outline 5.6 Templates Text template Picture message template Section 4 5.6.1 5.6.2 5.7 Voice mail 5.7.1 5.7.2 Call voice mail Voice server number 5.8 Delete all 5.9 Settings 5.9.1 5.9.2 Text message Picture message 5.10 Broadcast messages** 5.11 Memory status 6 Fun & Apps 6.1 My Files 6.1.1 6.1.2 6.1.3 6.1.4 6.1.5 6.2 6.3 6.4 6.5 6.6 6.7 Sounds Images Videos Music Memory status Audio player Camera Voice recognition Games Image editor Organizer 6.7.1 6.7.2 6.7.3 6.7.4 6.7.5 6.7.
Section 4 6.7.7 Stopwatch 7 Get More Help 8 Phonebook 8.1 8.2 8.3 8.4 8.5 8.6 8.7 8.8 Add new contact Contact list Group Speed dial My name card Own number FDN list Management 8.8.1 8.8.2 8.8.3 8.8.4 8.8.5 9 Default Saving Copy all to phone Sort by contacts Delete all Memory status Settings 9.1 Wi-Fi 9.1.1 9.1.2 9.1.3 9.1.4 9.1.5 9.1.6 9.1.7 Available Networks Saved Networks Quick Connect Turn Wi-Fi Off/On Get Security Key Add new network Wi-Fi Help 9.2 Time & Date 9.3 Phone settings 9.3.1 9.3.
Menu Outline 9.3.4 Extra settings 9.4 Display settings Wallpaper Interior display Brightness control Backlight Dialing display Calendar Show caller information Section 4 9.4.1 9.4.2 9.4.3 9.4.4 9.4.5 9.4.6 9.4.7 9.5 Sound settings 9.5.1 9.5.2 9.5.3 9.5.4 9.5.5 9.5.6 9.5.7 Incoming call Keypad tone Message tone Power on/off Slide tone Silent mode Extra tones 9.6 Network services 9.6.1 9.6.2 9.6.3 9.6.4 9.6.5 Call forwarding Call barring** Call waiting Network selection Caller ID 9.7 Security 9.7.
Section 4 9.8.3 9.8.4 9.8.5 9.8.6 My files Calendar Phonebook Games 9.9 Reset settings ** Shows only if supported by your SIM card.
Section 5: Entering Text Topics Covered • Changing the Text Input Mode • Using ABC Mode • Using T9 Mode • Using Number Mode Section 5 • Using Symbol Mode This section outlines how to select the desired text input mode when entering characters into your phone. This section also describes how to use the T9 predictive text entry system to reduce the number of key strokes associated with entering text.
Changing the Text Input Mode When using your phone, you will often need to enter text, such as when storing a name in your Phonebook, creating your personal greeting or scheduling events on your calendar. You can enter alphanumeric characters by using your phone’s keypad. Your phone has the following text input modes: • ABC mode: this mode allows you to enter letters by pressing Section 5 the key labeled with the letter you want. How many times you press the key determines which letter or number appears.
Using ABC Mode 1. To change the text input mode, press the Right soft key. The following options are available: : T9 mode : Number mode : Symbol mode : ABC mode 3. When the text input mode indicator that you desire is displayed, you may enter text in the text message box using the selected text input mode. Using ABC Mode To use ABC mode, use the number keys to enter your text. 1.
• And so on 2. Select the other letters in the same way. Section 5 • To enter periods, hyphens, or apostrophes, press the key. ABC mode applies grammar rules to ensure that correct punctuation is used. • To shift case in ABC mode, use the key. There are 3 cases: Initial capital, Capital lock, and Lower case. • You can move the cursor by using the Navigation keys. To delete letters, press the key. Press and hold the key to clear the display.
Using T9 Mode Section 5 Using T9 Mode T9 is a predictive text input mode that allows you to key in any character using single keystrokes. This text input mode is based on a built-in dictionary. To enter a word in T9 mode: 1. When you are in T9 mode, start entering a word by pressing the 2 to 9 keys. Press each key only once for each letter. Example: To enter “Hello” in T9 mode, press the 4, 3, 5, 5, and 6 keys.
The word that you are typing appears on the display. It may change with each key that you press. 2. Enter the whole word before editing or deleting the keystrokes. 3. When the word displays correctly, go to step 4. Section 5 If the word doesn’t display correctly, press the key to display alternative word choices for the keys that you have pressed. Example: Both “Of” and “Me” have the 6 and 3 keys. The phone displays the most commonly used choice first. 4. Insert a space by pressing the the next word.
Using Number Mode • To enter periods, hyphens, or apostrophes, press the key. T9 mode applies grammar rules to ensure that correct punctuation is used. • To shift case in T9 mode, use the key. There are 3 cases: Initial capital, Capital lock, and Lower case. • You can move the cursor by using the Navigation keys. To delete letters, press the clear the display. key.
52 Section 5
Section 6: Understanding Your Phonebook Topics Covered • Storing a Number in the Phone’s Memory • Storing a Number in the SIM Card • Finding a Phonebook Entry • Speed Dialing • Editing a Caller Group • Copying all SIM Phonebook Entries • Deleting all of the Phonebook Entries • My Name Card • Finding My Own Phone Number Section 6 • FDN List • Management This section describes how to manage your contacts by storing their name and number in your Phonebook.
Storing a Number in the Phone’s Memory The default for saving phone numbers to your phonebook is your phone’s memory. You can also save it to your SIM card or you can set your default so that whenever a new phonebook entry is created, you will be prompted to choose between Phone or SIM card. See "Default saving" on page 65 for information on how to change this setting. Also, numbers that have been stored on your SIM card can be copied to your phone’s memory.
Storing a Number in the SIM Card • Fax: assigns the number entered to the Fax entry. • Other: allows you to enter more detailed information for the entry. 6. Continue to scroll down using the Down Navigation key to enter Email address, Picture ID, Ringtone, Group, and Notes if desired. 7. Press the Save soft key or press the Options soft key and highlight the Save option and press the Select soft key or the key. The number is saved to your phone and the new contact information is displayed. 8.
location each time you add a new contact. See "Default saving" on page 65 for more information. Now that your phone is set up to store numbers to your SIM card, follow this procedure to store a number. 1. At the Idle screen, press the Down Navigation key to highlight Phonebook. Press the Select soft key. 2. Highlight the Add new contact option and press the Select soft key or the key. 3. Enter a name in the Name text box. Tab to the next text box by pressing the Down key.
Finding a Phonebook Entry The following options are available: • Edit: allows you to edit the name and number fields in the entry. • Send message: allows you to send a message to the selected number. You may choose between Text messages, Picture messages, or Voice notes. • Call: allows you to call the number. • Copy to: allows you to copy the number to your Phone, SIM card or FDN. • Send name card: allows you to send your name card via Text message or Picture message.
2. Highlight Contact list and press the Select soft key or the key. 3. Enter the first few letters of the name in the text box. The Phonebook entries are listed, starting with the first entry matching your input. 4. If needed, press the Up or Down Navigation key until the entry you want is highlighted. 5. Once you have found the entry, press the key to dial the number, or press the Options soft key to access the following Phonebook entry options: Section 6 • View: shows details of the Phonebook entry.
Speed Dialing • Send message: allows you to send a message to the selected number. You may choose between Text messages, Picture messages, or Voice notes. • Call: places a call to the number. • Copy to: allows you to copy the number to your phone, SIM card or FDN. • Send name card via: allows you to send your name card via Text message or Picture message. • Assign speed dial: allows you to assign a speed dial key number to the selected Phonebook entry.
2. Scroll to Speed dial by pressing the Up or Down Navigation key and press the Select soft key or the key. 3. Use the Up or Down Navigation key to select the number key to which you wish to assign the speed-dialing number. Select from the 2 to 9 keys, and press the Add soft key. 4. Highlight Contact list or FDN list and press the Select soft key or the key. 5. Highlight the entry that you want to assign the speed dial number to and press the Select soft key or the key.
Editing a Caller Group 6. To edit the Caller group name, modify the text in the Name text box. 7. To change the image associated with the Caller group, press the Down key to highlight the Picture ID icon. Press the key. The following options are available: 8. To change the ringtone associated with the Caller group, press the Down key to highlight the Ringtone icon. Press the key. The following options are available: • Default melodies: allows you to choose between 20 different melodies.
9. When you are finished making your changes, press the Save soft key. Your Caller group settings will be saved. 10. Press the key to return to Idle mode. Copying all SIM Phonebook Entries You can copy all SIM entries to the Phone using this option. When you copy entries to the phone, duplicate entries are created in your Phonebook. 1. At the Idle screen, press the Down Navigation key to highlight Phonebook. Press the Select soft key. 2. Highlight Management and press the Select soft key or the key. 3.
My Name Card Important! Once Phonebook entries have been deleted, they cannot be recovered. 1. At the Idle screen, press the Down Navigation key to highlight Phonebook. Press the Select soft key. 2. Highlight Management and press the Select soft key or the key. 3. Scroll to Delete all by pressing the Up or Down Navigation key and press the Select soft key or the key. 4. Press the key to place a check mark by the memory location you want to empty; All, Phone, SIM card, or SIM card (FDN).
highlight Phonebook. Press the Select soft key. 2. Highlight My name card and press the Select soft key or the key. 3. My Name Card opens with the Name field highlighted. 4. Enter information in each of the fields as desired. Use the Navigation keys to move between fields, then use the keypad to enter information. 5. When finished, press the Save soft key or press the Options soft key and highlight the Save option. Press the Select soft key or the key.
FDN List FDN List FDN (Fixed Dial Number) mode, if supported by your SIM card, allows you to restrict your outgoing calls to a limited set of phone numbers. The FDN List allows you to set up a list of numbers that your phone may dial. FDN mode must first be enabled in the Security settings. See "FDN mode" on page 109 for more information on changing this setting. To enable FDN mode, a PIN2 number is required. You can obtain your PIN2 from your service provider.
Copy all to phone This option allows you to copy all contacts from your SIM card to your phone. For more information, see "Copying all SIM Phonebook Entries" on page 62. Sort by contacts This option allows you to sort contacts stored to your phone’s memory, by first name or last name. Note: Contacts stored to your SIM card do not have first and last names as separate fields. Therefore, they will be sorted on the first letter of the name entered in the Name field.
Management 2. Highlight Management and press the Select soft key or the key. 3. Select the Memory status option by pressing the Up or Down Navigation key and press the Select soft key or the key. 4. When you are finished, press the soft key.
68 Section 6
Section 7: Messages Topics Covered • Voice Notes • Text Messages • Picture Messages • Inbox • Sentbox • Outbox • Drafts • Templates • Voice Mail • Delete All • Settings • Broadcast Messages (SIM Dependent) • Instant Messaging • Memory Status Section 7: Messages 69 Section 7 This section describes how to send or receive different types of messages. It also includes the features and functionality associated with messaging.
Types of Messages Your phone provides the following message types: • Voice Notes • Text Messages • Picture Messages • Voice Mail Messages • Broadcast Messages (SIM Dependent) • Instant Messaging Voice Notes In this menu, you can record a voice note of up to one minute long and then immediately send it by a Picture Messaging message. When you access this menu, a timer appears on the screen. 1. In Idle mode, press the Menu soft key to access Menu mode. 2.
Voice Notes • Send to: allows you to send the Voice note. • Play: plays back your Voice note. • Re-record: discards the Voice note and enables you to record another one. • Set default destination: allows you to remove or edit the default destination. • Save: saves the Voice note. 7. To send the Voice note, press the Send soft key. 8. Highlight one the following options: • Recent log: allows you to select a number or an address from the 20 last destinations you entered for sending the last messages.
13. When you have finished entering the destinations, press the Options soft key, highlight the Send option and press the Select soft key or the key. Your phone sends the message. After sending, the message is saved in the Sentbox. Text Messages Short Message Service (SMS) allows you to send and receive short text messages to and from other mobile phones.
Text Messages 3. Highlight the Create new option and press the Select soft key or the key. 4. Highlight the Text message option and press the Select soft key or the key. 5. Create your message. Notes: For further details about entering characters, see "Using ABC Mode" on page 47. You can enter up to 160 standard Alphabet characters per page in your message. The message can be up to 12 pages long for a total of 1920 characters. 6. When you finish entering your message, press the Options soft key.
The options for Bold and Italic are set by using the key to place a checkmark by them. Alignment options are Left, Center, and Right. • Back: allows you save to your draft folder without sending. 7. Highlight the Send option and press the Select soft key or the key. 8. Highlight one of the following options and press the Select soft key or the key: • Recent log: allows you to select from recipients of your previous messages.
Picture Messages Picture Messages This menu allows you to use the Multimedia Message Service. Picture Messaging is a messaging service that provides delivery of personal multimedia messages from phone to phone or from phone to e-mail. In addition to the familiar text content of text messages, multimedia messages can contain images, graphics, voice, and audio clips. A Picture Messaging message is a multimedia presentation in a single file. It is not a text file with attachments.
3. Highlight the Create new option and press the Select soft key or the key. 4. Highlight the Picture message option and press the Select soft key or the key. 5. Highlight Subject and press the key. 6. Enter the subject of your message and press the key. Note: For more information about entering characters, see "Using ABC Mode" on page 47. 7. To add a picture or video clip, highlight the Image & Video option and press the key. 8.
Picture Messages 12. Highlight one of the following options and press the Select soft key or the key. • Record audio: allows you to record a new audio message. • My sounds: allows you to select a sound from your My sounds folder. • Voice list: takes you to the Voice list folder to select a voice message to add. 13. Select a Sound or Voice memo and press key. Press the Add soft key to add the sound to your message. 14. To add a message, highlight Message and press the key. 15.
18. After selecting where to send your message, press the Options softkey and highlight the Send option. Press the Select soft key or the key. Your phone sends the message. Inbox The Inbox stores messages that you have received. You can tell what kind of message it is by the icon displayed. If the icon envelope is open then the message has been read, otherwise it will appear closed.
Inbox 2. Using the Navigation keys, scroll to the Messages icon. Press the Select soft key or the key to enter the menu. 3. Highlight the Inbox option and press the Select soft key or the key. Viewing a Text Message in Inbox 1. Select a text message from the list and press the Options soft key. The following options will appear: • View: read the text message. • Reply via: allows you to send a reply to the sender by sending a text or picture message. • Call back: places a call to the selected number.
• Reply via: allows you to send a reply to the sender by sending a text or picture message. • Call back: places a call to the selected number. • Forward: allows you to forward the message to another number. • Delete: allows you to delete the message. • Move to phone: allows you to move the message from the SIM card to the phone’s memory. This option is only available for messages stored in the SIM card. • Move to SIM card: allows you to move the message from the phone’s memory to the SIM card.
Inbox • Delete: deletes the selected picture message or all messages. • Sort by: allows you to sort messages by Read/Unread, Date, Name, Type, Size, or Subject. • Protection: allows you to lock the message to protect it from being deleted. • Properties: shows you information about the message, such as time and date the message was received, the sender’s email address or phone number, recipient’s e-mail address or phone number, Cc, message size, priority, and class. 2.
• Save media: allows you to save the message to different areas or to your vCard or vCalendar. • Protection: allows you to lock the message to protect it from being deleted. • Properties: shows you information about the message, such as time and date the message was received, the sender’s e-mail address or phone number, recipient’s e-mail address or phone number, Cc, message size, priority, and class. Viewing a Voice Note in Inbox 1. Highlight a Voice Note from the list and press the Options soft key.
Inbox 2. Highlight the View option and press the Select soft key or the key to listen to the message contents. While listening to the message, you may choose the following options by pressing the Options soft key: • Reply via: allows you to send a reply to the sender by sending a text or picture message or a voice note. • Reply all via: allows you to send a reply to All by sending a picture message or voice note. • Call back: places a call to the selected number.
1. Select a Push message from the list and press the Options soft key. The following options will appear: • View: listen to the Voice note and view message details. • Delete: allows you to delete the selected message or all messages. • Sort by: allows you to sort messages by Read/Unread, Date, Name, Type, Size, or Subject. 2. Highlight the View option and press the Select soft key or the key to listen to the message contents.
Sentbox Sentbox This message box stores messages that you have sent. When you enter this menu, the list of messages in the box displays with the recipients’ phone numbers or names, if available in your Phonebook. Note: By pressing the Left or Right Navigation keys, you may scroll between Inbox, Sentbox, Outbox, and Drafts. 1. In Idle mode, press the Menu soft key to access Menu mode. 2. Using the Navigation keys, scroll to the Messages icon. Press the Select soft key or the key to enter the menu. 3.
Outbox This message box stores messages that you have attempted to send but have not actually been sent yet. When you enter this menu, the list of messages in the box displays with the recipients’ phone numbers or names, if available in your Phonebook. Note: By pressing the Left or Right Navigation keys, you may scroll between Inbox, Sentbox, Outbox, and Drafts. 1. In Idle mode, press the Menu soft key to access Menu mode. 2. Using the Navigation keys, scroll to the Messages icon.
Drafts Drafts This message box stores messages that you may want to edit or send at a later time. When you enter this menu, the list of messages in the box displays. Note: By pressing the Left or Right Navigation keys, you may scroll between Inbox, Sentbox, Outbox, and Drafts. 1. In Idle mode, press the Menu soft key to access Menu mode. 2. Using the Navigation keys, scroll to the Messages icon. Press the Select soft key or the key to enter the menu. 3.
Templates Besides entering message text using the keypad keys, you can speed message composition by including copies of stored text (Templates) in your message. 1. In Idle mode, press the Menu soft key to access Menu mode. 2. Using the Navigation keys, scroll to the Messages icon. Press the Select soft key or the key to enter the menu. 3. Highlight the Templates option and press the Select soft key or the key. 4.
Delete All 2. Using the Navigation keys, scroll to the Messages icon. Press the Select soft key or the key to enter the menu. 3. Highlight the Voice mail option and press the Select soft key or the key. The following options are available: • Call voice mail: before using the Voice Mail feature, you must enter the voice server number obtained from your service provider. You can then select this option and press the Select soft key or the key to listen to your messages.
4. After you receive the Delete? confirmation, press the Yes soft key to delete the selected message box contents. Otherwise, press the No soft key. Settings In this menu, you can set up default text and picture message information. The last setting you accessed is automatically activated for sending subsequent messages. Text message • Service center: allows you to store or change the number of your message center, which is required when sending messages.
Broadcast Messages (SIM Dependent) Send Settings • Delivery report: when this option is enabled, the network informs you whether or not your message has been delivered. • Read reply: when this option is enabled, your phone sends a request for a reply along with your message to the recipient. • Priority: you can select the priority level of your messages. • Expiry date: The expiration date is how long the message receiver has to retrieve the message.
Starting your Instant Messaging 1. In Idle mode, press the Menu soft key to access Menu mode. 2. Using the Navigation keys, scroll to the IM icon. Press the Select soft key or the key to enter the menu. 3. Highlight the messenger service to which you subscribed using the Up or Down Navigation key and press the Select soft key or the key. 4. Highlight the Sign on, Connect, or Sign in option, depending on your messenger service and press the Select soft key or the key. 5.
Section 8: Changing Your Settings Section 8 Topics Covered • Time & Date Settings • Phone Settings • Display Settings • Sound Settings • Network Services Settings • Security Settings • Memory Status • Reset Settings This section explains the sound and phone settings for your phone. It includes display settings, security settings, and extra settings associated with your phone.
Section 8 Time & Date Settings This menu allows you to change the current time and date displayed. The following options are available: • Set time: allows you to change the hour and minute. • AM/PM: allows you to set either AM or PM. • Time format: allows you to select whether your time is displayed in 12 hour or 24 hour format. • Set date: allows you to enter the month, day, and year. • Date format: allows you to select MM/DD/YYYY, DD/MM/YYYY, or YYYY/MM/DD format.
Phone Settings 3. Highlight the Time & Date options and press the Select soft key or the key. 5. To set Set time or Set date, use the Left or Right key to position the cursor over the number you wish to change. 6. Enter the desired number. 7. To change other options, use the Left or Right key to select the desired setting. 8. When you are finished changing your settings, press the Save soft key to save your settings. Otherwise press the Cancel soft key.
Section 8 Slide settings This menu allows you to set how your phone will function when you slide your phone open or closed. The following options are available: • Up: select Accept call if you want the call to be answered when you slide your phone open. Otherwise, select None. • Down: select Stop operation if you want the call to be discontinued when you slide your phone closed. Otherwise, select Continue operation. Extra settings You can turn the automatic redialing or answering features on or off. 1.
Display Settings Display Settings In this menu, you can change various settings for the display or backlight. Wallpaper This menu allows you to change the background image or the color of the text to be displayed in Idle mode. The following options are available: • Get more wallpaper: this option takes you to t-zones where you can download wallpapers. • Default wallpapers: allows you to choose from a list of wallpapers included with your phone.
Section 8 Interior display You can select the color of the menus displayed. There are two different patterns to choose from. Brightness control You can adjust the display brightness to see it better in different lighting conditions. Press the Left or Right Navigation key or press the Volume keys to adjust the brightness. Press the Save soft key when you are finished.
Display Settings Dialing display To change the size of the font: 1. Highlight the Font size option and press the Select soft key or the key. 2. Use the Left or Right key to select between Large, Medium, or Small. 3. Press the Save soft key or the key to save your change. Otherwise, press the Cancel soft key. To change the color of the font: 1. Highlight the Font color option and press the Select soft key or the key. 2.
Section 8 Calendar This menu allows you to set a calendar to display over the top of your wallpaper in Idle mode. Choose between On or Off. The Calendar is set to Off by default. Show caller information By turning this option on, when you miss a call, caller information such as name will be displayed on your display when your missed calls are listed. Sound Settings You can customize various sound settings for your phone.
Sound Settings Use the Right or Left key to increase or decrease the volume. This menu allows you to specify how you are to be informed of incoming calls. Use the Right or Left key to select a ring tone. The following options are available: • Melody: the phone rings using the ring melody selected in the Ringtone menu. • Vibration: the phone vibrates but does not ring. • Vibration then melody: the phone vibrates 3 times and then starts ringing.
To turn off the sound, select Off. Section 8 Slide tone This menu allows you to select the melody that the phone sounds when you slide open or close your phone. You can choose between 4 tones. To turn off the sound, select Off. Silent mode This menu allows you to select whether or not your phone will vibrate while in quiet mode. You may choose between Vibration and Mute. Extra tones You can customize additional tones for the phone. 1. To turn a given tone on, press the displays in front of the option.
Network Services Settings Network Services Settings Call forwarding Section 8 This network service enables incoming calls to be rerouted to the number that you specify. Example: You may wish to forward your business calls to a colleague while you are on holiday. To set your call forwarding options: 1. Select a call forwarding option by pressing the Up or Down Navigation key and then press the Select soft key or the key. The following options are available: • Forward always: all calls are forwarded.
4. To deactivate call forwarding, select Deactivate by using the Left or Right key. Section 8 5. Enter the number to which the calls are to be forwarded in the Forward to text box and press the Select soft key or the key. To enter an international code, press and hold the key until the + sign displays. 6. When you select Unreachable in step 1, select the length of time the network waits for before forwarding a call. The phone sends your settings to the network and the network’s acknowledgement displays.
Network Services Settings The screen informs you whether call waiting is activated or deactivated. Section 8 2. Highlight IP Activated or Deactivate and press the Select soft key or the key. 3. Call waiting will then be activated or deactivated. 4. Select the Cancel all option to deactivate Call waiting on all voice and data calls. Network selection The Network Selection feature enables you to automatically or manually select the network used when roaming outside of your home area.
If you select Automatic, you are connected to the first available network when roaming. Section 8 3. If you select Manual, press the Up or Down Navigation key until the network you want highlights and then press the Select soft key or the key. The phone will scan for that network and you will be connected. Caller ID You can prevent your phone number from being displayed on the phone of the person being called. Note: Some networks do not allow you to change this setting.
Security Settings Consequently, any person who does not have your PIN cannot use your phone without your approval. The following options are available: • Disable: the phone connects directly to the network when you switch it on. • Enable: you must enter the PIN each time the phone is switched on. Change PIN This feature allows you to change your current PIN, provided that the PIN check feature is enabled. You must enter the current PIN before you can specify a new one.
• Enable: you are required to enter the phone password when Section 8 you switch on the phone. Change password The Change password feature allows you to change your current phone password to a new one. You must enter the current password before you can specify a new one. The password is preset to “00000000” at the factory. Once you have entered a new password, you are asked to confirm it by entering it again.
Memory Status FDN mode The following options are available: • Disable: you can call any number. • Enable: you can only call phone numbers stored in Phonebook. You must enter your PIN2. You can obtain your PIN2 from your service provider. Change PIN2 The Change PIN2 feature allows you to change your current PIN2 to a new one. You must enter the current PIN2 before you can specify a new one. Once you have entered a new PIN2, you are asked to confirm it by entering it again.
Section 8 In any of the Memory status menus, you can press the Left or Right navigation keys to scroll through different categories. Reset Settings From this menu you can reset your phone and sound settings to the default settings. The following options are available: • All: Phone, Display, Sound, and WLAN settings will be returned to default values. • Phone settings: only phone settings will be returned to default values. • Display settings: only display settings will be returned to default values.
Section 9: Fun & Apps Topics Covered • My Files • Audio Player • Voice Recognition • Games • Image Editor Section 9 • Organizer This section outlines the various applications that are available on your phone.
My Files My files allows you to manage your sounds, images, videos and music in one convenient location. Sounds In this menu, you can view the list of sounds downloaded from the web server or received in multimedia messages. You can set a downloaded sound as the current ring tone. The following options are available: Section 9 Get More MegaTones Using the Get More MegaTones option on the sounds list, you can access the web site preset by T-Mobile and download new sounds.
My Files • Delete: allows you to delete the sound or delete all sounds. • Rename: allows you to change the name of the sound. • Protection: allows you to lock the sound to protect it from deletion. • Properties: displays the sound name, date, format, length, size, and protection. Voice list • Play: plays the audio message. • Send via picture message: allows you to send the audio message via Picture message. • Set as: allows you to set the audio message as your ring tone, caller ringtone or alarm tone.
Get More Wallpapers Using the Get More Wallpapers option, you can access the web site preset by T-Mobile and download new images. My Album This menu provides the ability for you to view the photos you have stored on the t-zone browser. Use the following procedures to access My Album. Section 9 1. In your t-zone browser, select the My Albums Menu link and press the Select soft key or the key. 2. Photos sent to this folder are stored in the Inbox Album. Press the Select soft key to view the photos. 3.
My Files • Set as: allows you to set the image as Wallpaper or as a Caller ID. • Delete: allows you to delete the selected image or multiple images. • Rename: allows you to change the name of the item. • Display mode: allows you to see your images displayed in a Line view or in Thumbnail view. • Slide show: allows you to see all of your photos in a slide show presentation.
• Rename: allows you to change the name of the photo. • Display mode: allows you to see your images displayed in a Line view or in Thumbnail view. • Slide Show: allows you to see all of your photos in a slide show presentation. • Protection: allows you to lock the image to protect it from deletion. • Properties: displays the image name, date, format, resolution, size, and protection.
My Files • Protection: allows you to lock the video to protect it from deletion. • Properties: displays the video name, date, format, resolution, size, length, quality, and protection. My videos In this menu you can review the photos you’ve taken. Highlight a video and press the Options soft key to choose from the following options: • Play: plays the video. Picture message. • Set as caller ID: allows you to set the video as a Caller ID. • Delete: allows you to delete the video.
memory status of Fun & Apps, Sounds, Images, My ‘5’ icons, Videos, and Music. Audio Player The Audio Player can be used to play music files you have loaded from your PC. Note: The following characters cannot be used in the filename: / \ * ? “ < > : | The file name is limited to 47 total characters). Section 9 1. In the Fun & Apps menu, select Audio player and press the Select soft key or the key. 2.
Voice Recognition • Properties: allows you to view the audio file name, date, format, bitrate, length, size, and protection. 4. Highlight the Open option and press the Select soft key or the key. 5. Highlight the My playlist option and press the Select soft key or the key. 6. Four playlists are shown, each holding up to 30 audio files. Highlight a playlist and press the key. 8.
commands to launch applications and navigate phone menus. VoiceSignal Options The following is a list of functions that you can perform using VoiceSignal speech recognition on your phone. • Call : dial by saying either a Name in your Contacts list or a number • Send Text: send a text message to a number or to Section 9 someone in your Contacts List. • Lookup : open the contact record for any name in your Contacts list.
Voice Recognition 4. The number that you said is repeated through the earpiece and your phone dials the number. 5. If VoiceSignal is not sure of the number that you said, a list of possible matches appears in the display. 6. You’re asked to confirm the correct number as VoiceSignal displays the results. Say “Yes” or “No” to confirm or reject the number when prompted. Call Name Dialing 1. In Idle mode, press and hold the VoiceSignal. key to launch 2.
7. The location is repeated through the earpiece and your phone dials the number. Send Text Message 1. In Idle mode, press and hold the VoiceSignal. key to launch 2. A list of commands appears in the display and the audio prompt “Say a command” plays through the earpiece. Section 9 3. Say “Send Text” at a distance of 3-12 inches from the microphone. “Say the Name or Number” plays through the earpiece. 4.
Voice Recognition 4. Say the name exactly as it is displayed in your Contacts list, first name followed by last name. 5. The contact name appears in the display with other information that you’ve entered for that contact. Opening Applications You can open an application or access a menu on your phone using VoiceSignal. 1. In Idle mode, press and hold the VoiceSignal. key to launch 3. Say “Go To” at a distance of 3-12 inches from the microphone.
3. Say “Check” at a distance of 3-12 inches from the microphone. A list of options displays and a prompt of “Please choose” plays through the earpiece. 4. The phone status menu option spoken is displayed. VoiceSignal Settings You can adjust the settings and preferences for VoiceSignal by opening the Voice Settings menu. Section 9 To access the VoiceSignal Settings menu, follow these steps: 1. Press the Settings soft key. 2. Use the navigation keys to select the setting you want to change.
Voice Recognition something even if nothing was said. When VoiceSignal rejects an utterance, it displays a message such as “Please repeat…” or “No match found.” If you frequently experience these messages, you might be able to get better recognition by adjusting the Sensitivity setting toward Reject Less. If you frequently experience false activations (VoiceSignal detects a wrong match), you might be able to get better performance by adjusting the Sensitivity setting toward Reject More.
Games You can download MIDlets (Java applications that run on mobile phones) from various sources using t-zones and store them in your phone. When you access the Games menu, the list of default games appears. Once you have downloaded games, they are added to the list. Section 9 Note: Java services may not be available, depending on your service provider. Get more games You can download more games from the web site preset by your service provider using the Get more games option. Games List 1.
Image Editor To use the Image Editor, follow these steps: 1. In the Fun & Apps menu, select Image editor and press the Select soft key or the key. 2. The message No image loaded will appear. Press the Options soft key. 3. Select the New image option and press the Select soft key or the key. 4. To choose an image to edit, select either My photos or Take Photo and press the Select soft key or the key. Section 9 5. After you have selected a photo or taken a new one, press the Load soft key.
• Undo: allows you to undo the last action you performed on your edited image. Organizer The Organizer allows you to set alarms, schedule appointments, view the calendar, create To-Do lists, perform simple math calculations, check world time, perform unit conversions, set a timer, and use a stopwatch. Section 9 Alarm This feature allows you to: • set up to 3 alarms to ring at specified times. • set the phone to switch on automatically and ring the alarm even if the phone is switched off.
Organizer 4. Press the Down key to highlight the AM/PM option. Press the Left or Right key to set to AM or PM. 5. Press the Down key to highlight the Monday-Sunday checkboxes. Press the key to bring up a list of days. 6. Place a checkmark next to the days you want the alarm to sound. To place or remove a check mark, press the key. Press the OK soft key. 7. Press the Down key to highlight the Alarm tone option. Press the key to bring up a list of alarm tones. 9. Press the Save soft key or the 10.
When you select the Calendar menu, the following options are available: Month view When you select this option, the calendar displays the selected month with today’s date highlighted. At the bottom of the calendar, the following icons are displayed along with the number of entries for each: Schedule items Section 9 Anniversary events To do items Miscellaneous items The number of entries next to each icon reflects the number of entries for the selected day on the calendar.
Organizer The following options are available when you press the Options soft key: • View mode: allows you to select between Day view or Month view of the selected day. • Create: allows you to create a Schedule, Anniversary, Miscellaneous, or To do event. • Go to: allows you to see the Week view with today’s date highlighted or a specified date.
2. Highlight the Schedule option and press the Select soft key or the key. 3. Enter the subject in the Subject text box then press the Down soft key. 4. Continue to enter other information including Details, Start date, Start time, AM/PM, End date, End time, AM/ PM, Location, Alarm, and Alarm tone. Check the Repeat box using the key if you want to repeat the alarm. Section 9 5. When you are finished, press the Save soft key. Your information is saved to the Schedule.
Organizer Miscellaneous This option allows you to record miscellaneous dates or events in your calendar. 1. From Month, Week, or Day View, press the Options soft key. Highlight the Create option and press the Select soft key or the key. 2. Highlight the Miscellaneous option and press the Select soft key or the key. 4. Continue to enter other information including Details, Start date, Start time, AM/PM, End date, End time, and AM/PM.
4. Continue to enter other information including Start date, Due date, and Priority. 5. When you are finished, press the Save soft key. Your To do list is saved to the Calendar. Editing the To do List When you select Day view, the current contents display with a status checkbox and a priority marker. Section 9 If the item has been done, a check appears in the checkbox.
Organizer Calculator With this feature, you can use the phone as a calculator. The calculator provides the basic arithmetic functions; addition, subtraction, multiplication, and division. 1. Enter the first number using the numeric keys. 2. Enter the operation for your calculation by pressing the following navigation keys: Left: subtraction (-) Right: addition (+) Up: multiplication (x) Down: division (÷) 3. The Left soft key can be used to insert a decimal point, a left bracket, or a right bracket.
• Set daylight saving time: use the key to place a checkmark next to the cities that you want to set daylight saving time. Each city listed represents a time zone. Unit conversion The conversion menu provides the following conversion categories: • Currency • Length • Weight Section 9 • Volume • Area • Temperature To convert any of the above categories, do the following: 1. Scroll to the conversion feature you wish to use and press the Select soft key or the key. 2.
Organizer 1. Press the Set soft key to enter the length of time. 2. Enter the time and press the OK soft key. 3. Press the key to start the timer. Press the again to stop the timer. key Stopwatch This feature allows you to use a stopwatch. Press the key to start the stopwatch. Press the Reset soft key to erase all stopwatch times recorded. Press the key for the lap time. You can have up to 4 lap times.
138 Section 9
Section 10: Camera and Camcorder Topics Covered • Using the Camera and Camcorder • Take and Send • Record Video • My Photos • My Videos • My Album • My Journal Section 10: Camera and Camcorder 139 Section 10 This section explains how to use the camera and camcorder on your phone. You can take photos and video clips using the built-in camera and camcorder.
Using the Camera and Camcorder Using the camera/camcorder module in your phone, you can take photos or video clips of people or events while on the move. Additionally, you can send photos and video clips to other people in a Picture Messaging message or set a wallpaper or caller ID image. Note: Do not take photos or videos of people without their permission. Do not take photos or videos in places where cameras are not allowed.
Take and Send 3. Adjust the image by aiming the camera at the subject. Press the Left soft key to access the camera options. For details, see "Using Camera Options" on page 141. You can use the keypad to quickly change the camera options. 4. Press the key or the key to take the photo. Send To: My Album? is displayed. Press the Yes soft key if you want to send the photo to your T-Mobile My Album service. The phone’s default destination is set to My Album.
indicator appears at the top right of the display. The following modes are available: • Single shot: allows you to take a photo in the normal mode. • Multi shot: allows you to take a series of action stills. Select the capture speed, High Speed or Normal Speed, and the number of photos the camera will take.When you press the key, the camera takes photos successively. • Mosaic shot: allows you to take several photos to combine in a mosaic.
Take and Send • View finder: allows you to set the view finder to Full screen, Full screen & indicator, Full screen & Guideline, or Standard ratio. • Scene programs: allows you to choose Normal or Night scene. • Metering exposure: allows you to choose between Matrix, Center-weighted, and spot. • White balance: allows you to choose between Auto, Daylight, Incandescent, Fluorescent, Cloudy, and Sunset. • ISO: allows you to set ISO to Auto, 100, 200, or 400.
changes from camera to camcorder or camcorder to camera. changes the picture resolution. changes the camera shot mode. changes the color tone or applies a special effect to the photo. selects ISO settings. selects a decorative frame. sets a time delay. takes you to My photos menu. changes capture mode to full screen. adjusts the white balance. Section 10 Record Video Your camcorder produces videos in 3GP format. 1. In Idle mode, press and Up navigation key to turn on the camera.
Record Video 3. Adjust the image by aiming the camcorder at the subject. Press the Left soft key to access the camcorder options. For details, see "Using Camcorder Options" on page 145. You can use the keypad to quickly change the camcorder options. 4. To start recording your video clip, press the key. 5. To stop the recording, press Right soft key. The video clip is automatically saved in the My videos folder. 6.
Settings: allows you to change the recording settings. • Recording mode: allows you to change the size of your video. Select Normal or Limit for Picture message. • Size: allows you to set the image size to either CIF (352x288), QVGA (320x240), QCIF(176x144), or Sub-QCIF(128x96). The selected image size displays on the capture screen. • View finder: allows you to set the view finder to Full screen view, Full screen & indicator, or Standard Ratio.
My Photos changes the video resolution. changes the shooting mode. changes the color tone or applies a special effect to the video. turns the audio On or Off. changes scene program from Normal to Night scene. sets a time delay. takes you to My videos menu. changes capture mode to full screen. adjusts the white balance. My Photos 1. In Idle mode press the Menu soft key to access the Menu mode. 3. Select My photos and press the Select soft key or the key.
5. You can use the Left and Right navigation keys to scroll through your photos. Photo Album Options In the My photos menu, press the Options soft key to use the following options: • View: allows you to view the photo on your display. • Send to My Album: allows you to send the photo to My Album. • Send: allows you to send the photo via Picture message. • Default destination: allows you to remove or edit the default destination. • Set as: allows you to set the photo as your wallpaper or as a Caller ID.
My Videos delete and press the Options soft key. Highlight the Delete option and press the Select soft key or the key. 2. Highlight the Selected option and press the Select soft key or the key. Or, highlight All to delete all photos. 3. Press the Yes soft key to confirm the deletion. 4. When you have finished, press the key. My Videos 1. In Idle mode press the Menu soft key to access the Menu mode. 2. Highlight Camera and press the Select soft key or the key. 3. Press the key to view the video clip.
• Set as caller ID: allows you to set the video as a Caller ID. • Delete: allows you to delete the selected video clip or delete all video clips. • Rename: allows you to change the name of the video clip. • Display mode: allows you to see your videos displayed in a Line view or in Thumbnail view. • Protection: allows you to protect the video clip from being deleted.
My Album My Album This menu provides the ability for you to view the photos you have stored on the t-zone website. Use the following procedures to access My Album. 1. In Idle mode press the Menu soft key to access the Menu mode. 2. Highlight Camera and press the Select soft key or the key. 3. Select My Album and press the Select soft key or the key. The browser is launched and the T-Mobile Web page displays. 4.
152 Section 10
Section 11: t-zones Topics Covered • t-zones This section outlines the t-zones service on your phone. For more information, contact T-Mobile.
t-zones Your phone is equipped with a WAP (Wireless Application Protocol) browser to allow you to access and navigate the Wireless Web using your phone. To access t-zones, follow these steps: 1. In Idle mode, press the Menu soft key to access Menu mode. 2. Using the Navigation keys, scroll to the t-zones icon. Press the Select soft key or the key to enter the menu. The following options are available: Home Selecting this menu connects the phone to the network and loads the t-zones homepage.
t-zones 2. To select browser items, press the key. 3. To return to the previous page, press the key. 4. To return to the startup homepage, press the Menu soft key and select the Home option. Entering Text in the t-zones When you are prompted to enter text, the currently active text input mode is indicated as the Left soft key. Press the Left soft key to bring up all of the text entry modes. The following modes are available: • abc: works the same as ABC mode.
Note: The menus may vary, depending on your version of t-zones. The following options are available: • Go to URL: allows you to manually enter the URL address of a Web page. After entering an address, press the OK soft key or key to go there directly. • Favorites: shows the bookmarks list. You can bookmark the current web page or access previously bookmarked pages. • Messages: allows you to create an SMS message or check your My messages folder.
t-zones 4. Highlight the Save option and press the Select soft key or the key. Note: For further details about how to enter characters, see "Section 5: Entering Text" on page 45. After saving favorite items, you can access the following options by selecting the item, then pressing the Options soft key: • Go: takes you to the site. • Edit: allows you to edit the address. • Delete: allows you to delete the address or you can delete all addresses.
158 Section 11
Section 12: WI-FI Topics Covered • Introducing Your T-Mobile Wi-Fi Capable Phone • Connecting to Wi-Fi for the First Time • Using Wi-Fi • Connecting to WI-FI Networks • Wi-Fi Settings • Troubleshooting This section introduces you to T-Mobile Wi-Fi compatibility and provides you with information on WiFi and instructions on how to use this type of connection with your phone.
Introducing Your T-Mobile Wi-Fi Capable Phone Your phone is capable of connecting to T-Mobile via Wi-Fi (wireless Internet broadband) and GSM (cellular towers). When making voice calls, your phone will seamlessly transfer between Wi-Fi and GSM connections, always using the network with the best signal strength. Your T-Mobile Wi-Fi compatible phone is capable of the following: • Connect to Wi-Fi at home Connect to T-Mobile through Wi-Fi if you have a wireless router set up in your home.
Introducing Your T-Mobile Wi-Fi Capable Phone services. This includes voice calls, mobile browsing, email, Picture Messaging, Text Messaging, and basically any mobile service for which your phone uses a network connection. UMA technology offers fast, reliable, and affordable connectivity for your life using your mobile phone for virtually all of your communications. UMA connects your mobile phone to your GSM/GPRS services through WLAN (802.
What This Means to You When you are not in range of a Wi-Fi connection, your normal cellular network takes over and keeps you connected. Your phone switches automatically from WiFi to cellular whenever it's necessary to maintain your connection, whether your phone is in Idle mode or in the middle of an active call. The switching process is virtually unnoticeable.
Connecting to Wi-Fi for the First Time 3. At the end of the tutorial, your phone will detect a Wi-Fi network and attempt to connect to it. If your router requires a security key, it will prompt you to enter it. For T-Mobile routers, select Get Security Key, which automatically provides security keys for T-Mobile routers (see "Get Security Key" on page 174 for more information). If you have a T-Mobile router, select Yes.
4. Save the network when prompted. After the network is saved to your Saved Networks list, you will automatically connect to that network each time you are within range (see "Saved Networks" on page 169 for additional information). You have connected to your first Wi-Fi network and can begin making calls using Wi-Fi or your regular T-Mobile GSM network. To access all of the Wi-Fi features on your phone, go to Menu > Settings > Wi-Fi.
Connecting to Wi-Fi Networks You will always see the signal bars when on a call. They will change correctly when you are on a call to indicate what network you are on. The name of your network will show when on the idle screen as seen here. Connecting to Wi-Fi Networks Connecting to Wi-Fi networks with your phone is what allows you to make calls using Wi-Fi.
Note: If you want to connect to a secure network (marked by a key icon), you will be prompted to provide the security key for that network. If you change the router settings, you can edit the phone's profile with the new setting or you can create a new phone profile. signal-strength indicates that a network is connected. indicates that a network has been saved to your Saved Networks list (see next section for details).
Connecting to Wi-Fi Networks 6. Highlight the network to which you want to connect and press the Options soft key. Highlight the Connect option, and press the Select soft key. You will be prompted to save the network. 8. Create a profile name for your network and press the OK soft key. Section 12: WI-FI 167 Section 12 7. When prompted, press the Yes soft key to save the network to your Saved Networks list.
After the network is saved to your Saved Networks list, you will automatically connect to that network each time you are within range (see "Saved Networks" on page 169 for additional information). On the Available Networks list, a checkmark indicates a network to which you are currently connected, a star indicates that a network is saved, and a key indicates a network is protected with a security key.
Connecting to Wi-Fi Networks • Connect/Disconnect: Connects or disconnects your phone to or from the currently highlighted network. This option changes dynamically, depending on whether or not your phone is currently connected to a Wi-Fi network. Alternatively, you can connect to a network on the Available Networks list by highlighting the network and pressing the Select soft key.
On the Saved Networks List, a indicates a network to which you are currently connected . Connect to a Specific Saved Network 1. From the idle screen, press the Menu soft key to access Menu mode. 2. Using the Navigation keys, scroll to Settings. Press the Select soft key to enter the menu. 3. Highlight the Wi-Fi option and press the Select soft key. 4. Highlight the Saved Networks option and press the Select soft key. The phone displays your Saved Networks List. 5.
Connecting to Wi-Fi Networks Saved Networks Options In the Saved Networks menu, press the Options soft key to use the following options: • Edit Details: Allows you to edit the highlighted Wi-Fi network's parameters. Note that this option is not available for your TMobile-designated Wi-Fi network profiles. • Connect/Disconnect: Connects or disconnects your phone to or from the currently highlighted network.
• Add New Network: Adds a new network to your Saved Networks list. This option also allows you to manually add settings for the new network. The submenu items for the Add New menu are as follows: • From Available Networks: Allows you to add a new network from the list of Available Networks. • Create Manually: Allows you to manually enter the new network's settings.
Connecting to Wi-Fi Networks Or.. 1. From the Idle screen, press the Menu soft key to access Menu mode and proceed through the following steps: 2. Using the Navigation keys, scroll to Settings. Press the Select soft key to enter the menu. 3. Highlight the Wi-Fi option and press the Select soft key. 4. Highlight the Quick Connect option and press the Select soft key. 5. Your phone will connect to the strongest Wi-Fi network available.
1. In Idle mode, press the Menu soft key to access Menu mode. 2. Using the Navigation keys, scroll to Settings. Press the Select soft key to enter the menu. 3. Highlight the Wi-Fi option and press the Select soft key. 4. Highlight the Turn Wi-Fi ON/OFF option and press the Select soft key. Note: If the Quick Connect option is selected when your phone is in Sleep mode (Wi-Fi OFF), the phone automatically switches to Active Mode (Wi-Fi ON) before attempting to make the connection.
Connecting to Wi-Fi Networks automatically transferred to the phone. All laptops and devices connected wirelessly will need to be manually configured for the new security. When used on an already secured network, the key configured on the router will be transferred to the phone. For the duration of the process (for example, while the on the router is blinking), all laptops and devices using the wireless network will lose their connection.
Mobile Wi-Fi compatible phone from a T-Mobile wireless router. Use Get Security Key 1. From the idle screen, press the Menu soft key to access Menu mode. 2. Using the Navigation keys, scroll to Settings. Press the Select soft key to enter the menu. 3. Highlight the Wi-Fi option and press the Select soft key. 4. Highlight the Get Security Key option and press the Select soft key. 5. Follow the on-screen prompts to step through the process of acquiring security keys.
Connecting to Wi-Fi Networks or saved your settings when setting up your router, you may reference this as well. Add New Network By adding a network to your phone, you can automatically connect to the network when you are in range. If it requires a security key or passphrase, you can enter the key and the phone stores the key or passphrase with the profile.
1. In Idle mode, press the Menu soft key to access Menu mode. 2. Using the Navigation keys, scroll to Settings. Press the Select soft key to enter the menu. 3. Highlight the Wi-Fi option and press the Select soft key. 4. Highlight the Add New Network option and press the Select soft key. 5. Highlight the From Available Networks option and press the Select soft key. The phone searches for available networks and displays a list of networks in signal-strength order. 6.
Connecting to Wi-Fi Networks 5. Highlight the Create Manually option and press the Select soft key. 6. Type your desired profile name for the network. 7. Press the Down key to highlight the SSID option. Enter the new network's SSID. The SSID (Service Set Identifier), is the actual name of the wireless network, not the profile name you entered. The profile name is simply a name to help you keep track of which network is which.
11. Press the Down key to highlight the Non-Broadcast SSID option. Press the key to place a checkmark in this box if your router does NOT broadcast its SSID. In general, the default setting for most routers will broadcast the SSID. 12. Press the Down key to highlight the Inter AP handovers option.
Troubleshooting T-Mobile Wi-Fi Help Use the following steps to select the Wi-Fi Help option from the Wi-Fi menu and get specific Wi-Fi assistance.: 1. In Idle mode, press the Menu soft key to access Menu mode. 2. Using the Navigation keys, scroll to Settings. Press the Select soft key to enter the menu. 3. Highlight the Wi-Fi option and press the Select soft key. 4. Highlight the Wi-Fi Help option and press the Select soft key.
Understanding Displayed Error Codes The following table provides information on how to interpret the error messages that, from time to time, may appear on your phone. Error Code W000 Displayed Error Text Security key incorrect. Meaning The security on the router does not match the security on the phone.. How to fix it 1. Re-enter the key on the phone to match the key configured on the router. Make sure that the encryption type and security settings match on the router and phone. Section 12 2.
Troubleshooting Error Code W010 Displayed Error Text Meaning Wi-Fi Connection The wireless Failed network is no longer in range, or it has a weak signal. How to fix it 1. The wireless network is not in range or has a weak signal to provide a successful connection. 2. If the attempt to connect is through the Saved Networks list, the network may not be available or the profile saved has different security settings than the available WLAN. 3.
Error Code W002 Displayed Error Text Meaning Wi-Fi Connection The phone was Failed unable to get an IP address from the DHCP server in order to establish a connection. How to fix it 1. If WEP encryption is in use, check that the key configured on the router matches the key entered on the phone. 2. DHCP may be disabled on the wireless router and there is no other DHCP server on the network. Make sure that the option of DHCP is set to enable on the wireless router. 3.
Troubleshooting Error Code W003 Displayed Error Text Meaning How to fix it Wi-Fi Connection The phone 1. Another device on the WLAN Failed detected an IP network (laptop, desktop or Address conflict. phone) has the same IP address as the phone displaying the error, make sure that no other device is set for static IP addresses. User might want to re-try connecting to the network. 2.
Error Code W005.2 W005.3 W005.4 W005.5 Section 12 W005.6 186 Displayed Error Text Meaning How to fix it The phone is unable to establish network connectivity. 1. Retry connecting to the network. The phone is unable to establish network connectivity. 1. Retry connecting to the network. T-Mobile Network The phone is Error. Retry unable to establish network connectivity. 1. Retry connecting to the network. T-Mobile Network The phone is Error. Retry. unable to establish network connectivity. 1.
Troubleshooting Error Code W006.1 Displayed Error Text Meaning ISP or T-Mobile Network error. The phone is unable to establish network connectivity: This could be a problem on the ISP side or the network side. How to fix it 1. The connection to the WAN port of the wireless router is down: either the cable is unplugged or the DSL/Cable modem (whichever applies) is turned off. This could also be caused by an outageoftheDSL/Cableservice. 2. Check if MAC filtering is enabled on the wireless router.
Error Code W006.2 Displayed Error Text Meaning ISP or T-Mobile Network error. The phone is unable to establish network connectivity: This could be a problem on the ISP side or the network side. How to fix it 1. The connection to the WAN port of the wireless router is down: either the cable is unplugged or the DSL/Cable modem (whichever applies) is turned off. This could also be caused by an outage of the DSL/Cable service. 2. Check if MAC filtering is enabled on the wireless router.
Troubleshooting Error Code W006.3 Displayed Error Text Meaning ISP or T-Mobile Network error. The phone is unable to establish network connectivity: This could be a problem on the ISP side or the network side. How to fix it 1. The connection to the WAN port of the wireless router is down: either the cable is unplugged or the DSL/Cable modem (whichever applies) is turned off. This could also be caused by an outage of the DSL/Cable service. 2. Check if MAC filtering is enabled on the wireless router.
Error Code Displayed Error Text Meaning T-Mobile Network The phone is error. unable to establish network connectivity W006.5 T-Mobile Network The phone is error unable to establish network connectivity W006.6 T-Mobile Network The phone is error. unable to establish network connectivity W006.7 T-Mobile Network The phone is error. unable to establish network connectivity W006.8 T-Mobile Network The phone is error. unable to establish network connectivity Section 12 W006.
Troubleshooting Error Code Displayed Error Text Meaning How to fix it W006.9 T-Mobile Network The phone is error. unable to establish network connectivity J007 Incorrect Security Certificate. Make sure that the date set on the phone is current and not set to a previous year. J008.0 Network Busy. Retry. The network is experiencing congestion, try at a later time. J008.1 Failed to connect. Network Retry connectivity failed. J008.2 Phone not allowed on T-Mobile network. J008.
Error Code Displayed Error Text Meaning How to fix it The phone is not allowed to use UMA service. Phone not allowed on T-Mobile network. J009.3+ Phone not allowed on T-Mobile network. J0010.0 Network Busy. Retry J0010.1 Failed to connect. Network Retry. connectivity failed. J0010.2 Phone not allowed on T-Mobile network. J0010.3 Phone not allowed on T-Mobile network. J0011.0 Network Busy. Retry The network is experiencing congestion, try at a later time. J0011.1 Failed to connect.
Troubleshooting Error Code Displayed Error Text Meaning How to fix it Failed to connect. Network Location not connectivity allowed failed. Connections from the current location are not allowed to go through. Using the service at a different location should fix the problem. J0011.3 Phone not allowed on T-Mobile network. J0011.4 Failed to connect. Network connectivity Location failed. unknown. Connections from the current location are not allowed to go through.
Error Code Displayed Error Text Meaning J0011.9 Failed to connect. Network Retry. connectivity failed. 0011.10 Failed to connect. Network Retry. connectivity failed. How to fix it J0011.11 Failed to connect. Network Retry. connectivity failed. J0011.12 Phone not allowed on T-Mobile network. Network Busy. Retry The network is experiencing congestion, try at a later time. J0012.1 Failed to connect. Network Retry. connectivity failed.
Troubleshooting Error Code Displayed Error Text Meaning How to fix it Phone not allowed on T-Mobile network. J0012.4 Failed to connect. Network Location connectivity unknown. failed. Connections from the current location are not allowed to go through. Using the service at a different location should fix the problem. J0012.5 Phone not allowed on T-Mobile network. The phone is not allowed to use UMA service. J0012.6 Failed to connect. Network Retry. connectivity failed. J0012.
Error Code Displayed Error Text Meaning How to fix it J0012.10 Failed to connect. Network Retry. connectivity failed. J0012.11 Failed to connect. Network Retry. connectivity failed. Section 12 J0012.12 Phone not allowed + on T-Mobile network. J0013.0 Network Busy. Retry The network is experiencing congestion, try at a later time. J0013.1 Failed to connect. Network Retry. connectivity failed. The wireless router through which the phone is trying to use UMA service is not allowed on the network.
Troubleshooting Error Code Displayed Error Text Meaning How to fix it J0013.4 Failed to connect. Network Location connectivity unknown. failed. Connections from the current location are not allowed to go through. Using the service at a different location should fix the problem. J0013.5 Phone not allowed on T-Mobile network. The phone is not allowed to use UMA service. J0013.6 Failed to connect. Network Retry. connectivity failed. J0013.7 Failed to connect. Network Retry. connectivity failed.
Error Code Displayed Error Text Meaning J0013.11 Failed to connect. Network Retry. connectivity failed. Section 12 J0013.12 Phone not allowed + on T-Mobile network.
Section 13 Section 13: Health and Safety Information Topics Covered • Health and Safety Information • Consumer Information on Wireless Phones • Road Safety • Operating Environment • Using Your Phone Near Other Electronic Devices • Potentially Explosive Environments • Emergency Calls • FCC Notice and Cautions • Other Important Safety Information • Product Performance • Availability of Various Features/Ring Tones • Battery Standby and Talk Time • Battery Precautions • Care and Maintenance This section outli
Section 13 Health and Safety Information Exposure to Radio Frequency (RF) Signals Certification Information (SAR) Your wireless phone is a radio transmitter and receiver. It is designed and manufactured not to exceed the exposure limits for radio frequency (RF) energy set by the Federal Communications Commission (FCC) of the U.S. government.
Health and Safety Information Before a new model phone is available for sale to the public, it must be tested and certified to the FCC that it does not exceed the exposure limit established by the FCC. Tests for each model phone are performed in positions and locations (e.g. at the ear and worn on the body) as required by the FCC.
• Head: .24 W/Kg. Section 13 • Body-worn: .7 W/Kg. SAR information on this and other model phones can be viewed on-line at www.fcc.gov/oet/fccid. To find information that pertains to a particular model phone, this site uses the phone FCC ID number which is usually printed somewhere on the case of the phone. Sometimes it may be necessary to remove the battery pack to find the number.
Consumer Information on Wireless Phones Consumer Information on Wireless Phones What kinds of phones are the subject of this update? The term wireless phone refers here to hand-held wireless phones with built-in antennas, often called "cell," "mobile," or "PCS" phones. These types of wireless phones can expose the user to measurable radio frequency energy (RF) because of the short distance between the phone and the user's head.
Section 13 while being used. They also emit very low levels of RF when in the stand-by mode. Whereas high levels of RF can produce health effects (by heating tissue), exposure to low level RF that does not produce heating effects causes no known adverse health effects. Many studies of low level RF exposures have not found any biological effects. Some studies have suggested that some biological effects may occur, but such findings have not been confirmed by additional research.
Consumer Information on Wireless Phones • Design wireless phones in a way that minimizes any RF exposure to the user that is not necessary for device function; and possible information on possible effects of wireless phone use on human health. FDA belongs to an interagency working group of the federal agencies that have responsibility for different aspects of RF safety to ensure coordinated efforts at the federal level.
Section 13 thus not the primary subject of the safety questions discussed in this document. What are the results of the research done already? The research done thus far has produced conflicting results, and many studies have suffered from flaws in their research methods. Animal experiments investigating the effects of radio frequency energy (RF) exposures characteristic of wireless phones have yielded conflicting results that often cannot be repeated in other laboratories.
Consumer Information on Wireless Phones exposures, since the average period of phone use in these studies was around three years. A combination of laboratory studies and epidemiological studies of people actually using wireless phones would provide some of the data that are needed. Lifetime animal exposure studies could be completed in a few years. However, very large numbers of animals would be needed to provide reliable proof of a cancer promoting effect if one exists.
Section 13 FDA has been a leading participant in the World Health Organization international Electromagnetic Fields (EMF) Project since its inception in 1996. An influential result of this work has been the development of a detailed agenda of research needs that has driven the establishment of new research programs around the world. The Project has also helped develop a series of public information documents on EMF issues.
Consumer Information on Wireless Phones • If you must conduct extended conversations by wireless phone Again, the scientific data do not demonstrate that wireless phones are harmful. But if you are concerned about the RF exposure from these products, you can use measures like those described above to reduce your RF exposure from wireless phone use. What about children using wireless phones? The scientific evidence does not show a danger to users of wireless phones, including children and teenagers.
Section 13 Do hands-free kits for wireless phones reduce risks from exposure to RF emissions? Since there are no known risks from exposure to RF emissions from wireless phones, there is no reason to believe that hands-free kits reduce risks. Hands-free kits can be used with wireless phones for convenience and comfort. These systems reduce the absorption of RF energy in the head because the phone, which is the source of the RF emissions, will not be placed against the head.
Consumer Information on Wireless Phones What about wireless phone interference with medical equipment? Radio frequency energy (RF) from wireless phones can interact with some electronic devices. For this reason, FDA helped develop a detailed test method to measure electromagnetic interference (EMI) of implanted cardiac pacemakers and defibrillators from wireless telephones. This test method is now part of a standard sponsored by the Association for the Advancement of Medical instrumentation (AAMI).
Section 13 testing to assess the interference and work to resolve the problem. Additional information on the safety of RF exposures from various sources can be obtained from the following organizations: • FCC RF Safety Program: http://www.fcc.gov/oet/rfsafety/ • Environmental Protection Agency (EPA): http://www.epa.gov/radiation/ • Occupational Safety and Health Administration's (OSHA): http://www.osha.gov/SLTC/radiofrequencyradiation/ index.
Road Safety car, practice good common sense and remember the following tips: 2. When available, use a hands-free device. If possible, add an additional layer of convenience and safety to your wireless phone with one of the many hands free accessories available today. 3. Position your wireless phone within easy reach. Be able to access your wireless phone without removing your eyes from the road. If you get an incoming call at an inconvenient time, let your voice mail answer it for you. 4.
Section 13 7. Do not engage in stressful or emotional conversations that may be distracting. Make people you are talking with aware you are driving and suspend conversations that have the potential to divert your attention from the road. 8. Use your wireless phone to call for help. Dial 9-1-1 or other local emergency number in the case of fire, traffic accident or medical emergencies. Remember, it is a free call on your wireless phone! 9. Use your wireless phone to help others in emergencies.
Operating Environment Operating Environment As with other mobile radio transmitting equipment, users are advised that for the satisfactory operation of the equipment and for the safety of personnel, it is recommended that the equipment should only be used in the normal operating position (held to your ear with the antenna pointing over your shoulder if you are using an external antenna).
Persons with pacemakers: • should always keep the phone more than 15 cm (6 inches) from Section 13 their pacemaker when the phone is switched on. • should not carry the phone in a breast pocket. • should use the ear opposite the pacemaker to minimize potential interference. If you have any reason to suspect that interference is taking place, switch your phone off immediately.
Potentially Explosive Environments Potentially Explosive Environments Users are advised to switch the phone off while at a refueling point (service station). Users are reminded of the need to observe restrictions on the use of radio equipment in fuel depots (fuel storage and distribution areas), chemical plants or where blasting operations are in progress. Areas with a potentially explosive atmosphere are often but not always clearly marked.
Section 13 wireless phone networks or when certain network services and/or phone features are in use. Check with local service providers. To make an emergency call: 1. If the phone is not on, switch it on. 2. Key in the emergency number for your present location (for example, 911 or other official emergency number). Emergency numbers vary by location. 3. Press the key.
Other Important Safety Information require you to stop using the phone if such interference cannot be eliminated. Cautions Any changes or modifications to your phone not expressly approved in this document could void your warranty for this equipment, and void your authority to operate this equipment. Only use approved batteries, antennas and chargers. The use of any unauthorized accessories may be dangerous and void the phone warranty if said accessories cause damage or a defect to the phone.
• For vehicles equipped with an air bag, remember that an air bag Section 13 inflates with great force. Do not place objects, including both installed or portable wireless equipment in the area over the air bag or in the air bag deployment area. If wireless equipment is improperly installed and the air bag inflates, serious injury could result. • Switch your phone off before boarding an aircraft. The use of wireless phone in aircraft is illegal and may be dangerous to the aircraft's operation.
Availability of Various Features/Ring Tones Understanding How Your Phone Operates Maintaining Your Phone's Peak Performance For the best care of your phone, only authorized personnel should service your phone and accessories. Faulty service may void the warranty. There are several simple guidelines to operating your phone properly and maintaining safe, satisfactory service. • If your phone is equipped with an external antenna, hold the phone with the antenna raised, fully-extended and over your shoulder.
Section 13 charges. Not all features are available for purchase or use in all areas. Downloadable Ring Tones may be available at an additional cost. Other conditions and restrictions may apply. See your service provider for additional information. Battery Standby and Talk Time Standby and talk times will vary depending on phone usage patterns and conditions.
Battery Precautions • If left unused, a fully charged battery will discharge itself over time. battery only with Samsung-approved chargers. When a charger is not in use, disconnect it from the power source. Do not leave the battery connected to a charger for more than a week, since overcharging may shorten its life. • Do not use incompatible cell phone batteries and chargers.
• Do not permit a battery out of the phone to come in contact with metal objects, such as coins, keys or jewelry. Section 13 • Do not crush, puncture or put a high degree of pressure on the battery as this can cause an internal short-circuit, resulting in overheating. • Dispose of used batteries in accordance with local regulations. In some areas, the disposal of batteries in household or business trash may be prohibited.
Care and Maintenance • Do not drop, knock or shake the phone. Rough handling can break internal circuit boards. detergents to clean the phone. Wipe it with a soft cloth slightly dampened in a mild soap-and-water solution. • Do not paint the phone. Paint can clog the device's moving parts and prevent proper operation. • Do not put the phone in or on heating devices, such as a microwave oven, a stove or a radiator. The phone may explode when overheated.
226 Section 13
Section 14: Warranty Information Topics Covered • Standard Limited Warranty Section 14 Section 14: Warranty Information 227
Standard Limited Warranty What is Covered and For How Long? SAMSUNG Section 14 TELECOMMUNICATIONS AMERICA, L.P.
Standard Limited Warranty What are SAMSUNG's Obligations? During the applicable warranty period, SAMSUNG will repair or replace, at SAMSUNG's sole option, without charge to Purchaser, any defective component part of Product.
Section 14 warranted for a period of ninety (90) days. All other repaired/replaced Product will be warranted for a period equal to the remainder of the original Limited Warranty on the original Product or for 90 days, whichever is longer. All replaced parts, components, boards and equipment shall become the property of SAMSUNG. If SAMSUNG determines that any Product is not covered by this Limited Warranty, Purchaser must pay all parts, shipping, and labor charges for the repair or return of such Product.
Standard Limited Warranty Section 14: Warranty Information 231 Section 14 EXPRESS WARRANTY OF ANY KIND WHATSOEVER WITH RESPECT TO THE PRODUCT. ALL IMPLIED WARRANTIES AND CONDITIONS THAT MAY ARISE BY OPERATION OF LAW, INCLUDING IF APPLICABLE THE IMPLIED WARRANTIES OF MERCHANTABILITY AND FITNESS FOR A PARTICULAR PURPOSE, ARE HEREBY LIMITED TO THE SAME DURATION OF TIME AS THE EXPRESS WRITTEN WARRANTY STATED HEREIN.
Section 14 WARRANTY GIVES YOU SPECIFIC LEGAL RIGHTS, AND YOU MAY ALSO HAVE OTHER RIGHTS, WHICH VARY FROM STATE TO STATE/PROVINCE TO PROVINCE. THIS LIMITED WARRANTY SHALL NOT EXTEND TO ANYONE OTHER THAN THE ORIGINAL PURCHASER OF THIS PRODUCT AND STATES PURCHASER'S EXCLUSIVE REMEDY.
Standard Limited Warranty OF ANY SUCH THIRD-PARTY SOFTWARE OR EQUIPMENT LIE SOLELY WITH THE PURCHASER AND THE DIRECT VENDOR, OWNER OR SUPPLIER OF SUCH THIRD-PARTY SOFTWARE OR EQUIPMENT, AS THE CASE MAY BE. Samsung Telecommunications America, L.P. 1301 East Lookout Drive Richardson, Texas 75082 Phone: 1-800-SAMSUNG Phone: 1-888-987-HELP (4357) ©2006 Samsung Telecommunications America. All rights reserved. No reproduction in whole or in part allowed without prior written approval.
234 Section 14
Index Call Records all calls 26 call time 28 delete all 28 incoming calls 27 missed calls 26 outgoing calls 27 Waiting 34, 104 A ABC Mode 46 Accessing a Menu Function 38 Alarm 128 Alert Type 101 Audio Player 118 B Backlight description 18 settings 98 Battery charging 8 installing 8 low indicator 10 removing 6 Broadcast Messages 91 C Calendar 129 Call Barring 104 Call Functions 21 adjusting the call volume 24 answering a call 24 call records 25 correcting the number 22 ending a call 22 making a call 2
G Multi-Party Call 34 Games 126 Get More Help 19 Getting Started 5 dropping one participant 36 private conversation 35 setting up 35 Mute 32 activating your phone 6 voicemail 11 H Health and Safety Information 199 HiFi Ringers 100, 112 I Icon Descriptions 17 Image Editor 126 Instant Messaging 91 International Call 22 My Album 114, 151 My Files 112 My Journal 114, 151 My Name Card 63 My photos accessing pictures 147 My Videos 149 N Network Selection 105 Network Services call barring 104 call forwar
timer 136 to do list 133 unit conversion 136 world time 135 Own Number 64 S Security 106 Sentbox 85 Settings 93 sound settings 100 P Phone features of your phone 14 icons 17 switching on/off 10 view of your phone 14 Phone Lock 107 Phone Settings 95 Phonebook finding a phonebook entry 57 finding my phone number 64 management 65 searching for a number 33 understanding your phonebook 53 Phonebook Management 65 Picture Messages 75 PIN change 107 check 106 Privacy 108 Push Message settings 91 viewing in inb
navigating 154 U Understanding Your Phone 13 V Voice Mail 11, 88 changing number 12 Voice Messages 70 Voice Notes 70 Voice Recognition 119 VoiceSignal checking phone status 123 digit dial 120 features 120 menu 119 name dial 121 name lookup 122 open applications 123 send text message 122 settings 124 W Warranty Information 227 Wi-Fi Settings 180 238