SGH-t309 P O R T A B L E T r i - B a n d T E L E P H O N E User Guide Please read this manual before operating your phone, and keep it for future reference. UVEI1_1.
Intellectual Property All Intellectual Property, as defined below, owned by or which is otherwise the property of Samsung or its respective suppliers relating to the SAMSUNG Phone, including but not limited to, accessories, parts, or software relating there to (the “Phone System”), is proprietary to Samsung and protected under federal laws, state laws, and international treaty provisions.
GH68-07908A Openwave® is a registered Trademark of Openwave, Inc. RSA® is a registered Trademark RSA Security, Inc.
Table of Contents Activating Your Phone . . . . . . . . . . . . . . . . . . . . . . . . . . . . 6 Switching the Phone On or Off . . . . . . . . . . . . . . . . . . . . . 10 Setting Up Your Voice Mail . . . . . . . . . . . . . . . . . . . . . . . 10 Section 2: Understanding Your Phone . . . . . . . 13 Features of Your Phone . . . . . . . . . . . . . . . . . . . . . . . . . . View of Your Phone . . . . . . . . . . . . . . . . . . . . . . . . . . . . . Keys . . . . . . . . . . . . . . . . . . . . . . . . . .
Table of Contents Finding a Phonebook Entry . . . . . . . . . . . . . . . . . . . . . . . .57 Dialing a Number from Phonebook . . . . . . . . . . . . . . . . . .59 Speed Dialing . . . . . . . . . . . . . . . . . . . . . . . . . . . . . . . . . .59 Editing a Caller Group . . . . . . . . . . . . . . . . . . . . . . . . . . . .60 Dialing a Number from the SIM Card . . . . . . . . . . . . . . . .61 Copying all SIM Phonebook Entries . . . . . . . . . . . . . . . . . .62 Deleting all of the Phonebook Entries . .
Section 9: Fun & Apps . . . . . . . . . . . . . . . . . . . 111 File Manager . . . . . . . . . . . . . . . . . . . . . . . . . . . . . . . . . Voice Memo . . . . . . . . . . . . . . . . . . . . . . . . . . . . . . . . . Games . . . . . . . . . . . . . . . . . . . . . . . . . . . . . . . . . . . . . Organizer . . . . . . . . . . . . . . . . . . . . . . . . . . . . . . . . . . . 112 117 119 121 Section 10: Camera and Camcorder . . . . . . . . 135 Using the Camera and Camcorder . . . . . . . . . . . . . . .
Table of Contents Care and Maintenance . . . . . . . . . . . . . . . . . . . . . . . . . .179 Section 13: Warranty Information . . . . . . . . . .181 Standard Limited Warranty . . . . . . . . . . . . . . . . . . . . . . .182 Intellectual Property Statement . . . . . . . . . . . . . . . . . . . .188 Samsung Telecommunications America (STA), Inc. . . . . .189 Index . . . . . . . . . . . . . . . . . . . . . . . . . . . . . . . . .
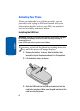
Section 1: Getting Started Topics Covered • Activating Your Phone • Switching the Phone On or Off • Setting Up Your Voicemail Section 1: Getting Started 5 Section 1 This section allows you to start using your phone by activating your service and setting up your voice mail.
Activating Your Phone When you subscribe to a cellular network, you are provided with a plug-in SIM card loaded with your subscription details, such as your PIN, any optional services available, and many others. Section 1 Installing the SIM Card Important! The plug-in SIM card and its contacts can be easily damaged by scratching or bending, so be careful when handling, inserting, or removing the card. Keep all SIM cards out of reach of small children.
Activating Your Phone Note: When you need to remove the SIM card, slide it, as shown, and take it out of the socket. Section 1 4. Place the battery so that the tabs on the end align with the slots at the bottom of the phone (1). Press the battery down until it clicks into place (2).
5. Make sure that the battery is properly installed before switching on the phone. Charging a Battery Your phone is powered by a rechargeable Li-ion battery. A travel adapter comes with your phone for charging the battery. Use only approved batteries and chargers. Ask your local Samsung dealer for further details. Section 1 You can use the phone while the battery is charging, but this causes the phone to charge more slowly.
Activating Your Phone 3. When charging is finished, unplug the adapter from the power outlet and disconnect it from the phone by pressing the buttons on both sides of the connector (1) and pulling the connector out (2). Section 1 Note: You must unplug the adapter before you remove the battery from the phone during charging; otherwise, the phone could be damaged.
Switching the Phone On or Off 1. Open the phone. 2. Press and hold the key until the phone switches on. 3. If the phone asks you to enter the phone password, enter the password and press the OK soft key or the key. The password is preset to “00000000” at the factory. For further details, see "Change password" on page 107. Section 1 4. If the phone asks for a PIN, enter the PIN and press the OK soft key or the key. For further details, see "PIN check" on page 106.
Setting Up Your Voice Mail 3. Follow the tutorial to create a password, a greeting, and your name. Note: These steps may be different depending on your network. Accessing Your Voice Mail You can access your Voice Mail by pressing the key on the keypad or by going to the menu. To access Voice Mail using the menu: 2. Highlight Messages and press the Select soft key or the key. 3. Highlight Voice mail and press the Select soft key or the key. 4.
3. Highlight Voice mail and press the Select soft key or the key. 4. Highlight Voice server number and press the Select soft key or the key. Highlight Empty and press the Options soft key. 5. Highlight Edit and press the Select soft key or the key. Or, you may highlight Delete to delete the number. 6. Edit the name if desired, and then press the Down Navigation key to edit the number. Section 1 7. Press the Options soft key, highlight the Save option, and press the Select soft key or the key. 8.
Section 2: Understanding Your Phone Topics Covered • Features of Your Phone • View of Your Phone • Keys • Display Layout • Get More Help This section outlines some key features of your phone. It also displays the screen and the icons that are displayed when the phone is in use.
Features of Your Phone Your phone is lightweight, easy-to-use and offers many significant features. The following list outlines a few of the features included in your phone. • User friendly, menu driven access to features and options • Instant Messaging capability • Multimedia capability • Fun & Apps feature provides file manager, voice memo, games, alarms, calendar, calculator, unit conversion, timer, and stopwatch.
Keys Keys The following list correlates to the illustrations. 1. The headset jack is used for the hands-free headset. 2. Performs the functions indicated by the screen text on the bottom line of the display. 3. During a call, adjusts the earpiece volume. 4. Makes or answers a call. In Idle mode, recalls the last number dialed or received when held down. 5. In Idle mode, accesses voice mail when held down. 6. Enters special characters. Performs various functions. 7.
10. Ends a call. Also switches the phone on and off when held down. In Menu mode, cancels your input and returns the phone to Idle mode. 11. In Idle mode, launches the WAP (Wireless Application Protocol) browser. In Menu mode, selects the highlighted menu options. 12. In Menu mode, scrolls through the menus and Phonebook. In Idle mode: 䢇 䢇 䢇 䢇 Down key: allows you to access your Contact list directly. Up key: allows you to access the Camera or Camcorder feature directly.
Display Layout Display Layout The display has 3 areas: Icons Shows the received signal strength. The greater the number of bars, the stronger the signal. Appears when a new text message has been received. Appears when a new voice mail has been received. Section 2 Appears when a new multimedia message has been received. Appears when you set an alarm to ring at a specified time. For details, see page "Alarm" on page 121. Appears when you are out of your service area. Appears when a call is in progress.
Appears when Silent Mode is active. Appears when Mute is active. Shows the level of your battery. The more bars you see, the more power you have remaining. Backlight A backlight illuminates the display and the keypad. When you press any key or open the phone, the backlight comes on. It goes off when no keys are pressed within a given period of time, depending on the setting in the Backlight menu. The display turns off after one minute to conserve battery power.
Get More Help 5. Highlight the On option. Use the Left or Right Navigation key to select the time that the backlight is on. You may choose between 15 seconds, 30 seconds, 1 minute, 3 minutes, or 10 minutes. 6. Press the Down key to take you to the Dim option. Use the Left or Right Navigation key to select the time that Dimming mode is on. You may choose between Off, 5 seconds, 15 seconds, 30 seconds, or 1 minute. 7. Press the Save soft key to save your settings.
3. The Get More Help menu will display with the following options available: • Browse Help Topics: this option gives you a list of different topics that you can select. • Enter a Search: this option allows you to enter a keyword to search on. • About: this option offers general information about Get More Help including concept and site design, copyright information, and contact email address. To access the browser options menu: 1. Press the Menu soft key. Or 2.
Section 3: Call Functions Topics Covered • Making a Call • Adjusting the Call Volume • Answering a Call • Call Records • Silent Mode • Selecting Functions and Options This section allows you to make or answer a call. It also includes the features and functionality associated with making or answering a call.
Making a Call When the idle screen displays, enter the number you wish to dial and press the key. Note: When you activate the Auto redial option in the Extra settings menu, the phone will automatically redial up to 10 times when the person does not answer the call or is already on the phone, provided your call is not sent to voice mail. See page "Extra settings" on page 95 for further details. Making an International Call 1. Press and hold the key. The + character appears. 2.
Making a Call 1. If you have typed characters on the display, press the key to return to Idle mode. 2. Press the key to display a list of the most recent numbers used in the order you dialed or received them. 3. Use the Up and Down keys to scroll through the numbers and highlight the number you want. 4. To view details of the number, press the 5. To dial the number, press the key. key.
Adjusting the Call Volume During a call, if you want to adjust the earpiece volume, use the Volume keys on the left side of the phone. Press the key to increase the volume level and the to decrease the level. key In Idle mode, you can also adjust the ring volume using these keys while the phone is open. Answering a Call Section 3 When somebody calls you, the phone rings and displays the incoming call image. The caller’s phone number, or name if stored in Phonebook, displays. 1.
Call Records If the Anykey answer option in the Extra Settings menu is activated, you can press any key to answer a call except for the key and the Reject soft key. If the Open to answer option in the Extra Settings menu is activated, you can answer the call simply by opening the phone. Note: To reject an incoming call, press and hold the Volume keys on the left side of the phone before opening the phone, or press the Reject soft key or key. 2. End the call by closing the phone or pressing the key.
All calls This menu lets you view the 60 most recent calls you received, dialed, and missed. The number or name, if already stored in your Phonebook, displays with the number of occurrences of each number. Note: at any time while you are in Call Records, you may use the Left or Right Navigation key to scroll between All calls, Missed calls, Incoming calls, and Outgoing calls. Missed calls This menu lets you view the 20 most recent calls you received, but did not answer.
Call Records 3. To scroll through the missed calls, press the Up or Down Navigation key. 4. To call the number displayed, press the key. 5. Press the Options soft key for the following options: • Details: Displays details of the number including name, number, and dates and times of calls. • Call back: Places a call back to the number. • Store to phonebook: Stores the number in your phone memory or your SIM card.
Delete all This menu allows you to delete all of the records in each call record separately, or you can delete all of your call records at one time. 1. Highlight the type of calls you want to delete and press the key to make a check mark. 2. Press the Delete soft key to delete the calls. 3. When a confirmation message displays, press the Yes soft key or key to confirm. Call time This menu lets you view the time log for calls made and received.
Silent Mode Note: The password is preset to “00000000” at the factory. To change this password, see "Change password" on page 107. Silent Mode Silent Mode is convenient when you wish to stop the phone from making noise, in a theater for example. In Idle mode, press and hold the key until the “Silent Mode On” message and the Silent Mode icon ( ) display. In Silent Mode, instead of sounds, your phone will vibrate.
Soft Keys The roles of the soft keys vary depending on the function you are currently using. The labels on the bottom line of the display just above each key indicate their current role. Press the left soft key for Menu mode. Press the right soft key to access the Ph.Book menu. Selecting Options To view the various functions and options available and to select the one you want: Section 3 1. Press the appropriate soft key. 2.
Selecting Functions and Options 4. To move back to the previous function or option on a list, press the Up key. 5. To move back up one level in the menu structure, press the Back soft key. 6. To exit the menu structure without changing the settings, press the key. In some functions, you may be asked for a password or PIN. Enter the code and press the OK soft key or the key. When you access a list of options, your phone highlights the currently active option.
2. Press the key to dial the second call. The first call is automatically put on hold. Or: 1. Press the Options soft key and select Hold. 2. Make the second call in the normal way. When you have an active call and a call on hold, you may switch between the two calls, changing the one on hold to active and placing the other on hold. To switch between the two calls, simply press the Options soft key and select Swap.
Selecting Functions and Options Using the Speakerphone While on a call, you can use your Speakerphone by following these steps: 1. Press the Spkr on soft key. 2. You will receive the confirmation, Speaker on? 3. Press the Yes soft key. The Speakerphone icon will appear at the bottom of the display. 4. To turn the Speakerphone off, press the Spkr off soft key. Muting or Sending Key Tones These options allow you to turn the key tones off or on.
3. Enter the name that you wish to find in the textbox located above the entries. If you enter the first few letters of the name, the Phonebook entries are listed starting with the first entry matching your input. Or, use the Up or Down Navigation key to highlight the contact that you desire. 4. To view the highlighted entry, press the Options soft key. 5. Highlight the View option and press the Select soft key or the key. The Contact is displayed.
Selecting Functions and Options To end the current call, press the key. Making a Multi-Party Call A multi-party call is a network service that allows up to six people to take part simultaneously in a multi-party or conference call. For further details about subscribing to this service, contact your service provider. Setting up a Multi-Party Call 1. Call the first participant in the normal way. 2. Call the second participant in the normal way. The first call is automatically put on hold. 3.
2. Highlight a person you wish to talk privately with by pressing the Up or Down Navigation key, and press the Select soft key or the key. Now you can talk only to that person. The other participants can continue to converse with each other. 3. To return to the multi-party call, press the Options soft key or the key and select Join. Press the Select soft key or the key. All of the multi-party call participants can now hear each other. Dropping One Participant 1.
Section 4: Menu Navigation Section 4 Topics Covered • Menu Navigation • Menu Outline This section explains the menu navigation for your phone. It also includes an outline of all the available menus associated with your phone.
Section 4 Menu Navigation You can tailor the phone’s range of functions to your needs using menus and sub-menus. Menus and submenus can be accessed by scrolling using the Navigation keys or by using the shortcuts. Accessing a Menu Function by Scrolling 1. In Idle mode, press the Menu soft key to access Menu mode. 2. Scroll using the Navigation keys to reach a main menu, Settings for example. Press the Select soft key or the key to enter the menu. 3.
Menu Outline Example: Accessing the Security menu. 1. Press the Menu soft key. 2. Press the key for Settings. 3. Press the key for Security. Menu Outline The following list shows the menu structure and indicates the number assigned to each option. 1 Voice notes 2 Call records 2.1 2.2 2.3 2.4 2.5 2.6 All calls Missed calls Incoming calls Outgoing calls Delete all Call time 2.6.1 2.6.2 2.6.3 2.6.4 2.6.5 3 Last call time Total outgoing Total incoming Life time Reset timers t-zones 3.
Section 4 3.2 Favorites 3.3 Go to URL 3.4 Clear cache 4 Instant Messaging 4.1 AIM 4.1.1 4.1.2 4.1.3 4.1.4 4.1.5 Sign on Saved conversations Offline conversations Settings Help 4.2 ICQ 4.2.1 4.2.2 4.2.3 4.2.4 4.2.5 Connect Saved conversations Offline conversations Settings Help 4.3 Yahoo! 4.3.1 4.3.2 4.3.3 4.3.4 4.3.5 5 Sign in Saved conversations Offline conversations Settings Help Messages 5.1 Create new 5.1.1 5.1.2 5.1.3 5.2 5.3 5.4 5.
Menu Outline 5.6 Templates Text messages Template Picture messages Template Section 4 5.6.1 5.6.2 5.7 Voice mail 5.7.1 5.7.2 Call voice mail Voice server number 5.8 Delete all 5.9 Settings 5.9.1 5.9.2 5.9.3 Text message Picture message Predictive text mode 5.10 Broadcast messages* 5.11 Memory status 6 Fun & Apps 6.1 File manager 6.1.1 6.1.2 6.1.3 6.1.4 Sounds Images Videos Memory status 6.2 Voice memo 6.3 Games 6.3.1 6.3.2 6.3.3 Get more games Downloaded games Memory status 6.4 Organizer 6.4.
Get More Help 8 Camera Section 4 7 8.1 8.2 8.3 8.4 8.5 8.6 9 Take Photo Record Video My Photos My Videos My Album My Journal Settings 9.1 Time & date 9.2 Phone settings 9.2.1 9.2.2 9.2.3 Language Greeting message Extra settings 9.3 Display settings 9.3.1 9.3.2 9.3.3 9.3.4 9.3.5 9.3.6 9.3.7 9.3.8 Wallpaper Text display Skin Brightness control Contrast Control Backlight Dialing display Show caller information 9.4 Sound settings 9.4.1 9.4.2 9.4.3 9.4.4 9.4.5 9.4.
Menu Outline 9.4.7 Extra tones 9.5 Network services Call forwarding Call barring* Call waiting Network selection Caller ID Section 4 9.5.1 9.5.2 9.5.3 9.5.4 9.5.5 9.6 Security 9.6.1 9.6.2 9.6.3 9.6.4 9.6.5 9.6.6 9.6.7 PIN check Change PIN Phone lock Change password Privacy FDN mode Change PIN2 9.7 Memory status 9.7.1 9.7.2 9.7.3 9.7.4 9.7.5 9.7.6 Shared memory Messages File manager Organizer Phonebook Games 9.8 Reset settings * Shows only if supported by your SIM card.
44 Section 4
Section 5: Entering Text Topics Covered • Changing the Text Input Mode • Using ABC Mode • Using T9 Mode • Using Number Mode Section 5 • Using Symbol Mode This section outlines how to select the desired text input mode when entering characters into your phone. This section also describes how to use the T9 predictive text entry system to reduce the number of key strokes associated with entering text.
Changing the Text Input Mode When using your phone, you will often need to enter text, such as when storing a name in your Phonebook, creating your personal greeting or scheduling events on your calendar. You can enter alphanumeric characters by using your phone’s keypad. Your phone has the following text input modes: • ABC mode: this mode allows you to enter letters by pressing the key labeled with the letter you want.
Using ABC Mode Text input mode indicator 2. Each time you press the Right soft key, a different Text input mode indicator will be displayed at the lower right corner of your display. The following options are available: : T9 mode : Number mode : Symbol mode : ABC mode 3. When the Text input mode indicator that you desire is displayed, you may enter text in the text message box using the selected text input mode. Using ABC Mode To use ABC mode, use the 1 to 0 keys to enter your text. 1.
• - Twice for the second letter • - And so on Section 5 2. Select the other letters in the same way. • To enter periods, hyphens, apostrophes, and other special characters, press the key. ABC mode applies grammar rules to ensure that correct punctuation is used. • To shift case in ABC mode, use the key. There are 3 cases: Initial capital, Capital lock, and Lower case. • You can move the cursor by using the Navigation keys. To delete letters, press the key. Press and hold the key to clear the display.
Using T9 Mode Section 5 Using T9 Mode T9 is a predictive text input mode that allows you to key in any character using single keystrokes. This text input mode is based on a built-in dictionary. To enter a word in T9 mode: 1. When you are in T9 mode, start entering a word by pressing the 2 to 9 keys. Press each key only once for each letter. Example: To enter “Hello” in T9 mode, press the 4, 3, 5, 5, and 6 keys.
The word that you are typing appears on the display. It may change with each key that you press. 2. Enter the whole word before editing or deleting the keystrokes. 3. When the word displays correctly, go to step 4. Section 5 If the word doesn’t display correctly, press the key to display alternative word choices for the keys that you have pressed. Example: Both “Of” and “Me” have the 6 and 3 keys. The phone displays the most commonly used choice first. 4. Insert a space by pressing the the next word.
Using Number Mode Note: This feature may not be available for some languages. • To enter periods, hyphens, or apostrophes, press the key. T9 mode applies grammar rules to ensure that correct punctuation is used. • To shift case in T9 mode, use the key. There are 3 cases: Initial capital, Capital lock, and Lower case. • You can move the cursor by using the Navigation keys. To delete letters, press the to clear the display. key.
52 Section 5
Section 6: Understanding Your Phonebook Topics Covered • Storing a Number in the SIM Card • Storing a Number in the Phone’s Memory • Finding a Phonebook Entry • Dialing a Number from Phonebook • Speed Dialing • Editing a Caller Group • Dialing a Number from SIM Card • Copying all SIM Phonebook Entries • Deleting all of the Phonebook Entries Section 6 • My Name Card • Finding My Phone Number • FDN List • Management This section allows you to manage your contacts by storing their name and number in your Pho
Storing a Number in the SIM Card 1. At the Idle screen, press the Ph.Book soft key. 2. Scroll to New contact by pressing the Up or Down Navigation key and press the Select soft key or the key. 3. Highlight SIM card and press the Select soft key or the key. Note: You can set the Default saving option to SIM Card, Phone memory or Ask on saving default in the Management menu.
Storing a Number in the Phone’s Memory • Cancel: cancels the Add New Contact screen and returns you to the previous menu. 7. To use the entry options after saving the number, press the Options soft key. The following options are available: • Edit: allows you to edit the name and number fields in the entry. • Send message: allows you to send a message to the selected number. You may choose between Text messages, Picture messages, or Voice notes.
Note: When you copy a phone number from your SIM card to your phone, the number will appear twice in your Contact list. 1. At the Idle screen, press the Ph.Book soft key. 2. Scroll to New contact by pressing the Up or Down Navigation key and press the Select soft key or the key. 3. Highlight Phone memory and press the Select soft key or the key. Note: You can set the Default saving option to SIM Card, Phone memory or Ask on saving default in the Management menu.
Finding a Phonebook Entry • Other: allows you to enter more detailed information for the entry. 7. Enter the number or numbers that you want to store and press the Save soft key or the key. The number is saved in your Phone memory. After storing, the phone displays the Phonebook entry number you just created in the View menu. 8. You can add additional information for the contact including a Picture ID, Ringtone, Notes, or assign to a group.
5. Once you have found the entry, press the key to dial the number, or press the Options soft key to access the following Phonebook entry options: • View: shows details of the Phonebook entry. • Send message: allows you to send a message to the selected number. You may choose between Text messages, Picture messages, or Voice notes. • New contact: takes you to the New Contact menu. • Delete: allows you to delete the selected name and number from your Phonebook or delete all numbers.
Dialing a Number from Phonebook the name and number by pressing the Yes soft key. To cancel, press the No soft key. Dialing a Number from Phonebook Once you have stored phone numbers in the Phonebook, you can dial them easily and quickly by using the location numbers that were assigned to them in the Phonebook. Note: If you cannot remember a location number, you must go into the Contact list menu in the Phonebook menu to search for the entry by name. For details, "Finding a Phonebook Entry" on page 57.
4. Highlight either Contact list or FDN list and press the Select soft key or the key. 5. Highlight a number from the list and press the Select soft key or the key. 6. You will receive a Saved! confirmation and the Speed dial menu will show the number assigned to the number key you selected. Note: Memory location 1 is reserved for your Voice mail server number and cannot be changed. Editing a Caller Group 1. When the idle screen displays, press the Ph.Book soft key. 2.
Dialing a Number from the SIM Card • Take Photo: allows you to take a picture with your camera. • My Photos: allows you to choose a photo from My photos folder. • My Downloads: allows you to choose a photo from your downloaded images folder. • Icons: allows you to choose from pre-defined icons • Not assigned: removes any image that was previously used and sets to Not assigned status. 8. To change the ringtone associated with the Caller group, press the Down key to highlight the Ringtone icon.
2. If you don’t know the location number, press and the first location number will be displayed. You can then press the Left or Right key to find other numbers in the list. 3. Press the Dial soft key, the key, or the key when you have selected the number you want to dial. Copying all SIM Phonebook Entries You can copy all SIM entries to the Phone using this option. When you copy entries to the phone, duplicate entries are created. 1. Press Ph. Book soft key. 2.
My Name Card Important! Once Phonebook entries have been deleted, they cannot be recovered. 1. When the idle screen displays, press the Ph.Book soft key. 2. Highlight Management and press the Select soft key or the key. 3. Scroll to Delete all by pressing the Up or Down Navigation key and press the Select soft key or the key. 4. To place a check mark by the memory location you want to empty; All, SIM Card, Phone memory, or FDN, press the key. You can remove the check mark by pressing the key. 5.
2. Highlight My Name Card and press the Select soft key or the key. 3. My Name Card opens with the Name field highlighted. 4. Enter information in each of the fields as desired. Use the Navigation keys to move between fields, then use the keypad to enter information. 5. When finished, press the Options soft key. 6. Highlight the Save option and press the Select soft key or the key.
FDN List FDN List FDN (Fixed Dial Number) mode, if supported by your SIM card, allows you to restrict your outgoing calls to a limited set of phone numbers. The FDN List allows you to set up a list of numbers that your phone may dial. FDN mode must first be enabled in the Security settings. See "FDN mode" on page 108 for more information on changing this setting. To enable FDN mode, a PIN2 number is required. You can obtain your PIN2 from your service provider.
Copy All to Phone This option allows you to copy all contacts from your SIM card to your phone. For more information, see "Copying all SIM Phonebook Entries" on page 62. Delete All Important! Once contact entries have been deleted, they cannot be recovered. This option allows you to delete your contacts. You may delete from SIM, Phone memory, FDN, or All. For more information, see "Deleting all of the Phonebook Entries" on page 62.
Section 7: Messages Topics Covered • Voice Notes • Text Messages • Picture Messages • Inbox • Sentbox • Outbox • Drafts • Templates • Voice mail • Delete All • Settings • Broadcast Messages • Instant Messaging • Memory Status Section 7: Messages 67 Section 7 This section describes how to send or receive different types of messages. It also includes the features and functionality associated with messaging.
Types of Messages Your phone provides the following message types: • Voice Notes • Text Messages • Picture Messages • Voice Mail • Broadcast Messages (SIM Dependent) • Instant Messaging Voice Notes In this menu, you can record a voice note of up to one minute long and then immediately send it by a Picture Messaging message. When you access this menu, a timer appears on the screen. 1. In Idle mode, press the Menu soft key to access Menu mode. 2. Using the Navigation keys, scroll to the Voice notes icon.
Voice Notes • Send: allows you to send the Voice note. • Play: plays back your Voice note. • Re-record: discards the Voice note and enables you to record another one. • Default destination: allows you to remove or edit the default destination. • Save: saves the Voice note and continues to the Send option. 7. To send the Voice note, press the Send soft key or select the Send option in the Options menu. 8.
• My Album: allows you to send the Voice note to My Album. • My Journal: allows you to send the Voice note to My Journal. • Change recipient: allows you to Cc or Bcc additional numbers. • Back: takes you back to the previous screen. 10. Highlight the Send option and press the Select soft key or the key. 11. To add a destination, select Empty and press the Select soft key. Repeat from step 8. You can enter up to 20 destinations. 12.
Text Messages Use the Delete option in each message box to delete obsolete messages. Create new In this menu, you can write and send a text message. Creating a Simple Text Message 1. In Idle mode, press the Menu soft key to access Menu mode. 2. Using the Navigation keys, scroll to the Messages icon. Press the Select soft key or the key to enter the menu. 3. Highlight the Create new option and press the Select soft key or the key. 4.
• • • • • • Text messages template menu. Phonebook allows you to add names and phone numbers to your message. Favorites allows you to add internet addresses to your message. Add picture: allows you to add a picture to your message. Select the category of the item to be added. In each category, you can select from the various factory-set items or choose an item received from other sources, such as the Internet or other phones. Add animation: allows you to add an animation to your message.
Picture Messages 9. The number you selected will be entered in the To text box. Press the Options soft key for the following options: • Send: allows you to send the text message. • Recent log: allows you to select from recipients of your previous messages. • Phonebook: allows you to enter the phone number you want from your phonebook. • Group: allows you to send the text message to an entire group such as family or friends. • Save to drafts: save the message to your Phone or SIM. 10.
multimedia presentation in a single file. It is not a text file with attachments. Using the Picture Messaging feature, your phone can receive and send messages that contain multimedia files, such as photos, sounds and images you downloaded from the Internet and voice memos you recorded. This function is available only if it is supported by your service provider. Only phones that offer multimedia messaging features can receive and display multimedia messages.
Picture Messages 7. To add a picture or video clip, highlight the Graphics & Video option and press the key. 8. Highlight one of the following options and press the Select soft key or the key. • Images: allows you to select a picture from your Images folder. • Videos: allows you to select a video clip from your Images folder. 9. Select an image or video and press the Options soft key. Highlight the Add option and press the Select soft key or the key to add it to your message. 10.
14. Enter your message and press the key. 15. To change the Subject or Message, select a category and press the Options soft key. Highlight Edit to edit the item. 16. To change the image or sound with another one, select a category and press the Options soft key. Depending on the category selected, highlight Change image or Change sound to remove or replace the item. 17. When you have finished creating the message, press the Options key and highlight the Send option. Press the Select soft key or the key.
Inbox • Phonebook: allows you to enter the phone number you want from your phonebook. • Group: allows you to send the text message to an entire group such as family or friends. • My Album: allows you to send the message to the My Album folder. • My Journal: allows you to send the message to My Journal. • Save to: allows you to save the message as a draft or a template. • Change recipient: allows you to Cc or Bcc additional numbers. • Back: takes you back to the previous screen. 20.
in your Phonebook. After you have read the message, the envelope in the icon will appear opened. Note: By pressing the Left or Right Navigation keys, you may scroll between Inbox, Sentbox, Outbox, and Drafts. 1. In Idle mode, press the Menu soft key to access Menu mode. 2. Using the Navigation keys, scroll to the Messages icon. Press the Select soft key or the key to enter the menu. 3. Highlight the Inbox option and press the Select soft key or the key. Viewing a Text Message in Inbox 1.
Inbox 2. Highlight the View option and press the Select soft key or the key to read the message contents. 3. To scroll through the contents, press the Up or Down Navigation key. While reading a text message, you may choose the following options by pressing the Options soft key: • Reply via: allows you to send a reply to the sender by sending a text or picture message. • Call back: places a call back to the number. • Forward: allows you to forward the message to another number.
• Reply via text message: allows you to send a reply to the sender by sending a text message. • Reply via picture message to: allows you to send a reply to the sender or All by sending a picture message. • Forward: allows you to forward the message to another number. • Delete: deletes the selected text message or all messages. • Sort by: allows you to sort messages by Read/Unread, Date, Name, Type, Size, or Subject.
Inbox • Save media: allows you to save message media to Graphic & Video folder, Audio folder, vCard, or vCalendar. • Properties: shows you information about the message, such as time and date the message was received, the sender’s email address or phone number, recipient’s e-mail address or phone number, Cc, message size, priority, and class. Viewing a Voice Note in Inbox 1. Select a Voice Note from the list and press the Options soft key.
• Reply via text message: allows you to send a reply to the sender by sending a text message. • Reply via picture message to: allows you to send a reply to the sender or All by sending a picture message. • Forward: allows you to forward the message to another number. • Delete: allows you to delete the message. • Save address: allows you to extract the sender’s number and URL, e-mail addresses or phone numbers from the message text, so that you can save them in your phone’s memory.
Sentbox 2. Highlight the View option and press the Select soft key or the key to listen to the message contents. While reading the message, you may choose the following options by pressing the Options soft key: • Go to URL: allows you to go to the website on your WAP browser. • Delete: allows you to delete the message. • Save address: allows you to extract the sender’s number and URL, e-mail addresses or phone numbers from the message text, so that you can save them in your phone’s memory.
1. In Idle mode, press the Menu soft key to access Menu mode. 2. Using the Navigation keys, scroll to the Messages icon. Press the Select soft key or the key to enter the menu. 3. Highlight the Sentbox option and press the Select soft key or the key. 4. Select a message from the list and press the Options soft key. 5. Highlight the View option and press the Select soft key or the key to view the message contents. 6. To scroll through the contents, press the Up or Down Navigation key.
Drafts 2. Using the Navigation keys, scroll to the Messages icon. Press the Select soft key or the key to enter the menu. 3. Highlight the Outbox option and press the Select soft key or the key. 4. Select a message from the list and press the Options soft key. 5. Highlight the View option and press the Select soft key or the key to view the message contents. 6. To scroll through the contents, press the Up or Down Navigation key.
3. Highlight the Drafts option and press the Select soft key or the key. 4. Select a message from the list and press the Options soft key. 5. Highlight the Edit option and press the Select soft key or the key to edit the message contents. 6. To send the message, press the Options soft key and highlight the Send option. 7. Press the Select soft key or the message.
Voice Mail You can choose from ten predefined sentences that you can add to your text message to save time. 5. If you want templates for a picture message, highlight the Picture messages Template option and press the Select soft key or the key. You can choose between eleven different picture message formats. You can then edit the parts that you choose. Voice Mail This menu provides you with a way of accessing your voice mailbox, if provided by your network. 1.
Note: Voice mail is a network feature. Please contact your service provider for further details. Delete All This menu allows you to delete all of the messages in each message box. Or, you can also delete all of your messages in all message boxes at one time. Important! Once messages have been deleted, they cannot be recovered. 1. To select a message box to clear, press the Up or Down Navigation key. To delete all of your messages, select the All option. 2. To place or remove a check mark, press the key.
Settings • Destination address: allows you to enter a number that you would like to send all messages to. You can still message others, but this number will always appear in the Send list. • Validity period: allows you to set the length of time your text messages are stored at the message center while attempts are made to deliver them. • Reply path: allows the recipient of your message to send you a reply message using your message center, if your network supports this service.
• Ads reject: you can set your phone to automatically reject advertising messages. • Report allowed: you can set the option to receive a delivery report. Predictive text mode The T9 predictive text entry mode is used to reduce the number of key strokes associated with entering text. You can set the Predictive text mode option to either On or Off. For more information on Predictive text, see "Using T9 Mode" on page 49.
Instant Messaging 2. Using the Navigation keys, scroll to the Instant Messaging icon. Press the Select soft key or the to enter the menu. key 3. Highlight the messenger service to which you subscribed using the Up or Down Navigation key and press the Select soft key or the key. 4. Highlight the Sign on, Connect, or Sign in option, depending on your messenger service and press the Select soft key or the key. 5. Enter the required sign on information such as ID and password and press the OK soft key.
• Help: provides help information on Service provider, Sign up, Connect, Contact list, Sending IMs, Receiving IMs, Privacy, and Away. Memory Status You can check the amount of the memory being used and the memory remaining for multimedia messages. Section 7 The display shows the total space including the used and free space. You can also view how much space is currently occupied by each message box.
Section 8: Changing Your Settings Section 8 Topics Covered • Time & Date Settings • Phone Settings • Display Settings • Sound Settings • Network Services Settings • Security Settings • Memory Status • Reset Settings This section explains the sound and phone settings for your phone. It includes display settings, security settings, and extra settings associated with your phone.
Section 8 Time & Date Settings This menu allows you to change the current time and date displayed. The following options are available: • Set time: allows you to change the hour and minute. • AM/PM: allows you to set either AM or PM. • Time format: allows you to select whether your time is displayed in 12 hour or 24 hour format. • Set date: allows you to enter the month, day, and year. • Date format: allows you to select MM/DD/YYYY, DD/MM/YYYY, or YYYY/MM/DD format.
Phone Settings Note: Automatic updates of time and date do not change the time you have set for alarm settings or calendar memos. Phone Settings You can customize various phone settings. Language This menu allows you to select a display language for Text language and Input mode. Choose from English, French, and Spanish. Greeting message This menu allows you to set a greeting to be displayed briefly when the phone is switched on. For details about entering characters, see "Using ABC Mode" on page 47.
• Auto redial: when this option is checked, the phone makes up Section 8 to ten attempts to redial a phone number after an unsuccessful call. Note: The interval between call attempts varies. • Anykey answer: when this option is checked, you can answer key or the an incoming call by pressing any key, except the Reject soft key. To reject the call, press the key or the Reject soft key. When this option is unchecked, you must press the key or Accept soft key to answer a call.
Display Settings • Main LCD wallpaper: you may select between Default wallpapers, photos from My Photos folder, or Downloaded images to be displayed on the idle screen. analog clock image to have displayed on the front LCD of your phone. To change the background image: 1. Scroll through the list by pressing the Navigation keys. 2. Press the Save soft key or the you want highlights. key when the image Text display This menu allows you to set text position, style and color.
Section 8 Select Main LCD or Front LCD and press the Select soft key. Press the Left or Right Navigation key or press the Volume keys to adjust the contrast. Backlight In this menu, you can select the length of time that the keypad backlight is on and how much longer the display is illuminated before going off. The On setting is how long the keypad backlight is on. You can select 15 seconds, 30 seconds, 1 minute, 3 minutes, or 10 minutes.
Sound Settings 3. Press the Save soft key or the key to save your change. Otherwise, press the Cancel soft key. 1. Highlight the Font color option and press the Select soft key or the key. 2. Use the Left or Right key to select either Basic (black) or Rainbow. 3. Press the Save soft key or the key to save your change. Otherwise, press the Cancel soft key.
Section 8 Volume This menu allows you to adjust the ring volume to one of 5 levels. Use the Right or Left key to increase or decrease the volume. Alert type This menu allows you to specify how you are to be informed of incoming calls. Use the Right or Left key to select a Ring tone type. The following options are available: • Melody: the phone rings using the ring melody selected in the Ringtone menu. • Vibration: the phone vibrates but does not ring.
Sound Settings Power on/off To turn off the sound, select Off. Folder on/off This menu allows you to select the melody that the phone sounds when you open or close your phone. To turn off the sound, select Off. Silent mode This menu allows you to select whether or not your phone will vibrate while in quiet mode. You may choose between Vibration All and Silent All. Extra tones You can customize additional tones for the phone. 1. To turn a given tone on, press the Select soft key or the key.
• Indicative tone: sets whether or not the phone informs you Section 8 when you have made a mistake. Network Services Settings Call forwarding This network service enables incoming calls to be rerouted to the number that you specify. Example: You may wish to forward your business calls to a colleague while you are on holiday. To set your call forwarding options: 1. Select a call forwarding option by pressing the Up or Down Navigation key and then press the Select soft key or the key.
Network Services Settings 3. To activate call forwarding, select Activate by using the Left or Right key. 4. To deactivate call forwarding, select Deactivate by using the Left or Right key. 5. Enter the number to which the calls are to be forwarded in the Forward to text box and press the Select soft key or the key. To enter an international code, press and hold the key until the + sign displays. 6.
Section 8 1. Select the type of calls, Voice calls or Data calls, to which the call waiting option is to be applied by pressing the Up or Down Navigation key and then press the Select soft key or the key. The screen informs you whether call waiting is activated or deactivated. 2. Highlight Activate or Deactivate and press the Select soft key or the key. 3. Call waiting will then be activated or deactivated. 4. Select the Cancel all option to deactivate Call waiting on all voice and data calls.
Security Settings 1. Highlight the Default Setup option and press the Select soft key or the key. If you select Automatic, you are connected to the first available network when roaming. 3. If you select Manual, press the Up or Down Navigation key until the network you want highlights and then press the Select soft key or the key. The phone will scan for that network and you will be connected. Caller ID You can prevent your phone number from being displayed on the phone of the person being called.
Section 8 PIN check When the PIN Check feature is enabled, you must enter your PIN each time you switch on the phone. Consequently, any person who does not have your PIN cannot use your phone without your approval. Note: Before enabling or disabling the PIN Check feature, you must enter your PIN. The following options are available: • Disable: the phone connects directly to the network when you switch it on. • Enable: you must enter the PIN each time the phone is switched on.
Security Settings The following options are available: • Disable: you are not asked to enter the phone password when • Enable: you are required to enter the phone password when you switch on the phone. Change password The Change password feature allows you to change your current phone password to a new one. You must enter the current password before you can specify a new one. The password is preset to “00000000” at the factory.
Section 8 FDN mode FDN (Fixed Dial Number) mode, if supported by your SIM card, allows you to restrict your outgoing calls to a limited set of phone numbers. The following options are available: • Disable: you can call any number. • Enable: you can only call phone numbers stored in Phonebook. You must enter your PIN2. You can obtain your PIN2 from your service provider. Change PIN2 The Change PIN2 feature allows you to change your current PIN2 to a new one.
Reset Settings Reset Settings The following options are available: • All: Phone, Display, and Sound settings will be returned to default values. • Phone settings: only phone settings will be returned to default values. • Display settings: only display settings will be returned to default values. • Sound settings: only sound settings will be returned to default values. To reset your settings: 1. Highlight one of the options and press the place a check mark next to the option. key to 2.
110 Section 8
Section 9: Fun & Apps Topics Covered • File Manager • Voice Memo • Games • Organizer Section 9: Fun & Apps 111 Section 9 This section outlines the various applications that are available on your phone.
File Manager File Manager allows you to manage your sounds, images, and videos in one convenient location. Sounds In this menu, you can view the list of sounds downloaded from the web server or received in multimedia messages. You can set a downloaded sound as the current ring tone. The following options are available: Section 9 Get more MegaTones Using the Get More MegaTones option on the sounds list, you can access the web site preset by T-Mobile and download new sounds.
File Manager • Delete: allows you to delete the selected sound or all sounds. • Protection: allows you to lock the sound to protect it from deletion. • Properties: displays the sound name, date, format, length, size, and protection. Voice list The Voice list contains your recorded audio messages. Highlight an item and press the Options soft key. The following options are available: Section 9 • Play: plays the audio message. • Rename: allows you to change the name of the audio message.
Note: when downloading Wallpapers, charges may apply. My Album This menu provides the ability for you to view the photos you have stored on the t-zone browser. Use the following procedures to access My Album. 1. In your t-zone browser, select the My Albums Menu link and press the Select soft key or the key. Section 9 2. Photos sent to this folder are stored in the Inbox Album. Press the Select soft key to view the photos. 3. Press the screen.
File Manager • Delete: allows you to delete the selected image or all images. • Protection: allows you to lock the image to protect it from deletion. • Properties: displays the image name, date, format, resolution, size, quality, and protection. My Photos In this menu you can review the photos you’ve taken. Highlight a photo and press the Options soft key to choose from the following options: Section 9 • View: allows you view the photo on your display.
Videos In this menu, you can view a list of videos downloaded from the web server or received in multimedia messages. The following options are available: Downloaded videos This menu allows you to access your downloaded video clips. Section 9 Scroll to the video you want to view. By pressing the Options soft key you can access the following options: Note: when downloading videos, charges may apply. • Play: plays the video. • Send: allows you to send the video via Picture message.
Voice Memo • Rename: allows you to rename the video. • Delete: allows you to delete the selected video or all videos. • Protection: allows you to set protection on this video so that it cannot be deleted. • Properties: displays the video name, date, format, resolution, size, length, quality, and protection. Memory Status Voice Memo You can record voice memos. After recording, you can send the memo to other people via the Multimedia Message Service. To use Voice Memo, follow these steps: 1.
1. To start recording, press the key. 2. Record a memo by speaking into the microphone. 3. When the you are finished recording, press the Stop soft key or the key. The voice memo is automatically saved in the Voice list. 4. Press the Options soft key to display the following options: Section 9 • • • • • Play: plays the voice memo. Rename: changes the name of the voice memo. Delete: deletes the voice memo. Protection: allows you to lock or unlock the voice memo.
Games • Recording time: allows you to set the recording time to 30 seconds, 1 minute, or 1 hour. • Volume: allows you to set the default volume for the recording. • Default name: allows you to set the default name for the recordings. Games You can download MIDlets (Java applications that run on mobile phones) from various sources using t-zones and store them in your phone. Note: Java services may not be available, depending on your service provider.
2. Scroll to the MIDlet you want on the Downloads list and press the key. 3. The startup screen of the MIDlet will be displayed along with game options. Use the Navigation keys to scroll between options. Press the key to make a selection. Note: MIDlet game options will differ depending on the MIDlet you select. MIDlet Options Section 9 1. In the Downloaded games Menu, scroll to the MIDlet you want and press the Options soft key. The following options are available: • Launch: starts the MIDlet.
Organizer Lower-case character mode (a): allows you to enter lower-case English characters. Number mode (1): allows you to enter numbers. Symbol mode: allows you to enter symbols. After highlighting a symbol by pressing the Navigation keys, press the key to insert it. T9 mode (T9): allows you to enter English characters by pressing one key per letter. In this mode, you can change the case by pressing the key. Memory Status You can check the amount of memory being used and memory remaining for your games.
The following options are available: • Wake-up call: the alarm rings to wake you up in the morning. • Alarm1: set the day, time, and tone for this alarm. • Alarm2: set the day, time, and tone for this alarm. • Auto power: alarm rings at the specified time even if the phone is turned off. If the option is set to Off and the phone is switched off at the specified time, the alarm does not ring. To set the alarm: Section 9 1. Highlight the Alarm option and press the Right navigation key to set Alarm to On.
Organizer 8. Press the Save soft key or the 9. Press the key. key to return to Idle mode. Note: Your phone is preset to a 12-hour format. To change the time format, see "Time & Date Settings" on page 94. 10. To stop the alarm when it rings, open the phone and press the OK soft key, Volume keys, key, key, or key. Calendar Section 9 With the Calendar feature, you can: • consult the calendar by month, week, or day. • set schedules and note anniversaries • make a To do list.
To do items Miscellaneous items The number of entries next to each icon reflects the number of entries for the selected day on the calendar. The following options are available when you press the Options soft key: • View: takes you to the Day view of the selected day. • Create: allows you to create a Schedule, Anniversary, Section 9 Miscellaneous, or To do event. • Week view: takes you to the Week view of the selected date. • Go to today: takes you to the Month view with today’s date highlighted.
Organizer • Go to date: takes you to the Week view of the date you entered. • Delete: allows you to delete all events for a selected date, or delete all events for preceding dates. You can also delete all events. Day view When you select this option, you are taken to the Day view of the selected day with any events listed.
7. Highlight the Save option and press the Select soft key or the key. Your information is saved to the Schedule. Anniversary This option allows you to record Anniversaries in your calendar. You can also set an alarm to remind you of important anniversaries. Section 9 1. Highlight the Anniversary option and press the Select soft key or the key. 2. Press the Options soft key. 3. Highlight the Create option and press the Select soft key or the key. 4.
Organizer 3. Highlight the Create option and press the Select soft key or the key. 4. Enter the subject in the Subject text box then press the Down soft key. 5. Continue to enter other information including Details, Start date, Start time, Alarm tone, AM/PM, End date, End time, and AM/PM. 6. When you are finished, press the Save soft key. Your Miscellaneous information is saved to the Calendar. This feature allows you to enter a list of tasks to be done. 1.
High priority items have a red explanation mark, Normal priority items have a blue explanation mark, and Low priority items have a gray explanation mark. 1. To mark an item Done, highlight the item and press the key. 2. Press the Options soft key. 3. Highlight the Done option and press the Select soft key or the key. Section 9 4. The status checkbox next to the To do item will be checked. 5. To edit other fields in the To do item, highlight the item and press the key. 6. Press the Options soft key. 7.
Organizer The missed alarm event information is displayed. 3. To acknowledge and remove the event, press the Confirm soft key or the key. The event will be removed from the Missed alarm events menu. Memo You can make up to 50 memos for the calendar. Writing a Memo 2. Press the Options soft key. 3. Highlight the Create option and press the Select soft key or the key. An empty memo screen displays to allow you to enter your memo. 4. Enter your memo and then press the Options soft key.
• Cancel: cancels the Memo screen and returns you to the previous menu. Editing a Memo 1. Highlight the Memo option and press the Select soft key or the key. 2. Highlight a memo and press the Options soft key or the key. 3. Highlight the Edit option and press the Select soft key or the key. Section 9 The memo displays to allow you to edit your memo. 4. To save your memo, press the Options soft key. Note: For further details about how to enter characters, see "Using ABC Mode" on page 47. 5.
Organizer Calculator With this feature, you can use the phone as a calculator. The calculator provides the basic arithmetic functions; addition, subtraction, multiplication, and division. 1. Enter the first number using the numeric keys. 2. Enter the operation for your calculation by pressing the key according to the illustration on the display. The key is used for the decimal. The key can also be used to create brackets. 4. To view the result, press the = soft key or the key.
• Weight • Volume • Area • Temperature To convert a length, weight, volume, area, or temperature, do the following: 1. Scroll to the conversion feature you wish to use and press the Select soft key or the key. Section 9 2. Enter the quantity you want converted. Note: To include a decimal point, press the key. 3. Use the Up, Down, Left, and Right navigation keys to select the From and To units of measure for the quantity you want converted. 4. Press the Back soft key to return to the Unit conversion menu.
Organizer all stopwatch times recorded. Press the time. You can have up to 4 lap times.
134 Section 9
Section 10: Camera and Camcorder Topics Covered • Using the Camera and Camcorder • Take Photo • Record Video • My Photos • My Videos • My Album • My Journal Section 10: Camera and Camcorder 135 Section 10 This section explains how to use the camera and camcorder on your phone. You can take photos and video clips using the built-in camera and camcorder.
Using the Camera and Camcorder Using the camera/camcorder module in your phone, you can take photos or video clips of people or events while on the move. Additionally, you can send photos and video clips to other people in a Picture Messaging message or set a wallpaper or caller ID image. Note: Do not take photos or videos of people without their permission. Do not take photos or videos in places where cameras are not allowed.
Take Photo 4. Press the or key to take the photo. Send To: My Album? is displayed. Press the Yes soft key if you want to send the photo to your T-Mobile My Album service. The phone’s default destination is set to My Album. The photo is automatically saved in My Photos in the phone. Note: To change the default destination for your pictures, press the Options soft key when Send To: My Album? appears on the display. Highlight the Default destination option and the Replace option.
Effects: allows you to change the color tone or apply special effects to the photo. Frames: allows you to select a decorative frame. Select a frame from the list using the Navigation keys and press the key to save your setting. Timer: allows you to set a time delay before the camera takes the photo. Select the length of delay you want. When you press the or key, the camera takes the photo after the specified time has elapsed. Go to My Photos: takes you to your My Photos folder.
Take Photo Short Cut: shows you how to change options using your keypad in capture mode. The following short cuts are available: Up and Down navigation keys zoom in and out. Left and Right navigation keys adjust the image brightness. flips the image vertically shows the mirror image changes from camera to camcorder or camcorder to camera. changes the picture resolution. changes the photo quality between Normal, Fine, and Super fine. Section 10 changes the camera Shooting mode.
Record Video Your camcorder produces videos in 3GP format. 1. In Idle mode, press and hold the key on the right side of the phone to turn on the camera. Press the key to toggle from camera to camcorder. You can also press the Menu soft key to access Menu mode. Highlight Camera and press the Select soft key or press the key. 2. Highlight Record Video and press the Select soft key or the key. 3. Adjust the image by aiming the camcorder at the subject.
Record Video The following options are available: Take Photo: allows you to take a photo in camera mode. Effects: allows you to change the color tone or apply special effects to the video clip. Timer: allows you to set a time delay before the camcorder takes the video clip. Select the length of delay you want. When you press the or key, the camcorder records the video after the specified time has elapsed. Go to My Video: takes you to your My Videos folder.
changes from camera to camcorder or camcorder to camera. changes the color tone or applies a special effect to the video. turns sound on or off. sets a time delay. takes you to My Videos menu. My Photos 1. In Idle mode press the Menu soft key to access the Menu mode. 2. Highlight Camera and press the Select soft key or the key. Section 10 3. Select My Photos and press the Select soft key or the key.
My Videos • Send to My Album: allows you to send your photos to My Album. • Send via picture message: allows you to create and send a photo in a picture message. For more details, see "Picture Messages" on page 73. • Default destination: allows you to Remove or Replace where your photos are sent after you take them. • Set as: allows you to set the photo as your Wallpaper or as a Caller ID. • Edit: allows you to add emoticons or frames to your photos or apply special effects.
mode. 2. Highlight Camera and press the Select soft key or the key. 3. Select My Videos and press the Select soft key or the key. When you access this menu, your phone displays the video clips in Thumbnail mode, which shows them as small images. Use the Navigation keys to scroll through the video clips. 4. To view the video clips on the full screen, press the key. To go back to Thumbnail mode, press the Back soft key or the key. 5.
My Album 1. From the My Videos menu, use the Up or Down Navigation key to highlight the video you want to delete and press the Options soft key. 2. Highlight the Delete Option, then press the Right Navigation key. 3. Highlight Selected if you only want to delete the video clip that you selected. Highlight All if you want to delete all video clips. 4. Press the Yes soft key to confirm the deletion. 5. When you have finished, press the key.
7. Press the screen. key to exit t-zones and return to the Idle My Journal Section 10 This menu provides the ability for you to store your photos using the t-zone website.
Section 11: t-zones Topics Covered • t-zones This section outlines the t-zones service on your phone. For more information, contact T-Mobile.
t-zones Your phone is equipped with a WAP (Wireless Application Protocol) browser to allow you to access and navigate the Wireless Web using your phone. Home Selecting this menu connects the phone to the network and loads the t-zones homepage. You can also press the key in Idle mode to launch the t-zones browser. The content of the t-zones startup homepage depends on your Wireless Web service provider. To scroll through the screen, use the Up and Down keys.
t-zones Entering Text in the t-zones When you are prompted to enter text, the currently active text input mode is indicated on the screen. The following modes are available: • Upper-case character mode (A): allows you to enter uppercase English characters. • Lower-case character mode (a): allows you to enter lowercase English characters. Note: You can enter symbols in upper-case or lower-case character mode by pressing the key. • Number mode (1): allows you to enter numbers.
Note: The menus may vary, depending on your version of t-zones. The following options are available: • Go to URL: allows you to manually enter the URL address of a Web page. After entering an address, press the there directly. key to go • Favorites: shows the bookmarks list. You can bookmark the current web page or access previously bookmarked pages. • Messaging: allows you to create a text message or check your My Messages folder.
t-zones 4. Highlight the Save option and press the Select soft key or the key. Note: For further details about how to enter characters, see "Using ABC Mode" on page 47. After saving favorite items, you can access the following options by selecting the item, then pressing the Options soft key: • Go: takes you to the site. • Edit: allows you to edit the address. • Delete: allows you to delete the address. Or, you can select the favorite item and press the Your browser will take you to the site. key.
152 Section 11
Section 12 Section 12: Health and Safety Information Topics Covered • Health and Safety Information This section outlines the safety precautions associated with using your phone. These safety precautions should be followed to safely use your phone.
Section 12 Health and Safety Information Exposure to Radio Frequency (RF) Signals Certification Information (SAR) Your wireless phone is a radio transmitter and receiver. It is designed and manufactured not to exceed the exposure limits for radio frequency (RF) energy set by the Federal Communications Commission (FCC) of the U.S. government.
Health and Safety Information Before a new model phone is available for sale to the public, it must be tested and certified to the FCC that it does not exceed the exposure limit established by the FCC. Tests for each model phone are performed in positions and locations (e.g. at the ear and worn on the body) as required by the FCC. Body-worn operations are restricted to Samsung-supplied, approved, or nonSamsung designated accessories that have no metal and must provide at least 1.
• Head: 1.18 W/Kg. Section 12 • Body-worn: 0.781 W/Kg. SAR information on this and other model phones can be viewed on-line at www.fcc.gov/oet/fccid. To find information that pertains to a particular model phone, this site uses the phone FCC ID number which is usually printed somewhere on the case of the phone. Sometimes it may be necessary to remove the battery pack to find the number.
Consumer Information on Wireless Phones Do wireless phones pose a health hazard? The available scientific evidence does not show that any health problems are associated with using wireless phones. There is no proof, however, that wireless phones are absolutely safe. Wireless phones emit low levels of radio frequency energy (RF) in the microwave range while being used. They also emit very low levels of RF when in the stand-by mode.
Section 12 or medical devices. However, the agency has authority to take action if wireless phones are shown to emit radio frequency energy (RF) at a level that is hazardous to the user. In such a case, FDA could require the manufacturers of wireless phones to notify users of the health hazard and to repair, replace or recall the phones so that the hazard no longer exists.
Consumer Information on Wireless Phones The National Institutes of Health participates in some interagency working group activities, as well. FCC also regulates the base stations that the wireless phone networks rely upon. While these base stations operate at higher power than do the wireless phones themselves, the RF exposures that people get from these base stations are typically thousands of times lower than those they can get from wireless phones.
Section 12 to 22 hours per day. These conditions are not similar to the conditions under which people use wireless phones, so we don't know with certainty what the results of such studies mean for human health. Three large epidemiology studies have been published since December 2000.
Consumer Information on Wireless Phones What is FDA doing to find out more about the possible health effects of wireless phone RF? FDA is working with the U.S. National Toxicology Program and with groups of investigators around the world to ensure that high priority animal studies are conducted to address important questions about the effects of exposure to radio frequency energy (RF).
Section 12 What steps can I take to reduce my exposure to radio frequency energy from my wireless phone? If there is a risk from these products - and at this point we do not know that there is - it is probably very small. But if you are concerned about avoiding even potential risks, you can take a few simple steps to minimize your exposure to radio frequency energy (RF).
Consumer Information on Wireless Phones Do hands-free kits for wireless phones reduce risks from exposure to RF emissions? Since there are no known risks from exposure to RF emissions from wireless phones, there is no reason to believe that hands-free kits reduce risks. Hands-free kits can be used with wireless phones for convenience and comfort. These systems reduce the absorption of RF energy in the head because the phone, which is the source of the RF emissions, will not be placed against the head.
Section 12 believe that accessories that claim to shield the head from those emissions reduce risks. Some products that claim to shield the user from RF absorption use special phone cases, while others involve nothing more than a metallic accessory attached to the phone. Studies have shown that these products generally do not work as advertised. Unlike "hand-free" kits, these so-called "shields" may interfere with proper operation of the phone.
Consumer Information on Wireless Phones FDA continues to monitor the use of wireless phones for possible interactions with other medical devices. Should harmful interference be found to occur, FDA will conduct testing to assess the interference and work to resolve the problem. Additional information on the safety of RF exposures from various sources can be obtained from the following organizations: • FCC RF Safety Program: http://www.fcc.
• Updated 4/3/2002: US Food and Drug Administration Section 12 http://www.fda.gov/cellphones Road Safety Your wireless phone gives you the powerful ability to communicate by voice, almost anywhere, anytime. But an important responsibility accompanies the benefits of wireless phones, one that every user must uphold. When driving a car, driving is your first responsibility. When using your wireless phone behind the wheel of a car, practice good common sense and remember the following tips: 1.
Road Safety 6. Dial sensibly and assess the traffic; if possible, place calls when you are not moving or before pulling into traffic. Try to plan calls when your car will be stationary. If you need to make a call while moving, dial only a few numbers, check the road and your mirrors, then continue. 7. Do not engage in stressful or emotional conversations that may be distracting.
Section 12 one appears injured, or a vehicle you know to be stolen, call roadside assistance or other special non-emergency number. "The wireless industry reminds you to use your phone safely when driving." For more information, please call 1-888-901-SAFE, or visit our web-site www.wow-com.com Provided by the Cellular Telecommunications & Internet Association.
Using Your Phone Near Other Electronic Devices from your wireless phone. Consult the manufacturer to discuss alternatives. Pacemaker manufacturers recommend that a minimum distance of 15 cm (6 inches) be maintained between a wireless phone and a pacemaker to avoid potential interference with the pacemaker. These recommendations are consistent with the independent research and recommendations of Wireless Technology Research.
Section 12 hearing devices. Not all phones have been rated. Phones that are rated have the rating on their box or a label on the box. The ratings are not guarantees. Results will vary depending on the user’s hearing device and hearing loss. If your hearing device happens to be vulnerable to interference, you may not be able to use a rated phone successfully. Trying out the phone with your hearing device is the best way to evaluate it for your personal needs.
Potentially Explosive Environments Vehicles RF signals may affect improperly installed or inadequately shielded electronic systems in motor vehicles. Check with the manufacturer or its representative regarding your vehicle. You should also consult the manufacturer of any equipment that has been added to your vehicle. Posted Facilities Switch your phone off in any facility where posted notices require you to do so.
Section 12 using liquefied petroleum gas (such as propane or butane), areas where the air contains chemicals or particles, such as grain, dust or metal powders, and any other area where you would normally be advised to turn off your vehicle engine. Emergency Calls This phone, like any wireless phone, operates using radio signals, wireless and landline networks as well as userprogrammed functions, which cannot guarantee connection in all conditions.
FCC Notice and Cautions Restricting Children's access to your Phone Your phone is not a toy. Children should not be allowed to play with it because they could hurt themselves and others, damage the phone or make calls that increase your phone bill. FCC Notice and Cautions FCC Notice The phone may cause TV or radio interference if used in close proximity to receiving equipment. The FCC can require you to stop using the phone if such interference cannot be eliminated.
Section 12 accessories may be dangerous and void the phone warranty if said accessories cause damage or a defect to the phone. Although your phone is quite sturdy, it is a complex piece of equipment and can be broken. Avoid dropping, hitting, bending or sitting on it. Other Important Safety Information • Only qualified personnel should service the phone or install the phone in a vehicle. Faulty installation or service may be dangerous and may invalidate any warranty applicable to the device.
Product Performance Product Performance The quality of each call you make or receive depends on the signal strength in your area. Your phone informs you of the current signal strength by displaying a number of bars next to the signal strength icon. The more bars displayed, the stronger the signal. If you're inside a building, being near a window may give you better reception.
Section 12 Maintaining Your Phone's Peak Performance For the best care of your phone, only authorized personnel should service your phone and accessories. Faulty service may void the warranty. There are several simple guidelines to operating your phone properly and maintaining safe, satisfactory service. • If your phone is equipped with an external antenna, hold the phone with the antenna raised, fully-extended and over your shoulder. • Do not hold, bend or twist the phone's antenna, if applicable.
Battery Standby and Talk Time Battery Standby and Talk Time Battery Precautions • Avoid dropping the cell phone. Dropping it, especially on a hard surface, can potentially cause damage to the phone and battery. If you suspect damage to the phone or battery, take it to a service center for inspection. • Never use any charger or battery that is damaged in any way. • Use the battery only for its intended purpose.
• Do not use incompatible cell phone batteries and chargers. Section 12 Some Web sites and second-hand dealers, not associated with reputable manufacturers and carriers, might be selling incompatible or even counterfeit batteries and chargers. Consumers should purchase manufacturer or carrier recommended products and accessories. If unsure about whether a replacement battery or charger is compatible, contact the manufacturer of the battery or charger.
Care and Maintenance Li-Ion batteries, contact your nearest Samsung authorized service center. Always recycle. Do not dispose of batteries in a fire. Your phone is a product of superior design and craftsmanship and should be treated with care. The suggestions below will help you fulfill any warranty obligations and allow you to enjoy this product for many years. • Keep the phone and all its parts and accessories out of the reach of small children. • Keep the phone dry.
• Do not put the phone in or on heating devices, such as a Section 12 microwave oven, a stove or a radiator. The phone may explode when overheated. • If your phone is equipped with an external antenna, use only the supplied or an approved replacement antenna. Unauthorized antennas or modified accessories may damage the phone and violate regulations governing radio devices. • If the phone, battery, charger or any accessory is not working properly, take it to your nearest qualified service facility.
Section 13: Warranty Information Topics Covered • Standard Limited Warranty Section 13 Section 13: Warranty Information 181
Standard Limited Warranty What is Covered and For How Long? SAMSUNG Section 13 TELECOMMUNICATIONS AMERICA, L.P.
Standard Limited Warranty What are SAMSUNG's Obligations? During the applicable warranty period, SAMSUNG will repair or replace, at SAMSUNG's sole option, without charge to Purchaser, any defective component part of Product.
Section 13 warranted for a period of ninety (90) days. All other repaired/replaced Product will be warranted for a period equal to the remainder of the original Limited Warranty on the original Product or for 90 days, whichever is longer. All replaced parts, components, boards and equipment shall become the property of SAMSUNG. If SAMSUNG determines that any Product is not covered by this Limited Warranty, Purchaser must pay all parts, shipping, and labor charges for the repair or return of such Product.
Standard Limited Warranty Section 13: Warranty Information 185 Section 13 EXPRESS WARRANTY OF ANY KIND WHATSOEVER WITH RESPECT TO THE PRODUCT. ALL IMPLIED WARRANTIES AND CONDITIONS THAT MAY ARISE BY OPERATION OF LAW, INCLUDING IF APPLICABLE THE IMPLIED WARRANTIES OF MERCHANTABILITY AND FITNESS FOR A PARTICULAR PURPOSE, ARE HEREBY LIMITED TO THE SAME DURATION OF TIME AS THE EXPRESS WRITTEN WARRANTY STATED HEREIN.
Section 13 WARRANTY GIVES YOU SPECIFIC LEGAL RIGHTS, AND YOU MAY ALSO HAVE OTHER RIGHTS, WHICH VARY FROM STATE TO STATE/PROVINCE TO PROVINCE. THIS LIMITED WARRANTY SHALL NOT EXTEND TO ANYONE OTHER THAN THE ORIGINAL PURCHASER OF THIS PRODUCT AND STATES PURCHASER'S EXCLUSIVE REMEDY.
Standard Limited Warranty OF ANY SUCH THIRD-PARTY SOFTWARE OR EQUIPMENT LIE SOLELY WITH THE PURCHASER AND THE DIRECT VENDOR, OWNER OR SUPPLIER OF SUCH THIRD-PARTY SOFTWARE OR EQUIPMENT, AS THE CASE MAY BE. Samsung Telecommunications America, L.P. 1301 East Lookout Drive Richardson, Texas 75082 Phone: 1-800-SAMSUNG Phone: 1-888-987-HELP (4357) ©2005 Samsung Telecommunications America. All rights reserved. No reproduction in whole or in part allowed without prior written approval.
Section 13 Intellectual Property Statement All Intellectual Property, as defined below, owned by or which is otherwise the property of Samsung or its respective suppliers relating to the SAMSUNG Phone, including but not limited to, accessories, parts, or software relating thereto (the "Phone System"), is proprietary to Samsung and protected under federal laws, state laws, and international treaty provisions.
Samsung Telecommunications America (STA), Inc. Samsung Telecommunications America (STA), Inc. Internet Address: http://www.samsungusa.com ©2005 Samsung Telecommunications America. Samsung is a registered trademark of Samsung Electronics America, Inc. and its related entities. Customer Care Center: 1301 E. Lookout Drive 1000 Klein St. Richardson, TX 75082 Plano, TX 75074 Tel: 972.761.7000 Toll Free Tel: 1.888.987.HELP (4357) Openwave® is a registered Trademark of Openwave, Inc.
190 Section 13
Index Delete all 28 Incoming calls 27 Missed calls 26 Outgoing calls 27 Waiting 34, 103 A ABC mode 46 Accessing a Menu Function 38 Alert type 100 Call Caller ID 105 Camcorder 135 recording video 140 B Backlight description 18 settings 98 Battery charging 8 installing 7 low indicator 9 removing 6 Broadcast Messages 90 Camera 135 taking photos 136 Change password 107 Charging battery 8 D Dialing a Number Phonebook 59 SIM Card 61 C Dialing display 98 Display Calendar 123 Call Barring 103 Call Fun
Functions and Options 29 G Games 119 Get More Help 19 Get more ringtones 99 Getting Started 5 Activating Your Phone 6 Voicemail 10 H Health and Safety Information 153 HiFi Ringers 112 I Icons, description 17 Instant Messaging 90 International Call 22 K Keypad Tone 100 Messages 67 Messaging Types of Messages 68 Missed Call Viewing 26 Multi-Party Call 35 Dropping One Participant 36 Private Conversation 35 Setting up 35 Mute 32 My Album 114, 145 My Journal 114, 146 My Name Card 63 My photos accessing p
Calculator 131 Calendar 123 Stopwatch 132 Timer 132 To do List 127 Unit Conversion 131 World time 131 Own Number 64 P Phone icons 17 switching on/off 10 Phone lock 106 Phone Settings 95 Phonebook Searching for a Number 33 Picture Messages 73 PIN change 106 check 106 Privacy 107 Push message Voice Memo 118 Shortcuts 38 Silent mode 101 SIM card installing 6 Soft Keys 30 Speakerphone 33 Speed Dial Setting Up Entries 59 Standard Limited Warranty 182 Stopwatch 132 Storing a number Phone’s Memory 55 SIM
Understanding Your Phonebook 53 Finding a Phonebook Entry 57 Finding My Phone Number 64 V Voice List 118 Voice Mail 11, 87 changing number 11 Voice Memo 117 Voice Messages 68 Voice notes 68 W Warranty Information 181 194