Deutsch
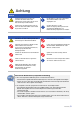
SICHERHEITSHINWEISE Diese Sicherheitshinweise sollen die sichere Nutzung des Geräts gewährleisten und Sachschäden vermeiden. Bitte lesen Sie sich dieses Dokument sorgfältig durch. Gebrauch Warnung Enthält Informationen oder Anleitungen, die Sie befolgen müssen zur Vermeidung von Personenschäden oder Verletzungen mit Todesfolge. Achtung Enthält Informationen oder Anleitungen, die Sie befolgen müssen zur Vermeidung eines Ausfalls oder einer Beschädigung Ihres Geräts.
Warnung Strom Stecken Sie den Netzstecker in die Steckdose. Schließen Sie nicht mehrere Geräte gleichzeitig an eine Steckdose an. Berühren Sie das Gehäuse, die Stromkabel oder den Netzstecker nicht mit feuchten Händen. Wenn das Video-/Soundkabel nach dem Anschließen heiß wird, ziehen Sie den Netzstecker und kontaktieren Sie sofort den Kundenservice. Installation/Wartung Installieren Sie das Produkt in einem gut belüfteten Raum. Legen Sie nichts auf die Oberfläche.
Achtung Strom Schließen Sie Ihren Fernseher an, nachdem Sie durch Ziehen der Netzstecker sowohl Fernseher als auch das Gerät ausgeschaltet haben. Die Steckdose sollte sich in der Nähe des Geräts befinden und leicht zugänglich sein. Stecken Sie den Netzstecker nicht ein, bevor Sie das Stromkabel an das Gerät angeschlossen haben. Vor dem Anschluss an die Stromversorgung sollten permanente Schutzleiterverbindungen zur Kabelverteilung vorgenommen werden.
INHALTSVERZEICHNIS SICHERHEITSHINWEISE 1 Gebrauch .................................................................................1 Symbole...................................................................................1 Warnung ..................................................................................2 Achtung ...................................................................................3 VOR INBETRIEBNAHME 6 Kabel-HD-DVR ...............................................................
Anschluss an einen Fernseher mit einem Antennenkabel ..........24 Anschluss an einen Router ..........................................................25 USB-Anschluss ............................................................................26 VERWENDUNG DES PRODUKTS 27 Installationsassistent ........................................................... 27 Grundlegende Bedienung................................................... 31 Nutzung der Hauptfunktionen ............................................
VOR INBETRIEBNAHME Kabel-HD-DVR Beim SMT-C7200 handelt es sich um einen HD-DVR (Digitaler Video-Recorder), d.h. einen Festplattenrecorder für Kabelempfang. Hauptfunktionen des SMT-C7200 HD-Bildanzeige Unterstützt hochauflösende Videoausgabe bis zu 1080i und bietet Ihnen damit klare und gestochen scharfe Bilder. Dolby Digital Sound Erzeugt einen realistischen Digitalsound durch Anschluss des Geräts an einen Empfangsverstärker über den SPDIF-Ausgang, der Dolby Digital unterstützt.
Timeshift beginnt, wenn der Nutzer die Taste Pause ( beendet, wenn der Nutzer die Taste Stopp ( ) drückt und wird ) drückt. Die Timeshift-Funktion nutzt den Timeshift-Puffer auf der Festplatte zur Aufnahme. Sofortaufnahme Automatische Aufnahme der aktuell ausgestrahlten Sendung. Eine vorübergehende Aufnahme wird gestartet, wenn Sie vom aktuellen Sender auf einen anderen Sender umschalten, und wird beendet, wenn Sie zu einem anderen Sender umschalten.
Lieferumfang Bitte überprüfen Sie, ob die folgenden Bestandteile in der Produktverpackung enthalten sind. SMT-C7200 Netzkabel Antennenkabel SCART-Kabel Standard HDMI-Kabel Fernbedienung (mit 2 AAA-Batterien) Benutzerhandbuch/ Kurzanleitung 8_ © SAMSUNG Electronics Co., Ltd.
Namen und Funktionen Dieser Abschnitt beschreibt die Namen und Funktion der Elemente an der Vorderund Rückseite des Geräts. Vorderseite Dieser Abschnitt beschreibt die Elemente auf der Vorder- und Rückseite. Benennung Beschreibung SmartcardSteckplatz öffnen TV/Radio Zwischen TV- und Radiosendern umschalten. - Leuchtet grün im Radio-Modus Menü Zeigt das Hauptmenü an. Zurück Zurückkehren zum vorherigen Screen oder Modus. Navigation Navigieren im ausgewählten Menü und die Funktion auswählen.
Benennung Aufnahme Beschreibung Eine laufende Sendung aufnehmen oder eine Sendung zur Aufnahme reservieren. Abbrechen einer Aufnahme, falls zur Aufnahme reserviert. - Leuchtet rot, wenn Aufnahme aktiv - Leuchtet grün, wenn Aufnahme reserviert ist Standby Status des Geräts in Standby-Modus oder aktiven Modus ändern. - Leuchtet rot im Standby-Modus - Leuchtet grün im aktiven Betriebs-Modus 10_ © SAMSUNG Electronics Co., Ltd.
Rückseite In diesem Abschnitt werden die Namen und die Funktionen der Anschlüsse auf der Rückseite beschrieben. Benennung Beschreibung Netzkabelanschluss Anschluss, an den das Netzkabel angeschlossen wird. Ein-/Aus-Schalter Schalter zum Ein- und Ausschalten des Geräts. Das Gerät ist eingeschaltet, wenn I auf der Taste gedrückt ist. Kabeleingang Anschluss, mit dem das Gerät über ein Antennenkabel mit der Antennendose verbunden wird.
Fernbedienung In diesem Abschnitt werden die Funktionen aller Tasten der Fernbedienung beschrieben. Exit: Einen Bildschirm/Modus beenden, zum zuletzt angesehenen Sender umschalten, vom TV-Modus in den Receiver-Modus wechseln. TV: In TV-Modus wechseln und Fernseher bedienen. Programm: Anzeige der elektronischen Programmzeitschrift (EPG) von einem beliebigen Bildschirm aus Select Video: Zugriff auf Video-on-Demand (VOD) Standby: Ein-/Ausschalten TV/Radio: Zwischen TV- und Radiosendern umschalten.
Einlegen der Batterien in die Fernbedienung Um eine ausreichend lange Betriebsdauer der Batterien zu gewährleisten, sollten Alkalibatterien (keine Standardbatterien) verwendet werden. Wenn Sie Standardbatterien benutzen, können Probleme bei der Bedienung des Geräts mit der Fernbedienung auftreten. - Es sollten zwei identische, neue Batterien für die Fernbedienung benutzt werden. - Entnehmen Sie die Batterien, wenn die Fernbedienung für längere Zeit nicht genutzt wird.
3 Geben Sie den 4-stelligen Code für Ihr Fernsehgerät oder die 4-stellige universelle Codenummer ein, indem Sie der Reihe nach jede Zahlentaste jeweils innerhalb von nicht mehr als 10 Sekunden drücken. Bei den ersten 3 Ziffern, blinkt die LED kurz auf. Bei der 4. Ziffer blinkt die LED zweimal, wenn der eingegebene Code gültig ist.
- Drücken Sie die Tasten 3 ( abzufragen. - Drücken Sie die Tasten 4 ( Ziffer abzufragen. ) und Info ( ) gleichzeitig, um die dritte Ziffer ) und Info ( ) gleichzeitig, um die letzte Zurücksetzen der universellen Fernbedienung - Drücken Sie auf der Fernbedienung die Tasten Menü ( ), Teletext ) und Standby ( ) gleichzeitig für mindestens 3 Sekunden, bis die LED ( zweimal blinkt. - Die Fernbedienung löscht alle auf ihr gespeicherten Codes.
INSTALLATION Dieser Abschnitt beschreibt die Installation des Geräts (SMT-C7200). Installationsumgebung Die nachstehende Tabelle enthält Angaben zur Installationsumgebung für das Gerät. Element Beschreibung Betriebstemperatur 0-40°C Luftfeuchtigkeit bei Betrieb 20–80% (40°C) Nennspannung, Frequenz AC 230 V +/- 15%, 50 Hz Leistungsaufnahme Max. 28 W Rundfunkfrequenz (Rx) 47~862 MHz Bei Gebrauch und Installation des Produkts Das Produkt muss unter bestimmten Umgebungsbedingungen genutzt werden.
Anschluss von Peripheriegeräten Dieser Abschnitt beschreibt, wie Sie Kabel und die einzelnen Peripheriegeräte an das Gerät anschließen. (Die Produktabbildung kann vom aktuellen Produkt abweichen.
Anschluss an einen Fernseher mit HDMIAnschluss Dieser Abschnitt beschreibt, wie Sie das Gerät über den HDMI-Anschluss an den Fernseher anschließen. Verbinden Sie den HDMI-Anschluss auf der Rückseite des Geräts mit dem HDMIAnschluss am Fernseher mit Hilfe eines HDMI-Kabels. High Definition Multimedia Interface (HDMI) Das SMT-C7200 enthält HDMI-Technologie. Der HDMI-Anschluss ist ein integrierter und Video-/Audio- Anschluss für beste HD-Bilder, wenn das Gerät an einen HD-Fernseher angeschlossen wird.
Anschluss an ein Fernsehgerät mit SCARTAnschluss Dieser Abschnitt beschreibt, wie Sie das Gerät über den SCART-Anschluss an einen Fernseher anschließen. Verbinden Sie den TV SCART-Anschluss auf der Rückseite des Geräts mit dem SCART-Anschluss des Fernsehers mit Hilfe eines SCART-Kabels.
Anschluss an einen Videorekorder mit SCARTAnschluss Dieser Abschnitt beschreibt, wie Sie einen Videorekorder mit einem SCART-Kabel an das Gerät anschließen. Verbinden Sie den VCR SCART-Anschluss auf der Rückseite des Geräts mit dem SCART-Anschluss des Videorekorders mit Hilfe eines SCART-Kabels. Anschließen eines Videorekorders (VCR) Schalten Sie bei Anschluss eines Videorekorders sowohl den Videorekorder als auch das Gerät aus, ziehen Sie die Netzstecker und verbinden Sie dann die Geräte.
Anschluss an einen Fernseher oder Videorekorder mit Composite-Anschluss Dieser Abschnitt beschreibt, wie Sie das Gerät über einen Kombinationsanschluss (Video und Audio) an einen Fernseher/Videorekorder anschließen. Video-Anschluss Verbinden Sie den VIDEO-Anschluss auf der Rückseite des Geräts mit dem Video Eingang des Fernsehers/Videorekorders. Audio-Anschluss Verbinden Sie die ANALOG AUDIO (L/R)-Anschlüsse auf der Rückseite des Geräts mit dem Audio Eingang (L/R) des Fernsehers/Videorekorders.
Anschluss an ein digitales Audiosystem Dieser Abschnitt beschreibt, wie Sie ein digitales Audiosystem (einen Verstärker oder ein Heimkinosystem mit Dolby Digital-Decodierfunktion) anschließen. Verbinden Sie mithilfe eines optischen Kabels für digitales Audio den DIGITAL AUDIO-Anschluss auf der Rückseite des Geräts mit dem Digital Audio Eingang (SPDIF) an Ihrem Dolby Digital Audio-Gerät.
Anschluss an die Antennendose (an das Kabelnetz) Dieser Abschnitt beschreibt, wie Sie das Gerät an die Antennendose anschließen. Verbinden Sie das beiliegende Antennenkabel in KABELEINGANG des Geräts und dann direkt in die Antennendose.
Anschluss an einen Fernseher mit einem Antennenkabel Dieser Abschnitt beschreibt, wie Sie einen Fernseher mit Hilfe eines Antennenkabels zum Empfang analoger TV- und Radiosender anschließen. Verbinden Sie den KABELAUSGANG auf der Rückseite des Geräts über ein Antennenkabel (nicht im Lieferumfang enthalten) mit dem Antenneneingang (CABLE IN) des Fernsehgeräts. 24_ © SAMSUNG Electronics Co., Ltd.
Anschluss an einen Router Dieser Abschnitt beschreibt, wie Sie das Gerät über ein Ethernet-Kabel an einen Router anschließen. Verbinden Sie den NETZWERK-Anschluss auf der Rückseite des Geräts über ein Ethernet-Kabel mit dem Router. Ethernet-Kabel Es muss ein geschirmtes Ethernet-Kabel benutzt werden.
USB-Anschluss Dieser Abschnitt beschreibt, wie Sie zusätzliche USB-Geräte wie z. B. einen USB WLAN-Stick anschließen. Verbinden Sie den USB-Anschluss auf der Rückseite des Geräts über ein USBKabel mit den USB-Geräten. 26_ © SAMSUNG Electronics Co., Ltd.
VERWENDUNG DES PRODUKTS Installationsassistent Bevor Sie fernsehen können, müssen Sie den Installationsassistenten ausführen, der beim erstmaligen Einschalten des Geräts aufgerufen wird. Vorbereitung TV-Erkennung Der Installationsassistent versucht zu erkennen, ob ein HD-fähiges Fernsehgerät an das Gerät angeschlossen ist. - Wenn kein HDTV-Fernsehgerät erkannt wird, wird die Bildschirmauflösung am HDMI-Anschluss auf 720p eingestellt. - Darüber hinaus wird das Farbformat auf RGB eingestellt.
Schritt 2 - Geräteeinstellungen prüfen In diesem Schritt werden automatisch einige Geräteeinstellungen überprüft, um eine ordnungsgemäße Funktionsweise des Geräts sicherstellen zu können. - Zu prüfende Einstellungen: HDTV Einstellungen / Antennensignal / Smartcard / Neue Software: 1 HDTV Einstellungen Die Installation des Fernsehers wurde als erstes ausgeführt. Daher wird dies bereits überprüft, wenn der Screen zum ersten Mal erscheint.
4 Neue Software Das Gerät prüft, ob eine neue Software-Version vorhanden ist. - Falls eine neue Software-Version gefunden wird, haben Sie nicht mehr die Möglichkeit, eine Aktualisierung abzulehnen. - Wenn eine neue Software-Version gefunden wird, führt das Gerät nach einem Countdown von 5 Sekunden einen Neustart durch und beginnt mit der SoftwareAktualisierung. - Falls keine neue Software-Version gefunden wird, fährt der Installationsassistent mit dem nächsten Bildschirm fort.
Schritt 4 - Suchergebnisse Nach einem erfolgreichen Sendersuchlauf wird der Ergebnisbildschirm angezeigt, auf dem die Anzahl der gefundenen TV- und Radiosender angegeben wird. Kunden, die das Gerät in einem Kabelnetz in Betrieb nehmen, die für den Videoabrufdienst SELECT VIDEO vorbereitet sind, erhalten die Auswahl, die Internetverbindung sofort oder später einzurichten. Wenn Sie ‘Ja, jetzt installieren’ wählen, können Sie die Internetverbindung über WLAN oder LAN installieren.
Grundlegende Bedienung Auswahl eines Senders - Sie können durch Drücken der Taste P+/- ( / ) zwischen Sendern wechseln oder die Nummer des Senders über die Zifferntasten eingeben. - Sie können durch Drücken der Taste Zurück ( ) zum zuletzt gesehenen Sender oder zum zuletzt geöffneten Menübildschirm zurückschalten. - Drücken Sie die Taste Navigation (Hoch/Runter ), während das Zapping- Banner erscheint, um die Senderliste anzuzeigen. Sie können auch mit Hilfe der Taste OK ( ) zu einem Sender wechseln.
Lautstärkeregelung/Stummschaltung - Sie können die Lautstärke durch Drücken der Tasten V+/- ( - Um den Ton abzuschalten, drücken Sie die Taste Stumm ( - Drücken Sie die Taste Stumm ( einzuschalten. 32_ © SAMSUNG Electronics Co., Ltd. ) oder V+/- ( / / ) regeln. ).
Zapping-Banner Das Zapping-Banner wird angezeigt, wenn Sie einmal OK ( Tasten zur Navigation ( ) drücken oder die ) einmal drücken, während Sie eine Sendung ansehen. - Nachfolgende Sendungen auf dem aktuellen Sender oder anderen Sendern können Sie durch Drücken der Taste Navigation ( - Mit der Gelben ( Bildschirm auf. ) anzeigen.
Detaillierte Programminformationen Sie können detaillierte Programminformationen zu einer Sendung anzeigen, indem Sie die Taste Info ( ) drücken. Um den Bildschirm mit den Programminformationen wieder zu schließen und zur aktuell gesehenen Sendung zurückzukehren, drücken Sie Info ( ) oder Exit ( ). Je nach Sendung können Sie aus verschiedenen Optionen wählen. - Ansehen: Sendung ansehen, die gerade auf dem Sender ausgestrahlt wird.
Nutzung der Hauptfunktionen Zeitversetzter Modus (Timeshifting) Das Gerät speichert automatisch die letzten Minuten des aktuellen TV- oder Radiosenders (Je nach Signaleigenschaften die letzen 60 bis 120 Minuten). Mit dieser Funktion können Sie die laufende Sendung anhalten, zurückspulen und von diesem Punkt erneut ansehen. Darüber hinaus können Sie vorspulen, bis die Live-Sendung wieder angezeigt wird.
Vorspulen - Sie können vorspulen, indem Sie die Taste Vorspulen ( ) drücken. - Es verringert sich dadurch der Zeitraum zwischen der Stelle, die Sie gerade ansehen und der Live-Sendung. Durch mehrmaliges Drücken der Taste Vorspulen ( ) wird die Vorspulgeschwindigkeit erhöht. (Bis zum 30-fachen der normalen Geschwindigkeit.) - Wenn Sie im Vorspul-Modus bleiben, erreichen Sie wieder den Zeitpunkt der LiveSendung.
Aufnahme eines Optionskanals Schalten Sie zur Aufnahme eines Optionskanals den entsprechenden Hauptsender ein, wählen Sie den gewünschten Optionskanal über die Opt ( ) - Taste aus und starten Sie die Aufnahme durch Drücken der Rec ( )-Taste. Wenn Sie während der Aufnahme den Sender wechseln, wird die Auswahl des Optionskanals nicht beibehalten, sondern stattdessen der Hauptsender aufgezeichnet.
Hauptmenü )–Taste drücken, wird das Hauptmenü angezeigt. Wenn Sie die Menü ( Sie können die Hauptfunktionen des Geräts aufrufen. Hauptmenü Programm/Aufnahmen/Select Video/Suche/Einstellungen - Wählen Sie den gewünschten Menüpunkt mit Hilfe der Tasten Navigation (Hoch/Runter ). - Drücken Sie nach Auswahl des gewünschten Menüs die Taste OK ( ), um den Bildschirm für das ausgewählte Menü anzuzeigen oder drücken Sie eine numerische Taste, um das entsprechende Menü auszuwählen.
Elektronische Programmzeitschrift (EPG) Das Menü listet alle gefundenen Sender (TV und Radio) auf. Sie können auf dieses Menü auch durch Drücken der Taste Programm ( ) direkt zugreifen. Um zwischen TV- und Radiosendern zu wechseln, drücken Sie die Taste TV/Radio ).
Aufnahmen Dieses Menü zeigt eine Liste aller Aufnahmen an (laufende, programmierte und abgeschlossene). Sie können auf dieses Menü auch durch Drücken der Taste Aufnahmen ( direkt zugreifen. Wählen Sie eine Sendung und drücken Wiedergabe ( ) ) auf der Fernbedienung. - Wenn die ausgewählte Sendung aufgenommen wurde oder gerade aufgenommen wird, beginnt die Wiedergabe entweder am Anfang oder an der zuletzt angesehenen Szene, je nachdem, ob die Sendung vorher bereits teilweise angesehen wurde.
- Programmierte Sendungen: Wählen Sie aus den Optionen Nicht aufnehmen, Sperren, in Ordner verschieben, Ordner erstellen. - Serienordner: Wählen Sie eine Episode aus und wählen Sie dann aus den Optionen Wiedergeben, Aufnahme löschen, Sperren, Diese Episode löschen, Alle Episoden sperren, Serie sperren, Serie löschen, Sendung umbenennen, Ordner umbenennen, Serienprogrammierung abbrechen. Einzel-Sendungen [Wiedergeben] Wählen Sie Wiedergeben, um eine aufgenommene Sendung abzuspielen.
[Löschen] Wählen Sie Löschen und bestätigen Sie mit der Taste OK ( ), um die Aufnahme zu löschen. - Wenn die Aufnahme gesperrt ist, heben Sie die Sperre auf. Versuchen Sie anschließend erneut, die Aufnahme zu löschen. [Sendung umbenennen] Wählen Sie Sendung umbenennen, um die Sendung umzubenennen. [In Ordner verschieben] Wählen Sie In Ordner verschieben, um die Aufnahme zu verschieben. [Ordner erstellen] Wählen Sie Ordner erstellen, um einen Ordner zu erstellen. 42_ © SAMSUNG Electronics Co., Ltd.
Select Video Dies ist das Menü für Video-On-Demand (VoD). Falls Sie das Gerät in einer Region Ihres Kabelbetreibers nutzen, in der der Abrufdienst SELECT VIDEO verfügbar ist, können Sie hier Ihre Lieblingsfilme und Fernsehprogramme aus einem reichhaltigen Angebot sofort bestellen. Überprüfen Sie bitte, ob der Dienst SELECT VIDEO in Ihrer Region verfügbar ist und ob Sie eine Internetverbindung eingerichtet haben, bevor Sie den VoD-Dienst starten.
[TV auf Abruf] Hier können Sie kostenfrei erhältliche Programme verschiedener Sender auswählen. - Drücken Sie die Taste OK ( ), um TV auf Abruf und die Auswahl der Sender zu öffnen. - Drücken Sie die Tasten Hoch/Runter ( OK ( ) und ), um das Angebot des entsprechenden Senders auszuwählen. [PremiumTV auf Abruf] Hier können Sie die im Rahmen eines Abonnements erhältlichen Programme auswählen. - Drücken Sie die Taste OK ( ), um PremiumTV auf Abruf und die Auswahl der Sender zu öffnen.
[Suche] Hier können Sie Programme nach Kategorie, Titel, Schauspieler oder Regisseur suchen. [Mein Select Video] Dies ist der persönliche Bereich. Hier finden Sie bereits gesehene Videos des Nutzers, die Merkliste, Clip-Listen, Geliehene Videos und weitere Informationen. - Drücken Sie die Tasten Hoch/Runter ( OK ( )und ), um die entsprechenden Menüpunkte zu öffnen.
Suche Kategorien Sie können nach einer Sendung in den Kategorien suchen. - Der Suchbildschirm wird auch angezeigt, wenn Sie ) auf der Fernbedienung die Taste Suche ( drücken, unabhängig davon, auf welchem anderen Bildschirmmenü Sie sich gerade befinden. Titel/Schauspieler Sie können durch Eingabe des Titels oder des Namens des Schauspielers nach einer Sendung suchen.
Einstellungen System-Update [Art Software-Update] Zur Einstellung des Software-Update-Modus. - Automatisch: Aktualisierung erfolgt automatisch im Standby-Modus. - Manuell: Ist eine neue Software-Version für das Gerät verfügbar, kann der Nutzer entscheiden, ob er die Aktualisierung durchführen möchte oder nicht. [Neue Software suchen] Zur Suche nach einer neuen SoftwareVersion.
[Zusatzsender löschen] Zum Löschen der in diesem Abschnitt aufgelisteten Sender. - Wählen Sie die Sender aus, die aus der Senderliste gelöscht werden sollen, indem Sie die Taste OK ( ) drücken. [Zusatzsender suchen] Zum Suchen und Hinzufügen von Zusatzsendern. - Nachdem Sie die Frequenz eingetragen haben, auf der nach Zusatzsendern gesucht werden soll, wählen Sie Suche, um neue Sender zu suchen und zur Senderliste hinzuzufügen.
Einstellungen [Sprache] Zur Festlegung der auf dem Bildschirm und in Untertiteln verwendeten Sprache - Menüsprache: Wählen Sie eine Sprache für Bildschirmmenüs, Ton und Untertitel. - Untertitel: Einstellung zur Aktivierung/Deaktivierung der automatischen Untertitelanzeige. Die Standardeinstellung ist 'AUS'. [Ton] Zur Einstellung der Tonauswahl an den Audio Ausgängen. - Audio Ausgang: Sie können den für Ihre Ausstattung am besten geeigneten Audiomodus wählen (Stereo oder Mono).
[Energiesparmodus] - Auswahlmöglichkeit, ob im Standby-Modus ein geringer Energieverbrauch bevorzugt wird und dafür eine längere Startzeit in Kauf genommen wird (auf An gestellt) oder ob das Gerät schnell aus dem Standby-Modus starten soll (auf Aus gestellt). [Internet] - Internet einrichten: Installationsassistant zum Einrichten einer WLAN-/LAN-Verbindung für den Zugang zum VoD-Service SELECT VIDEO. - Einstellungen anzeigen: Anzeige der Interneteinstellungen.
Jugendschutz [PIN ändern] Zum Ändern der Jugendschutz-PIN, die auf der Smartcard gespeichert ist. Die Jugendschutz-PIN dient dazu, den Zugriff auf für Jugendliche ungeeignete Sendungen und Aufnahmen durch eine PIN zu sperren. - Aktuelle Jugendschutz-PIN eingeben, neue Jugendschutz-PIN eingeben und diese zur Bestätigung ein zweites Mal eingeben. [PIN-18 ändern] Zur Änderung des Erwachsenen-/FSK 18-PIN zum Zugriff auf VoD-Inhalte, die für Jugendliche ungeeignet sind.
Aufnahmen [Programmieren] Zum Aufruf des Dialogfensters für die manuelle Programmierung einer Aufnahme. - Drücken Sie die Tasten Navigation (Hoch/Runter ), um eine Option zu wählen. - Einstellen und Aktivieren der gewünschten Optionen durch die Tasten OK und Navigation/Zifferntasten (Sender, Datum, Anfangsund Endzeit, Wiederholung und Sperren). Bestätigen Sie die Programmierung durch Auswahl der Option “Speichern”. - Drücken Sie die Taste OK ( ), um die Auswahl zu bestätigen.
[Aufnahmeverlängerung] Einstellung des Geräts, dass die Aufnahme von Sendungen vor der angekündigten Anfangszeit beginnt und nach der angekündigten Endzeit aufhört. - Automatisch: Bei Aufnahmen wird automatisch eine Aufnahmeverlängerung hinzugefügt. - Manuell: Sie können die gewünschte Anfangs- und Endzeit der Aufnahmeverlängerung manuell festlegen. Geben Sie die gewünschte Minutenzahl ein (von 00 bis 99). Favoriten [Hinzufügen] Zum Hinzufügen eines Senders zu Favoriten.
[Sortieren] Zum Sortieren der Sender in der Favoritenliste. - Wählen Sie einen Sender durch Drücken der Taste OK ( ) und bewegen ihn durch Drücken der Tasten Navigation (Hoch/Runter Sie dann die Taste OK ( ). Drücken ), um den Sender an der gewünschten Stelle zu platzieren. - Drücken Sie die Taste Zurück ( ), um diesen Bildschirm zu verlassen. Eine Bildschirmanzeige fragt, ob die Änderungen gespeichert werden sollen. Speichern erfolgt durch Drücken der Taste OK ( ).
[Telefon-Hotline] Zeigt die Nummer verfügbarer TelefonHotlines an, falls Sie Hilfe benötigen. [Service-Infos] Hier können Sie empfangene ServiceMitteilungen ansehen. Bei einer Servicemitteilung handelt es sich um eine Textnachricht, die Ihnen Ihr Programmanbieter oder Netzbetreiber zuschicken kann. [Netzwerk] Zeigt detaillierte Informationen zum Netzwerk an, wie z.B. Datum des letzten Sendersuchlaufs, Anzahl der gefundenen TVund Radiosender, Empfangspegel der einzelnen Tuner.
System Diagnose [Geräte-Info] Zeigt Informationen zum Gerät sowie den verbleibenden freien Speicherplatz auf der Festplatte an. [Smartcard] Zeigt Informationen zur eingelegten Smartcard an. [TV Signal] Zeigt Informationen z.B. über den Empfangspegel auf verschiedenen Frequenzen, Datum und Uhrzeit des letzten Sendersuchlaufs oder die Anzahl der gefundenen TV- und Radiosender an. 56_ © SAMSUNG Electronics Co., Ltd.
[HDMI] Zeigt den Status der HDMI-Verbindung und Informationen zum TV-Gerät, das über HDMI angeschlossen ist, an. [Bildschirm] Zeigt die Sendernummer und den Sendernamen des ausgewählten Senders sowie Informationen zu den BildschirmEinstellungen an. [Ton] Zeigt Informationen zu den Ton-Einstellungen an. [LAN/WLAN] Zeigt Informationen zur angeschlossenen Internetverbindung über LAN/WLAN an.
[Rückkanal] Testet den aktuellen Verfügbarkeitsstatus des Rückkanals. [Test Internet] Testet die Geschwindigkeit der aktuellen Internetverbindung. 58_ © SAMSUNG Electronics Co., Ltd.
FEHLERBEHEBUNG Dieser Abschnitt beschreibt, wie Sie mit eventuell auftretenden Problemen bei der Verwendung des Geräts umgehen. Sollte das Gerät nicht mehr ordnungsgemäß funktionieren, überprüfen sie zunächst Folgendes: Wenn das Problem weiterhin besteht, wenden Sie sich an den Kundenservice. Bildschirm Problem Auf dem TV-Bildschirm wird kein Bild angezeigt. Lösung 1. Vergewissern Sie sich, dass Fernseher und Gerät eingeschaltet sind. 2.
Fernbedienung Problem Die Fernbedienung funktioniert nicht. Lösung 1. Drücken Sie eine Taste auf der Fernbedienung, um festzustellen, ob die Infrarot-LED an der Vorderseite des Geräts grün aufleuchtet. Wenn sie beim Drücken einer Taste grün aufleuchtet, bedeutet dies, dass Fernbedienung und Gerät normal funktionieren. 2. Überprüfen Sie, ob die Fernbedienung für das Gerät geeignet ist. 3. Ersetzen Sie die Batterien durch neue und überprüfen Sie, ob die Fernbedienung jetzt normal funktioniert. 4.
ANHANG TV-Herstellernummer In der nachfolgenden Liste werden die Hersteller von Fernsehgeräten und ihre von einer Fernbedienung unterstützten Nummern-Codes aufgeführt. Hersteller Samsung Marken code 2078 A.R.
Manufacturer Bosch Brand code 0354 TV code Manufacturer Dantax Brand code 0397 TV code 0513 0741 0633 0742 BPL 0064 0583 Daytek 1403 Brandt 0652 Daytron 0036 0064 0583 Brandt Electronique Brinkmann 0314 0136 0223 0314 0362 0498 0370 0587 0362 de Graaf 0235 0575 0064 0583 0695 0546 0445 0513 Dell 1430 Brother 0291 Bruns 0114 0513 0579 0388 BSR 0321 BTC 0245 Bush 1064 1679 0741 1943 0695 1672 0546 1694 0064 0583 1736 335 0805 0614 1286 2154 0688 1583 0514 1176 1353 Denver
Manufacturer Etron Brand code 0064 TV code Manufacturer 0583 0036 GPM Brand code 0245 Eurofeel 0291 Graetz 0388 EuroLine 0064 2077 Gran Prix 0675 Euroman 0291 0064 0583 0448 0397 Grundig 0222 Europa 0064 0583 H&B 0835 Europhon 0064 0583 0274 0579 Haier 1642 Halifax 0291 0583 0274 Hanimex 0245 1640 Evesham 1694 Exquisit 0064 TV code 0398 1190 1250 0562 0097 1609 0581 0218 0561 2227 1286 1827 0583 1064 1694 0784 1403 1335 2266 2152 0514 2154 1943 0397 0036 0614 0370 2
Manufacturer InFocus Brand code 1457 Ingelen 0514 Ingersoll 0036 TV code Manufacturer 1233 Lemair 0637 0741 0388 1464 Brand code 0438 Lenco 0064 Lentec 1558 0274 TV code 0036 1822 0583 0614 1064 2010 Inno Hit 0036 0064 0583 0245 0274 1190 1612 Lesa Innovation 0546 0064 0583 Levis Austria 0064 0583 Innowert 0892 1325 Lexsor 1223 1534 Interactive 0064 0291 0064 0583 0321 0036 0583 0039 0114 0539 0354 0388 0397 0136 0438 0064 0291 0274 0539 0583 Leyco Interbuy LG 1450
Mirai Brand code 1693 Mitsubishi 0135 Manufacturer TV code Manufacturer 2099 1879 Orbit Brand code 0064 064 0562 0539 1064 0583 0114 0235 Orion 2034 0064 TV code 0583 2032 0470 0741 0262 0682 0064 2135 0321 0583 2027 0907 0382 1943 1223 0571 0291 0038 0036 0245 0583 Mivar 0397 Orline Monaco 0036 Ormond 0695 1064 0064 0583 Morgan’s 0064 0583 Osio 0064 0583 0376 0539 0388 Oso 0245 MTC 0397 MTlogic 1335 Multitec 0695 Multitech 0376 Osume 0245 0064 0583 1064 1583 2009
Protech Brand code 0064 0 Proview 1672 Manufacturer TV code Manufacturer 583 0036 0274 0376 0291 0445 0695 0579 0513 1064 Save Brand code 0064 SBR 0064 0583 0039 2127 1399 0513 0575 0633 1398 0388 1221 0376 2152 1694 1390 1164 0064 1064 2155 1644 0695 0546 0379 0039 0571 1501 0376 1395 0274 0741 1399 2009 0421 1264 0398 0388 0245 0370 1943 0097 0675 2010 Provision 1064 1558 0064 0583 0741 1399 Schaub Lorenz 0741 Pye 0064 0583 0039 0114 0581 0376 Schneider 0583 Pymi 0036 Scott 1216
Standard Brand code 0064 Starion 1064 Manufacturer Starlite 0036 Starmedia 2136 Stenway 0245 Stern 0291 TV code Manufacturer 0583 1064 0245 0036 Telestar Brand code 2345 Teletech 0064 0579 0064 0583 0291 0438 Teleton 0376 Televideon 0579 TV code 0064 2117 0583 0695 1064 0036 0274 Teleview 0064 0583 Tensai 0245 0064 0583 0321 0036 0132 0398 0274 0742 1064 Strato 0064 0583 0291 0036 Tenson 0036 Strong 0064 0583 1190 1176 1064 Tesla 0064 Sungoo 2064 Tevion 1275 Su
Watt Radio Brand code 0571 Wega Wegavox Welltech 1679 Weltblick 0064 Weltstar 1064 Weston 0064 White Westinghouse Wilson 0064 Windy Sam 0583 Manufacturer TV code Manufacturer 0376 0579 0513 World-of-Vision Brand code 0907 0064 0583 0114 Xomax 1797 0036 0064 0583 Xoro 1816 Xrypton 0064 Yakumo 1640 2324 Yamaha 0677 0824 1553 1603 0583 Yokan 0064 0583 0583 0651 1936 Yoko 0064 0583 0245 0291 0036 0448 0397 0274 Yorx 0245 0583 0583 68_ © SAMSUNG Electronics Co.
Produktdaten Element Beschreibung Modellbezeichnung SMT-C7200 CPU BCM 7405 Arbeitsspeicher 256 MB, 128 MB NAND Flash, 4 MB NOR Flash Festplatte 320 GB 3,5 Zoll Typ Eingangsstecker IEC-Buchse (weiblich) gemäß IEC 60169-2 Eingangsimpedanz 75 Ω Funkfrequenz (Rx) 47 bis 862 MHz Art der Sendemodulation (Rx) DVB-C: 16 QAM, 64 QAM, 256 QAM Kanalbandbreite 8 MHz Typ des Ausgangssteckers IEC-Buchse (männlich) gemäß IEC 60169-2 Smartcard-Schnittstelle Smartcard-Schnittstelle: 1 Steckplatz (konf
Genehmigung zur Nutzung des Dolby-Logos Hergestellt unter Lizenz von Dolby Laboratories. “Dolby” und das Doppel-D-Symbol sind Markenzeichen von Dolby Laboratories. Rovi-Produkthinweis Dieses Produkt enthält Kopierschutz-Technologie, die durch US-Patente und andere geistige Eigentumsrechte geschützt ist.
Allgemeine Geschäftsbedingungen für die Nutzung von tvtv Services Februar 2011 Für die Nutzung des von tvtv Services (im Folgenden „tvtv” – weitere Informationen über tvtv siehe Abschnitt 6) angebotenen elektronischen Dienstes zur Übertragung von Fernsehprogramminformationen (im Folgenden „Dienst“) und der Fernsehprogrammdaten (im Folgenden „Daten“), die im Rahmen des Dienstes zur Verfügung gestellt werden, gelten ausschließlich die Bedingungen der folgenden Allgemeinen Geschäftsbedingungen.
3.1 Die Daten, die Ihnen im Rahmen des Dienstes zur Verfügung gestellt werden, können urheberrechtlich geschützt sein oder anderen gesetzlichen Bestimmungen unterliegen. 3.2 Sie dürfen die Ihnen zur Verfügung gestellten Daten ausschließlich für private und nichtkommerzielle Zwecke verwenden, soweit es erforderlich ist und mit dem Bestimmungszweck des Endverbrauchergerätes übereinstimmt. 3.3 BITTE BEACHTEN: Insbesondere ist es Ihnen untersagt: 3.3.
WEEE SYMBOL INFORMATION Korrekte Entsorgung von Altgeräten (Elektroschrott) (Gilt für Länder mit Abfalltrennsystemen) Die Kennzeichnung auf dem Produkt, Zubehörteilen bzw. auf der dazugehörigen Dokumentation gibt an, dass das Produkt und Zubehörteile (z. B. Ladegerät, Kopfhörer, USB-Kabel) nach ihrer Lebensdauer nicht zusammen mit dem normalen Haushaltsmüll entsorgt werden dürfen. Entsorgen Sie dieses Gerät und Zubehörteile bitte getrennt von anderen Abfällen, um der Umwelt bzw.
SAFETY INSTRUCTIONS The purpose of the Safety Concerns section is to ensure the safety of users and prevent property damage. Please read this document carefully for proper use. Usage Warning Provides information or instructions that you should follow in order to avoid personal injury or fatality. Caution Provides information or instructions that you should follow in order to avoid a failure or damage to your device. Note Indicates additional information for referrence.
Warning Warning Power Insert the power plug firmly. Do not connect multiple devices to a single outlet simultaneously. Do not touch the main body, power cable, or power plug with moist hands. If video/sound cable generates heat after connection, pull out the power plug and contact customer service immediately. Installation/Maintenance Install the product in an area with good ventilation. Do not cover the top. Do not place in humid or dusty areas, or near heat sources.
Caution Power Connect your TV after powering off the TV and the device by pulling out the power plugs. The socket-outlet shall be installed near the device and shall be easily accessible. Do not insert the power plug before connecting the power cable to the device. Before connecting the power source, permanent protective earth connection to the cable distribution should be made. Installation/Maintenance Install the product correctly complying with the instructions in the user guide.
TABLE OF CONTENTS SAFETY INSTRUCTIONS 1 Usage .......................................................................................1 Symbols ...................................................................................1 Warning....................................................................................2 Caution ....................................................................................3 BEFORE USAGE 6 HD DVR Cable.................................................................
Connection to a Router ................................................................24 USB Port .......................................................................................25 HOW TO USE THE PRODUCT 26 Installation Wizard ............................................................... 26 Basic Operation ................................................................... 30 Using the Main Functions ................................................... 34 Main Menu...............................
BEFORE USAGE HD DVR Cable The SMT-C7200 is a HD DVR (Digital Video Recorder), i.e. a harddisk recorder for cable reception. Key Functions of the SMT-C7200 HD Grade Image Display Supports high-resolution video output of up to 1080i and offers you clear and piercingly sharp images. Dolby Digital Sound Produces realistic digital sound by connecting the device to a receiver amplifier through the SPDIF output port, which supports Dolby Digital.
Instant Recording Automatic recording of the program currently being watched. A temporary recording starts when you change from the channel you are watching to another one and stops when you change channels again. Note that when one temporary recording stops, it is deleted and another one starts at the same time.
Package Contents Please make sure the following items are included in your product packaging. SMT-C7200 Power Cable Antenna cable SCART Cable Standard HDMI Cable Remote Control (with 2 AAA Batteries) User Guide/ Quick Start Guide 8_ © SAMSUNG Electronics Co., Ltd.
Names and Functions This section describes the names and functions of the parts on the front and rear panel of the device. Front Panel This section describes the elements on the front and front panel. Name Smartcard Slot TV/Radio Description Pull flap to insert Smartcard with chip facing down. Toggle between TV and Radio services. - Illuminates green in Radio mode Menü (Menu) Display the main menu. Zurück (Back) Go back to the previous screen or mode.
Name Record Description Record a currently showing program or schedule a recording. Cancel recording if scheduled for recording. - Illuminates red while recording is in progress - Illuminates green while recording is scheduled Standby Change the status of a device to standby or active mode. - Illuminates red in standby mode - Illuminates green in active mode 10_ © SAMSUNG Electronics Co., Ltd.
Rear Panel This section describes the names and functions of the ports on the rear panel. Name Description Power Cable Port Port that connects to the power cable. Power On/Off Switch Switch to turn the device power on/off. The device is switched on when I at the top of the button is pushed. Cable IN * Port that connects the device to an antenna jack through an antenna cable. Cable OUT * Port that connects the device to a TV through an antenna cable.
Remote Control This section describes the functions of all buttons on a remote control. Exit: stop a screen/mode, and go back to the last channel watched, switch from TV to receiver mode TV: Switch to TV mode and operate TV. Programm: Shows EPG screen from any screen Select Video: Access Video-onDemand (VOD) Volume (V+/V-): Adjust the volume Standby: Power on/off TV/Radio: Toggle between TV and Radio services Menü: Navigates straight to Menu screen of the receiver from any screens.
Inserting Batteries in the Remote Control Alkaline batteries (not standard batteries) should be used for the remote control to prolong its life span. Using standard batteries, may cause problems when using the remote control. - Two identical new batteries should be used for the remote control. - Remove the batteries when a remote control is not used for a long time. TV Operation using a Remote Control You can operate a TV with the remote control.
4 Press the Standby ( ) button continuously until the TV turns off. ) button and press the When the TV turns off, release the Standby ( TV ( ) button for 3 seconds to confirm the code. 5 Press the TV ( ) button to operate your TV. Volume Setting When a TV ID is programmed the volume control on the remote control regulates the TV also in device mode. To control the device volume again, press the Exit ( ) button and Mute ( ) button simultaneously for at least 3 seconds.
INSTALLATION This section describes how to install the device (SMT-C7200). Installation Environment The table below includes details on the installation environment for the device. Parameter Description Operating Temperature 0-40°C Operating Humidity 20–80% (40°C) Rated Voltage, Frequency AC 230 V +/- 15%, 50 Hz Rated Power Consumption Max. 28 W Broadcasting Rx Frequency 47~862 MHz When Using and Installing the Product The product must be used under the specified environment.
Peripheral Devices Connection This section describes how to connect the cable and each peripheral device to the device. (The product image may differ from the actual product.) 16_ © SAMSUNG Electronics Co., Ltd.
Connection to a TV with an HDMI Port This section describes how to connect the device to a TV with an HDMI port. Connect the HDMI port on the rear of the device to the HDMI port of the TV using an HDMI cable. High Definition Multimedia Interface (HDMI) SMT-C7200 incorporates HDMI technology. The HDMI port is an integrated video-audio port to provide high-definition images by connecting the device to a HD TV. Connect the device to the HDMI port of your HD TV.
Connection to a TV with a SCART Port This section describes how to connect the device to a TV with a SCART port. Connect the TV SCART port on the rear of the device to the SCART port of the TV using a SCART cable. 18_ © SAMSUNG Electronics Co., Ltd.
Connection to a VCR with a SCART Port This section describes how to connect a VCR to a device with a SCART cable. Connect the VCR SCART port of the device to the SCART port of the VCR using a SCART cable. When Connecting to a VCR When connecting to a VCR, power off both the VCR and device, pull out their power plugs and then connect. You can easily connect it by referring to the ‘VCR User Manual’. Macrovision Installation Notice Do not connect the device through a VCR.
Connection to a TV or VCR with a Composite Port This section describes how to connect the device to a TV/VCR with a composite (video and audio) port. Video Connection Connect the VIDEO port on the rear panel of the device to the Video Input port of the TV/VCR. Audio Connection Cable, connect the ANALOG AUDIO (L/R) ports on the rear panel of the device to the Audio Input (L/R) ports of the TV/VCR. Ensure the colors of the audio ports and the plugs match. 20_ © SAMSUNG Electronics Co., Ltd.
Connection to a Digital Audio Equipment This section describes how to connect digital audio equipment (an amplifier or home theater system that has a Dolby Digital decoding function). Using the optical cable for digital audio, connect the DIGITAL AUDIO port on the rear panel of the device to the Digital Audio In (SPDIF) port of the Dolby Digital audio equipment.
Connection to Antenna Socket (to the Cable Network) This section describes how to connect the device to an antenna Socket. Connect the included antenna cable to the Cable IN of the device and then directly to the antenna Socket. 22_ © SAMSUNG Electronics Co., Ltd.
Connection to a TV with an Antenna Cable This section describes how to connect to a TV using an antenna cable for receiving analog TV channels and radio stations. Connect the Cable OUT port on the rear panel of the device to the antenna input (CABLE IN) port on the TV using an antenna cable.
Connection to a Router This section describes how to connect the device to a router using an Ethernet Cable. Connect the NETWORK port on the rear panel of the device with the router using an Ethernet cable. Ethernet cable A shielded Ethernet cable must be used. 24_ © SAMSUNG Electronics Co., Ltd.
USB Port This section describes how to connect additional USB devices, e.g. a WiFi USB device. Connect the USB port on the rear panel of the device to the USB devices using a USB cable.
HOW TO USE THE PRODUCT Installation Wizard Before you can view television programs, you must execute the installation wizard that is run when the device is first powered up. Preparation - TV Detection The installation wizard will automatically try to detect whether a HD-ready TV is connected to the device. - If no HD TV set is detected, the screen resolution at the HDMI port will be set to 720p. - In addition, the color format will be set to RGB.
Step 2 - Checking device settings In this step, some device settings are automatically checked to ensure proper functioning of the device. - Settings to be checked: HD TV Settings/Antenna signal/Smartcard/New software. 1 HDTV Settings TV setup was carried out as the first step. Therefore, this will be checked as soon as the screen is initially displayed. 2 Antenna Signal The device finds a sufficiently strong and valid antenna signal automatically.
4 New Software The device will check for a software update. - You are not given the choice to reject the upgrade if one is found. - If a software update is detected, the device will reboot after a countdown from 5 seconds and begins with the software update. - If no new software version is detected, the Installation Wizard will proceed to the next screen. Do not power off the STB while updating a software.
Step 4 - Scan Results After successfully scanning, the results screen will be shown, indicating the number of TV channels and radio stations found. Customers, who start-up the device in a cable network which is enabled for the SELECT VIDEO VOD service, have the option of setting up the internet connection now or later. If you select 'Yes, Install Now', you can install the internet connection via WLAN or LAN. After the Installation Wizard is complete, all device features will be available.
Basic Operation Selecting a Channel - You can move through the channels by using the P+/- ( / ) buttons or entering the channel number on the numeric buttons. ) button to go back to the channel you last - You can use the Zurück ( watched. - While the zapping banner is displayed, press the Navigation (Up/Down ) buttons to display the channel list. You can also switch to the channel using the OK ( ) button. 30_ © SAMSUNG Electronics Co., Ltd.
Volume Control/Mute - You can adjust the volume using the V+/- ( - To turn off the sound, press the Mute ( - Press the Mute ( ) button or V+/- ( / ) buttons. ) button. / ) buttons to turn on the sound again.
Zapping Banner You can view the zapping banner by pressing the OK ( Navigation ( ) button once or the ) buttons while watching a program. - You can view the next programs on the current channel or other channels by pressing the Navigation ( ) buttons. - You can view the "Category" menu for the current screen using the Yellow ( button. Option Banner You can change the Audio Language, Subtitle language and Video Subchannel temporarily on the current channel. ) button to display the option banner.
Detailed Program Information You can view detailed program information on a program by pressing the Info ( ) button. To close the program information screen and go back to the program you ) button or the Exit ( ) button. were watching, press the Info ( Depending on the program, you can select from different options. - Watch: Watch the program if it is currently shown on a channel.
Using the Main Functions Time Shift Mode The device automatically saves the previous minutes of the channel watched or the radio channel listened to. (The last 60 to 120 minutes depending on the signal characteristics.) This feature allows to stop live mode, rewind and replay the program from this point. ), Play/Pause ( Press the Rewind ( buttons to enter Time Shift recording. ) and Fast-Forward ( ) Pause/Play - You can pause a program without missing what’s next by pressing the Play/Pause ( ) button.
Fast-Forward - You can fast-forward by pressing the Fast-Forward ( ) button. - The time lapse between the part you are watching and the live program decreases. By pressing the Fast-Forward ( ) button several times, you can increase the fast-forward speed (Up to 30 times the normal speed). - If you remain in fast-forward, you will reach the time of the live program. Stop To exit Time Shift mode and go back to the live program, press the Stop ( button or the Exit ( ) ) button.
Recording a video subchannel To record a video subchannel, tune in to the main channel, select the desired subchannel from the options banner (Opt button), then start recording by pressing the Rec ( ) button. If you switch channels during the recording, the selection of the subchannel will not be retained, but will record the main channel instead. After a Recording is Launched Once a recording is launched, you can no longer rewind the program before the start time.
Main Menu If you press the Menü ( ) button while watching TV, a main menu screen is displayed. You can use the main functions of the device. Main Menu Program Guide/Recordings/ Select Video/Search/Settings - Select a desired menu using the Navigation (Up/Down - When a desired menu is selected, press the OK ( ) buttons. ) button to move to the selected menu screen or press the numeric button to select the respective menu.
Program Guide This menu displays all the channels found (TV and radio). You can also access this menu by pressing the Programm ( ) button on the remote control. To switch between the TV program guide and the radio program guide, press the ) button. TV/Radio ( You can use the following functions by pressing the button on the remote control: - OK ( ) button: Display the program information screen for a future program or switch to program shown currently.
Recordings This menu displays the full recordings list (in progress, booked and completed). You can also access this menu by pressing the Aufnahmen ( ) button on the remote control. Select a program and press the Play ( ) button on the remote control. - If the selected program is recorded or recording, the playback will start either from the beginning or from the last viewed scene, depending on whether the program has been viewed before.
- Booked programs: Select the Cancel booking, Lock, Move to folder, Create folder options. - Series folder: Select an episode and select the Play, Lock this episode/all episodes, Delete this episode/all episodes, Cancel series booking options. Recorded single programs [Play] Select Play to play a recorded program. - You can select the Play from start, Play from last viewed and Choose start position options. - Parental rated program: Enter PIN code.
[Rename program] Select Rename to rename the recorded program. [Move to folder] Select Move to folder to move the recorded program. [Create folder] Select Create folder to create a folder.
Select Video SELECT VIDEO is the Video-On-Demand service. You can order your favorite movie or TV program instantly with Video-On-Demand. You have to check if the service is available in your home, if you have set up an Internet connection and if you are entitled to VoD before starting the VoD service. ) button on You can also access this menu by pressing the Select Video ( the remote control.
[TV on Demand] Displays all available videos from different Free-TV channels. - Press OK ( ) button to browse the channel. - Press Navigation (Up/Down ( ) and OK ) button to open the video selection of a specific Free-TV channel.
[Premium TV on Demand] Displays all available videos from different subscription based channels. - Press OK ( ) button to browse the channel. - Press Navigation (Up/Down ( ) and OK ) button to open the video selection of a specific Premium-TV channel. [Videostore] Displays a library of Pay-per-View videos. - Press OK ( ) button to browse video lists. - Press Navigation (Up/Down ( ) and OK ) button to open the video selection of specific areas in the Videostore.
Search Categories You can search for a program by category. - The Search screen is also displayed by pressing the Suche ( ) button on the remote control from any other screen. Title/Actor You can search for a program by entering the title or the actor name. - The Search screen is also displayed by pressing the Suche ( ) button on the remote control from any other screen.
Settings System Update [Software Update Mode] Used to set the software update mode. - Automatic: upgrade automatically in standby overnight. - Manual: If the device is needed to update, the user can decide whether to allow updates. [Search for New Software] Used to search for a new version of the software and upgrade to it. - If a new version of the software has been detected, select download. The device will reboot in order to download the software.
[Delete Additional Channels] Used to delete channels listed in this section. - Select the channels to be deleted from the channel list by pressing the OK ( ) button. [Search for Additional Channels] Used to search and add another channel. - After setting the Frequency, select Search; you can search for new channels and add them to the channel list. - If a recording is in progress or about to start, search for additional channels is denied.
System Setup [Language] Used to set the on-screen and subtitle language. - On-screen language: Select a default on-screen, audio and subtitle language. - Subtitles: Set to enable/disable the automatic subtitle display. Default setting is ‘OFF’. [Audio] Used to set the audio output mode. - Audio Output: You can set the audio output best suited to your equipment (Stereo or Mono).
[Energy saving mode] - Notification that the device uses less energy in standby if mode is ‘On’. If a quick start of the device is preferred, the energy saving mode must be set to ‘Off’. Default setting of Energy Saving Mode is ‘Off’. [Internet] - Internet setup: Install assistant to set up wireless LAN or wired internet connection for VOD service. - View Settings: Displays internet settings. - Change Settings: Activate or deactivate wireless LAN, set wireless settings and configure IP settings.
Parental Control [Change PIN] Used to change the Parental Control PIN stored on the Smartcard. The Parental Control PIN is used to PIN-lock access to channels, programs and recordings which are protected for minors. - Enter current Parental Control PIN, new Parental Control PIN and confirm new Parental Control PIN (to verify). [Change PIN-18] Used to change the Adult/FSK 18 PIN for the management of VOD adult contents.
Recordings [Recording] Used to set the manual recording dialog to be displayed. - Press the Navigation (Up/Down ) buttons to choose options. - Set the desired options by activating them with the OK ( ) button and the Navigation/number buttons for the channel, date, start/end time, repetition and lock. Confirm the schedule by selecting the Save option. - Press the OK ( ) button to make the selection.
[Guard Time] Used to set the device so that it starts to record a program before its scheduled start time and stops after its scheduled end time. - Automatic: The device automatically adds guard times to recordings (1 minute before scheduled start time and 14 minutes after scheduled end time). - Manual: You can define the desired start/end guard time. Enter the desired number of minutes (from 00 to 99). Favorites [Add] Used to add channels to the Favorites channel list.
[Rearrange] Used to rearrange channels in the Favorites channel list. - Select a channel by pressing the OK ( ) button and move it by pressing the Navigation (Up/Down ( ) buttons, then press the OK ) button again to place the channel where it is required. ) button to exit the - Press the Zurück ( screen. A display will pop up asking whether to save changes or not. Save by pressing the OK ( ) button.
[Hotline List] Displays hotline numbers in case you need support. [Service Information] You can view the service messages received. A service message is a text message that broadcasters or operators may send you. [Network] Displays detailed network information, the date and time of the last channel scan and the number of TV and radio channels found. 54_ © SAMSUNG Electronics Co., Ltd.
System Check [Device Info] Displays the Information about the device, as well as the remaining free disk space. [Smartcard] Displays the information about inserted smartcard. [TV Signal] Displays detailed network information (e.g. the signal level on different channel frequencies), the date and time of the last channel update and the number of TV and radio channels found.
[HDMI] Displays status about HDMI connection and the information about HDMI device. [TV Picture] Displays the channel number and the channel name of the currently selected channel. And displays the information about TV Picture settings. [Audio] Displays the information about Audio settings. [LAN/WLAN] Displays the information about current connected LAN/wireless LAN. 56_ © SAMSUNG Electronics Co., Ltd.
[Back Channel] Starts a test by pressing the OK ( ) key and displays the current connection status to back-end servers. [Test IP Connection] Starts a test by pressing the OK ( ) key and displays about the current Internet status.
TROUBLESHOOTING This section describes how to deal with any problems that may occur while using the device. If the device stops working properly, first check the following: If the problem continues, contact your customer support hotline. Screen Trouble Nothing appears on the TV screen. Solution 1. Check if the TV and device are powered on. 2. Check the connection status of the cable between the TV and device. 3. Check if the TV input is set to an external input mode. The menu screen is not displayed. 1.
General Trouble No sound comes out from the TV or audio system. Solution 1. Check the connection status of the cable between the audio port of the TV/audio system and the AUDIO OUT port at the rear of the device. 2. If the cable is connected correctly, check if the MUTE function is enabled. If the MUTE function is enabled, press the Mute button on the remote control to disable it. 3. Check if the volume level on both the device and the TV is sufficient.
ANNEX TV Manufacturer Number The TV manufacturers and their numbers that a remote control can support are listed in the table below. Manufacturer Samsung Brand code 2078 A.R.
Manufacturer Bosch Brand code 0354 TV code Manufacturer Dantax Brand code 0397 TV code 0513 0741 0633 0742 BPL 0064 0583 Daytek 1403 Brandt 0652 Daytron 0036 0064 0583 Brandt Electronique Brinkmann 0314 0136 0223 0314 0362 0498 0370 0587 0362 de Graaf 0235 0575 0064 0583 0695 0546 0445 0513 Dell 1430 Brother 0291 Bruns 0114 0513 0579 0388 BSR 0321 BTC 0245 Bush 1064 1679 0741 1943 0695 1672 0546 1694 0064 0583 1736 335 0805 0614 1286 2154 0688 1583 0514 1176 1353 Denver
Manufacturer Etron Brand code 0064 TV code Manufacturer 0583 0036 GPM Brand code 0245 Eurofeel 0291 Graetz 0388 EuroLine 0064 2077 Gran Prix 0675 Euroman 0291 0064 0583 0448 0397 Grundig 0222 Europa 0064 0583 H&B 0835 Europhon 0064 0583 0274 0579 Haier 1642 Halifax 0291 0583 0274 Hanimex 0245 1640 Evesham 1694 Exquisit 0064 TV code 0398 1190 1250 0562 0097 1609 0581 0218 0561 2227 1286 1827 0583 1064 1694 0784 1403 1335 2266 2152 0514 2154 1943 0397 0036 0614 0370 2
Manufacturer InFocus Brand code 1457 Ingelen 0514 Ingersoll 0036 TV code Manufacturer 1233 Lemair 0637 0741 0388 1464 Brand code 0438 Lenco 0064 Lentec 1558 0274 TV code 0036 1822 0583 0614 1064 2010 Inno Hit 0036 0064 0583 0245 0274 1190 1612 Lesa Innovation 0546 0064 0583 Levis Austria 0064 0583 Innowert 0892 1325 Lexsor 1223 1534 Interactive 0064 0291 0064 0583 0321 0036 0583 0039 0114 0539 0354 0388 0397 0136 0438 0064 0291 0274 0539 0583 Leyco Interbuy LG 1450
Mirai Brand code 1693 Mitsubishi 0135 Manufacturer TV code Manufacturer 2099 1879 Orbit Brand code 0064 064 0562 0539 1064 0583 0114 0235 Orion 2034 0064 TV code 0583 2032 0470 0741 0262 0682 0064 2135 0321 0583 2027 0907 0382 1943 1223 0571 0291 0038 0036 0245 0583 Mivar 0397 Orline Monaco 0036 Ormond 0695 1064 0064 0583 Morgan’s 0064 0583 Osio 0064 0583 0376 0539 0388 Oso 0245 MTC 0397 MTlogic 1335 Multitec 0695 Multitech 0376 Osume 0245 0064 0583 1064 1583 2009
Protech Brand code 0064 0 Proview 1672 Manufacturer TV code Manufacturer 583 0036 0274 0376 0291 0445 0695 0579 0513 1064 Save Brand code 0064 SBR 0064 0583 0039 2127 1399 0513 0575 0633 1398 0388 1221 0376 2152 1694 1390 1164 0064 1064 2155 1644 0695 0546 0379 0039 0571 1501 0376 1395 0274 0741 1399 2009 0421 1264 0398 0388 0245 0370 1943 0097 0675 2010 Provision 1064 1558 0064 0583 0741 1399 Schaub Lorenz 0741 Pye 0064 0583 0039 0114 0581 0376 Schneider 0583 Pymi 0036 Scott 1216
Standard Brand code 0064 Starion 1064 Manufacturer Starlite 0036 Starmedia 2136 Stenway 0245 Stern 0291 TV code Manufacturer 0583 1064 0245 0036 Telestar Brand code 2345 Teletech 0064 0579 0064 0583 0291 0438 Teleton 0376 Televideon 0579 TV code 0064 2117 0583 0695 1064 0036 0274 Teleview 0064 0583 Tensai 0245 0064 0583 0321 0036 0132 0398 0274 0742 1064 Strato 0064 0583 0291 0036 Tenson 0036 Strong 0064 0583 1190 1176 1064 Tesla 0064 Sungoo 2064 Tevion 1275 Su
Watt Radio Brand code 0571 Wega Wegavox Welltech 1679 Weltblick 0064 Weltstar 1064 Weston 0064 White Westinghouse Wilson 0064 Windy Sam 0583 Manufacturer TV code Manufacturer 0376 0579 0513 World-of-Vision Brand code 0907 0064 0583 0114 Xomax 1797 0036 0064 0583 Xoro 1816 Xrypton 0064 Yakumo 1640 2324 Yamaha 0677 0824 1553 1603 0583 Yokan 0064 0583 0583 0651 1936 Yoko 0064 0583 0245 0291 0036 0448 0397 0274 Yorx 0245 0583 0583 TV code 1759 2028 0917 0892 1316
Product Specifications Item Description Model Name SMT-C7200 CPU BCM 7405 Memory 256 MB, 128 MB NAND Flash, 4 MB NOR Flash HDD 320 GB 3.
Dolby Logo Usage Approval Manufactured under license from Dolby Laboratories. “Dolby” and the double-D symbol are trademarks of Dolby Laboratories. Rovi Product Notice This product incorporates copyright protection technology that is protected by U.S. patents and other intellectual property rights. Use of this copyright protection technology must be authorized by Rovi Corporation, and is intended for home and other limited consumer uses only unless otherwise authorized by Rovi Corporation.
Open Source Announcement Some software components of this product incorporate source code covered under the GNU General Public License (GPL), the GNU Lesser General Public License (LGPL) and BSD License etc. Acknowledgement: The software included in this product contains copyrighted software that is licensed under the GPL/LGPL. You may obtain the complete Corresponding Source code from us for a period of three years after our last shipment of this product by sending email to: nwswmanager@samsung.
We protect your rights with two steps: (1) copyright the software, and (2) offer you this license which gives you legal permission to copy, distribute and/or modify the software. Also, for each author’s protection and ours, we want to make certain that everyone understands that there is no warranty for this free software.
b) 4) 5) 6) 7) 8) 9) 10) Accompany it with a written offer, valid for at least three years, to give any third party, for a charge no more than your cost of physically performing source distribution, a complete machine-readable copy of the corresponding source code, to be distributed under the terms of Sections 1 and 2 above on a medium customarily used for software interchange; or, c) Accompany it with the information you received as to the offer to distribute corresponding source code.
NO WARRANTY 11) BECAUSE THE PROGRAM IS LICENSED FREE OF CHARGE, THERE IS NO WARRANTY FOR THE PROGRAM, TO THE EXTENT PERMITTED BY APPLICABLE LAW. EXCEPT WHEN OTHERWISE STATED IN WRITING THE COPYRIGHT HOLDERS AND/OR OTHER PARTIES PROVIDE THE PROGRAM “AS IS” WITHOUT WARRANTY OF ANY KIND, EITHER EXPRESSED OR IMPLIED, INCLUDING, BUT NOT LIMITED TO, THE IMPLIED WARRANTIES OF MERCHANTABILITY AND FITNESS FOR A PARTICULAR PURPOSE. THE ENTIRE RISK AS TO THE QUALITY AND PERFORMANCE OF THE PROGRAM IS WITH YOU.
If your program is a subroutine library, you may consider it more useful to permit linking proprietary applications with the library. If this is what you want to do, use the GNU Lesser General Public License instead of this License. GNU LESSER GENERAL PUBLIC LICENSE Version 2.1, February 1999 Copyright (C) 1991, 1999 Free Software Foundation, Inc.
Although the Lesser General Public License is Less protective of the users’ freedom, it does ensure that the user of a program that is linked with the Library has the freedom and the wherewithal to run that program using a modified version of the Library. The precise terms and conditions for copying, distribution and modification follow. Pay close attention to the difference between a “work based on the library” and a “work that uses the library”.
4) 5) 6) 7) This option is useful when you wish to copy part of the code of the Library into a program that is not a library.
b) 8) 9) 10) 11) 12) 13) 14) Give prominent notice with the combined library of the fact that part of it is a work based on the Library, and explaining where to find the accompanying uncombined form of the same work. You may not copy, modify, sublicense, link with, or distribute the Library except as expressly provided under this License. Any attempt otherwise to copy, modify, sublicense, link with, or distribute the Library is void, and will automatically terminate your rights under this License.
16) IN NO EVENT UNLESS REQUIRED BY APPLICABLE LAW OR AGREED TO IN WRITING WILL ANY COPYRIGHT HOLDER, OR ANY OTHER PARTY WHO MAY MODIFY AND/OR REDISTRIBUTE THE LIBRARY AS PERMITTED ABOVE, BE LIABLE TO YOU FOR DAMAGES, INCLUDING ANY GENERAL, SPECIAL, INCIDENTAL OR CONSEQUENTIAL DAMAGES ARISING OUT OF THE USE OR INABILITY TO USE THE LIBRARY (INCLUDING BUT NOT LIMITED TO LOSS OF DATA OR DATA BEING RENDERED INACCURATE OR LOSSES SUSTAINED BY YOU OR THIRD PARTIES OR A FAILURE OF THE LIBRARY TO OPERATE WITH ANY OTH
WEEE SYMBOL INFORMATION Correct Disposal of This Product (Waste Electrical & Electronic Equipment) (Applicable in countries with separate collection systems) This marking on the product, accessories or literature indicates that the product and its electronic accessories (e.g. charger, headset, USB cable) should not be disposed of with other household waste at the end of their working life.