SPF-87H SPF-107H Digital Photo Frame User Manual Thank you for purchasing a Samsung digital photo frame "Safety precautions" is to protect safety of a user and to prevent property damage. Read it carefully and use the product properly.
Special Features Ultra-slim design which gives life to your living space The ultra slim design which is 50% less thick than our previous models takes up much less space than a regular picture frame. Also the crystal design and soft charcoal gray color of this product make it a great addition as a refined piece for any room in your home.
Table of Contents Special Features ..............................................2 Table of Contents ...........................................3 Safety Instruction ............................................4 Before use Mini Monitor Package contents............................................8 Using as a PC screen (Mini Monitor) ..............20 Name and function of each part .....................8 Installing the Frame Manager Program ..........20 Setting up the frame ..............................
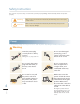
Safety Instruction The content is to protect safety of a user and to prevent property damage. Read it carefully and use the product properly. Warning Failure to follow the instructions indicated by this mark may cause serious injury or fatal wound. Attention Failure to follow the instructions indicated by this mark may cause personal injury or property damage. 1PXFS * The following images are for your reference and may differ depending on models and countries.
Attention Ensure that the power plug is disconnected before cleaning the product. Do not install the product near any heating appliance. There is a risk of fire. Failing to do so, may cause electric shock or fire. Keep the product away from places exposed to oil, smoke or moisture; do not install inside a vehicle. This may cause a malfunction, electric shock or fire. In particular, avoid operating the monitor near water or outdoors where it could be exposed to snow or rain.
Attention Place the product down gently when installing it. Failing to do so may cause product damage or personal injury. Avoid dropping the product when moving, as this may cause product damage or personal injury. Do not install the product in a location easily reached by children. As the product may fall and cause personal injury.
SAMSUNG When cleaning the product, first disconnect the power plug and clean it with a soft, dry cloth. When not using the product for a long time, make sure to disconnect the power plug. Do not use any chemicals such as benzene, alcohol, thinners, mosquito repellant, aromatic, lubricant, detergent or wax. Heavy accumulated dust may cause electric shock or fire.
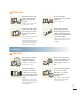
* Before use Package contents Please check to make sure that all of the following items are included in your delivered package before using this product.
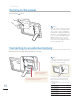
* Before use Setting up the frame Use the frame stand in a horizontal or vertical direction according to your preference as shown in the pictures below. Using it in a horizontal direction Using it in a Vertical direction Do not apply excessive force or turn the stand in the wrong direction during setup. This may cause damage to the stand. Connecting the power supply Using the provided power cable, connect the power supply to the product.
* Before use Turning on the power Press the power [ ] button. 1RWH When the product is turned on for the first time after purchase, the function will be activated. , , , and can be set up conveniently with . will also be activated when the product is turned off and on again after selecting - under the menu.
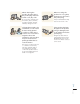
* Before use Connecting to a PC If you connect to a PC using the provided USB cable, you can download photos onto the frame memory of the product (² p.11) or use the product as the Mini Monitor (² p.20). USB port e.g.) SPF-87H Auxiliary power port 1RWH Ⱂ You can use the SPF-87H model by connecting it to a PC with only the USB cable. However, if the picture is lost or the screen goes blank due to power shortage, connect the additional auxiliary power cable.
¨ Transferring photos from the PC 1RWH Ⱂ This product comes with basic photos included on the memory. If the memory is insufficient, delete the photos that come with this product. Ⱂ A large file size (high resolution) photo occupies lots of the frame memory and slows down the preview. In this case, in stead of copying the photo file directly to the removable disk, save the photo file to an external memory and then copy the file to the frame memory.
* SildeShow SlideShow All or only the selected photos of the frame memory or external memory can be enjoyed as a Slideshow. Photos Frame Memory ⶺ FileName JPG To play Slideshow with all photos 19/24 MENU 1 In the main menu screen ² P.12 2 Press the [ ] button to select . Ⱂ The screen will switch to the photo list screen. ENTER BACK 3 SLIDE SHOW When a photo is selected, press the [ ] button. Ⱂ Slideshow will start from the selected photo.
* Slideshow Rotating / zooming photos You can rotate or enlarge a photo during Slideshow. 1 Fi eName JPG Press the [MENU] button during the Slideshow mode. Ⱂ The Slideshow will be paused and the menu will appear. MENU Home Rotate 2 Zoom Setting Press the [ⶸ/ⶼ] buttons to select a desired item, and then press the [ ] button.
* Managing photos Selecting a storage device When an external memory (SD memory card/ USB memory device) is connected, you can select a memory to play a Slideshow from the Photos menu. )UDPH 0HPRU\ Photos Clock Mini Monitor Settings 1 In the main menu screen ² p.12 2 Press the [ⶾ] button to move to . 3 Press the [ⶸ/ⶼ] buttons to select a desired storage device, and then press the [ ] button. SELECT Ⱂ The setting will be changed to the selected storage device.
* Managing photos Copying photos When an external memory (SD memory card/ USB memory device) is connected, you can copy photos from the external memory to the frame memory or vice-versa. Photos Frame Memory ⶺ FileName JPG To copy a photo or folder 19/24 FileName.jpg Photo Size Date File Size 1920 x 1200 2009 1 23 1 245KB MENU 1 Home Copy Delete Select Multiple Files Ⱂ The menu will appear.
¨ Copying photos Photos Frame Memory ⶺ FileName JPG To copy multiple files at one time 19/24 FileName.jpg Photo Size Date File Size 1920 x 1200 2009 1 23 1 245KB MENU 1 Press the [MENU] button in the photo list. Ⱂ The menu will appear. Home Copy Delete Select Multiple Files SELECT 2 Press the [ⶸ/ⶼ] buttons to select
* Managing photos Deleting photos You can delete photos in the frame memory and/ or external memory (SD memory card / USB memory device). Photos Frame Memory ⶺ FileName JPG To delete a photo or folder 19/24 FileName.jpg Photo Size Date File Size 1920 x 1200 2009 1 23 1 245KB MENU 1 Home Copy Delete Select Multiple Files Ⱂ The menu will appear. SELECT Select Storage Device Settings BACK 2 Press the [ⶸ/ⶼ] buttons to select , and then press the [ ] button.
¨ Deleting photos Photos Frame Memory ⶺ FileName JPG To delete multiple files at one time 19/24 FileName.jpg Photo Size Date File Size 1920 x 1200 2009 1 23 1 245KB MENU 1 Press the [MENU] button in the photo list. Ⱂ The menu will appear. Home Copy Delete Select Multiple Files SELECT 2 Press the [ⶸ/ⶼ] buttons to select
* Mini Monitor Using as a PC screen (Mini Monitor) You can use the photo frame as a Mini Monitor (secondary monitor) by connecting it to your PC after installing the Frame Manager program onto the PC. To use the product as a Mini Monitor, you must install the Frame Manager program onto your PC. For more information about downloading Frame Manager or using as a Mini Monitor, visit the Samsung Electronics homepage (http://samsung.com) and search for the corresponding model name (SPF-87H or SPF-107H).
* Mini Monitor Connecting to a PC 1 Ⱂ The screen will appear. USB Communication PC Connected via USB cable. Select a function to use. Mass Storage Mini Monitor Connect the product to your PC using the provided USB cable. ² p.11 2 Photo Frame Press the [ⶾ/ⶺ] buttons to select , and then press the [ ] button. Ⱂ It will switch to Mini Monitor.
* Settings Photo Settings You can enjoy photos more pleasantly with various effects and settings. Settings -Photos Category Option Photos Slideshow Transition : Fade Clock Slideshow Speed : Normal General Slideshow Mode : All photos Support Slideshow Order : Normal View Mode : Photo & Calendar Aspect Ratio : Auto Fit Portrait Photo Mode : On Display Photo Info : On 1 In the main menu screen ² p.12 2 Press the [ⶸ/ⶼ] buttons to select , and then press the [ ] button.
¨ Photo Settings Slideshow Transition 1RWH The selected will be applied only when is in or . Only the effect will be applied in other types of .
* Settings Clock Settings You can set the current time and also display the time in various formats and types. Settings -Clock Category Option Photos Clock Set Clock Date Format : DD/MM/YYYY General Time Format : 12 hours Support Clock Type : Clock Only 1 In the main menu screen ² P.12 2 Press the [ⶸ/ⶼ] buttons to select , and then press the [ ] button. Ⱂ The menu will appear. SELECT 3 BACK Press the [ⶸ/ⶼ] buttons to select , and then press the [ ] button.
* Settings General Customize the product’s general settings. Settings -General Category Option Photos Quick Setup Clock Language : English General Brightness : 69 Support Auto Picture On/Off In the main menu screen ² P.12 2 Press the [ⶸ/ⶼ> buttons to select , and then press the [ ] button. Ⱂ The menu will appear.
¨ General 1RWH Ⱂ When the screen turned off by the Auto Picture On/Off function, pressing any button other than the [ ] button will turn on the screen. Ⱂ When used as Mass Storage (mass storage device) or Mini Monitor by connecting to a PC with a USB cable, the screen doesn’t turn off even at Off time (). * Settings Support You can check contents related to the usage of the product and/ or reset menus, etc. that the user has set to the default settings.
* Appendix Checklist before requesting service If the product doesn’t operate properly, first check the following items. If the problem still persists, contact or visit the nearest Samsung service center. Troubles Solutions The power won’t switch on. Ensure that the power cable is correctly connected. Spots which look like light leaking can be seen on the edges of the clock screen. Black LCD panel screens by nature can have this effect, which is not a defect. The time setting is wrong.
Troubles Solutions The picture size changes when I rotate it. The picture size changes automatically depending on the rotation angle (90°, -90°) in order to display the entire image on the screen. The picture looks stretched horizontally or vertically. Press [MENU] on the Slideshow screen. Go to - and change the setting to and check again. Previews are too slow. Previews may be slow for large-sized images and multiple images.
* Appendix Software Upgrade You can download and install the latest software from Samsung Electronics homepage. While Upgrade Software is in progress, pay attention to the following. Before Upgrade Software ! Ⱂ Do not remove the USB memory device or SD card. Ⱂ Do not turn off the product's power. Ⱂ Do not press any buttons on the product. Ⱂ Do not insert any another card.
Product Specifications Classification Details Model name SPF-87H SPF-107H Panel Type 8” TFT LCD 10” TFT LCD Resolution 800 x 480 1024 x 600 Supported format JPEG Ⱂ Progressive or CMYK type pictures are not supported. Ⱂ It can only recognize up to 4,000 photos. Ⱂ Only a photo with a resolution less than 8000 (Horizontal) *8000 (Vertical) pixel can be played. Internal memory 1 GB USB Host (USB 2.0) / Device (USB 2.