SR8980 Vacuum Cleaning Robot user manual This manual is made with 100% recycled paper. ✻ Before operating this unit, please read the instructions carefully. ✻ For indoor use only. English imagine the possibilities Thank you for purchasing a Samsung product. To receive a more complete service, please register your product at www.samsung.com/register DJ68-00632D(0.0).indd 01 2012.1.
safety information SAFETY INFORMATION • Before operating the appliance, please read this manual thoroughly and retain it for your reference. • Because these following operating instructions cover various models, the characteristics of your WARNING vacuum cleaner may differ slightly from those described in this manual. WARNING CAUTION/WARNING SYMBOLS USED WARNING CAUTION Indicates that a danger of death or serious injury exists. Indicates that a risk of personal injury or material damage exists.
IMPORTANT SAFETY INSTRUCTIONS When using an electrical appliance, basic precautions should be observed, including the following: READ ALL INSTRUCTIONS BEFORE USING YOUR VACUUM CLEANING ROBOT. Unplug from outlet when not in use and before conducting maintenance. WARNING: to reduce the risk of fire, electric shock, or injury: GENERAL • Use only as described in this manual. • Do not operate the vacuum cleaning robot or charger if it has been damaged in any way.
safety information VACUUM CLEANING ROBOT • Do not pick up hard or sharp objects such as glass, nails, screws, coins, and etc. • Do not use without a filter in place. When servicing the unit, never put fingers or other objects into the fan chamber in case the unit accidentally turns on. • Do not put any objects into openings. Do not use with any openings blocked; keep openings free of dust, lint, hair, and anything that may reduce air flow.
contents SAFETY INFORMATION 02 06 07 10 11 Power Related Before Use In Use Cleaning and Maintenance PRODUCT FEATURES 13 ASSEMBLING THE CLEANER 15 Components 16 Name of each part 15 OPERATING THE CLEANER 20 MAINTAIN TOOLS AND FILTERS 38 TROUBLESHOOTING 20 Installing the vacuum cleaning robot 20 Installation order 20 Turning the Power Switch on or off 21 Installing the charger 22 Learn about how to use the Auto Empty function 22 Attaching the carpet accessory 23 Charging 24 About the Battery 25 Se
safety information POWER RELATED WARNING WARNING Do not bend the power cord forcefully or place a heavy object on it that could break it. - This may result in fire or electric shock. Make sure to remove any dust or water from the power plug. - Failing to do so may result in a malfunction or electric shock. WARNING Do not pull the power plug by the cord or touch the plug with wet hands. - This may result in fire or electric shock. WARNING Do not use multiple plugs in a single socket.
BEFORE USE CAUTION CAUTION CAUTION CAUTION CAUTION CAUTION 01 SAFETY INFORMATION CAUTION Before activating the vacuum cleaning robot, make sure that the dust bin is assembled. - If the dust bin is not inserted, vacuum cleaning robot will not operate. Never use vacuum cleaning robot in locations with combustible material such as. - Locations with candles or desk lamps on the floor. - Locations with unattended fires (fire or embers).
CAUTION CAUTION CAUTION CAUTION CAUTION CAUTION CAUTION Remove small objects or brittle items from the area to be cleaned in advance. - Make sure to clear any objects before cleaning. - Make sure to remove fragile items such as china, glass objects, flowerpots, etc. - Vacuum cleaning robot does not recognize coins, rings or other valuable items such as jewelry. Remove objects scattered on the floor before cleaning. - Vacuum cleaning robot is designed to detect obstacles 5cm away from it.
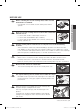
CAUTION WARNING Objects in front of the charger will prevent the vacuum cleaning robot from auto-charging itself. - Clear the area. m t 0.5 abou m t 0.5 abou ab ou t There should be no obstacles and cliffs 0.5m to the left and right and within 1m of the front. m t 0.5 abou 1m ab ou t WARNING Do not short-circuit the charge pins with metal objects such as chopsticks, screwdrivers, and etc. - This will result in critical damage to the charger.
IN USE CAUTION You cannot use the vacuum cleaning robot on thick carpets. - This may result in problems with the vacuum cleaning robot. - This may result in damage to carpets. CAUTION Do not use the vacuum cleaning robot on a table or other high locations. - This may result in damage when the unit accidentally drops. CAUTION CAUTION CAUTION WARNING Vacuum cleaning robot may bump into furniture such as chair legs, table legs, thin and long furniture, etc. while operating.
CAUTION NOTE NOTE 01 SAFETY INFORMATION NOTE Do not move the robotic vacuum cleaner holding the dustbin part. - This may cause the dustbin to separate, resulting in injury or serious damage to the product. Vacuum cleaning robot may not be able to continue its operation if it is stuck at the entrance or veranda doorsill. - To resume operating, turn the Power Switch off and then on again after moving it to a location where it can continue cleaning.
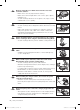
WARNING When removing foreign substances, always use the cleaning brush after turning the Power Switch off. - Failing to do so may result in sudden operation of the unit and cause an injury or critical damage to the product. Edge-cleaning side brush Power brush WARNING WARNING WARNING If the power cord is damaged, have it replaced by a qualified service engineer from the customer care center. - Failing to do so may result in fire or electric shock.
product features CONVENIENT VIRTUAL GUARD FUNCTION You can confine the vacuum cleaning robot to a particular section by using the Fence (virtual wall) mode. • What is ceiling shape recognition (Visionary mapping plus™)? This function recognizes the shape of the ceiling using the camera on top to identify the area to be cleaned and determines the best way to pass over and clean every section of the floor.
AUTO CHARGING When the battery is low, the vacuum cleaning robot is automatically guided to the charger to enable it to perform a quick auto charge. THE AUTO DUST EMPTYING FUNCTION OF THE VACUUM CLEANING ROBOT When the vacuum cleaning robot returns to the auto-emptier after cleaning, dust is emptied automatically from the vacuum cleaning robot.
assembling the cleaner COMPONENTS 02 ASSEMBLING ■ Main Body ■ Remote Control ■ Charger (Station) ■ Others Components (AAA-Type Batteries) User Manual / 2 Battery VIRTUAL GUARD Quick Start Guide Accessory for Carpet Spare Filter Cleaning Brush assembling _15 DJ68-00632D(0.0).indd 15 2012.1.
NAME OF EACH PART ■ Main unit Dustbin Eject Button Display panel Virtual Guard Sensor Camera Remote Control Sensor Obstacle Sensor Obstacle Sensor Bumper Sensor Front Dustbin Eject Button Dust bin Remote Control Sensor Side Cliff Sensor Driving Wheel Rotating Side Brush Power Switch Charge Pin Power Brush Roller Power Brush Cover Cliff Sensor Battery Cover Charge Pin Driving Wheel Cliff Sensor Bottom 16_ assembling DJ68-00632D(0.0).indd 16 2012.1.
■ Charger (Station) Auto Empty On/Off Select button Dustbin removal button Dustbin 02 ASSEMBLING Full lamp (red) Auto Empty lamp (red) Power button Charging lamp (green) Power lamp (red) Cyclone cap Dust inlet of the vacuum cleaning robot dustbin Charging terminals ■ VIRTUAL GUARD Power Button Lamp Main Body Detection Sensor Distance Detection Sensor ■ Installing the batteries Batteries are not supplied with the product. You have to purchase the batteries separately.
■ Remote Control Power Recharging Auto Max Directional Buttons Spot (moving backwards is not supported.) Start/Stop Manual Dust Sensor Turbo Sound Clock Timer/Weekly ■ Installing the Remote Control Batterise Batteries are not installed in the remote control when purchasing the product. Install the batteries (type AAA) before use. 1 Lift the battery compartment cover at the back of the remote control, while pressing the locking tab.
■ Display panel 2 3 4 5 6 1 7 8 B 9 02 ASSEMBLING A C 10 DISPLAY PART 1. 2. 3. 4. 5. 6. 7. - Number Display Shows the timer display, progress status, and error codes using numbers, letters and graphics. Weekly Reservation When you set a weekly reservation to start cleaning from the specified time on the specified day of the week, the icon for the selected day of the week is turned on. Battery Level Indicator Charging : Shows the charging progress in 3 steps. In Use : Shows the battery charge level.
operating the cleaner INSTALLING THE VACUUM CLEANING ROBOT Installation order 1. Turning the Power Switch on or off To use the vacuum cleaning robot, you must turn on the Power Switch at the bottom of the main unit. 2. Installing the Charger To charge the vacuum cleaning robot, you must first install the charger. Since the battery is discharged when the product is purchased, you must fully charge the battery before use. 3.
Installing the charger Power lamp Charging lamp 03 OPERATING 1. Install the charger on a flat surface. 2. There should be no obstacles and cliffs 0.5m to the left and right and within 1 m of the front. m t 0.5 m t 0.5 abou abou ab ou t1 m 3. Install the charger in a location where it can be easily accessed by the vacuum cleaning robot. 4. Arrange the power cord along the wall. 5. When the floor is made of wood, install the charger in the same direction as the grain of the wood.
Learn about how to use the Auto Empty function 1. Turn on the Power button. Power button 2. Turn on the Auto Empty button. ❈ If the Auto Empty button is turned off, the cleaner does not carry out the Auto Empty function. ❈ If the dust bin was filled by dust, the vacuum cleaning robot return to the AutoEmptier. And the autoemptier begin autoempty. Auto Empty On/Off Select button Auto Empty lamp (red) 3. When the vacuum cleaning robot docks with the autoemptier, it starts to automatically empty the dust.
Charging When the product is initially purchased, the battery is fully discharged, and you must charge the vacuum cleaning robot manually. Power lamp Charging lamp 03 OPERATING Turn on the Power Switch at the bottom of the product. 1. After aligning the charge pins of the main unit with the charge pin of the charger station, press the main unit until you hear a Recharging power sound from the charger. - The Charging Lamp turns green. Power lamp 2. Check the charge status of the vacuum cleaning robot.
NOTE • When the product is initially purchased, it will take about 180 minutes to fully charge the battery and will run for about 100 minutes. • When charging the battery while the battery is over-heated, the charging time can increase. • Measures to take when charging is not smooth. When the vacuum cleaning robot cannot be automatically charged, check the following: - Turn the Power Switch at the bottom of the vacuum cleaning robot off and on. - Re-plug the power of the charger.
Setting the Time The clock displays the current time. You can change the current time with the following steps. ■ You can only set the time using the remote control. Configuration Sequence Blinks 1. Press the Clock button. - The current time is displayed. Blinks 03 OPERATING Remote Control 2. Press the Clock button. - The day of the week will blink. Press the Y or Z button to set the day of the week. Decrease Increase Decrease Increase 3. Press the Clock button.
Installing the VIRTUAL GUARD You can confine the vacuum cleaning robot to a particular section by using Fence (virtual wall) mode. Power Button Lamp Distance Detection Sensor Main Body Detection Sensor Button operations 1. Lamp operations - Fence (virtual wall) Mode: The red lamp flashes. - Off :The lamp is turned off. 2. Turn the Power Button on - Whenever you press the Power button, Fence (virtual wall) mode ➝ Power off is selected in this sequence. ❈ The distance of virtual wall is 2.
About the IrDA sensor CAUTION 03 OPERATING • The infrared signal transmission may not be [Infrared Signal Priority] smooth in locations exposed to halogen lamps or in outdoor locations. • Vacuum cleaning robot uses 3 types of infrared > > devices and a device may not work in front of another device with a higher priority.
USING THE VACUUM CLEANING ROBOT Starting/Stopping Cleaning You can run or stop all vacuum cleaning robot functions. ■ Each vacuum cleaning robot function only runs when the Power Switch is turned on. ■ When the vacuum cleaning robot is operating, press the ( button to cancel the operation and select a function. ) Turning the power on or off Turning the power on - Main unit: Press the ( ) button. Turning the power off - Remote control: Press the [Power] button.
Recharging You can have the vacuum cleaning robot return to the charger to charge the battery by using the Recharging button. 03 OPERATING ) ■ When the vacuum cleaning robot is operating, press the ( button to cancel the operation and press the Recharging button. 1. Press the Recharging button. ”) is displayed on the display panel and the vacuum - (“ cleaning robot returns to the charging station for recharging. 2.
Auto Cleaning The vacuum cleaning robot will move by itself and automatically clean the house until cleaning is completed once. ■ If you press the Start/Stop button on the main unit or remote control without selecting a cleaning mode, an automatic cleaning run starts. ■ If cleaning begins when the vacuum cleaning robot is docked with the charger station, the time to return to the charger is decreased since the vacuum cleaning robot remembers its original position while moving.
Spot Cleaning Main unit button Remote control button About 1.5m About 1.5m 03 OPERATING You can conveniently clean a specific area that has a a lot of cookie crumbs, dust, and etc. ■ Move the vacuum cleaning robot to the location where you want to perform a spot clean. Configuration Sequence 1. Set the mode. ▶ 2time 2. Cancel the mode. Normal Mode - In Spot cleaning mode, the vacuum cleaning robot cleans an area with a length of 1.5m and a width of 1.5m.
Max Cleaning The vacuum cleaning robot automatically moves and cleans until the battery runs out and the battery level flashes only one level. ■ If cleaning begins when the vacuum cleaning robot is docked with the charger station, the time to return to the charger is decreased since the vacuum cleaning robot remembers its original position while moving.
Manual Cleaning Remote control button 03 OPERATING You can move the vacuum cleaning robot to clean a particular location directly by using the remote control. ■ Move the vacuum cleaning robot to the location where you want to perform manual cleaning. ■ You can manually clean using the remote control only. Configuration Sequence 1. Set the mode. 2. Cancel the mode. NOTE CAUTION • When the vacuum cleaning robot is docked with the charger station, manual cleaning is not supported.
Timer Reservation In this mode, you can schedule the cleaner to start a once-off cleaning run from a particular time. ■ A scheduled cleaning run is only performed when the cleaner is docked to the charger station. Remote Control Blinks Decrease Increase Decrease Increase Decrease Increase Blinks Blinks Blinks Blinks Blinks Blinks - Timeout 1. Press the Timer/Weekly button. - The current setting is displayed and blinks. Press the Y or Z button to set the hour.
Weekly Reservation In this mode, you can schedule the cleaner to start a once-off cleaning run from the specified time on the specified days of the week. ■ A scheduled cleaning run is only performed when the cleaner is docked to the charging station. Wed Sat Fri Sun ~ Configuration Sequence Standby mode - In Standby mode, the scheduled days of the week are displayed.
Remote Control Blinks Decrease Blinks 4. Press the Timer/Weekly button. Press the Y or Z button to set the cleaning mode. - You can select either Auto or Repeat cleaning mode. 5. Press the Timer/Weekly button. - The value you set blinks and the settings are completed. ❈ After the settings are completed, the day of week you have set blinks. At this time you can move to step ( 2 ) and add another day of the week.
ADDITIONAL FUNCTIONS Using additional functions Turbo Mode Each time you press the Turbo button, the Turbo icon on the display panel is turned on or off sequentially. On turbo (Turbo Mode) : The power brush rotates at maximum speed. Off turbo (Normal Mode) : The power brush rotates at normal speed. 03 OPERATING You can use the cleaning robot more easily and conveniently using various additional functions. ■ You can only configure the additional functions with the remote control.
maintain tools and filters CLEANING THE VACUUM CLEANING ROBOT Please keep the cleaning and maintenance methods in mind ■ When the Power Switch is damaged, please contact the service agent so that it does not cause any accidents. ■ Do not use any means or mechanical devices not installed by the manufacturer that could accelerate the deformation of the vacuum cleaning robot. ■ Always turn off the power switch at the bottom of the main unit before cleaning the vacuum cleaning robot.
Cleaning the Dust Bin and the Filters 04 MAINTAIN First, empty the dust bin before cleaning it. ■ When separating the dust bin, take care not to spill the dust out of the dust bin. ■ Empty the dust bin in the following cases. 1. When dust has accumulated inside the dust bin. 2. When the suction power suddenly becomes weak. 3. When the noise suddenly increases. 1. Press the Dust Bin Eject (PUSH) button and pull the dust bin to separate the dust bin. 2.
EMPTYING THE AUTO-EMPTIER DUSTBIN 1. Remove the dustbin in the direction of the arrow. 2. Slide the locking bar downward to open the dustbin cover. ❈ Open the cover after positioning the dustbin over a wastebasket. Slide the locking bar downward to open the dustbin cover. 3. Shake the dust from the dustbin. 4. Close the dustbin cover until it clicks into place, and then reassemble the dustbin on the main body.
CLEANING THE FILTER OF THE AUTO-EMPTIER DUSTBIN 1 2 4 Pull the holding part of the filter in the direction of the arrow. 5 After removing the dustbin, shake the dust from the filter. 7 6 Clean the filter with water. 8 11 Clean the filter with water. Dry the filter in the shade. 9 First assemble the top of the filter Pull the filter forward and remove and then assemble the bottom it from the dustbin. holding part. 10 Remove the filter from the dustbin.
CLEANING THE BOTTOM OF THE AUTO-EMPTIER 1. Turn the auto-emptier over so that its bottom is facing upward. Then open the 6 fixing screws using a coin as shown in the figure. 2. Remove the bottom cover from the auto-emptier using a coin, and then clean the bottom cover. 3. Clean the bottom cover with water. 4. Dry the bottom cover in the shade. 5. After a cleaning run, close the bottom cover in the direction of the arrow. 6.
7. Cleaning the lower side of the Auto-Emptier periodically. 04 MAINTAIN CLEANING THE VACUUM CLEANING ROBOT Cleaning the Power Brush You must turn off the Power Switch at the bottom of the main unit before cleaning the vacuum cleaning robot. • Because the dust in the dust bin may come out, separate the CAUTION dust bin first before cleaning the power brush. 1. After checking whether there are any foreign substances, press the hook that is fixing the brush cover to separate it. 2.
4. After a cleaning run, first fix the side of the power brush opposite to the Power Switch and then fix the other side. 5. Insert the side into the two grooves and assemble it by slightly sliding it down until it clicks into place. CAUTION • To prevent the vacuum cleaning robot from becoming clogged, be careful not to vacuum tooth picks or cotton swabs. • When removing foreign substances becomes difficult, contact a customer care center.
Cleaning the Edge-Cleaning Side rotating Brush You must turn off the Power Switch at the bottom of the main unit before cleaning the vacuum cleaning robot. 04 MAINTAIN 1. Check whether the side rotating brush is bent or whether there are any foreign substances stuck on the brush. 2. Wearing rubber gloves, wrap the side rotating brush with a cloth using hot water for about 10 seconds and wipe it on the cloth. 3. Turning the side rotating brush, repeat the procedures in Step 2. 4.
Cleaning the Driving Wheel You must turn off the Power Switch at the bottom of the main unit before cleaning the robot. ■ If the vacuum cleaning robot suddenly starts to zigzag, there may be foreign substances stuck on the driving wheel. 1. When cleaning the driving wheel, place a soft cloth on the floor and flip the main unit, placing it down carefully. 2. Check for foreign substances and remove them using a stick or a pair of blunt nippers if necessary. 46_ maintain DJ68-00632D(0.0).indd 46 2012.1.
troubleshooting CHECKLIST BEFORE SVC CALLS Symptom Vacuum cleaning robot stopped operating while cleaning. Checklist Measure to Take • Is the dust bin assembled? • Install the dust bin. • Is the Power Switch turned on? • Turn on the Power Switch. • Is cleaning mode panel turned on? button. (To turn it in the display • Press the button off, press and hold the down for 3 seconds or longer.
Symptom Checklist Measure to Take Vacuum cleaning • Check whether the power plug of robot cannot find the the charger is plugged correctly charger. into the outlet. • If there are any obstacles within a range of about 1m in front of the charger and about 0.5m range to the left and right of the charger, you should remove the obstacles. • If there are any foreign substances on the change pin, wipe them off with a dry towel.
Symptom Checklist Measure to Take • Turn on the power switch on the left side of the autoemptier. The auto-emptier does not empty the dustbin automatically. • Check whether there is a foreign substance on the filter. • Clean the filter. • Check whether there is a foreign substance inside the dustbin. • Remove the foreign substance from the inside of the dustbin. • The bottom of the autoemptier is clogged. • Open the bottom of the autoemptier using a coin and then remove the dust clogging it.
TROUBLESHOOTING FOR ERROR CODES ERROR CODE CAUSE SOLUTION • Vacuum cleaning robot is caught, stuck or trapped while navigating. • Turn off the Power Switch at the bottom and move the vacuum cleaning robot to a different location. • A foreign substance (string, paper, toy etc.) is caught in the power brush. • Turn off the Power Switch at the bottom and remove the foreign substance from the power brush. • A foreign substance (string, paper, toy etc.) is caught in the left driving wheel.
product specification 357 mm (Width) 80 mm (Height) 06 PRODUCT SPECIFICATION 260 mm (Height) 350 mm (Length) 350 mm (Width) 560 mm (Length) Main Body Classification Mechanical Specifications Electrical Specifications Cleaning Specifications Charger (Station) Item SR8980* SERIES Diameter 350mm Height 80mm Weight 3.2kg Power voltage AC220-240V~, 50-60Hz Charge power consumption 40 W Main unit power consumption 40 W Auto emptying power consumption 600 W Battery specifications 14.4V / 31.
OPEN SOURCE ANNOUNCEMENT Some software components of this product incorporate source code covered under the BSD. And this software is based in part on the work of the Independent JPEG Group. ■ OpenCV : IMPORTANT : READ BEFORE DOWNLOADING, COPYING, INSTALLING OR USING. By downloading, copying, installing or using the software you agree to this license. If you do not agree to this license, do not download, install, copy or use the software.
memo DJ68-00632D(0.0).indd 53 2012.1.
memo DJ68-00632D(0.0).indd 54 2012.1.
memo DJ68-00632D(0.0).indd 55 2012.1.
If you have any questions or comments relating to Samsung products, please contact the SAMSUNG customer care center. Country Customer Care Center Web Site U.K 0330 SAMSUNG (7267864) www.samsung.com SOUTH AFRICA 0860 7267864 (SAMSUNG) www.samsung.com DJ68-00632D REV(0.0) DJ68-00632D(0.0).indd 56 2012.1.