CompactFlash File System on Logix5000 Controllers 1756-L61, 1756-L62, 1756-L63, 1756-L64, 1756-L60M03SE Application Solution
Important User Information Solid state equipment has operational characteristics differing from those of electromechanical equipment. Safety Guidelines for the Application, Installation and Maintenance of Solid State Controls (Publication SGI-1.1 available from your local Rockwell Automation sales office or online at http://www.ab.com/manuals/gi) describes some important differences between solid state equipment and hard-wired electromechanical devices.
Table of Contents Important User Information . . . . . . . . . . . . . . . . . . . . . . . . . . . . . . . . . . 2 Preface Purpose of This Manual. . . . . . . . . . . . . . . . . . . . . . . . . . . . . . . . . . . . . . 5 Who Should Use This Manual. . . . . . . . . . . . . . . . . . . . . . . . . . . . . . . . . 5 Additional Resources . . . . . . . . . . . . . . . . . . . . . . . . . . . . . . . . . . . . . . . . 5 Chapter 1 CompactFlash Card Enhancements Overview Introduction . . . . . . . . . . . . .
Table of Contents Write Data to the CompactFlash Card . . . . . . . . . . . . . . . . . . . . . . . . . 26 Read Data from the CompactFlash Card . . . . . . . . . . . . . . . . . . . . . . . 28 Delete a File on the CompactFlash Card . . . . . . . . . . . . . . . . . . . . . . . 29 Build an Example . . . . . . . . . . . . . . . . . . . . . . . . . . . . . . . . . . . . . . . . . . 30 Set Up Recipe Data . . . . . . . . . . . . . . . . . . . . . . . . . . . . . . . . . . . . . 31 Create the File . . . . . .
Preface Purpose of This Manual This manual describes how you can use the CompactFlash file system on Logix5000 controllers. Who Should Use This Manual You should use this manual if you program applications that use CompactFlash card and RSLogix 5000 programming software with the following Logix5000 controllers: • ControlLogix controller Additional Resources This table lists Logix products and documentation that may be valuable as you program your application.
Notes: Publication LOGIX-AP007B-EN-P - January 2007
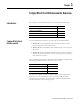
Chapter 1 CompactFlash Card Enhancements Overview Introduction CompactFlash Card Enhancements This chapter reviews the enhancements for the CompactFlash file system. Topic Page CompactFlash Card Enhancements 7 Sample File Compatibility 8 CompactFlash File System Features 8 Possible Applications of the CompactFlash File System 9 The CompactFlash file system has gone through several enhancements.
CompactFlash Card Enhancements Overview Sample File Compatibility This document is compatible with the sample projects, version 3.2, dated January 2007. • CF_Read_Write_V3_2.ACD • CF_Read_Write_V3_2_Example.ACD CompactFlash File System Features The file system has the ability to perform a variety of operations to read or write data to the CompactFlash card.
CompactFlash Card Enhancements Overview Possible Applications of the CompactFlash File System 9 Using RSLogix 5000 software, version 16 or later, and using the application provided in this publication, you can read and write data to the CompactFlash card. This could include tag values, recipes, or data log information, just to name a few. A possible application would be to store a collection of recipes on the CompactFlash card.
CompactFlash Card Enhancements Overview Notes: Publication LOGIX-AP007B-EN-P - January 2007
Chapter 2 CompactFlash File System Restrictions Introduction Restrictions of the File System This chapter describes the restrictions of the CompactFlash file system. Topic Page Restrictions of the File System 11 Number of Open Files 11 Maximum Data Per Message 11 Memory Resources and Performance 12 Limited Life 12 Read or Write Portions of a File 12 The following are the restrictions of the CompactFlash file system. Number of Open Files The total number of open files at one time is one.
CompactFlash File System Restrictions Minimum File Size/Resolution The minimum file size supported is 450 bytes. If you create a file and write 4 bytes to the file the application will actually write 450 bytes. The same concepts applies for reads and writes. If you read or write 500 bytes, 900 bytes will be read or written. Memory Resources and Performance The subroutines described in this document depend on messaging to perform the required operations to the CompactFlash card.
Chapter 3 CompactFlash Commands Introduction This chapter describes four of the CompactFlash commands, the ControlFlash Data Working Tag, and how to determine the number of bytes to read or write. Topic Page CF_Data_Working Tag 14 Create Command 15 Write Command 16 Read Command 18 Delete Command 19 Determine the Number of Bytes to Read or Write 19 The file system has the ability to perform a variety of operations to read or write data to the CompactFlash card.
CompactFlash Commands CF_Data_Working Tag Before explaining the four commands, you need to understand the layout of a key tag in the application. The CF_Data_Working tag, a user-defined data type tag (UDT), is at the program scope. This is an example of a user-defined data type tag or UDT. When a command is executed, the routines use this tag to get all the information needed to perform the command, such as file name, data, or number of bytes to read or write.
CompactFlash Commands 15 The UDT tag's type is called CF_File_Structure. This will be important if you create a Recipe_Manager. The only 3 tags you will need to manipulate in the UDT are: • File_Name The name of the file that will be on the CompactFlash card. This name can be up to 140 characters in length. The file name must include a file extension. The .xxx is included in the 140 characters. For example, testfile1.dat would be an 11-character file name.
CompactFlash Commands Set Up the Create Command To set up the Create command, define the filename including the file extension, for example, testfile1.dat. To execute the Create command, set the execute_CF_Create_File bit. The application code resets this bit. Refer to Chapter 4, Example Application for complete instructions. Write Command Use the Write command to write data to the CompactFlash card. A file must exist on the CompactFlash card before executing this command.
CompactFlash Commands 17 • The checksums are verified and the data in data_to_write and data_read are compared to make sure they are equal. TIP If the checksums are not calculated, compared, and parsed, the file is closed and the write sequence is restarted from the beginning. The application will attempt to write a file four times. After the fourth failure, a checksum error is set. • The file is closed. • Error handling is performed, if needed.
CompactFlash Commands Read Command The Read command is used when you want to read data from the CompactFlash card. A file must exist on the CompactFlash card before executing this command. The read command is broken into six commands: • The file is open. • The file pointer is set. • The file is read. Only 450 bytes can be read at one time from the file. Therefore, reading from the file is broken down into 450 byte chunks. This moves the data into the data_read array.
CompactFlash Commands Delete Command 19 Use the Delete command when a file needs to be deleted from the CompactFlash card. A file must exist on the CompactFlash card before you can use the Delete command. The delete command consists of two commands: • Delete the file. • Error Handling is performed, if needed. Set Up the Delete Command To set up the Delete command: • define a filename including a file extension, for example, testfile1.dat. • set the bit execute_CF_Delete_File.
CompactFlash Commands For example, the tag MYDINTS[100] will be 4 times 100 elements, or 400 bytes of data. Similarly, if a UDT is used, 1 instance of that UDT will be the sum of the sizes of all the data types within the structure. TIP When reading or writing to the CompactFlash card, it is best to use UDT tags. This lets you mix different data types together and lets you know the number of bytes that will need to be transferred to and from the card.
Chapter 4 Example Application Introduction Requirements You should now have a good understanding of the basics using the CompactFlash file system. This example application brings all the concepts together.
Example Application 2. Open the MainPrograms tags. 3. Expand the MainPrograms tags. 4. Double-click Program Tags. Make sure the Monitor Tags tab is selected in the tag editor. 5. Sort the tags by Name. 6. Find the tag Controller_Slot_Number.
Example Application 23 7. Enter the slot number where the controller will be located in the value column. When the application enters Run mode, the D_CF_Intialization routine executes. The paths for all the message instructions will be modified to contain the slot number you just entered. You can add a new rung zero to the D_CF_Intialization routine to move the slot number into the tag Controller_Slot_Number. 8. Download the project to the controller and go online. 9. Put the controller into Run mode.
Example Application 6. Click Browse and the string browser window displays. 7. Enter testfile1.dat and click OK. 8. Switch the Scope to CF_Read_Write in the tag monitor to view the Controller Scoped tags.
Example Application 25 9. Sort the tags by name. 10. Find the tag execute_CF_Create_File. 11. Enter a 1 in the value field and press Enter. The tag goes back to a 0. This indicates that the application has attempted to create your file. 12. Find the tag CF_Create_Seq_Status. 13. Click + to expand the tag. This is a user-defined data type (UDT). As the tag name indicates, this will give you status on the create file sequence. There is an element of the UDT called Overall_Status.
Example Application Write Data to the CompactFlash Card Set up how the program is going to write the data to the CompactFlash card. 1. Switch to the MainPrograms tags. Make sure the Monitor Tags tab is selected in the tag editor. 2. Sort the tags by Name. 3. Find the tag CF_Data_Working. This is a user-defined data type (UDT). 4. Click + to expand the tag. Leave the filename the same as the previous section, testfile1.dat. There is an element in the UDT called CF_Data_Working.Bytes_to_RW.
Example Application 27 7. Enter a value of 100 in the first element of the Data array. 8. Switch the Scope to CF_Read_Write in the tag monitor to view the Controller Scoped tags. 9. Sort the tags by name. 10. Find the tag execute_CF_Write_Data. 11. Enter a 1 in the value field and press Enter. The tag will go back to a 0. This indicates that the application has attempted to write to your file. 12. Find the tag CF_Write_Seq_Status and click + to expand the tag. This is a user-defined data type (UDT).
Example Application Read Data from the CompactFlash Card Determine how the program is going to read the data from the CompactFlash card. 1. Switch to the MainPrograms tags. Make sure the Monitor Tags tab is selected in the tag editor. 2. Sort the tags by Name. 3. Find the tag CF_Data_Working. This is a user-defined data type (UDT). 4. Click + to expand the tag. 5. Use the file name from the previous section, testfile1.dat. The UDT element Bytes_to_RW remains set at 450.
Example Application 29 10. Enter a 1 in the value field and press Enter. The tag will go back to a 0. This indicates that the application has attempted to read from your file. 11. Find the tag CF_Read_Seq_Status and click + to expand the tag. This is a user-defined data type (UDT). As the tag name indicates, this will give you status on the read file sequence. There is an element of the UDT called Overall_Status. At this point, it should be equal to 1. This means that the file was created successfully.
Example Application 6. Find the tag execute_CF_Delete_File. 7. Enter a 1 in the value field and press Enter. The tag will go back to a 0. This indicates that the application has attempted to delete your file. 8. Find the tag CF_Delete_Seq_Status and click + to expand the tag. This is a user-defined data type (UDT). As the tag name indicates, this will give you status on the file sequence. There is an element of the UDT called Status. It should be equal to 1.
Example Application 31 2. Open the Recipe_Manager routine. 3. Look at the next rung (rung 1). The first conditions determine that this recipe and a command have been selected. After this there are 5 branches. Branch Description 1 Handles the command to write data to the CompactFlash card. 2 Handles creating the file on the CompactFlash card. 3 Handles the reading of data from the CompactFlash card and placing it into the Recipe. 4 Handles deleting the file on the CompactFlash card.
Example Application 3. Scroll down until you find the tag Recipe1. This is the UDT (Recipe Data) we discussed in the previous chapter. 4. Expand the tag and enter some data. Earlier we discussed a program scope tag called CF_Working_Data. When a command is executed, the routines use this tag to get all information, such as file name, data, number of bytes to read or write.
Example Application 33 8. Define how many bytes you want to read/write to the file. From the previous section, a waffle recipe was 72 bytes in size. 9. Enter 72 in the tag Bytes_to_RW. The last piece of data to manipulate is the Data. You will copy the data from the waffle Recipe1 into this array. This is done in the Recipe_Manager code. TIP Remember to set the tag controller_slot_number and to make sure a CompactFlash card is installed in the controller. 10.
Example Application Write the Recipe Write the recipe data to the CompactFlash card. You entered data into Recipe1 before you download to the controller. 1. Enter a value of 1 in the Recipe_Number tag. This tells the Recipe_Manager routine to work with Recipe1. 2. Enter a value of 2 in the Recipe_Command tag. This tells the Recipe_Manager to write to the file. Once the command has completed, the tags Recipe_Number and Recipe_Commmand will be set to zero.
Appendix A Format a CompactFlash Card Introduction This appendix reviews how to format a CompactFlash card with a CompactFlash Card Reader or using RSLogix5000 software. Topic Page Requirements 35 Format with a Personal Computer and a CompactFlash Card Reader 35 Format RSLogix 5000 Software and a Logix5000 Controller with CompactFlash Support 37 Requirements To use the information described in this document, it is necessary to have the CompactFlash card formatted to a FAT16 file system.
Format a CompactFlash Card The following screen appears. 4. Choose FAT from the File system pull-down menu. 5. Enter a volume label, if desired. 6. Click Start. The card will now be formatted and, once complete, the card is ready for use. The second method formats the card only if it is unformatted or incorrectly formatted. In both cases, if the card is formatted, all data on the card will be lost.
Format a CompactFlash Card Format RSLogix 5000 Software and a Logix5000 Controller with CompactFlash Support 37 The card can also be formatted using RSLogix 5000 software and a Logix5000 controller with CompactFlash Support. 1. Open RSLogix 5000 software, click Start > Programs > Rockwell Software > RSLogix 5000 Enterprise Series > RSLogix 5000. The following screen appears. 2. Select File -> Open. 3. Navigate to the location of CF_Read_Write_V3_2 or any other file that is version 16 or later.
Format a CompactFlash Card 4. Double-click the file to open it. The following window appears. Be sure that the controller is Online. Instructions for bringing a controller online can be found in the RSLogix 5000 software help files. 5. Right-click the Controller folder in the Controller Organizer and select Properties.
Format a CompactFlash Card 39 The following screen appears. 6. Click the Nonvolatile Memory tab.
Format a CompactFlash Card The computer screen should look similar to the following. 7. Click Load/Store. 8. Make sure that the controller is in Program mode. 9. Click Store.
Format a CompactFlash Card 41 The following message box appears. 10. Click Yes. 11. Click OK in any dialogs that my appear. The CompactFlash card formats to a FAT16 file system and the current project image file is stored on the CompactFlash card. The card is now ready for use.
Format a CompactFlash Card Notes: Publication LOGIX-AP007B-EN-P - January 2007
Appendix B Performance Data This appendix describes performance data of the CompactFlash card. All tests were done with Rockwell Automation 1784-CF64 Revision BO1 cards. Performance with third party CompactFlash cards will vary.
Performance Data Access 4500 Bytes This table shows the baseline performance of the CompactFlash card. The application code as it is shipped was used to access 4500 bytes. All data shown is in ms. Each command was performed 32,000 times and the highest value is shown. L6X Controllers Create Command Write Command Read Command Delete Command 68 572 178 83 Access 4500 Bytes with an HMI Load This table shows the baseline performance of the CompactFlash card.
Appendix C Troubleshoot the CompactFlash File System Introduction Status User-defined Data Type This appendix describes possible troubleshooting topics you might encounter while using the CompactFlash file system. Topic Page Status User-defined Data Type 45 Tag Layout 46 Message Error Codes 47 For each command that the application supports there is a status user-defined data type created. These are found in the Controller Scoped tags.
Troubleshoot the CompactFlash File System Tag Layout In the write sequence, there are seven major steps and one overall status. The CF_Write_Seq_Status.Parse_Data status has been expanded to show its format. After a command has been executed, you will want to check the overall status. The following table lists the codes that will appear in the overall status. Code Description 0 The command has not been run or is currently running. 1 The command executed without errors.
Troubleshoot the CompactFlash File System Message Error Codes 47 The following table lists the error codes that you might see when working with the CompactFlash file system. All error codes are in hex. Error / Extended Extended Error Description 0C/0 File does not exist. Invalid handle (State conflict). 05/00 Card removed while command was active. 02/0 Media does not have the free space to create the new file. 0D/0 File already exists. 0C/0 File does not exist (Delete command).
Troubleshoot the CompactFlash File System Notes: Publication LOGIX-AP007B-EN-P - January 2007
Appendix D Expand the Code to Support More than 4500 Bytes of Data Introduction Modify the Application to Access More Data This appendix describes how to expand the code to support more than 4500 bytes of data. Topic Page Modify the Application to Access More Data 49 Access 10,000 Bytes Example 50 Modify the Arrays 51 Modify the Data Element 51 The baseline application supports reading or writing 4500 bytes of data to CompactFlash card.
Expand the Code to Support More than 4500 Bytes of Data Access 10,000 Bytes Example For example, if you want to access 10,000 bytes: Step 1: Actual_Bytes_to_RW = 10,000 + (TRN (10,000/442) * 8) + (If the MOD (10,000/442) > 0 then 8 else 0) = 10,000 + 22(8) + 8 = 10,184 Step 2: 450[(TRN(10,184/450)) + (If the MOD (10,148/450) > 0 then 1 else 0)] = 450 [22+1] = 450(23) = 10350 bytes You need to increase the arrays to a minimum of 10,350 elements. Do not place this value in the Actual_Bytes_to_RW.
Expand the Code to Support More than 4500 Bytes of Data 51 Modify the Arrays The arrays that will need modification are in the program scope: • data_read • data_to_write • UDT CF_File_Structure The third change to make is the definition of the UDT CF_File_Structure, shown below. Data Element Modify the Data Element You will need to modify the Data element. This will modify all usage of this data type throughout the application.
Expand the Code to Support More than 4500 Bytes of Data Notes: Publication LOGIX-AP007B-EN-P - January 2007
How Are We Doing? Your comments on our technical publications will help us serve you better in the future. Thank you for taking the time to provide us feedback. You can complete this form and mail (or fax) it back to us or email us at RADocumentComments@ra.rockwell.com Pub. Title/Type CompactFlash File System on Logix5000 Controllers Cat. No. 1756-L61, 1756-L62, 1756-L63, 1756-L64, 1756-L60M03SE Pub. No. LOGIX-AP007B-EN-P Pub. Date January 2007 Part No. 953014-88 Please complete the sections below.
PLEASE FASTEN HERE (DO NOT STAPLE) PLEASE FOLD HERE NO POSTAGE NECESSARY IF MAILED IN THE UNITED STATES BUSINESS REPLY MAIL FIRST-CLASS MAIL PERMIT NO.
Rockwell Automation Support Rockwell Automation provides technical information on the Web to assist you in using its products. At http://support.rockwellautomation.com, you can find technical manuals, a knowledge base of FAQs, technical and application notes, sample code and links to software service packs, and a MySupport feature that you can customize to make the best use of these tools.