
User`s manual


Sans Digital – EN104L+(B) Admin Guide
26
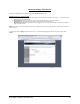
When asked to confirm adding hot spare, select YES
Hot spare is added and is identified as “(Spare)” assigned next to a RV member.
Hot spare can also be used to expand the capacity of RAID volume. Selecting EXPAND button will execute the process. CAUTION: RAID
volume expansion process will take much longer time than RAID volume creation or rebuilding. It is recommended to only execute this task
when no clients are accessing the RAID volume.
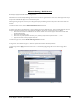
To remove hot spare from the RV, select the hot spare and REMOVE next to the spare. Confirm removal of spare by selection YES to
confirmation. Hot spare is assigned to the Disk Pool as available disk.
RAID Volume Rebuilding:
In the event a RV member becomes fatal or intermittent, RV will be identified as Degraded. Degraded RV can sustain normal operation but it
will become fatal if another member of that RV fails. RV with hot spare will automatically repair itself by replacing the fatal RV member with
the hot spare.
RV in degraded mode is being rebuilt by automatically adding the hot spare as the RV member while fatal RV member is placed in Disk Pool
with INOPERABLE status.
Fatal RV member, now in individual disk state, can be removed from the system and replaced with a new disk drive. CAUTION: It is highly
recommended that replacement disk is the same make, model, capacity and version as the original disk. Furthermore, replacement disk must
not have any RAID signature as a result of having been a member of another RAID volume. Not following this recommendation can result in
unstable RAID volume and loss of data.
Replacement disk drive will be placed in the Disk Pool, ready to be assigned as hot spare to the RV, or, used to create another RAID volume.
If RV did not have hot spare assigned, following steps can be used to rebuild the degraded RV.
Pull out the fatal RV member from the Disk Pool.
Insert the replacement disk drive.
Select the replacement disk drive, or any other available drive in the Disk Pool.
Select the degraded RV.
Select CREATE RAID & ADD SPARE.
Confirm adding hot spare by selecting YES.
Degraded RV will start to rebuild using the newly added spare as replacement of fatal RV member.
After desired RAID volume has been created, go to Volume Group Manager to convert the RV’s into Physical Volume (PV) so as to prepare for
Logical Volume (LV) assignment. Please go to Volume Group Manager and Logical Volume Manager in this manual for details.
Removing RAID Volume:
Removing the RAID volume can be done voluntarily as long as Physical Volume (PV) is not assigned to the RV. This is to prevent accidental
removal of RV that is likely configured and being used as Logical Volume (LV). LV is likely to contain valuable data and it cannot be recovered
once the RV is removed.
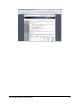
To remove RV, select RV from the RV Pool and select REMOVE.
If PV is assigned to the RV, it is identified by display “Used by PVx” where “x” is a PV ID #.
PV must first be removed from RV at Volume Group Manager, return back to Software RAID Manager, and recommence RV removal process.
Confirm RV removal by confirming with YES.
RV will be removed and all RV members will be assigned to the Disk Pool as available disks.
CAUTION: Removing RV will cause permanent loss of data in all the LV’s that were assigned to the RV.
During any steps described in this section, clicking on Cancel will discard the changes and return to the Administration Home.