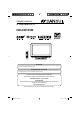
OWNER’S MANUAL 19” CLASS WIDE LCD TV HDLCD185W ATTENTION If you purchase a universal remote control from your local retailer, please contact the remote manufacturer for the required programming code. AIR/CABLE MODE SELECTION When shipped from the factory, the Signal Type option is set to the “Cable” (Cable Television) mode. If not using Cable TV, set this menu option to the “Air” position.
ENGLISH The lightning flash with arrowhead symbol, within an equilateral triangle is intended to alert the user to the presence of uninsulated dangerous voltage within the product's enclosure that may be of sufficient magnitude to constitute a risk of electric shock.
15) Apparatus should not be exposed to dripping or splashing, and objects filled with liquids, such as vases, should not be placed on the apparatus. 16) An outside antenna system should not be located in the vicinity of overhead power lines or other electric light or power circuits, or where it can fall into such power lines or circuits. When installing an outside antenna system, extreme care should be taken to keep from touching such power lines or circuits, as contact with them might be fatal.
IMPORTANT SAFETY INSTRUCTIONS 20) When replacement parts are required, be sure the service technician uses replacement parts specified by the manufacturer or those that have the same characteristics as the original part. Unauthorized substitutions may result in fire, electric shock or other hazards. 21) Upon completion of any service or repairs to this unit, ask the service technician to perform safety checks to determine that the unit is in proper operating condition.
IMPORTANT SAFETY INSTRUCTIONS CONDENSATION Moisture will form in the operating section of the unit if the unit is brought from cool surroundings into a warm room or if the temperature of the room rises suddenly. When this happens, unit's performance will be impaired. To prevent this, let the unit stand in its new surroundings for about an hour before switching it on, or make sure that the room temperature rises gradually.
How to attach the stand NOTE: • Unplug the AC cord from the AC INPUT terminal. • Before beginning this process, assure that the TV is laid on a clean, safe, and cushioned surface to avoid any damage to the unit. • Do not touch or press the TV screen, glass might break under pressure. the tv with back facing upwards as shown below. 1 Place Align the stand with the TV as below and insert securely. Note: It will fit in one direction only. Secure with 2 screws (M4 x 25mm, included).
Features • Integrated Digital Tuner - You can view digital broadcasts without using a Digital TV Set-Top Box. • Closed Caption Decoder With Full Text Mode - Displays text captions or full screen text on the screen for hearing impaired viewers. • Picture Adjustments Using The Remote Control - The On-Screen display allows precise remote control adjustment of BRIGHTNESS, CONTRAST, COLOR, TINT and SHARPNESS.
Contents Before using your unit IMPORTANT SAFETY INSTRUCTIONS ...........3 SAFETY PRECAUTIONS .................................5 How to attach the stand ....................................6 How to remove the stand ..................................6 Features............................................................7 Power source ....................................................7 Contents ...........................................................8 Parts and functions ..................................
Parts and functions Front Right side VOLUME +/– buttons CHANNEL / buttons MENU button INPUT/ENTER button POWER button Press MENU button to display the menu screen. CHANNEL / buttons, VOLUME +/– buttons and INPUT/ENTER button can be used to select the desired setting during the menu screen operations. Remote sensor Power indicator Red: Standby Rear DIGITAL AUDIO COAXIAL OUT jack ANT.
Remote control 1 2 3 10 11 4 12 5 13 6 7 14 8 9 15 16 1.POWER Button - Used to turn the power on/off to the LCD TV. 2.Direct Channel Selection Buttons (0-9) - Allows direct access to any channel of the LCD TV. 3.– Button -This button is the “–” button used when selecting digital channels. 4.CH (CHANNEL) + / – / CURSOR / Buttons Used to operate the menu functions of the LCD TV, and to change the channels of the LCD TV. 5.EXIT Button - Press to remove setup menu. 6.
Antenna connections If you are using an indoor or outdoor antenna, follow the instructions below that correspond to your antenna system. If you are using a Cable TV service, see “Cable TV connections”. Combination VHF/UHF Antenna (Single 75-ohm cable) Connect the 75-ohm cable from the combination VHF/UHF antenna to the Antenna Jack. Antenna Jack 75-ohm Coaxial Cable Cable TV connections This TV has an extended tuning range and can tune most cable channels without using a Cable TV Converter box.
Connections to other equipment The exact arrangement you use to interconnect various video and audio components to this unit is dependent on the model and features of each component. Check the Owner’s Manual provided with each component for the location of video and audio inputs and outputs.
Connections to other equipment (continued) Using an AV Amplifier with built-in digital surround If you are using an AV Amplifier with built-in digital surround sound, you can enjoy various audio systems including Dolby Digital Surround audio that sounds just like the movie. Connect an AV amplifier with built-in Dolby Digital decoder, etc. as shown below.
Connections to other equipment (continued) To connect a HDMI or a DVI device to the unit The HDMI input receives digital audio and uncompressed video from a HDMI device or uncompressed digital video from a DVI device. When you connect to a DVI device with a HDMI-to-DVI adapter cable, it transfers only video signal. Separate analog audio cords required.
Starting setup The Auto Setup menu appears the first time you turn on the TV, and assists you to specify the Air/Cable setting, and program your channels automatically. IMPORTANT: Make sure that the antenna or cable TV system connection is made! 1 To turn on the TV, press (POWER) (It may take approx. 10 seconds for a picture to appear on screen.). The Auto Setup function begins.
CH / Press and release CH / . The channel automatically stops at the next channel set into memory. For proper operation, before selecting channels, they should be set into the memory. See “Memorizing channels” on page 18. DISPLAY Press DISPLAY to display the current information on the screen. When the TV receives a digital signal, the digital information will appear. 62-1 HDTV Moving Picture...
Convenience functions You can change the default settings by pressing the MENU button on your remote, then select the one of the icons at the left of the menu - follow the On-Screen prompts to set your preferences.
Memorizing channels This TV is equipped with a channel memory feature which allows channels to skip up or down to the next channel set into memory, skipping over unwanted channels. Before selecting channels, they must be programmed into the TV’s memory. To use this TV with an antenna, set the Signal Type option to the Air mode. When shipped from the factory, this menu option is in the Cable mode. Air/Cable selection 1 2 3 4 Select “Channel”, then press ▶ or ENTER.
Clear All CH Ch Label All channels are deleted from the channel memory. 1 2 3 Channel Number Ch Label Label Clear Select “Channel”, then press ▶ or ENTER. Press ▲ or ▼ to select “Add/Delete”, then press ▶ or ENTER. Press ▲ or ▼ to select “Clear All”, then press ▶ or ENTER. 4 Adding Channel Add/Delete Clear All >> >> >> CH DTV Signal 0 50 100 Signal Level NOTE: • Signal meter feature is not available for analog channels.
Setting the V-Chip Genre: D L S V FV An age limitation can be set to restrict children from viewing or hearing violent scenes or pictures that you may choose to exclude. The restriction applies to “TV Rating” and “Movie Rating” if this data is transmitted. You may set this restriction separately. To use the V-Chip function, you must register a password. Movie Rating Movie Rating G PG PG-13 R NC-17 X To register a password 1 2 Select “Lock”, then press ▶ or ENTER.
3 4 5 6 7 Press ◀ or ▶ to set “V-Chip” to “On”. Press ▲ or ▼ to select “V-Chip Set (DTV)”, then press ▶ or ENTER. If the TV is not storing the additional rating system, the TV will begin downloading it, which may take some time to be completed. Set your preferred content rating limits for the additional rating system. You also need “Update” procedure to update rating information. NOTE: • You can only download the additional V-Chip rating system when your TV is receiving a digital signal.
5 6 Press ▲ or ▼ to select “CC Advanced”, then press ▶ or ENTER. The CC Advanced menu will appear. Press ▲ or ▼ to select the desired item, then press ◀ or ▶ to change the setting. CC Advanced Text Size Auto Text Type Auto Text Edge Auto Text Color Auto Text Opacity Auto Background Color Auto Background Opacity Auto :Select Cinema Wide1 (for 4:3 format programs) To fill the screen, the right and left edges are extended, however; the center of the picture remains near its former ratio.
Reception disturbances Most types of television interference can be remedied by adjusting the height and position of the VHF/UHF antenna. Outdoor antennas are recommended for best results. The most common types of television interference are shown below. If one of these symptoms appear when the TV is connected to a Cable TV system, the disturbance may be caused by the local Cable TV company broadcast. IGNITION Black spots or horizontal streaks may appear, the picture may flutter or drift.
Troubleshooting Use the following checklist for troubleshooting if you have problems with your unit. Consult your local dealer or service outlet if problems persist. Be sure all connections are properly made when using with other units. SYMPTOMS TV does not operate. • • • • • Poor sound or no sound. • • • • Poor picture • or no picture. • • • Poor reception on some channels. • • • • Poor color or no color. • • • • Picture wobbles or drifts.
Specifications GENERAL Power supply: Power consumption: Weight: Dimensions: Operating temperature: Operating humidity: Type: Display method: Number of Pixels: Broadcasting system: Receiving channels: Tuner type: Inputs: Output: Speakers: Audio output power: ACCESSORIES AC 120V, 60Hz Operation: 29W Stand by: 0.3W 3.2 kg (7.1 lbs) Width: 472 mm (18-9/16 inches) Height: 362 mm (14-1/4 inches) Depth: 174 mm (6-7/8 inches) 5˚C - 40˚C Less than 80% RH 470.1mmV (19” class/18.
limited WARRANTY 19” WIDE LCD TELEVISION ORION warrants this product to be free from manufacturing defects in material and workmanship under normal use and conditions for a period of 1 year from date of original purchase in the United States.
Memo .................................................................................................. .................................................................................................. .................................................................................................. .................................................................................................. .................................................................................................. ............
J3EZ0601A SH 11/07 N 3EZ0601A_En.