R OWNER’S MANUAL 50” WIDE PLASMA DISPLAY HDPDP5000 ATTENTION If you purchase a universal remote control from your local retailer, please contact the remote manufacturer for the required programming code. IF CONTACT WITH CUSTOMER SERVICE IS REQUIRED PLEASE HAVE THE MODEL NUMBER READY PRIOR TO THE CALL CUSTOMER SERVICE – 1-800-289-0980 ORION WEBSITE FOR INFORMATION ON OUR OTHER PRODUCTS, PLEASE VISIT OUR WEBSITE AT www.orionsalesinc.com Before operating the unit, please read this manual thoroughly.
The lightning flash with arrowhead symbol, within an equilateral triangle is intended to alert the user to the presence of uninsulated dangerous voltage within the product's enclosure that may be of sufficient magnitude to constitute a risk of electric shock. CAUTION: TO REDUCE THE RISK OF ELECTRIC SHOCK, DO NOT REMOVE COVER (OR BACK). NO USER-SERVICEABLE PARTS INSIDE. REFER SERVICING TO QUALIFIED SERVICE PERSONNEL.
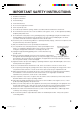
IMPORTANT SAFETY INSTRUCTIONS 1) Read these instructions. 2) Keep these instruction. 3) Heed all warnings. 4) Follow all instructions. 5) Do not use this apparatus near water. 6) Clean only with dry cloth. 7) Do not block any ventilation openings. Install in accordance with the manufacturer's instructions. 8) Do not install near any heat sources such as radiators, heat registers, stoves, or other apparatus (including amplifiers) that produce heat.
SAFETY PRECAUTIONS The unit emits heat when in operation. Do not place any covers or blankets on the unit, this may cause overheating. Do not block ventilation holes, or set up near radiators. Do not place in direct sunshine. When placing on a shelf leave 10 cm (4 inches) free space around the entire unit. 10cm Notes when mounting the Plasma Display on a wall • When installing the unit on a wall, allow at least 6 cm (2 1/2 inches) clearance between the rear of the Plasma Display and the wall.
Contents PREPARATIONS IMPORTANT SAFETY INSTRUCTIONS ...................................... 3 SAFETY PRECAUTIONS ............................................................. 4 IMPORTANT NOTICE .................................................................. 4 Contents ........................................................................................ 5 Features ........................................................................................ 6 Power source .....................................
Features • Picture Adjustments Using The Remote Control - The On-Screen display allows precise remote control adjustment of BRIGHTNESS, CONTRAST, COLOR, TINT and SHARPNESS. • Programmable Display Sleep Timer - Operable from the remote control, the Plasma Display can be programmed up to 120 minutes to turn off automatically. • V-Chip - The V-Chip function can read the rating of a broadcast program or movie content if the program is encoded with this information.
Parts and functions Left side Front Right side *CURSOR ▲/▼ button *VOLUME ▲/▼ button VIDEO-3 IN INPUT button STANDBY/ON indicator POWER button Remote sensor * To display the menu screen. Press both VOLUME ▲/▼ buttons at the same time to display the menu screen. CURSOR ▲/▼ buttons and VOLUME ▲/▼ buttons can be used to select the desired setting during the menu screen operations.
Remote control 1 10 2 11 3 12 4 13 14 5 15 6 16 17 7 18 8 9 19 20 * You can use these buttons to operate your VCR, Cable/Satellite box or DVD after you have programmed the remote control for the code that operates your VCR, Cable/Satellite box or DVD (see page 10 and 11). 1. PLASMA DISPLAY, VCR, CBL (Cable/Satellite box), DVD POWER Button* - Used to turn the Plasma Display, VCR, Cable/Satellite box or DVD on or off after you select the operating mode on step 9. 2.
Remote control Before using the remote control, batteries must first be installed. Use two “AA” size batteries. The batteries may last approximately one year depending on how much the remote control is used. For best performance, it is recommended that batteries should be replaced on a yearly basis, or when the remote operation becomes erratic. Do not mix old and new batteries or different types. HOW TO INSTALL BATTERIES 1. Open the battery compartment cover. BATTERY PRECAUTIONS 2.
Remote control TO REGISTER YOUR VCR, CABLE/SATELLITE BOX OR DVD WITH THE REMOTE CONTROL 1 Slide the selector switch to select the product you want to register (VCR, CBL or DVD), then press CODE SET. 2 Enter the 2-digit code listed below using the Direct Channel Selection buttons (0-9) within 10 seconds. NOTES: • When shipped from the factory, the remote control is set to operate your Plasma Display.
Remote control DVD Aiwa Apex Denon Ferguson Funai Hitachi JVC Kenwood Konka Mitsubishi Nordmende Onkyo Orion Oritron Panasonic Philips Pioneer 23 20 00, 01 18, 11 09 15, 19 05 01 21 33 24 00 03, 02 17 32 29 16 Raite RCA Saba Sampo Samsung Sharp Silvania SMC Sony Technics Thomson Toshiba Vialta Wave Yamaha Zenith 13 01, 01 14 10 08 18, 25 04, 00 01 03 31 22 00, 07, 06 32 26, 27, 28 30 12 11 3X90101A_En_p02-11 11 3/16/06, 9:56 PM
Connections to other equipment The exact arrangement you use to interconnect various video and audio components to the Plasma Display is dependent on the model and features of each component. Check the Owner's Manual provided with each component for the location of video and audio inputs and outputs. The connection diagrams below are offered as suggestions. You may need to modify them to accommodate your particular assortment of components.
Connections to other equipment To connect the Plasma Display to a DVD player/Satellite receiver If your DVD player or Satellite receiver has a S-Video out jack, connect cords as shown.
Connections to other equipment To connect the Plasma Display to a DTV receiver/set-top box If you connect a DTV receiver/set-top box, connect your Plasma Display to a DTV receiver/set-top box using a component video cord.
Connections to other equipment To connect the Plasma Display to a HDMI or a DVI device The HDMI input receives digital audio and uncompressed video from a HDMI device or uncompressed digital video from a DVI device. When you connect to a DVI device with a HDMI-to-DVI adapter cable, it transfers only the video signal. Separate analog audio cords are required.
Connections to other equipment To connect the Plasma Display to a camcorder To playback from a camcorder, connect the camcorder to the Plasma Display as shown. Side of the Plasma Display To Audio/Video OUT Audio/Video cord (not supplied) To connect the Plasma Display to a Game The Plasma Display can also be used as a display device for many video games.
Setting the language You can choose from three different languages (English, French and Spanish) for the on-screen displays. 1 Press MENU. The menu screen will appear. 2 Press or to select (SETUP) menu. SETUP LANGUAGE ENGLISH CLOSED CAPTION OFF PICTURE SIZE PICTURE SCROLL CINEMA MODE FILM :SELECT :ADJUST 3 Press ▲ or ▼ to select “LANGUAGE”. 4 Press or to select the desired language: English (ENGLISH), French (FRANÇAIS) or Spanish (ESPAÑOL). 5 Press EXIT to return to the normal screen.
Display operation VOLUME Adjust the volume level by pressing VOL + or – . The volume level will be indicated on the screen by white bars. As the volume level increases, so do the number of bars. If the volume decreases, the number of white bars also decreases. 32 VOLUME DISPLAY Press DISPLAY to display the current information on the screen.
Selecting the video input source/Labeling the video input source Selecting the video input source Press INPUT SELECT to view a signal from another device connected to your Plasma Display, such as a VCR or DVD player. You can select VIDEO1, VIDEO2, VIDEO3 (left side of the unit), COMPONENT1, COMPONENT2, HDMI1, HDMI2 or PC depending on which input jacks you used to connect your devices. SOURCE SELECTION 0. 1. 2. 3. 4. 5. 6. 7.
Closed Caption WHAT IS CLOSED CAPTIONING? This Plasma Display has the capability to decode and display Closed Captioned television programs. Closed Captioning will display text on the screen for hearing impaired viewers and may translate and display text in another language if broadcast. Captions: This Closed Caption Mode will display text on the screen in English or another language if broadcast.
Setting the V-Chip An age limitation can be set to restrict children from viewing or hearing violent scenes or picture that you may choose to exclude. The restriction applies to “TV RATING” and “MOVIE RATING” if this data is transmitted. You may set this restriction separately. To use the V-Chip function, you must register a password. To register a password 1 Press MENU. The menu screen will appear. Then press or to select (LOCKS) menu.
Setting the V-Chip To set the V-CHIP 1 Press MENU, then press select or to (LOCKS) menu. LOCKS V-CHIP PANEL LOCK NEW PASSWORD :SELECT :ADJUST 2 Press ▲ or ▼ to display the password entering mode. Use number buttons (0-9) to enter your password, then press ENTER. The LOCKS menu appears. LOCKS PA S S W O R D [0-9] : SELECT ENTER : SET EXIT : END 3 Press ▲ or ▼ to select “TV RATING”. Then press or desired rating.
Setting the V-Chip To change the password MENU, then press 1 Press or to select (LOCKS) menu. LOCKS V-CHIP PANEL LOCK NEW PASSWORD :SELECT :ADJUST 2 Press ▲ or ▼ to display the password entering mode. Use the number buttons (0-9) to enter your password, then press ENTER. The LOCKS menu appears. LOCKS PASSWORD [0-9] : SELECT ENTER : SET EXIT : END 3 Press ▲ or ▼ to select “NEW PASSWORD”, then press or .
Setting the panel lock You can lock the front panel buttons to prevent your settings from being changed accidentally (by children, for example). When the panel lock is ON, all control buttons on the Plasma Display front panel (except POWER) do not operate. To lock the front panel MENU, then press or 1 Press to select (LOCKS) menu. LOCKS V- C H IP PA N EL L O C K N EW PA SSW O R D : SEL EC T : A D J U ST 2 Press ▲ or ▼ to display the password entering mode.
Setting the picture size You can view 480i and 480p format programs in a variety of picture sizes—NATURAL, CINEMA WIDE1, CINEMA WIDE2, CINEMA WIDE3, and FULL. Selecting the picture size 1 Press MENU. Press or to (SETUP) menu. select Press ▲ or ▼ to select “PICTURE SIZE”. SETUP LANGUAGE ENGLISH CLOSED CAPTION OFF PICTURE SIZE PICTURE SCROLL CINEMA MODE FILM :SELECT or . The PICTURE 2 Press SIZE menu will appear.
Setting the picture size NOTES: • The PICTURE SIZE feature is not available for some program formats (such as 1080i or 720p). Such formats will display in FULL. • The PICTURE SIZE feature is not available in the PC mode. CINEMA WIDE2 picture size (for letter box programs) The entire picture is uniformly enlarged—it is stretched the same amount both wider and taller (retains its original proportion). The top and bottom edges of the picture may be hidden.
Setting the picture scroll You can scroll the picture in CINEMA WIDE2 and CINEMA WIDE3 1 Press MENU in CINEMA WIDE2 or CINEMA WIDE3 mode. Then press or to select (SETUP) menu. SETUP LANGUAGE ENGLISH CLOSED CAPTION OFF PICTURE SIZE PICTURE SCROLL CINEMA MODE FILM :ADJUST :SELECT 2 Press ▲ or ▼ to select “PICTURE SCROLL”. SETUP LANGUAGE ENGLISH CLOSED CAPTION OFF PICTURE SIZE PICTURE SCROLL CINEMA MODE FILM :ADJUST :SELECT 3 Press or to display the SCROLL ADJUSTMENT mode.
Selecting the cinema mode A smoother motion may be obtained by setting the CINEMA MODE to FILM when you view a DVD from the DVD player connected with the component input. To set the CINEMA MODE to FILM 1 Press MENU, then press to select menu. or (SETUP) SETUP LANGUAGE ENGLISH CLOSED CAPTION OFF PICTURE SIZE PICTURE SCROLL CINEMA MODE FILM :SELECT :ADJUST Press ▲ or ▼ to select 2 “CINEMA MODE”, and then press or to select “FILM”.
Adjusting the picture preference You can select four picture modes—SPORTS, STANDARD, MOVIE, and MEMORY—as described in the following table: 1 Press MENU, then press select or (PICTURE) menu. to PICTURE PICTURE PREFERENCE SPORTS BRIGHTNESS CONTRAST COLOR TINT SHARPNESS 25 50 25 0 25 :SELECT :ADJUST Press ▲ or ▼ to select 2 “PICTURE PREFERENCE”.
Picture control adjustment 1 Press MENU, then press to select or (PICTURE) menu. PICTURE PICTURE PREFERENCE SPORTS BRIGHTNESS CONTRAST COLOR TINT SHARPNESS 25 50 25 0 25 :ADJUST :SELECT 2 Press ▲ or ▼ to select the item you want to adjust. Press or to adjust the setting.
Selecting the color temperature/Resetting your picture adjustment Selecting the color temperature Change the picture quality by selecting from three preset color temperatures—COOL, MEDIUM, and WARM: 1 Press MENU, then press select or (PICTURE) menu. PICTURE PICTURE PREFERENCE SPORTS BRIGHTNESS CONTRAST COLOR TINT SHARPNESS 25 50 25 0 25 :ADJUST :SELECT Press ▲ or ▼ to select “COLOR 2 TEMPERATURE”. Press or you prefer.
Sound control adjustment/Turning off the built-in speakers Sound control adjustment Sound controls are factory preset but you can adjust them individually as follows: 1 Press MENU, then press select or to (AUDIO) menu. AUDIO BASS TREBLE BALANCE SPEAKERS :SELECT 25 25 0 ON :ADJUST 2 Press ▲ or ▼ to select the item you want to adjust. Press or to adjust the setting. BASS: Press or to adjust the bass sound. TREBLE: Press or to adjust the treble sound.
Using the WOWTM surround sound feature/Selecting the HDMI audio input source/Resetting your audio adjustment Using the WOWTM surround sound feature WOW is a special combination of SRS Labs audio technologies that creates a thrilling surround sound experience with deep, rich bass from stereo sound sources. Your TV’s audio will sound fuller, richer, and wider. WOW consists of three features; SRS 3D, FOCUS, and TruBass.
Screen Saver function INVERSION/FULL WHITE Assists in preventing retained images on the screen. 1 Press MENU, then press to select or (SETUP) menu. SETUP LANGUAGE ENGLISH CLOSED CAPTION OFF PICTURE SIZE PICTURE SCROLL CINEMA MODE FILM :SELECT :ADJUST 2 Press ▲ or ▼ to select the “INVERSION” or “FULL WHITE”, then press or . SETUP INVERSION FULL WHITE SCREEN SAVER ON INVERSION MENU disappears and the screen color will invert.
Picture/Audio control adjustment in the PC mode PC Monitor Menu There are a number of picture and audio settings you can adjust to optimize the performance of the unit in PC mode. Press INPUT SELECT repeatedly to select PC mode. Press MENU. The PC Monitor Menu will appear. AUDIO Menu PICTURE Menu PIC T U R E B R IG H T N ESS CO N T R A ST HO R PO SIT IO N V ER PO SIT IO N P H A SE CL O C K : SEL EC T NOTES: • If you wish to change the onscreen language, follow the steps 1 - 5 on page 17.
Picture/Audio control adjustment in the PC mode Resetting your picture/audio adjustment in the PC mode The RESET function returns your picture/audio adjustment to the following factory settings: PICTURE menu BRIGHTNESS ........ center (25) CONTRAST ........... center (25) RED ........................ center (25) GREEN .................. center (25) BLUE ...................... center (25) AUDIO menu BASS ...................... center (25) TREBLE ................. center (25) BALANCE ..............
Troubleshooting Use the following checklist for troubleshooting if you have problems with your Plasma Display. Consult your local dealer or service outlet if problems persist. Be sure all connections are properly made when using with other units. SYMPTOMS POSSIBLE SOLUTIONS Display does not operate. • • • • Poor sound or no sound. • Check sound adjustments (Volume and Mute). • Check for sources of possible interference. • • • • • • • • • Poor picture or no picture. Poor color or no color.
Specifications Power supply: Power consumption: AC 120 V 60 Hz Operation: 520 W Stand by: 1 W Weight: Dimensions: 106.9 lbs (48.5 kg) Width: 49-7/16 inches (1,255 mm) Height: 34-3/16 inches (869 mm) Depth: 16-3/16 inches (411 mm) Inputs: 1 V (p-p)/75 ohms –8 dBm/50k ohms Y: 1 V (p-p), 75 ohms C: 0.286 V (p-p), 75 ohms Y: 1 V (p-p), 75 ohms PR: 0.7 V (p-p), 75 ohms PB: 0.
R LIMITED WARRANTY 50” WIDE PLASMA DISPLAY ORION warrants this product to be free from manufacturing defects in material and workmanship under normal use and conditions for a period of 90 days from date of original purchase in the United States.
Printed in Thailand J3X90101A SH 06/04 N 3X90101A_En_p32-back 40 3/16/06, 9:57 PM