fJSANSUI =< o £: _=. VCR RW VIDE'O/R/raN COMPATIBLE 01GITAL AUDIO TV/CATV MODE SELECTION When shipped from the factory, the TV/CATV menu option is set to the "CATV" (Cable Television) mode. If not using CATV (Cable TV), set this menu option to the "TV" mode. ORION WEBSITE FOR INFORMATION ON OUR OTHER PRODUCTS,PLEASE VISIT OUR WEBSITE AT WWW.ORIONSALESINC.COM Before operating the unit, please read this manua{ thoroughly.
Contents Contents .................................................................... Sansui Dual Deck DVD Recorder ............................. 2 4 Warranty ................................................................ Master Protection Agreements .............................. 4 4 CAUTION .................................................................. IMPORTANT SAFEGUARDS .................................... Disc ...........................................................................
Contents Loading and unloading a cassette tape .................. Cassette tape playback ........................................... Special playback ..................................................... Picture search ...................................................... 48 49 50 50 Still picture ........................................................... Slow motion ......................................................... 50 50 Frame by frame picture ........................................
Sansui Dual Deck DVD Recorder Warranty OneYear Full Warranty on Sansui Dual Deck DVD Recorder If this productis defective in material or workmanship within one year fromthe date of purchase, RETURN IT TO YOUR NEAREST SEARS PARTS & REPAIRCENTER, and it will be repaired free of charge. This warranty gives you specific legal rights, and you may also have other rights which vary from state to state. Sears, Roebuck and Co., Dept.
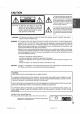
CAUTION The lightning flash with arrowhead symbol, within an equilateral triangle is intended to alert the user to the presence of uninsulated dangerous voltage within the product's enclosure that may be of sufficient magnitude to constitute of electric shock to persons. CAUTION: WARNING: WARNING: TO REDUCE a risk THE RISK OF ELECTRIC SHOCK, DO NOT REMOVE COVER (OR BACK). NO USER-SERVICEABLE PARTS INSIDE. REFER SERVICING TO QUALIFIED SERVICE PERSONNEL.
IMPORTANT SAFEGUARDS 1. READ INSTRUCTIONS All the safety and operating instructions should be read before the unit is operated. 2. RETAIN INSTRUCTIONS The safety and operating instructions should be retained for future reference. 3. REED WARNINGS All warnings on the unit and in the operating instructions should be adhered to. 4. FOLLOW INSTRUCTIONS All operating and use instructions should be followed. 5. CLEANING Unplug this unit from the wall outlet before cleaning.
IMPORTANT SAFEGUARDS 14. POWER LINES An outside antenna system should not be located in the vicinity of overhead power lines or other electric light or power circuits, or where it can fall into such power lines or circuits. When installing an outside antenna system, extreme care should be taken to keep from touching such power lines or circuits, as contact with them might be fatal. 15. OVERLOADING Do not overload wall outlets and extension cords, as this can result in a risk of fire or electric shock. 16.
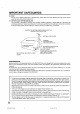
IMPORTANT SAFEGUARDS 26. DISC Do not use a cracked, deformed_ or repaired disc. These discs are easily broken and may cause serious personal injury and product malfunction. 27.
Disc Handling discs Removing the Disc from its case Be sure to hold the disc by its edges. Do not touch the surface of the disc. Take the disc carefully from its case. Example: • Do not scratch the disc. • Do not get dirt on the surface of the disc. • Do not stick labels or adhesive tapes on the disc. • Do not drop or bend the disc. Storing discs • Store the disc in the case to avoid any risk of scratches, dirt or damage. • Do not leave the disc exposed to direct sunlight or in hot or humid places.
Disc Discs on which video can be re- Recording corded This unit has two modes for formatting discs for recording: VR mode and Video mode. When an unused DVD-RW (Ver.1.1) is loaded into this unit, the automatic format function starts to format the disc. (For the disc format setting in this step, see page 27.) To record video with this unit, use the discs below: Media type DVD-RW Ver.l.0 Ver.l.1 Logo mark Ver.1.1 CPRM support DVD-R Ver.2.0 DVD-RW • The disc can repeatedly record about 1,000 times.
Disc TiUe/Chapter/Track A DVD-Video has large partitions called "Titles", and smaller partitions within them called "Chapters". A music CD has another partitions called a "Tracks". A number is allotted to each partition and these numbers are called "title numbers", "chapter numbers" or "track numbers". DVD DISC I= TFFLE2 Trn.E1 CHAP11ER _ [ CHAPTER2 [ CHAPteR1 CHAPTER 2 CHAPteR3 Disc playback in other players A disc recorded in this unit can be finalized.
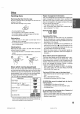
Parts and functions Front VCR indicator DVD indicator Cassette Loading Slot Display window STOP button REC button Disc tray f D CHANNELA/V OPEN/CLOSE button AUDIO(L/R)/VlDEO IN (LINE 2) jacks PLAY button buttons FF (Fast Forward) button REW (Rewind) button DVD S-VIDEO IN (LINE 2) jack Rear RF OUT jack DVD COMPONENT OUT jacks DVD COAXIAL DIGITAL AUDIO OUT jack AC power cord RF IN DVD S-VIDEO © ( © © DVD OPTICAL DIGITAL AUDIO OUT jack DVD S-VIDEO OUT jack DVD AUDIO (L/R) OUT jacks DV
Parts and functions Display window C VCR I No. (_) Display Description • Lights during video tape playback. || Video tape is temporarily stopped. • Lights during video tape recording. [] Progressive scanning mode. [] Timer recording display. XP/SP/LP/SLP4 DVDrecording modes. XP,SP,LPorSLPisselected inturnbypressing theRECMODE/SPEED repeatedly. _) SP/SLP 2 VCRrecording modes.SPor SLPisselectedintornbypressing theRECMODE/SPEED repeatedt_ _CD Appears when a CD is inserted.
Parts and functions Remote Page control POWER Turns power on/off. 22 EJECT Ejects the cassette tapes. 48 OPEN/CLOSE Opens or Closes the tray. 33 DVD/VCR 0-9 Switches to operation between VCR and DVD. 22, 76, 77 Direct channel selection of TV 54 Setting input 37, 74 Entering a password 25 TIMER REC Sets the unit to start recording at a preset time. 59 INPUT SELECT Switches the connected TV to external inputs. DISPLAY/CALL Displays VCR or DVD operation status.
Parts and functions Inserting Batteries into the Remote Control: Open the battery compartment cover in the direction of the arrow. 2 Installtwo "AAA" batteries, paying attention to the polarity diagram in the battery compartment. Replace the compartment cover. Battery precautions The precautions below should be followed when using batteries in this device: 1. Use only the size and type of batteries specified. 2.
Antenna connections If you are using an antenna system, follow these instructions. If you are a cable (CATV) subscriber, skip ahead to page 18 for the proper connections. IANTENNATO DVD/VCR CONNECTION I The DVD/VCR must be connected "between" the antenna and the TV. First, disconnect the antenna from the TV and connect it to the DVD/VCR. Then connect the DVD/VCR to the TV. Below are 3 common methods of connecting an antenna system to a DVD/VCR.
Antenna connections JDVD/VCR TO TV CONNECTION J After you have connected the antenna to the DVD/VCR, you must connect the DVD/VCR to the TV. Below are 3 common methods of connecting your DVD/VCR to a TV. Find the type of TV you are using and follow the connection diagram. This DVD/VCR has a single 75 ohm output for connection to a TV. If your TV has separate UHF and VHF antenna inputs (numbers 2 and 3 below), use a splitter to connect the DVD/VCR to the TV for UHF and VHF reception.
CATV (CABLE TV) connections Many cable companies offer services permitting reception of extra channels including pay or subscription channels.This DVDiVCR has an extended tuning range and can be tuned to most cable channels without using a cable company supplied converter box, except for those channels which are intentionally scrambled. If you subscribe to a special channel which is scrambled, you must have a descrambler box for proper reception.
CATV (CABLE TV) connections IMPORTANT: Make sure theTV/CATV menu option is set to the "CATV" mode. This DVDIVCR cannot receive scrambled programs since it does not contain a descrambler. In order to receive scrambled programs, your existing descrambler must be used.
Connections with the TV or audio component The exact arrangement you use to interconnect various video and audio components to the DVDiVCR is dependent on the model and features of each component. Check the Owne¢s Manual provided with each component for the location of video and audio inputs and outputs.
Connections with the TV or audio component Connect to a stereo amplifier with audio output You can enjoy high quality audio by connecting the audio output to your amplifier. Connect the audio outputjacksto any line-levelinputs (such as AUX, DVD, CD, etc.) of an audio amplifier.
Auto clock setting / Setting the video channel Auto clock setting Preparation: You must set the antenna connection serted into the AC outlet. before the AC cord plug is in- WAiT 30 MINUTES when the power switch is off, after the connections of the antenna and the power plug, because the auto clock setting feature is activated. After the clock is set automatically, you may have to set the time zone and daylight saving time.
SETUP MENU The SETUP MENU consists of several menus where you can make various settings concerning language, audio functions, and images. In addition, this menu includes a clock, channel and other things that require setting just after purchase. For details of each menu, see the corresponding section in this chapter. Using the SETUP Press • or to select the desired submenu and press ENTER. The setting screen of the selected submenu will appear.
Setting the language You can choose the language of the menu screen, DVD menu, DVD audio and subtitles. Preparation: • Turn ON the TV and set it to the video input mode. • Select "LANGUAGE" from "SYSTEM SETUP". For the procedure, see steps I to 3 in "Using the SETUP MENU" on page 23. Selectable languages: ENGLISH, FRANCAIS, ESPANOL The language you have sefected will play if it is recorded on the disc. ORIGINAL The unit will select the first priority language of each disc.
Setting the parental control Some discs are specified as not suitable for children.This unit can prevent playback of such discs. Preparation: • Turn ON theTV and set it to the video input mode. • Select _'PARENTAL _'from '_SYSTEM SETUP". For the procedure, see steps 1 to 3 in "Using the SETUP MENU" on page 23. NOTE: • The selected level will apply to operations executed after this. • The unit cannot restrict playback of some discs.
Setting the clock The clock is set to the correct time automatically, but it can also be set manually, The clock can be set for daylight saving time and time zone. Preparation: • Turn ON the TV and set it to the video inputmode. • Select"CLOCW from "SYSTEM SETUP".Forthe procedure, see steps I to 3 in "Using the SETUP MENU" on page 23.
Setting the disc You can format, protect or finalize the disc. NEW DISC FORMAT Preparation: • Turn ON theTV and set it to the video input mode. • Select "DISC SETUP" from "SYSTEM SETUP". For If you insert a blank DVD-RW, the disc is automatically formatted. Select "NEW DISC FORMAT '_and select the mode to be used for automatic format from the list below. the procedure, see steps I to 3 in "Using the SETUP MENU" on page 23. VR: Format the DVD in the VR mode Video: Format the DVD in the Video mode.
Setting the disc / Other SYSTE.SETop NOTES: • The finalization process may require a few minutes to about 1 hour according to disc type or the amount of free space on the disc. • You can record or edit a finalized DVD-RW (in VR mode) by cancelling the finalizing, but you cannot do these operations with a DVD-RW (in Video mode) or DVD-R.
Setting the screen This section describes settings about the screen. Preparation: • Turn ON the TV and set it to the video input mode. • Select "AM SETUP 1"from "AV SETUP" For the procedure, see steps I to 3 in *'Using the SETUP MENU" on page 23. Note for the field still and frame still: (with 480i interlaced scanning mode) • Field* still (240 lines) Since only one field (half of the video information) is shown on the TV screen, the picture appears rough but does not shake.
Setting the image quality / Setting the audio This section describes image quality settings. This section describes audio settings. Preparation: • Turn ON the TV and set it to the video input mode. • Select"AV SETUP 2"in _'AVSETUP_L For the procedure, see steps I to 3 in "Using the SETUP MENU" on page 23. Preparation: • Turn ON the TV and set it to tile video input mode. • Select ,,AUDIO" from ,,AV SETUP"= For the procedure, see steps I to 3 in "Using the SETUP MENU" on page 23.
Setting the audio / Setting the recording SAP (Second Audio Program) This unit is fitted with an SAP broadcast system that enables you to switch to a second audio program while viewing a selected channel. This function applies only when the program is broadcast in multiple languages through the SAP broadcast system. Select "SAP" and select "ON" to use SAP, and to not use it, select "OFF". This section describes recording settings. Preparation: • Turn ON theTV and set it to the video input mode.
Setting the channel / Setting other items This DVDiVCR is equipped with a channel memory feature that allows you to skip channels up or down to the next channel sat in memory, hence skip over unwanted channels. Before selecting channels, they must be programmed into the DVD/VCR's memory. In addition to normal VHF and UHF channels, this DVDI VCR can receive up to 113 Cable TV channels. To use this DVD/VCR with an antenna, sat the TV/CATV menu option to theTV mode.
Playback procedure Preparation: • Turn ON the TV and set to the video input mode. • Press DVDNCR to select the DVD mode. (The DVD indicatorwill light.) Press OPEN/CLOSE. The disc tray will open. 2 3 4 5 6 Place a disc onto the tray --_ printed label side up, align it with Holdguides, the disc, the the and position place it inititswith proper position. _f Press OPEN/CLOSE to close the disc tray. "READING" appears on the screen and some discs start playback automatically.
Playback by selecting a title When playing back a recorded disc, you can display the title menu and select the title to be played back. Preparation: • Turn ON the TV and set to the video input mede. • Load a recorded DVD. • Press DVDNCR to select the DVD mode. (The DVD indicator will light.) Press TITLE MENU. The title menu will appear. Thumbnail image Recording If there are many original titles and playlists...
Checking media information Various information on the loaded disc can be displayed on the TV soreR, Preparation: • Turn ON the TV and set it to the video input mode. • Load the disc. • Press DVDiVCR to select the DVD mode. (The DVD indicator will light.) PressDISPLAYICALL. Media information will appear. number of titles and present title number - Current subtitles language The number of chapters and present chapter number Press DISPLAY/CALL while the media information above is displayed.
Special playback Fast forward NOTE: There may be a slight delay between pressing the button and the function activation. playback Press F.FWD during normal playback. Each press of F.FWD will increase the speed of the search I_(x2), (x_2),_ (x24),_ (x60). (The speed of the serch is increased up to only 2 steps in Audio CD.) • To resume normal playback, press PLAY. Review playback Press REW during normal playback.
Commercial skip / Locating a specific scene __ Commercial Use this function skip to skip commercials while you playback. Press CM SKIP during playback. The time jumps to a point approx. 30 seconds later and playback resumes. NOTE: With some DVD-Video, the Commercial Locating a specific skip operation may net work. scene Specify the time recorded on the disc, chapter or title to playback. Press PLAY MODE. The play mode screen will appear.
Repeat playback One touch repeat This feature repeats playback on a recent section during play_ back by returning the video to a recently viewed point. Press ONE TOUCH REPEAT during playback. The video returns to a point 10 seconds before and playback resumes. NOTES: • If the time from the title top is less than 10 seconds when ONE TOUCH REPEAT is pressed, the title top is repeated and then the video is played back. • With some DVD-Video, the one touch repeat operation may net work.
Title selection / DVD menu Title selection Two or more titles are recorded on some discs. If the title menu is recorded on the disc, you can select the desired title. PressTITLE MENU/TOP MENU during playback, The title menu appears on the screen. • Press TITLE MENU/TOP MENU again to resume playback at the scene when you pressed TITLE MENU/TOP MENU. Press Air or • / • to select the desired title. Press ENTER. The playback of the selected title will start.
Changing angles / Zooming Changing angles When playing back a disc recorded with multi-angle facility, you can change the angle that you are viewing the scene from. Press ANGLE during playback. The current angle will appear. Press ANGLE repeatedly until the desired angle is selected. Zooming This unit will allow you to zoom in on the frame image.You can then make selections by switching the position of the frame. 1 Press ZOOM during playback. The center part of the image will be zoomed in.
Changing soundtrack language / Subtitles __ Changing soundtrack language You can select the language when you play a multilingual disc. Press AUDIO during playback. The current seundtrack language will appear. Press AUDIO repeatedly until the desired language is selected. The on-screen display will disappear after a few seconds. Turning the subtitles On and Off When playing back a disc recorded with subtitles, you can turn the subtitles on or off.
Various operations on CD This section describes the TRACK tNFO screen where music CDs can be played back using the various operations, Preparation: • Turn ON the TV and set to the video input mode. • Load the music CD. • Press DVDiVCR to select the DVD mode. (The DVD indicator will light.) Press TITLE MENU/TOP MENU. The TRACK INFO screen will The elapsed time and total time of the music -data (during playback) appear.
Various operations on CD Random playback Press • or to select"RANDOM PLAY_'from the press ENTER. The order of music tracks is randomly changed. menu list and Press PLAY. Music is played back in random order. To cancel random playback, select *'RANDOM PLAY" from the menu list again, and press ENTER. Repeat playback of selected track Press • or to select the track number you want to repeat playback and press •. Press • or to select "REPEAT TRACK" from the menu list and press ENTER, Press PLAY.
MP3/WMA/JPEG MP3 and WMA files can be played back. Also, you can display JPEG files on the TV screen and enjoy them as a slide show. playback Preparation: • Turn ON the TV and set to the video input mode. • Load the disc storing MP3, WMA or JPEG. • Prass DVDiVCR to select the DVD mode. (The DVD indicator will light.) Using the BROWSER screen Press TITLE MENU. The BROWSER screen will appear. Limitations on MP3/WMN JPEG CD playback: • MP3iWMAfJPEG CD is a disc that is standardized by ISO9660.
MP3/WMA/JPEG playback Playing back MP3/WMA files Press • or to select MP3 or WMA file. • In case the disc includes more than 11 files, you can turn to the next or the previous page. (See page 42.) MP3 CD • MP3 files must have the extension letters ".mp3_'. • Standard, sampling frequency, and the bit rate: MPEG-1 Audio 32kHz, 44.1kHz, 48kHz 32kbps to 320kbps (constant bit rate or variable bit rate) • The recommend recording setting for a high quality sound is 44.
MP3/WMA/JPEG playback Playing back JPEG files Press • or to select JPEG file. • In case the disc includes more than 11 flies, you can turn to the next or the previous page. (See page 42.) Carry out either of the item a or b below. a: Press ENTER. b: Press • to select "PLAY" and press ENTER. The thumbnail images of the JPEG files stored in the route directory or the folder appear.
Progressive scan The unit supports the progressive scanning system as well as the conventJonaI interlaced scanning sys_ tern. ffyourTVis equipped with component jacks which support the progreasive video input, you can enjoy high quaI_y picture by making the progressive scanning mode active. Preparation: • Connect to aTV equipped with cemponect jacks which support the progressive video input. • Turn ON theTV and set it to the corresponding video input mode. • Press DVDiVCR to select the DVD mode.
Loading and unloading a cassette tape Use only video cassette tapes marked _S] and _. • Cassettes marked "VHS" (or"S-VHS") can be used with this video cassette recorder However, S-VHS recording is not possible with this model. • This model is equipped with SQPB (S-VHS QUASI PLAYBACK) that makes it possible to playback S-VHS recordings with regular VHS resolution. • HQ VHS is compatible with existing VHS equipment.
Cassette tape playback Preparation: • Turn ON the TV and set to the video input mode. • Press DVDiVCR to select the VCR mode. (The VCR indicator will light.) Load a prerecorded tape (When loading a cassette tape without the erase prevention tab, playback will start automatically). 1"o start playback Press PLAY Playback will start. "•" will appear on the screen for about 4 seconds. To stop playback Press STOP once. The tape will stop but remain fully loaded and ready to play.
Special playback Repeat playback The entire video tape will be played until its end. The tape will then automatically rewind to the beginning and the playback will be repeated. Picture search Reverse picture search function Press REW x 1 or x 2 during the playback. Forward picture search function Press RFWD x 1 or x 2 during the playback. Press REPEAT while VCR is played back.
ZERO RETURN function ZERO RETURN function /Video index search system Press DISPLAYICALL. The counter display shows the tape running time during playback or recording. This function makes tape rewinding stop at the counter "00:00:00" position automatically. Press COUNTER RESET at the desired tape position. The counter display will be reset to the "00:00:00" position (e.g. the beginning ef recording). Press STOP when playback or recording is finished. Press ZERO RETURN.
Read this before recording on disc This section explains things you must know to record onto a disc. Read it before attempting to record. Types of disc You can use DVD-RW and DVD-R discs to record video. DVD-RW discs • Vet.1.1 discs can be formatted for recording in one of two modes: the VR mode or the Video mode. Ver.1.0 discs can only be formatted for recording in the VR mode. • High quality images and sound can be repeatedly recorded about 1,000 times.
Read this before recording on disc NOTES: • When using one touch timer recording to record on a DVD disc, it takes some time from when you press REC/OTR until recording actually starts. Press REC/OTR a little before your preferred starting point. • Even if STOP is pressed during recording, recording does not stop instantly. • Because of characteristics peculiar to digital video compression technology, scenes with fast motion may appear as a matrix of larger blocks.
Recording a TV program You can record programs you watch on TV onto video tapes or DVDs. Preparation: • Turn ON the TV and set it to the video input mode. • Load a reoordable DVD or video tape into the unit. • Press DVD/VCR to select the appropriate mode. 1 Press REC MODE/SPEED to select the re- VCR mode cording mode. The recording mode will appear on the TV monitor and change every time REC MODE/SPEED is pressed.
Recording a TV program To stop recording Press STOP to stop recording. _'•" will appear on the screen for about 4. seconds. To stop recording temporarily Press PAUSE/STILL to avoid recording unwanted material. *'•11 "will appear on screen for about 4.seconds. VCR mode DVD mode Press again to resume recording. NOTES: • In video recording, the pause function will be released after 5 minutes to prevent damage the video tape. The unit will change to the STOP mode.
One-touch Timer Recording (OTR) The One-touch Timer Recording feature provides a simple and convenient way to make a timed re_ cording. Preparation: • Turn ON the TV and set to the video input mode. • Load a recordable DVD or video tape into the unit. • Press DVD/VCR to select the appropriate mode. Example: One-touch Timer Recording for 30 minutes. Press REC MODE/SPEED to select the recording mode. For the recording mode, see the step 1 on page 54.
Timer recording Setting timer recording The timer recording system allows you to select the date, time and channel and record the desired programs. Up to 8 timer programs within a month can be stored in this unit. Preparation: • Turn ON the TV and set to the video input mode. • Load a recordable DVD er video tape. • Press DVD/VCR to select the appropriate mode. • Confirm that the clock is indicating the correct time.
Timer recording or or • to select *q'YPE" and press ENTER, to select *'ONCE" from the list and press ENTER. Press • or Press • or • press ENTER. to select *'DATE" and press ENTER. to select the date to be recorded from the list and Press • Press • NOTES: • If you select timer recording on a specified date only one time, select *'ONCE" in the *%YPE" for recording. You can record same days of every week or from Monday to Friday using the item "TYPE".
Timer recording 11 12 13 Se lect *'OK" and press ENTER The timer program is determined screen appears again. and the TIMER REC SET When you enter the other program for the timer recording, repeat the steps 3 to 11. Press SETUP, The TIMER REC SET screen disappears and the display will return to the normal screen. 14 Press TIMER REC. Thetimer indicator" [] "w,Iappear onthe display and the unit stands by for recording.
Stereo recording and playback The VHS Hi-Fi audio system permits high fidelity recording of MTS STEREO TV broadcasts. When a MTS STEREO broadcast is received, the word '*STEREO" will appear on the screen and the program can be viewed or recorded in stereo. The Hi-Fi STEREO recording procedure is the same as for normal recordings. NOTE: When using a CATV system, stereo TV programs may be transmitted over a mono cable channel. In this case the word "STEREO" will not appear and the sound will be in mono.
Editing the disc This section explains how to edit the recorded contents on DVDRWs. However, the items that you can edit vary with the recording formats. In VR mode, you can edit various title menus, whereas in Video mode, you can edit only a few items. Title menu For the disc in VR mode, when the content is recorded, a title name that includes the date, time, channel number and other information is created automatically.
Editing a playlist You can create and edit the playlist based on the original title. Preparation: • Turn ON the TV and set to the video input mode. • Load the recorded DVD-RW (VR), • Press DVD/VCR to select the DVD mode. (The DVD indicatorwill light.) Creating a playlist PressTITLEMENU. The title menu will appear. Press • or to select the original title which will be used as the base of a playliet. 3 Press I_The editing menu of original title will appear.
Editing a playlist Changing a title name Press TITLE MENU to display the title menu. Select the playlist where you want to change the title name. • Press • or • to select the playlist. • Press • to display the editing menu of the playlist. • Press • or • to select"RENAMETITLE'L Press ENTER. The keyboard screen will appear. Use the keyboard screen to enter the title name. Press DISPLAY/CALL to return the title menu.
Editing a playlist Erasing a scene (Edit title) You can erase an unnecessary scene from the created playlist. When you erase the scene from the playlist, the scene is not erased from the original title. Press TITLE MENU to display the title menu. Select the • Press • • Press • • Press • playlist where a scene you want to erase is included. or • to select the playlist. to display the editing menu of the playlist. or • to select"EDITTITLE'L Press ENTER, The EDIT TITLE screen appears.
Editing a playlist Press • or te select "SET START" at the start point ef the scene that you want to erase and press ENTER. (To set the start point easily, search the start point while "SET START" is selected) The still image at the start point appears at the left small screen. Press • or to select *'SET END" at the end point of the scene you want to erase and press ENTER. The still image at the end point appears at the right small screen. 7 Chee. the erased scenas. • Select "Preview" and press ENTER.
Editing a playlist Combining the title You can create a playlist by combining the several original titles or playlists To combine the titles, it is necessary to create a playlist at first. By combining the titles in the playlist, a playlist where several titles are combined is created. Press TITLE MENU te display the title menu. Select the • Press • • Press • • Press • playlist where you want to combine the titles. or • to select the playlist. to display the editing menu of the playlist.
Editing a playlist Erasing a playlist You can erase the created playlist. Even if you erase the playlist, the original title will not be erased. Press TITLE MENU to display the title menu. Select the playlist that you want to erase. • Press • or • to select the playlist. • Press • to display the editing menu of the playlist. • Press • or • to select*'DELETETITLE'L Press ENTER. The selected playlist will be erased. 67 VRDVD4005 P61-P78 87 f}3 £.
Editing an original title In MR mode, you can edit various items, whereas in Video mode, you can edit the title names only. Preparation: • Turn ON the TV and set to the video input mode. • Load the recorded disc. • Press DVD/VCR to select the DVD mode. (The DVD indicator will light.) Adding a chapter mark You can add a chapter mark to the original title.You can add up te 999 chapter marks to one disc. Press TITLE MENU to display the title menu.
Editing an original title When the scene you want to add a chapter mark, press ENTER. The playback is paused and the position of the added chapter mark appears yellow. 3-he added chapter mark If you continue to add a chapter mark, repeat step 5. Adding chapter marks is finished. • To display the title menu, press RETURN. • To return to the normal screen, press TITLE MENU. Combining chapters By erasing the added chapter marks, the chapters can be combined. Press TITLE MENU to display the title menu.
Editing an original title Press SKIP + or SKIP - to select the chapter marks to be erased. Press ENTER. The chapter marks are erased and 2 chapters are combined into 1 chapter. To continue erasing the chapter marks, repeat steps 4 and 5. The combining chapters will completed. • To display the title menu, press RETURN. • To return to the normal screen, press TITLE MENU. Changing an original title name Press TITLE MENU to display the title menu.
Editing an original title Erasing a scene (Edit title) You can erase an unnecessary scene from the original title. Erase the scene after checking the title.You cannot restore the erased scene, When you erase the scene, you can increase the disc space. Press TITLE MENU to display the title menu. Select the cluded. • Press • • Press • • Press • original title where a scene you want to erase is inor • to select the original title. to display the editing menu of original title. or • to select "EDIT TITLE".
Editing an original title Erasing an original title You can erase the original title. Erase the original title after checking its title. The erased title cannot be restored. When you erase the titles, you can increase the disc space. Press TITLE MENU to display the title menu. Select the • Press • • Press • • Press • original title you want to erase or • to select the original title. to display the editing menu of original title. or • to select "DELETE TITLE".
Changing a disc name You can change a disc name from the title menu. Preparation: • Turn ON the TV and set to the video input mode. • Lead the recorded DVD disc. • Press DVD/VCR to select the DVD mode. _he DVD indicator will light.) Changing a disc name Press TITLE MENU to display the title menu. • Press • • Press • • Press • or to select"DlSC NAME"L to display the editing menu. or • to select"RENAME DISC'L PressENTER. The keyboard screen will appear. Use the keyboard screen to enter the disc name.
Changing a disc name Using the keyboard screen This section explains the function of the keyboard screen and how to input characters= The disc name and the title name can be changed using the keyboard screen. Character input 2 Example: Explained here is the procedure when you input "P and "J'L Press the numeric keys where a character you want to input is assigned. Keyboard screen types The keyboard screen has three types of "Letters", "Numbers" and "Signs".
Changing a disc name Erasing a character You can erase the input character. Press • or to select the type of letters in the list below and press ENTER. Erasing method 1 Auto Caps: Determines uppercase and lowercase automatically. Upper: Inputs all with uppercase letters. Lower: Inputs aUwith lowercase letters. 1 Press •, V, • or • to select "Back'L Press ENTER. The last input character will be erased. To erase the characters continuously, press ENTER.
Dubbing a tape onto a disc You can record video or audio on a video tape onto a disc. Preparation: • Turn ON the TV and set to the video input mode. • Load a source video tape and a disc for recording. • Remove the erase protection tab of the source video tape to prevent the data from accidentally being erased. • Confirm the disc space before operation. Press DVDNCR to set this unit to DVD mode. The DVD indicator will light. Press REC MODE/SPEED and select the recording mode.
Dubbing a disc onto a tape You can record video or audio on a disc onto a video tape. When a disc with a copy guard function is used, a disordered image is re_ corded on the video tape. Preparation: • Turn ON the TV and set to the video input mode • Lead a source disc and a video tape for recording. • Confirm the remaining tape for recording before operation. Press DVDNCR to set this unit te VCR mode. The VCR indicator will light. 2 3 Press REC MODE/SPEED and select the recording mode.
Dubbing using other equipment You can connect another VCR or camcorder to dubbing. Typical connection: When using this unit as a recording device Pla_yback VOR Playback Oamcorder To AV jack Rscording VOR "AUDIOJVIDEO cord (supplied) Recording VOR _ ,1E _-i"1 mowd , mo odio , % Audio(L) iN AUDIONtDEO cord (not supplied) You can also connect to the audio/video input jack (L1) at the rear side of this unit.
Glossary A-B Repeat Playback Playback that repeats between two set points, A and B. finalize Operation that enabfes discs recorded or edited with this unit to be played back on other DVD players. angle Recorded onto some DVD discs are scenes which interlaced scanning Technology that alternately displays odd-numbered scanning lines and even-numbered scanning lines. Also called "480i", "i" meaning *'interlace".
Glossary playlist User-created titles based en each eriginaI title. progressive scanning Technology that simultaneously displays odd-numbered scanning lines and even-numbered scanning lines from ted to bottom. Also caUed "480p", "p" meaning "progressive". region number There is software that enables DVD playback in differing countries.
Language code list Enterthe appropriate code number for the initial settings _'DVDMENU",_'AUDIO"and/or"SUBTITLE" (see page 24).
Error/Warning message list CAUSE POSSIBLE SOLUTIONS SYSTEM ERROR PLEASE WAIT The power supply was shut down without termination process due to a power feiF ure or disconnection of the AC cord plug. (Abnormal termination) Wait until the message disappears. SYSTEM ERROR PLEASE WAIT DISC CHECKING The power was abrupgy turned off before writing onto the disc was completed The data is now restoring. SYSTEM ERROR DISC MIGHT BE FAILED PRESS ENTEPdSELECT The data restoration was completed.
Problems and troubleshooting Use the following check listfor troubleshooting when you have problems with your unit. Consult your local dealer or service outlet if problems persist. Be sure all connections are properly made when using with other units. SYMPTOMS POSSIBLE SOLUTIONS DVDfv'CR does not operate. • • • • • • • Make sure the power cord is plugged in. Try another AC outlet. Power is off, check fuse or circuit breaker. Unplug unit, then plug it back in.
Problems and troubleshooting SYMPTOMS /Video head cleaning POSSIBLE SOLUTIONS PAGE TV recording does not work. • The erase prevention tab of the video cassette is broken off. • The unit is in the external input mode. Timer recording does not work. • The time is not set correctly. • The recording start/end time is not set correctly. • TIMER REC has not been pressed (E,'!, is not lit). 26 57 57 50 Noise bars on screen. • Tracking adjustment beyond range of automatic tracking circuit.
Specifications GENERAL Power supply: Power consumption: AC 120V 60Hz Operation: 32W Standby: 2.5W (if display window is off.) 12.1 Ibs (5.
Memo 86 VRDVD4005 PT_P_8 B8 03.9.
Memo 87 _RDVD4005 Pzg-P88 87 039.
Your Home For repair-in your home-of all major brand appliances, lawn and garden equipment, or heating and cooling systems, no matter who made it, no matter who sold it! For the replacement parts, accessories and owner's manuals that you need to do-it-yourself, For Sears professional installation of home appliances and items like garage door openers and water heaters, 1-800-4-MY-HOME <_>(1-800-469-4663) Call anytime, day or night (U.S.A. and Canada) www.sears.com www.sears.