TABLE OF CONTENTS Introduction 2 Safety Instructions 3 Locations of Controls 4 Use of Remote Control 5 Antenna Connections 6 Cable TV Connections 7 Video/Audio Connections 8 Basic Operation 10 Basic Menu Operation 11 Set-Up 13 Antenna Selection Auto Channel Programming Manual Memory (Add/Delete) Fine Tuning Channel Guide Channel Guard Picture Adjustment 21 P.STD Button Manual Adjustment Sound Adjustment 24 S.
INTRODUCTION SAFETY INSTRUCTIONS Congratulations on your purchase of this Sanyo MTS stereo television. ANTENNA The stereo speakers are front-mounted at the left and right sides of the TV screen for better stereo effect, delivering a high audio output of 24 watts (total). With over 500 lines of horizontal resolution via the built-in S-video jack, pictures from DVD will be reproduced in amazing detail.
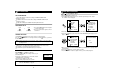
LOCATION OF CONTROLS USE OF THE REMOTE CONTROL FRONT Point to remote control sensor of the TV set. The maximum operable distance is approximately 20 feet from the remote control sensor, and not more than 30 to either side of center. The operation of the remote control is most effective when there is nothing between it and the remote control sensor. The duration of the batteries is approximately 6 months to 1 year. Replace the batteries when the remote operation becomes unstable.
ANTENNA CONNECTION CABLE TV (CATV) CONNECTION ANTENNA The antenna requirements for good color television reception are more important than those for black & white television reception. For this reason, a good quality outdoor antenna is strongly recommended. The following is a brief explanation of the type of connections that are provided with the various antenna systems: 1. A 75-ohm system is generally a round cable with F-type connector that can easily be attached to a terminal without tools. 2.
VIDEO/AUDIO CONNECTIONS Prior to making any connections to your TV set, be sure to turn the POWER off. For a more detailed understanding of each connection, it is recommended that you read the instruction manual for each connected component. If you use video or audio equipment placed near the TV, picture and/or sound may become distorted due to interference between these components. In such a case, separate each piece of equipment at a sufficient distance.
BASIC MENU OPERATION BASIC OPERATION The FIRST PREPARATIONS Connect either Antenna or Cable TV according to "ANTENNA CONNECTION" instructions on page 6. Insert batteries into the remote control unit according to "REMOTE CONTROL USE" instructions on page 5. Insert the AC Cord Plug into a standard 120V, 60Hz polarized AC outlet. TURN ON/OFF THE TV POWER POWER or (Front panel) (Remote control) 1. Press the "POWER" button on the front panel or on the remote control. 2.
BASIC MENU OPERATION SET-UP You can execute every operation by pressing CH / buttons and VOL +/- buttons alternately. If you learn one menu, you can easily operate other functions by viewing pictures. 1. Pressing these buttons alternately makes every operation easy. 2. MOVE Press CH / buttons to move cursor. 3. SELECTION Press VOL +/-buttons to change your selection. In this mode, you can change the broadcast mode between " TV " (for regular VHF/UHF channels) and " CATV " (for cable channels). 1.
SET-UP SET-UP MANUAL MEMORY (channel add/delete) AUTO CHANNEL PROGRAMMING This function allows the channels to be memorized automatically to match the TV broadcasts and cable channels in your area. 1. Press MENU button, move the cursor to "SET UP" option and press VOL + button. The "SET UP" menu is displayed. SET UP MENU * ANTENNA : TV 2 * AUTOPROGRAM * FINE TUNE : 00 * CH GUIDE * CH GUARD PICTURE SOUND TIME SET UP FUNCTION SEL. + ENTER 2. Press CH / VOL + button. SEL. + ENTER 1.
SET-UP SET-UP FINE TUNING CHANNEL GUIDE If the reception is clear, you do not have to fine-tune the channel, as this is done automatically during auto program and manual memory. If, however, the signal is weak or distorted, you may have to fine-tune the channel manually. You can choose up to 5 channels and assign them to the Channel Guide (CH GUIDE). This function allows you to select your favorite channels easily. 1. Press CH / buttons or use the number buttons to select a channel you want to adjust.
SET-UP SET-UP CHANNEL GUARD CH GUIDE PRESETTING With this feature, you can protect your children from viewing violent or other inappropriate TV programs. 5. Press CH / buttons to select characters for station name (if desired) and press VOL + / buttons. The color of the next character changes into white. If you press CH the characters appear sequentially as follows : A B C ..... X Y Z - 0 1 ..... 8 9 A B I.D. NUMBER PRESETTING 1.
SET-UP PICTURE ADJUSTMENT CH GUARD SETTING/CANCELLING 1. Press CH / buttons or number buttons to select the channel you wish to guard or cancel the guard. 2. Press MENU button and move the cursor to "SET UP" option; press VOL + button then the "SET UP" menu is displayed. SET UP MENU * ANTENNA : TV 2 * AUTOPROGRAM * FINE TUNE : 00 * CH GUIDE * CH GUARD SEL. + ENTER PICTURE TIME SET UP FUNCTION SEL. + ENTER 3. Press "0" twice then "CH GUARD" menu is displayed. 4. Press 1 or 2 to set or cancel a channel.
PICTURE ADJUSTMENT PICTURE ADJUSTMENT CUSTOM (MANUAL) ADJUSTMENT If you select this mode, you can directly adjust "BRIGHTNESS" without "MENU" option. You can sequentially select and adjust one of five picture properties. Contrast, Brightness, Color, Sharpness or Tint. 1 Press the MENU button. Move the cursor to PICTURE by pressing the CH / buttons and press the VOL + button. MENU PICTURE SOUND TIME SET UP FUNCTION e.g. : Bright. Adjustment by "PICTURE" button. 1 PICTURE PICTURE SEL. SEL.
SOUND ADJUSTMENT SOUND ADJUSTMENT S.STD (Sound Standard) BUTTON SOUND MENU There is a choice of five audio settings. By pressing the S.STD button, the five settings can be viewed in the sequence illustrated. You can sequentially select and adjust one of four sound properties. (BASS, TREBLE, BALANCE and MTS) 1. Press S.STD button. Whenever this button is pressed, the mode will be changed as follows.
SOUND ADJUSTMENT SOUND ADJUSTMENT MTS MTS 1) USING MTS BUTTON : METHOD 1 2) USING SOUND MENU : METHOD 2 Your TV set incorporates an MTS (Multichannel Television Sound) decoder to receive stereo broadcasts and any accompanying SAP (Second Audio Program), such as a bilingual broadcast. 1 PICTURE SOUND TIME SET UP FUNCTION 1. Press the MTS button Whenever this button is pressed, the reception mode will be changed as follows. STEREO SAP Press the MENU button.
CLOCK/TIMER CLOCK/TIMER CLOCK SLEEP TIMER : METHOD 1 You can set the television’s clock so that the current time will be displayed when you press the MENU button on the remote control. You must set the current time before you can set the automatic On/Off timer. You can select a sleep time period from 15 through 90 minutes. The television automatically shuts off after the sleep time period.
CLOCK/TIMER CLOCK/TIMER ON/OFF TIMER The ON/OFF timer lets you use alarm and automatic off functions. 1 4 * CLOCK * SLEEP * TIMER * ON TIME * OFF TIME Press MENU button. The " MENU " is displayed on the screen. MENU PICTURE SOUND TIME SET UP FUNCTION TIME : : : : : MOVE. AM 11 : 30 OFF ON AM 07 : 30 AM - - : - ADJ Move the cursor to "ON TIME" by using buttons and press the VOL CH / + / - buttons to set the time.
FUNCTIONS FUNCTIONS 1. Press the MENU button. Move the cursor to FUNCTION by pressing the CH Make a selection by pressing the VOL + button. MENU MENU PICTURE SOUND TIME SET UP FUNCTION PICTURE SOUND TIME SET UP FUNCTION SEL. + ENTER SEL. + ENTER / buttons. LANGUAGE You can select language among ENGLISH, SPANISH, PORTUGUESE and FRENCH by pressing VOL + button. FUNCTION : OFF * CCD * BLUE BACK : OFF * LANGUAGE : ENGLISH * DEMONSTRATION SEL.
PICTURE-IN-PICTURE (PIP) PICTURE-IN-PICTURE (PIP) AVM-27D11 only AVM-27D11 only PIP OPERATION : 1. PIP ON/OFF In this mode, you can enjoy viewing two programs at the same time. The "PIP" function enables you to enjoy the present broadcast program while viewing a video source (Eg. video tape, CD, DVD). Also, It enables you to view two TV channels at the same time, using a VCR with a built-in tuner. Press PIP ON/OFF button on the remote control and then the PIP window will be displayed as shown below.
PICTURE-IN-PICTURE (PIP) PICTURE-IN-PICTURE (PIP) AVM-27D11 only AVM-27D11 only 3. PIP SIZE Also, you can use the TV/VIDEO button in the VIDEO mode. Press SIZE button and then the size of the PIP window will be toggled as shown below. 1/9 1/16 VIDEO1 CATV13 VIDEO1 VIDEO1 VIDEO1 VIDEO2 TV A/V A/V 1/36 4. PIP STILL 6. PIP SWAP Press STILL button and then the PIP picture will freeze frame. Press SWAP button to swap pictures between the main screen and the PIP window.
OTHER USEFUL FUNCTIONS RECEPTION DISTURBANCE The most common types of television interference are as follows: CCD : This TV set incorporates a CCD (Closed Caption Decoder) to enable viewing closed captions and TEXT broadcasts. Closed caption and TEXT each has 2 channels (CH1 & CH2). Closed caption and TEXT information can only be viewed if they are being broadcast by a television station, or contained in a videotape or videodisc. Press the CCD button to select CCD mode.
TROUBLESHOOTING GUIDE Before requesting service, please refer to the following chart for the symptom and possible solution. For more information, see the corresponding page in this manual. SYMPTOM TV does not operate Poor sound or no sound Poor picture or no picture Poor reception on some channels.
LIMITATIONS (a). SANYO Canada Inc. reserves the right to change or improve the design of the model of the product warranted hereunder without incurring any obligation to make any modifications to or to install any improvement in or on the product. (b). In no event shall SANYO Canada Inc. or any of its Authorized Dealers be liable for special or consequential damage arising from the use of this product.